This pattern contains affiliate links which means I may earn a small commission if you purchase through them, at no extra cost to yourself. By shopping through these links, you’re helping support this blog and the free content I share — thank you so much.
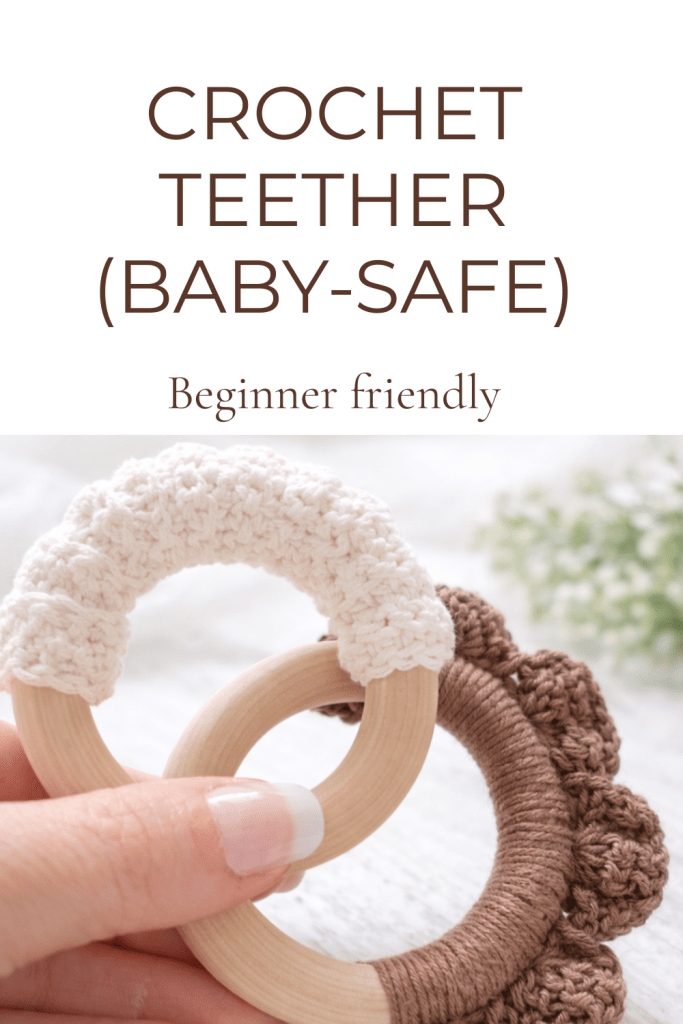
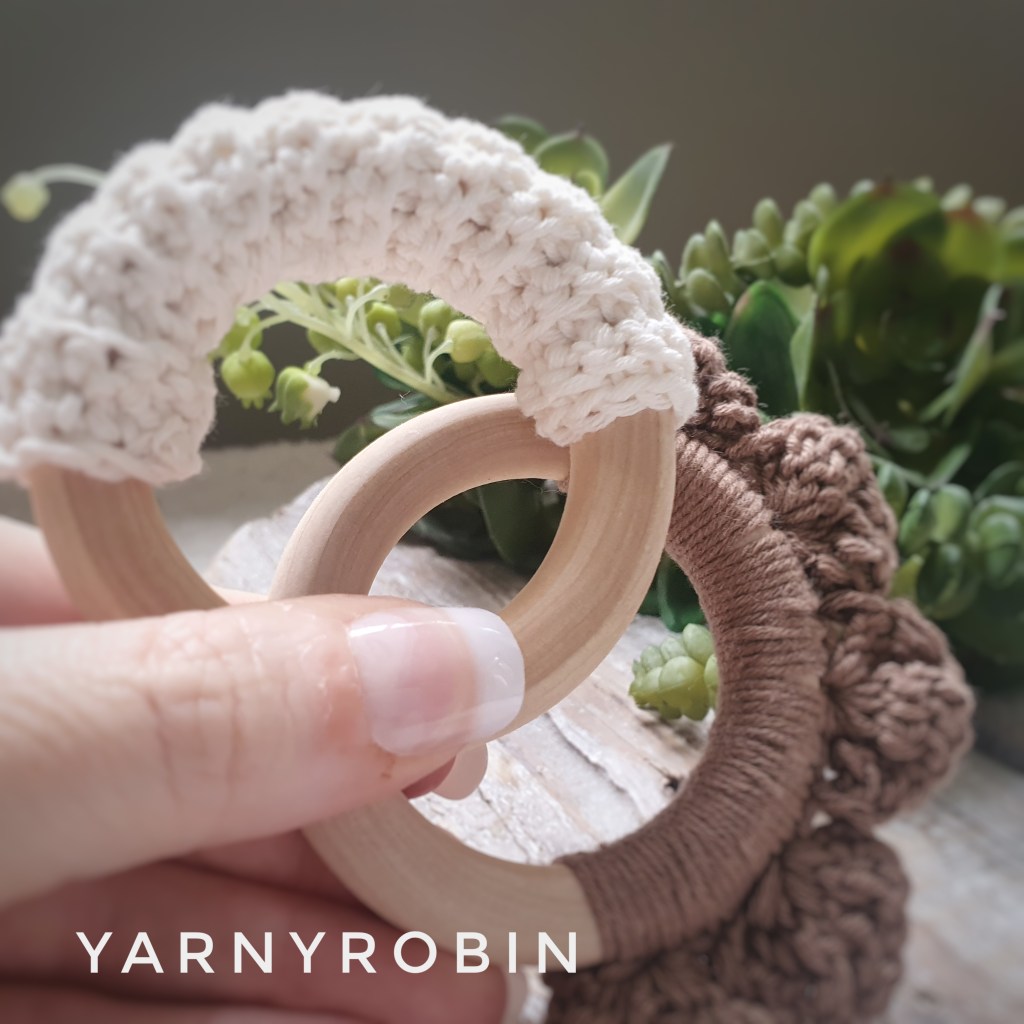
Today I’m going to share with you my amazingly simple pattern for making Crochet Teething Rings.
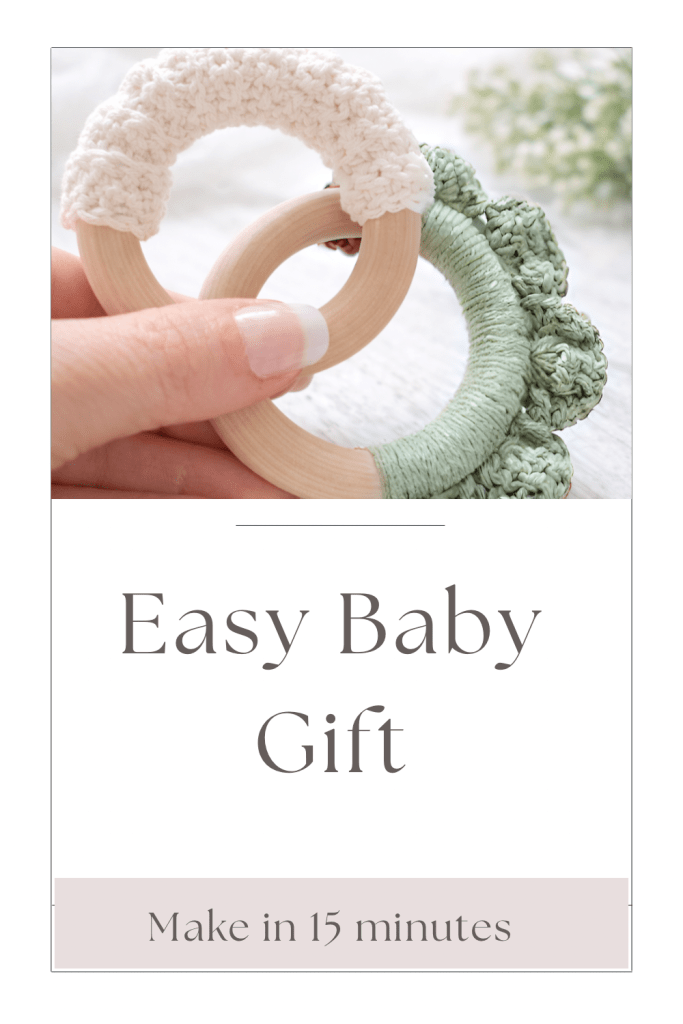
The pattern is suitable for a beginner and they literally take 15 minutes to make.
Teethers, make cute baby shower gifts on their own. They also make an ideal accessory set when paired with my Spring Bunny Lovey. What’s more they are made with safety in mind and safe for baby to chew on. They are also really useful first toys to help develop Baby’s hand eye coordination and grasp.
Prefer an ad-free, printable pattern? I’ve created a tidy PDF version teething ring pattern with UK & US crochet terms included, perfect for printing or saving to your pattern library.
A word on yarn choice
I have opted to use Drops Safran 100% cotton as it is not only affordable, but it has a great colour pallete too. It was also really important to me that I chose a cotton that was Oeko Tex standard 100 approved. This means the cotton has been certified to be free of harmful chemicals and is safe for human use. It has also been verified as both safe and non-irritating to human skin.
Pattern Protocols
This pattern including all photos are the property of Nicola Florence at ayarnyrobin.wordpress.com. Please do not modify, resell, publish in part or in full, or share this pattern or photo’s as your own. You may sell finished items made from this pattern, (subject to toy making regulations) I hope it becomes a hot item for you; but please credit, with a link, that the item is made using @yarnyrobin pattern
less than 10g of Drops Safran 100% cotton in colour of choice
This pattern is written using UK crochet terminology and the stitch abbreviations can be found below. I have included US terminology in brackets if you wish to convert.
Repeats are marked by asterisks *.
Stitch Abbreviations:
Ch – chain stitch /chain stitch (US)
St – stitch / stitch (US)
Slst – slip stitch / slip stitch (US)
Dc – double crochet / single crochet (US)
Dtr – Double treble / treble crochet (US)
BLO: Work stitch as stated, but in back loop of stitch only.
Dc – Insert hook into chain or under both loops of stitch, yarn over and pull through so there are 2 loops on hook, yarn over again and pull through both loops on hook.
Dtr – yarn over hook twice, insert hook into chain or under both loops of stitch, yarn over and pull through so there are 4 loops on hook, yarn over again and pull through 2 loops, yarn over and pull through 2 loops on hook, yarn over and pull through last 2 loops on hook.
Would you like an ad-free printable PDF version of this pattern? It is useful if you’d prefer to work offline or to keep in your pattern library. It includes both UK and US crochet terminology so you don’t have to keep converting – just download the version you prefer. Click the link below
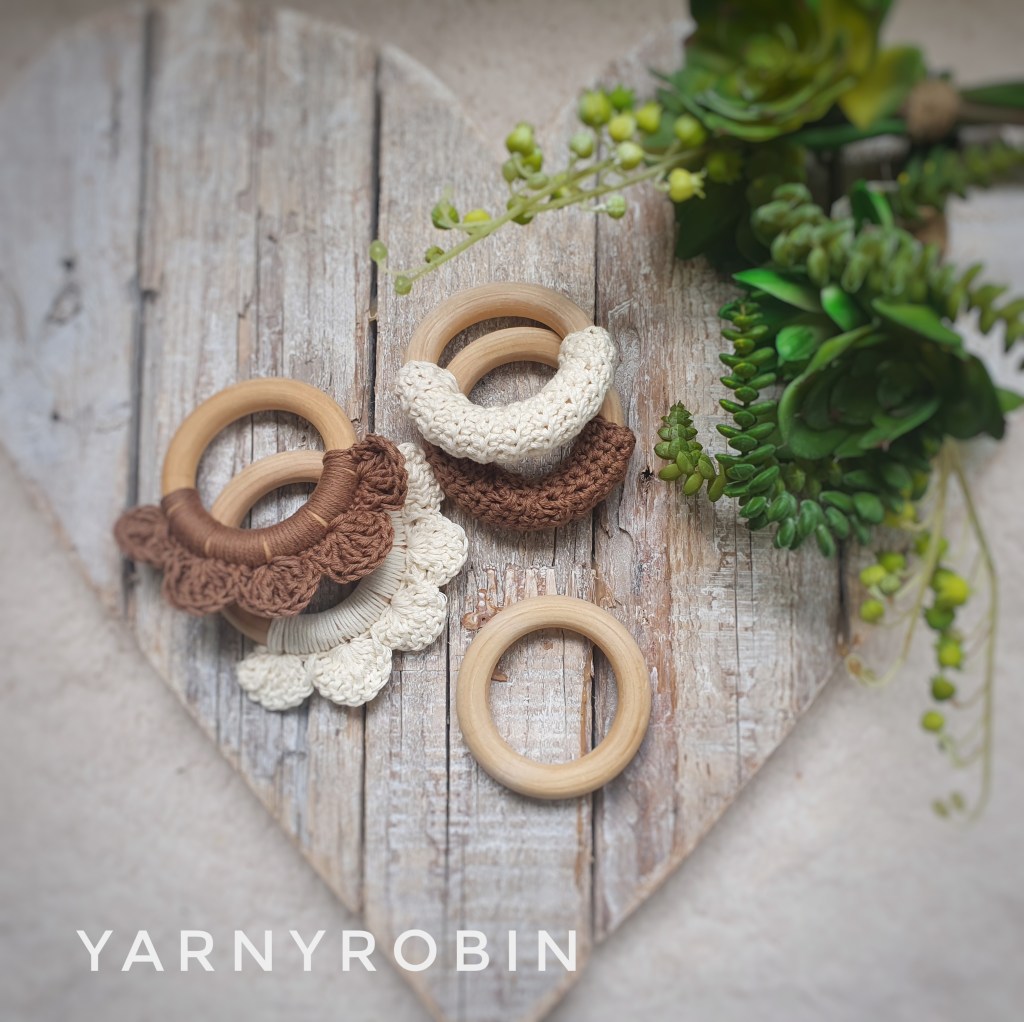
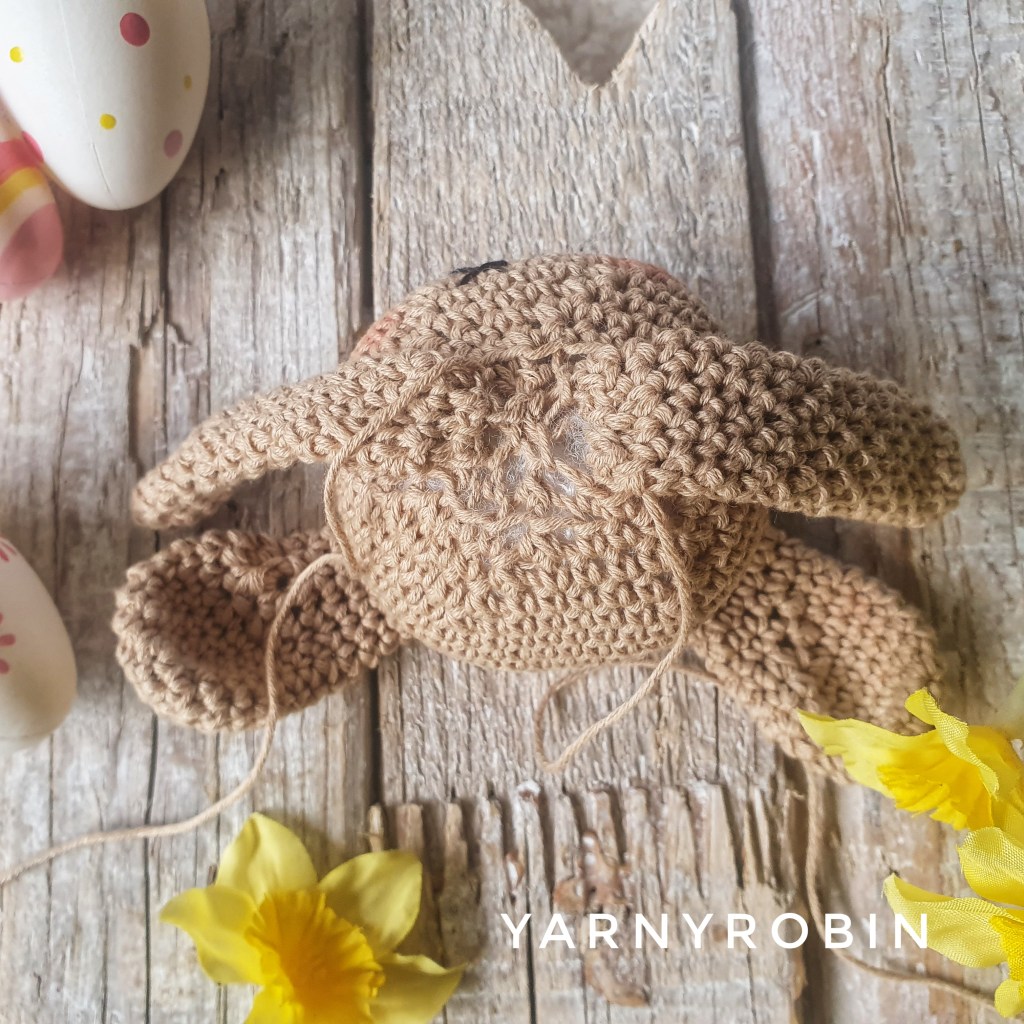
Petal Teething Ring
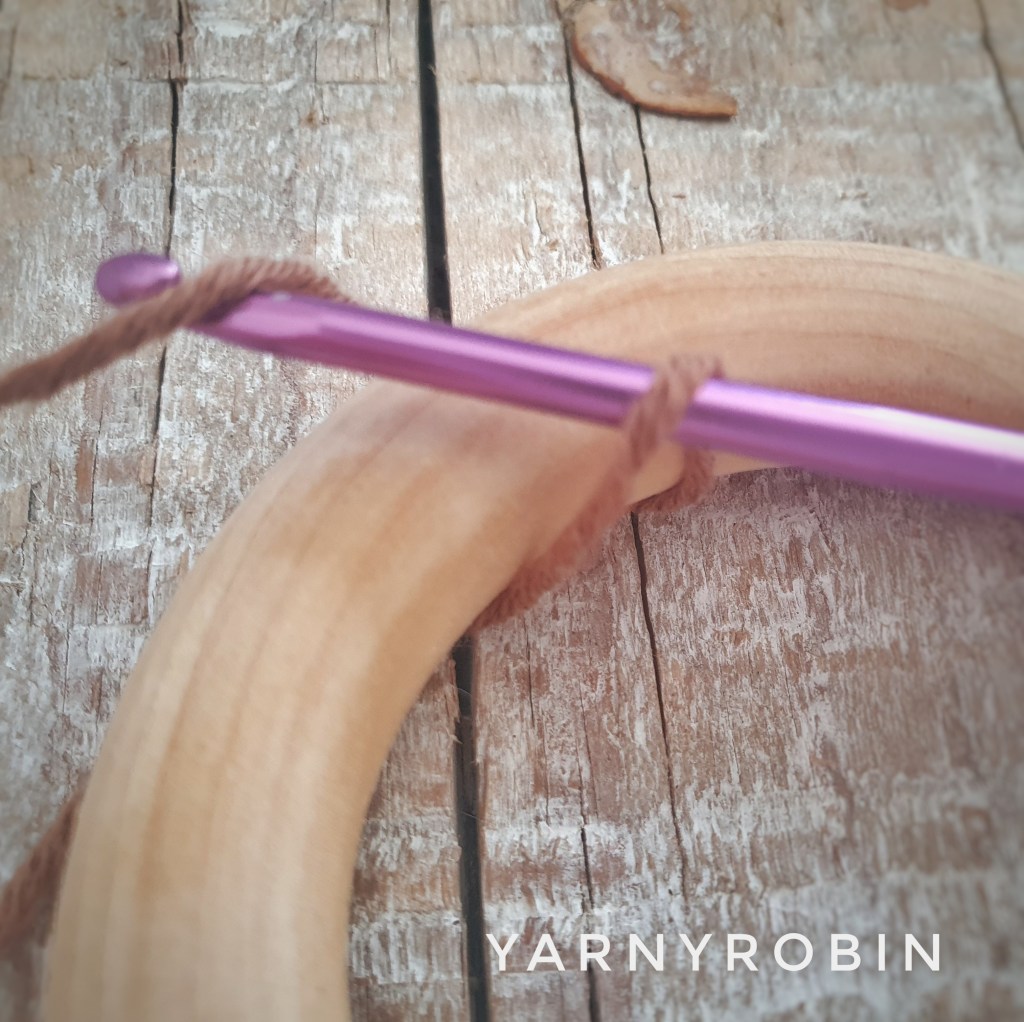
Begin by securing yarn around the teething ring with a slst (this does not count as a st)
28dc around teething ring
ch1 and turn,
miss a st, *9dtr in next st, miss 2 sts, slst into next st, miss 2 sts* repeat * – * 3 more times, 9dtr in next st, miss a st, slst into last st.
Because you are cramming 9dtr into one st, it is easy to miscount the 2 missed sts immediately after; as the 1st missed st tends to hide under the petal made, so if your stitch count isn’t working for you check this first!
Fasten off and weave in loose ends.
The teething rings can be washed in the washing machine, or hand washed as per preference. Always check teething ring for safety before each use.
📌Pin this post for later
Top Tip
Wet the crochet petals with cold water and place the teether in the freezer, for an extra boost of teething comfort
If you’re making these teethers for a baby shower or gift set, you might also like my crochet Bunny Lovey pattern — which is also quick to make and pairs beautifully with these teethers.
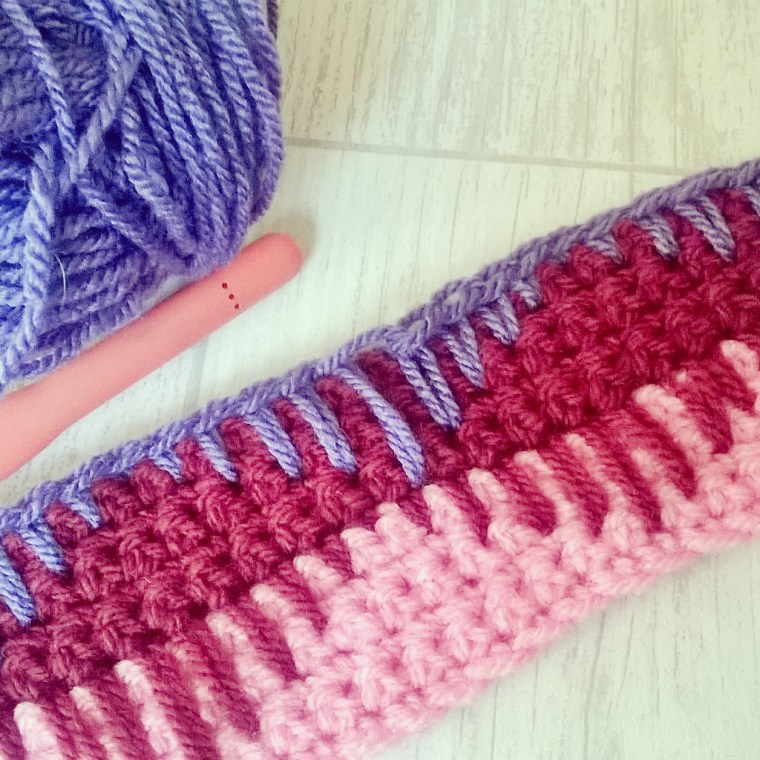
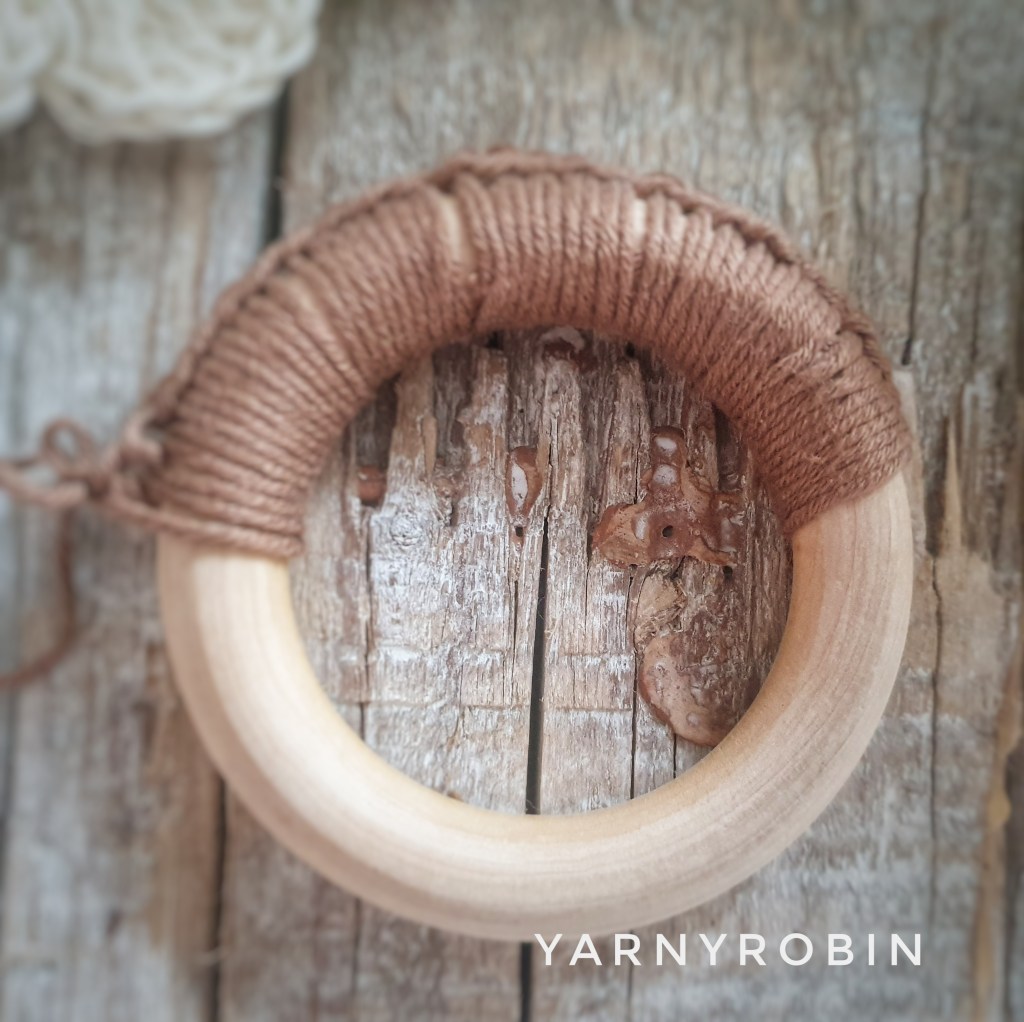
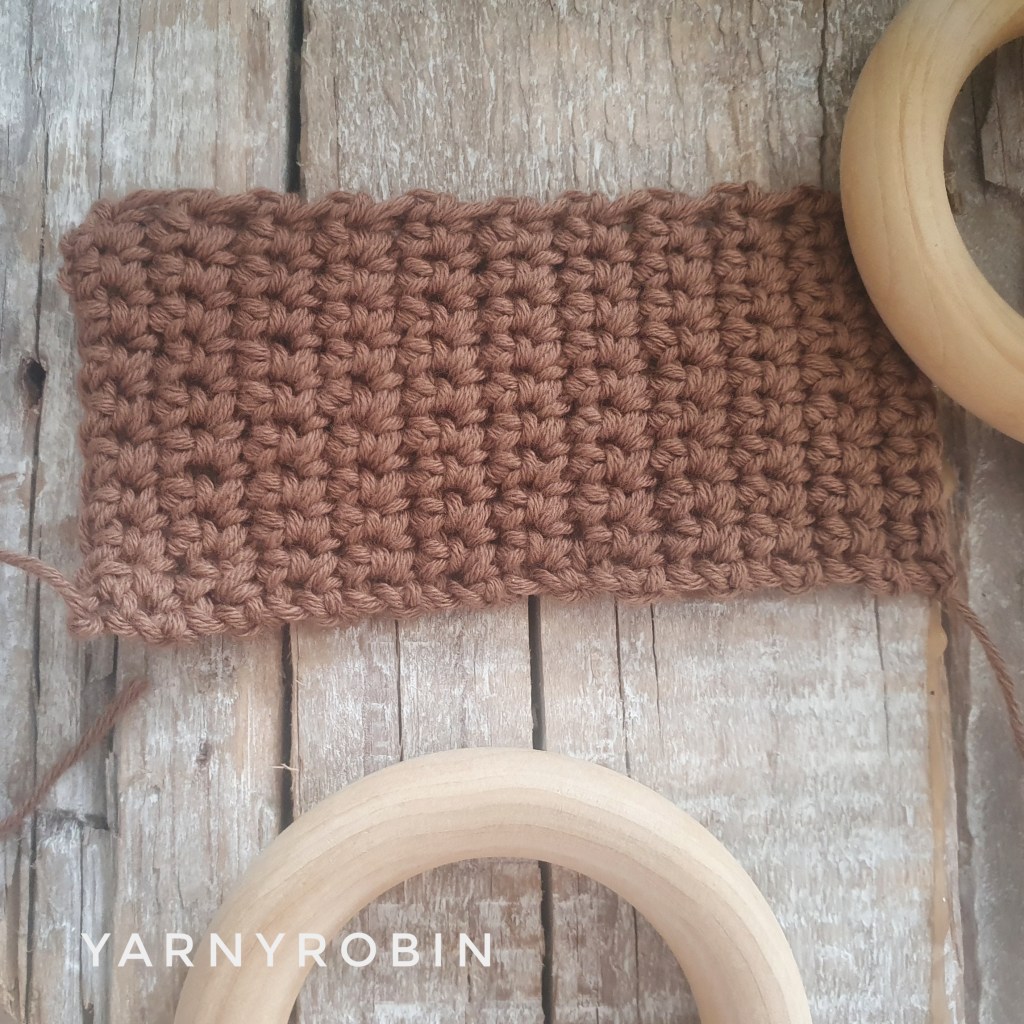
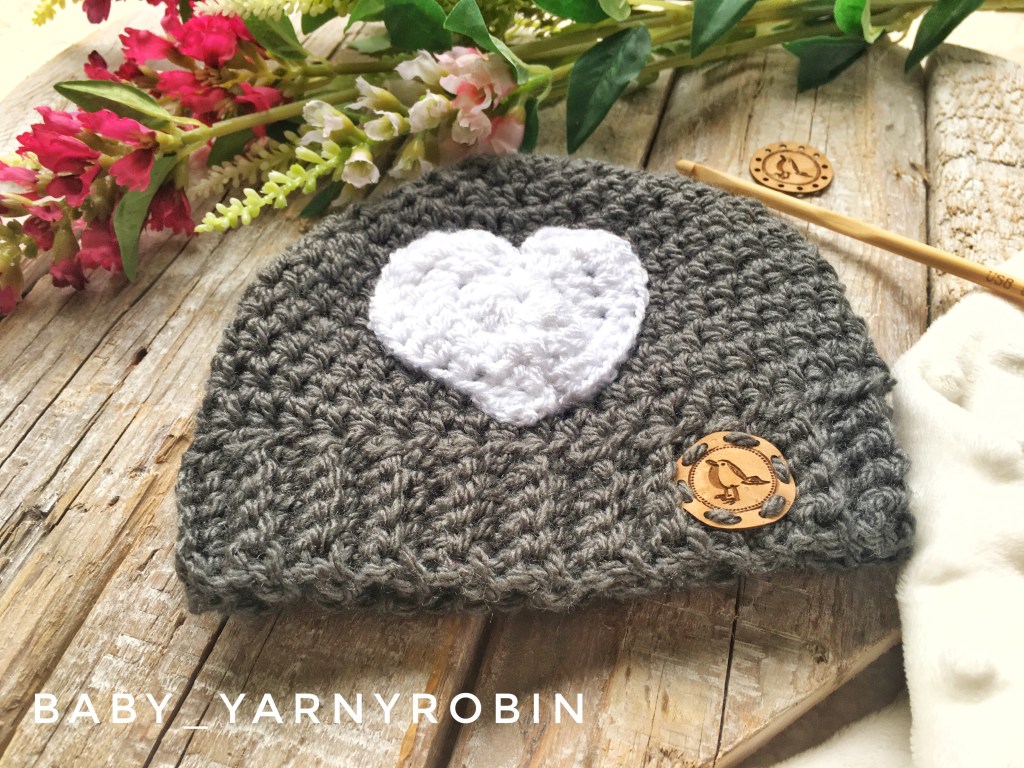
Ridged Teething Ring
chain stitches do not count as a stitch throughout pattern
Ch11, dc in 2nd ch from hook and in each ch along, ch1 turn (10dc)
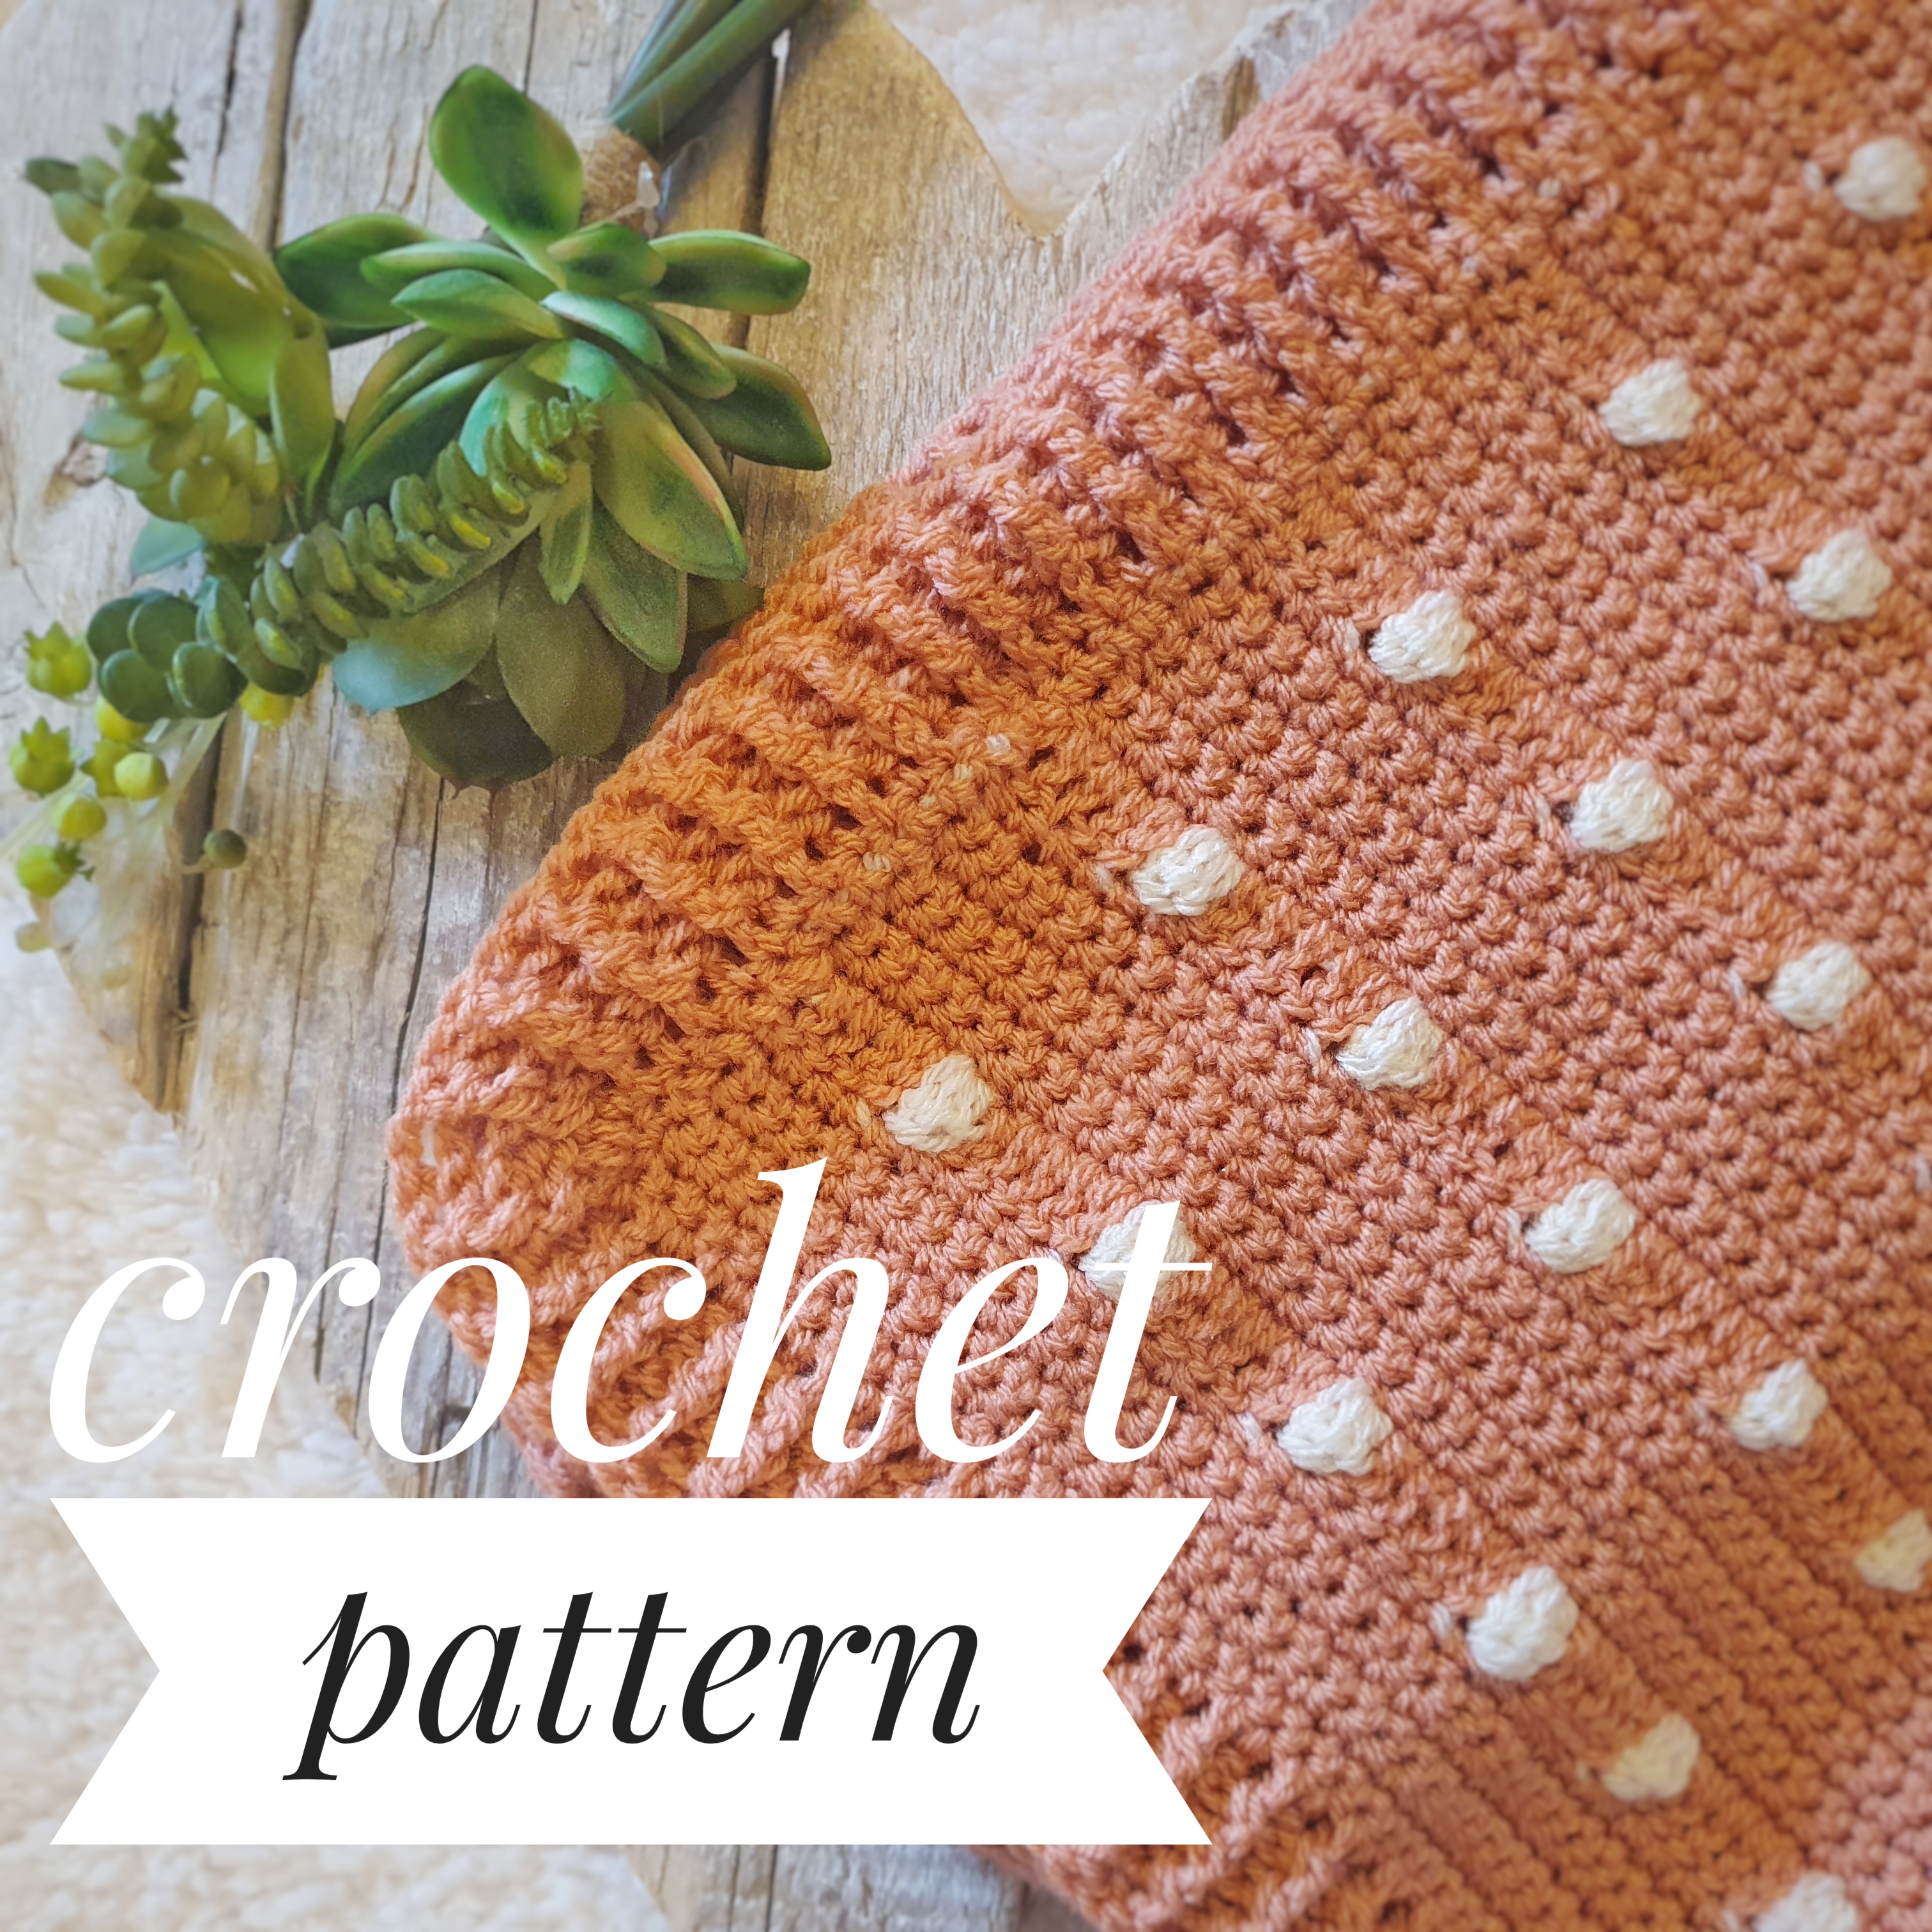
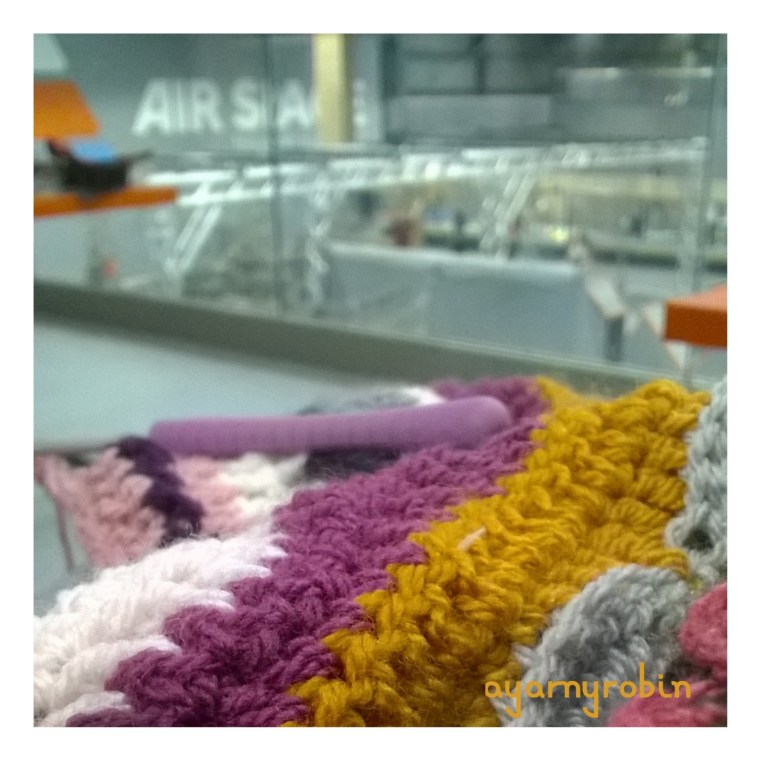
For ridged teether work remainder of pattern in back loops only -BLO. For a smooth crochet look work sts as normal. NB/ pictures below are not worked in back loop so do not show ridged effect. See picture at the top of this post for ridged effect.
Row 2 – 21: dc in each st along, ch1, turn
Fasten off leaving a long tail for sewing.
Sew long sides of rectangle together around the teething ring, using a whip st. Fasten off and weave in ends.
If you give this teether a go, I’d absolutely love to see it.
Which colour did you choose — blush, cream, sage… or something totally different? Let me know in the comments.
If you enjoy beginner-friendly patterns like this, feel free to have a little browse around the blog and follow along for more cosy crochet ideas.
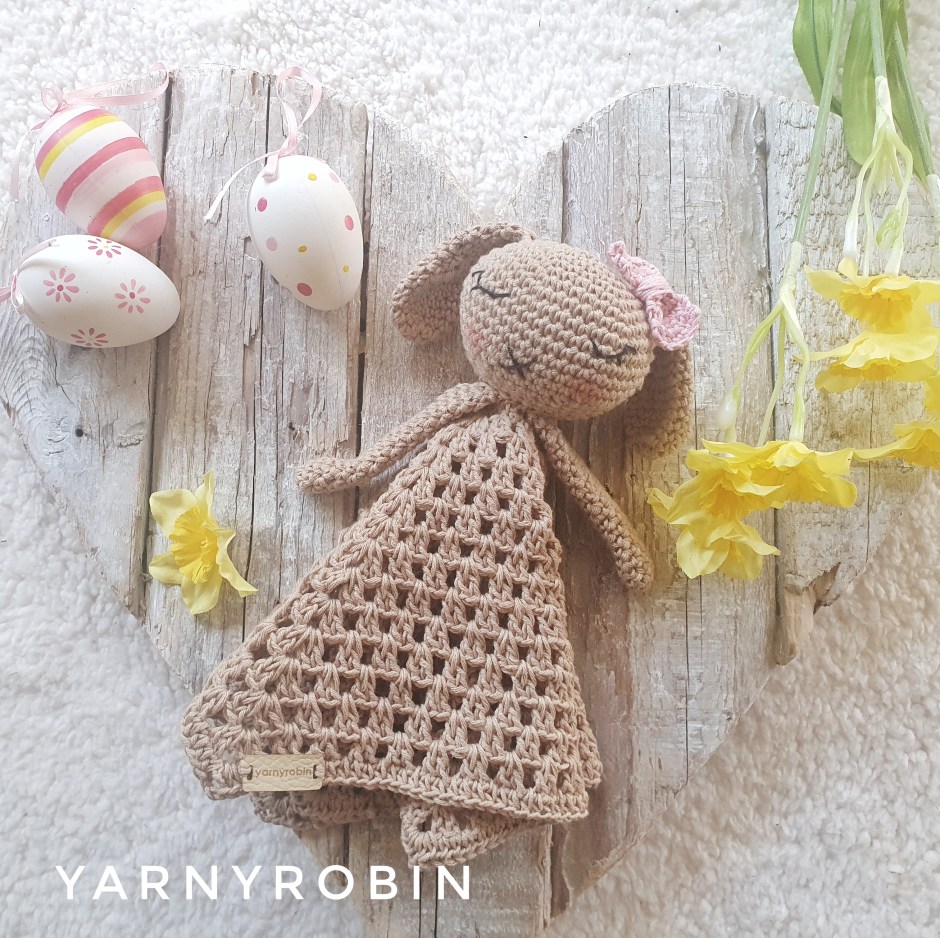
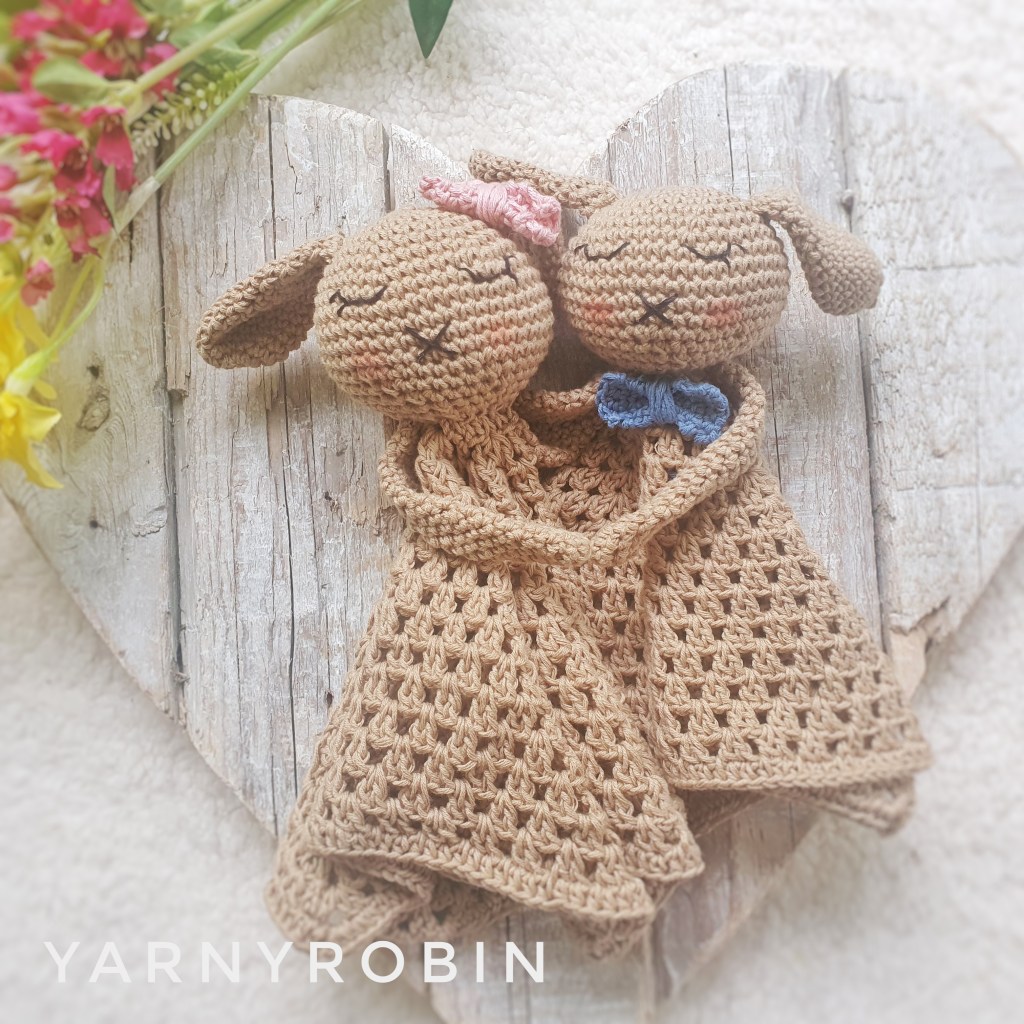
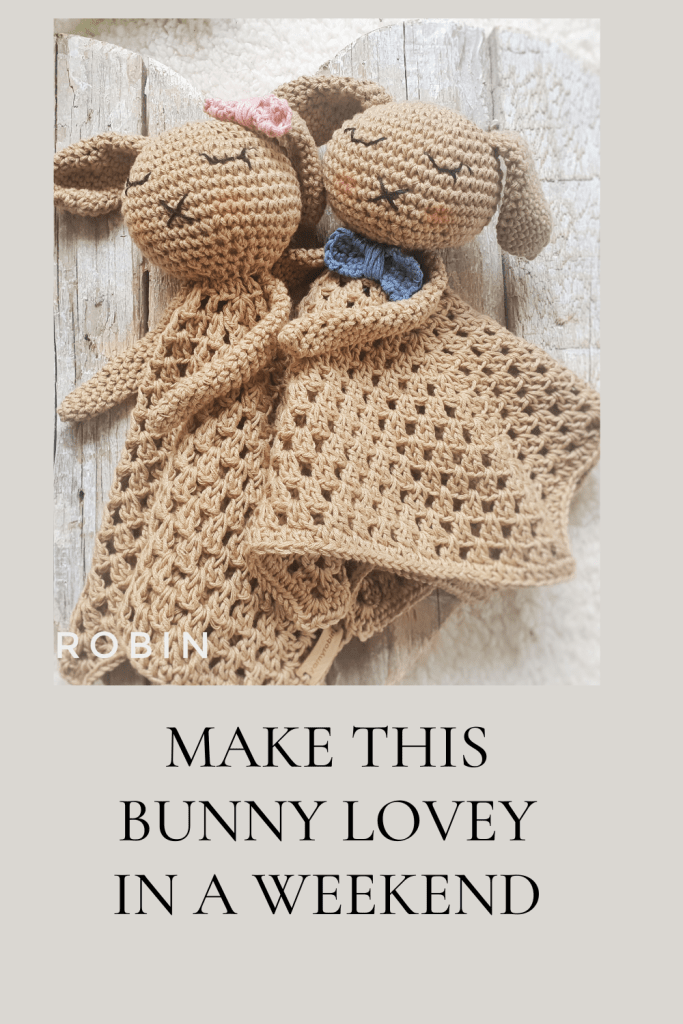
Would you like to crochet your own Spring Bunny Lovey, well you can…because I’m going to share my free pattern with you and just in time for Easter. You will find the full pattern details in this post
Prefer a printable, ad-free version?I’ve created a tidy PDF version of this Bunny Lovey Pattern with BOTH UK and US crochet terms included. This way, you can follow the version you prefer with no conversions. Perfect if you like to print your patterns or follow them offline.
this post contains affiliate links, which help to support my blog at no extra cost to you
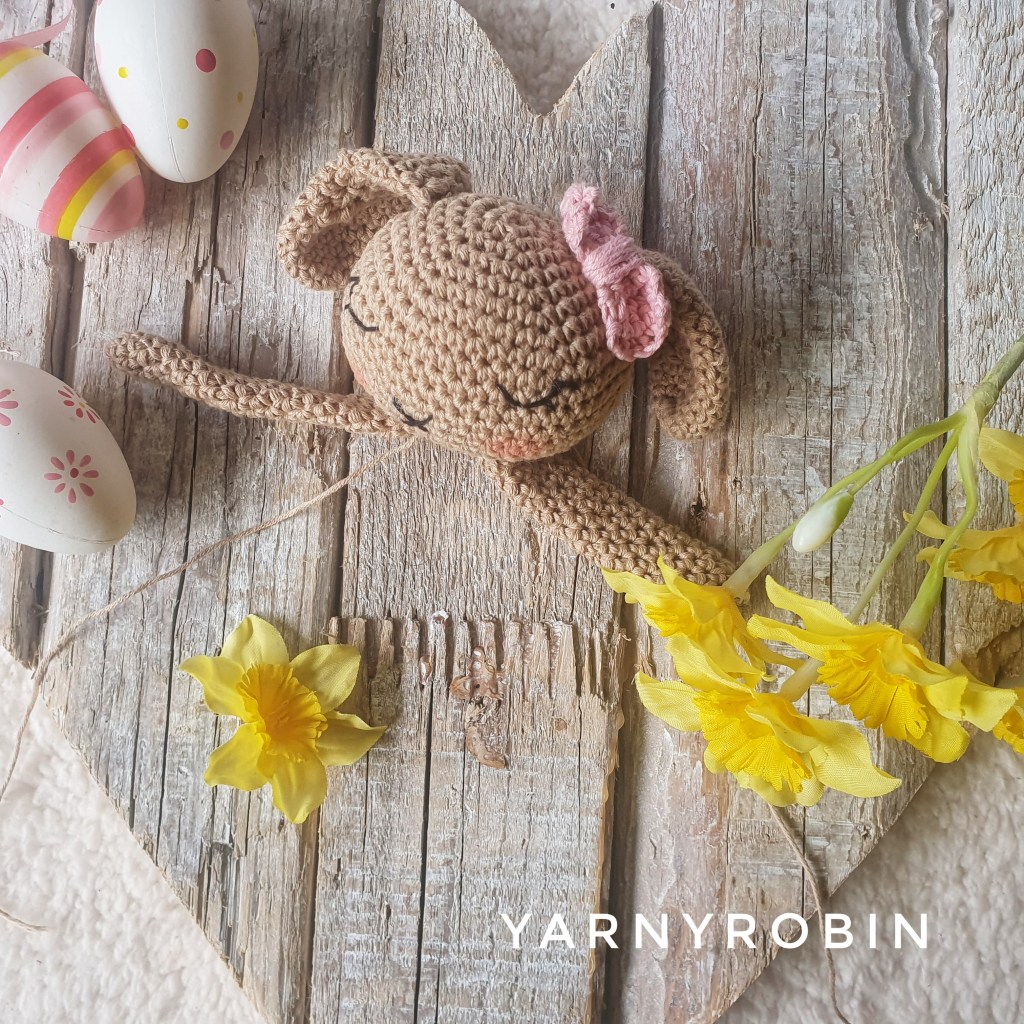
The pattern is simple and quick to hook up. It uses only 50g of cotton plus a tiny amount for the bow. This is just perfect for gifting a special little someone! I made this in an afternoon so it really is a quick make.
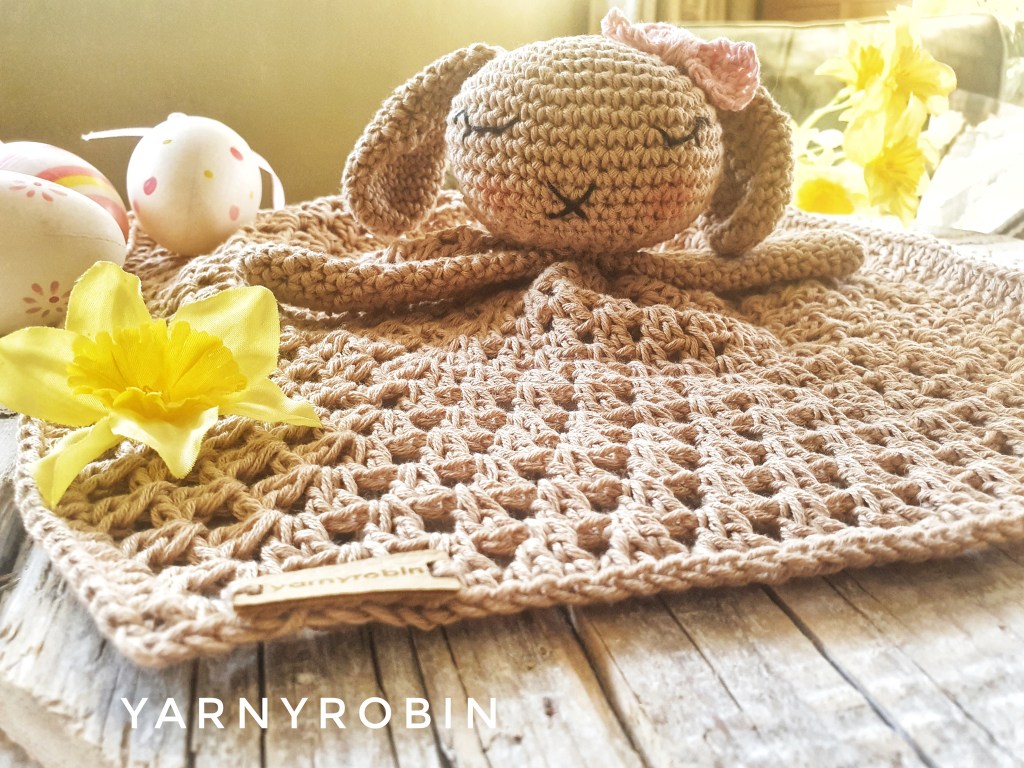
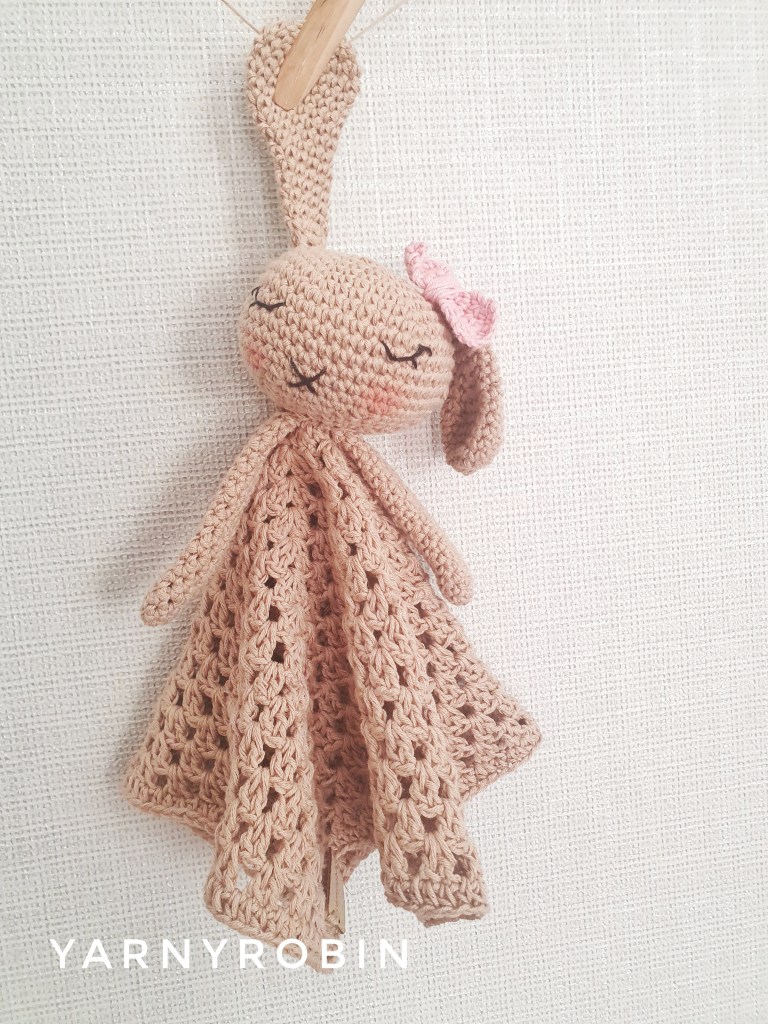
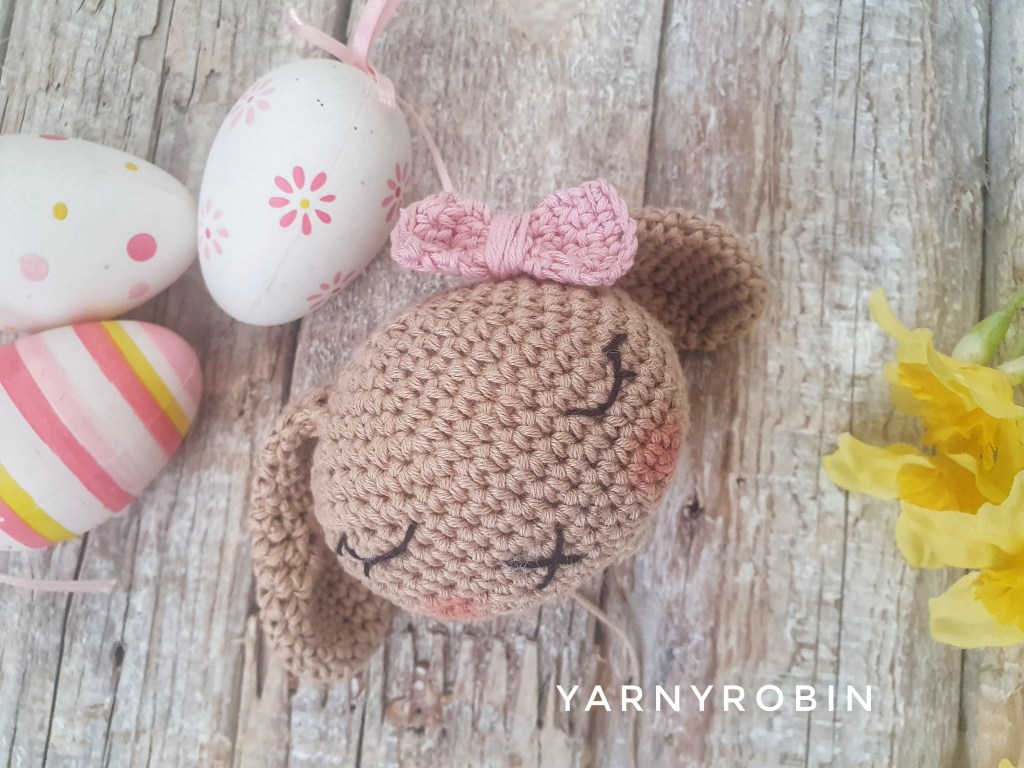
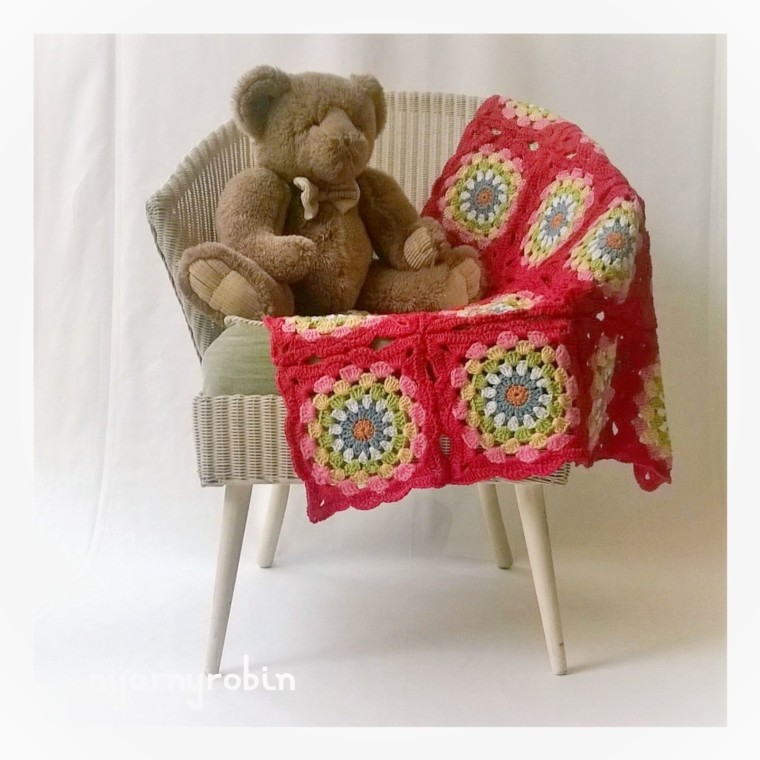
With her rosy cheeks and little criss cross nose, this little bunny has the sweetest face and floppy ears. The granny square blanket adds a vintage vibe coupled with it’s neutral tones.
If you’re putting together a handmade baby gift, I also have a free crochet teether pattern that pairs beautifully with this bunny lovey.
A word on yarn choice
I have opted to use Drops Safran 100% cotton as it is not only affordable, but it has a great colour palette too. It was also really important to me that I chose a cotton that was Oeko Tex standard 100 approved. This means the cotton has been certified to be free of harmful chemicals. It is safe for human use. Moreover, it has been verified as both safe and non-irritating to human skin. As this bunny lovey was inspired by a very precious little human, I wanted to be sure there were no hidden nasties.
Pattern Protocols
This pattern including all photos are the property of Nicola Florence at ayarnyrobin.wordpress.com. Please do not modify, resell, publish in part or in full, or share this pattern or photo’s as your own. You may sell finished items made from this pattern, (subject to toy making regulations) I hope it becomes a hot item for you; but please credit, with a link, that the item is made using @yarnyrobin pattern /
2g of Drops Safran 100% cotton colour 01 (desert rose pink)
Small amount of black embroidery floss
Want a calm, ad-free, printable version with both UK and US terminology included, check out the premium pattern in my Etsy shop — perfect to save with your project notes or take on the go./em> Click below to get the PDF.
Pattern Notes
This pattern is written using UK crochet terminology and the stitch abbreviations can be found below. I have included US terminology in brackets if you wish to convert.
The head, arms and ears are made in continuous rounds or spirals. It is a method commonly used in amigurumi and means there will be no visible seams. Therefore, when you start a new round just work it into the next st. I recommend marking the first st of each round with a st marker.
Starting chains in the blanket section counts as a stitch throughout the pattern unless otherwise stated. Repeats are marked by asterisks *.
Dc – double crochet / single crochet (US) BLO – back loop only
Htr – half treble / half double (US)
Dc2tog – decrease / Sc2tog – decrease (US)
Dc: Insert hook into chain or under both loops of stitch, yarn over and pull through so there are 2 loops on hook, yarn over again and pull through both loops on hook.
Tr: Yarn over hook, insert hook into chain or under both loops of stitch, yarn over and pull through so there are 3 loops on hook, yarn over again and pull through 2 loops, yarn over and pull through last 2 loops on hook.
Htr: Yarn over hook, insert hook into chain or under both loops of stitch, yarn over and pull through so there are 3 loops on hook, yarn over and pull through all 3 loops on hook.
BLO: Work stitch as stated, but in back loop of stitch only.
Dc2tog – decrease st worked over 2 stitches: insert hook under both loops of stitch, yarn over and pull through so there are 2 loops on your hook, insert hook into next st, yarn over and pull through so there are 3 loops on your hook, yarn over and pull through all 3 loops.
Gauge:
Please check your gauge to obtain stated size and to ensure yarn quantities stated are achieved. If your swatch is too small, try going up a hook size to obtain gauge. If your swatch size is too big try going down a hook size to obtain gauge. Of course, gauge isn’t imperative as this is not a garment that is worn. However, if you do not check your gauge, you may need more yarn than stated and your lovey may turn out smaller or larger than stated.
Round 2: 2dc in next st and in each st around (12dc / 12sc )
Round 3: *2dc in next st, dc in next st* repeat around (18dc / 18sc )
Round 4: *2dc in next st, dc in next 2 sts*repeat around (24dc / 24sc )
Round 5: * 2dc in next st, dc in next 3 sts *repeat around (30dc / 30sc )
Round 6: *2dc in next st, dc in next 4 sts* repeat around (36dc / 36sc )
Round 7: *2dc in next st, dc in next 5 sts* repeat around (42dc / 42sc )
Round 8: *2dc in next st, dc in next 6 sts* repeat around (48dc / 48sc )
Round 9 – 13: dc in each st around (48dc / 48sc )
Round 14: *dc2tog, dc in next 6 sts* repeat around (42dc / 42sc)
Round 15: *dc2tog, dc in next 5 sts* repeat around (36dc / 36sc )
Round 16: *dc2tog, dc in next 4 sts* repeat around (30dc / 30sc )
Round 17: *dc2tog, dc in next 3 sts* repeat around (24dc / 24sc )
Round 18: *dc2tog, dc in next 2 sts* repeat around (18dc / 18sc )
Now tightly stuff head with safety toy filling
In Back Loops Only (BLO)
Round 19: *dc2tog, dc in next st* repeat around (12dc / 12sc )
Fasten off leaving a long tail. You will use this to sew the head to the blanket.
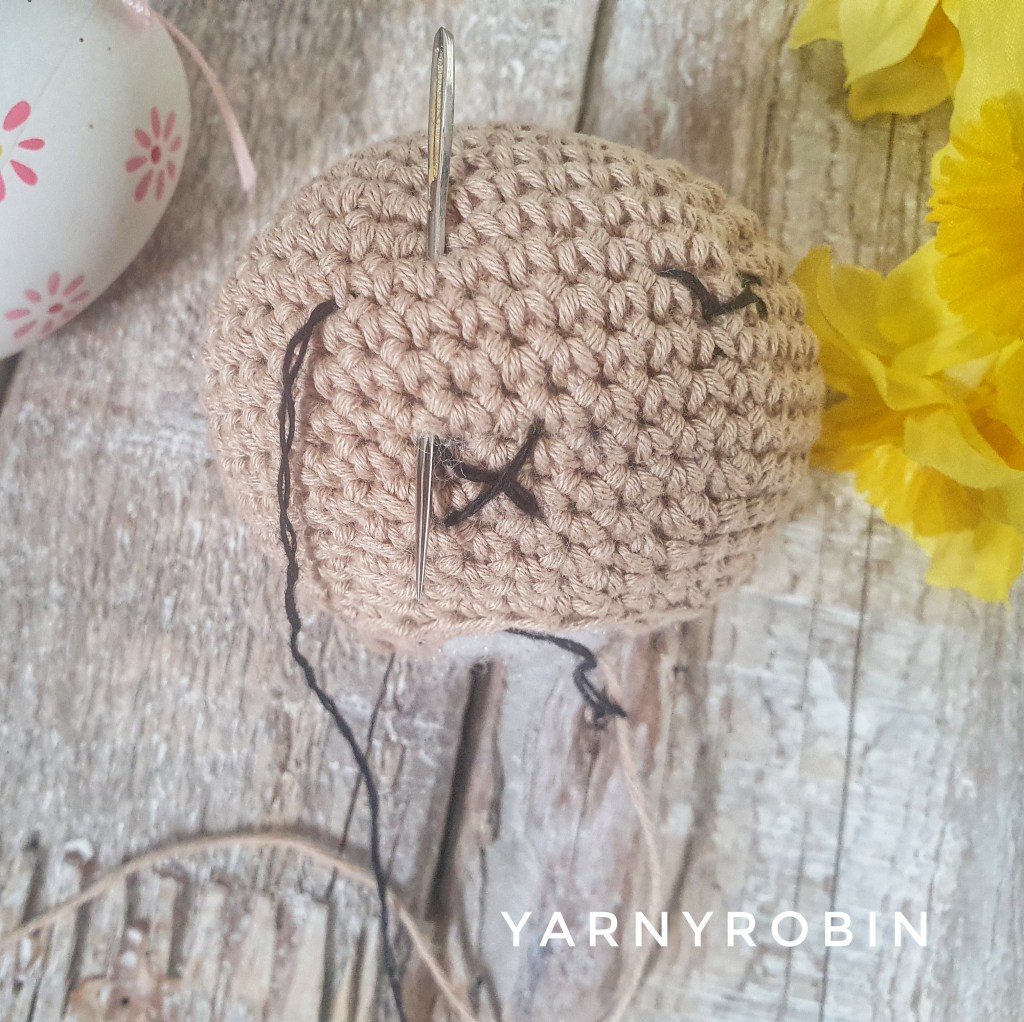
How to embroider the face
Take a long length of embroider floss and split off 3 strands by holding them and pulling down the whole length. When making your stitches do not pull them to tight, a gentle tension is all that is needed. I embroidered the face with one long length of floss, to do this pull your stitches through slowly, to prevent tangling and /or knotting.
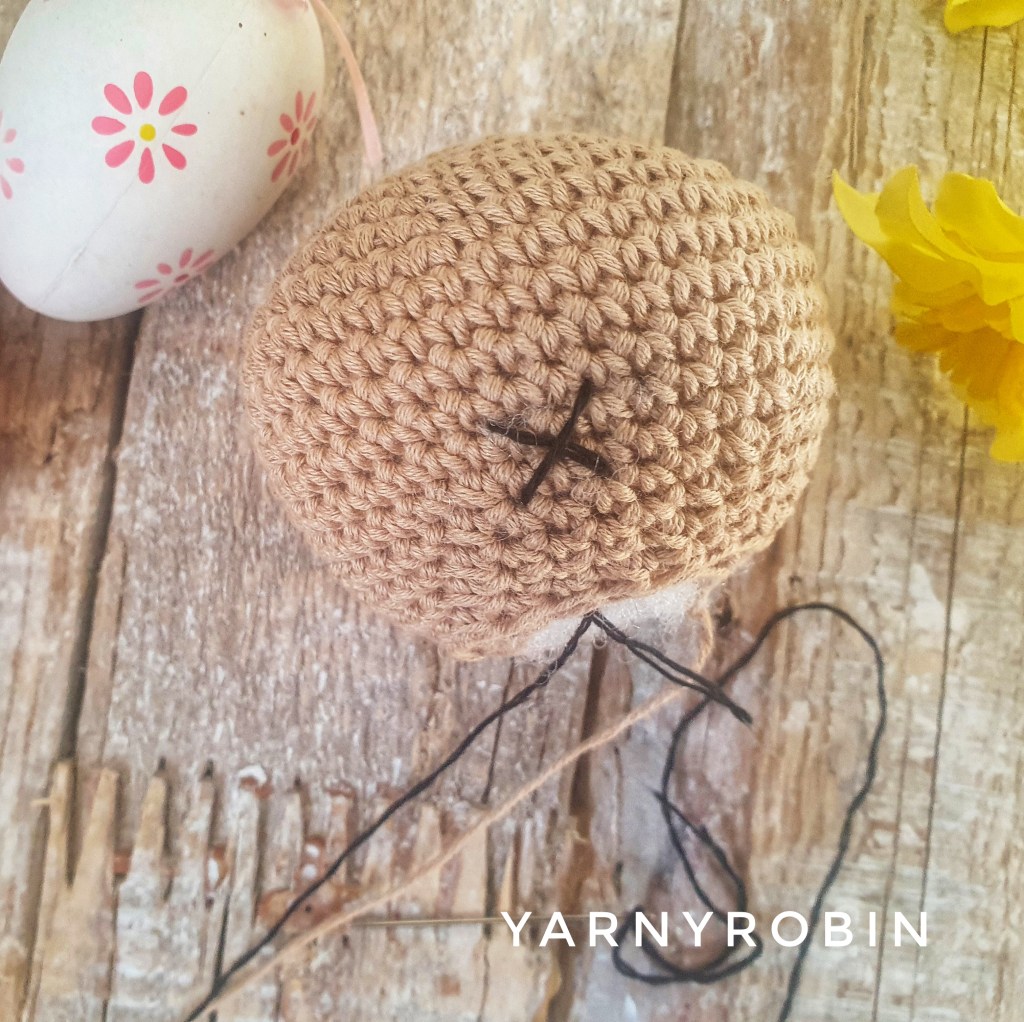
Nose:
Start by threading your sewing needle and inserting it through the bottom of the head and leaving a small tail visible hanging from the stuffing. Exit needle on row 6 from the bottom of the head, insert needle diagonally into row 8. I made my diagonal stitch over 3 dc’s width. Exit needle in row 6 under previous entry point and insert at opposite diagonal. Do not fasten off move straight onto the eyes.
Eyes:
Insert pin to mark where the eye will start, above and inline with the outside of the nose on the right side (facing you) with the floss still on your needle exit in st marked by your needle on row 11, insert needle in a gentle diagonal on row below, exit needle horizontally on same row about 2sts across, insert needle at point of last entry (back stitch), exit needle in a gentle diagonal on outside edge of eye on row above the horizontal st just made, exit needle below lid a ¼ of the way from the outside of eye and insert needle in a straight line to eye lid to make first eyelash. Exit needle below outside edge of lid at a slight angle and insert needle at outside edge of eye lid to make final eye lash. Do not fasten off.
Exit needle at point for second eye and repeat process. Finish by bringing floss through the bottom of the head and tie with starting tail and trim ends.
Round3: *2dc in next st, 1dc in next st* repeat around (18dc / 18sc )
Round 4 – 7: dc in each st around (18dc / 18sc )
Round 8: dc2tog, dc in next 14sts, dc2tog, (16dc / 16sc )
Round 9: dc2tog, dc in next 12sts, dc2tog (14dc / 14sc )
Round 10: dc2tog, dc in next 10sts, dc2tog (12dc / 12sc )
Rounds 11 – 14: dc in each st around (12dc / 12sc )
Round 15: dc2tog all around (6dc / 6sc ) Fasten off and leave along tail, now with a darning needle attach the ears securely to the head by sewing along both the outer side and under side of the ear, catching under the stitches of the head and the ear. You may find it helpful to pin the ears into position before you sew them on. This helps you to decide on a good position and will prevent lopsided ears! Once competed weave in any loose ends.
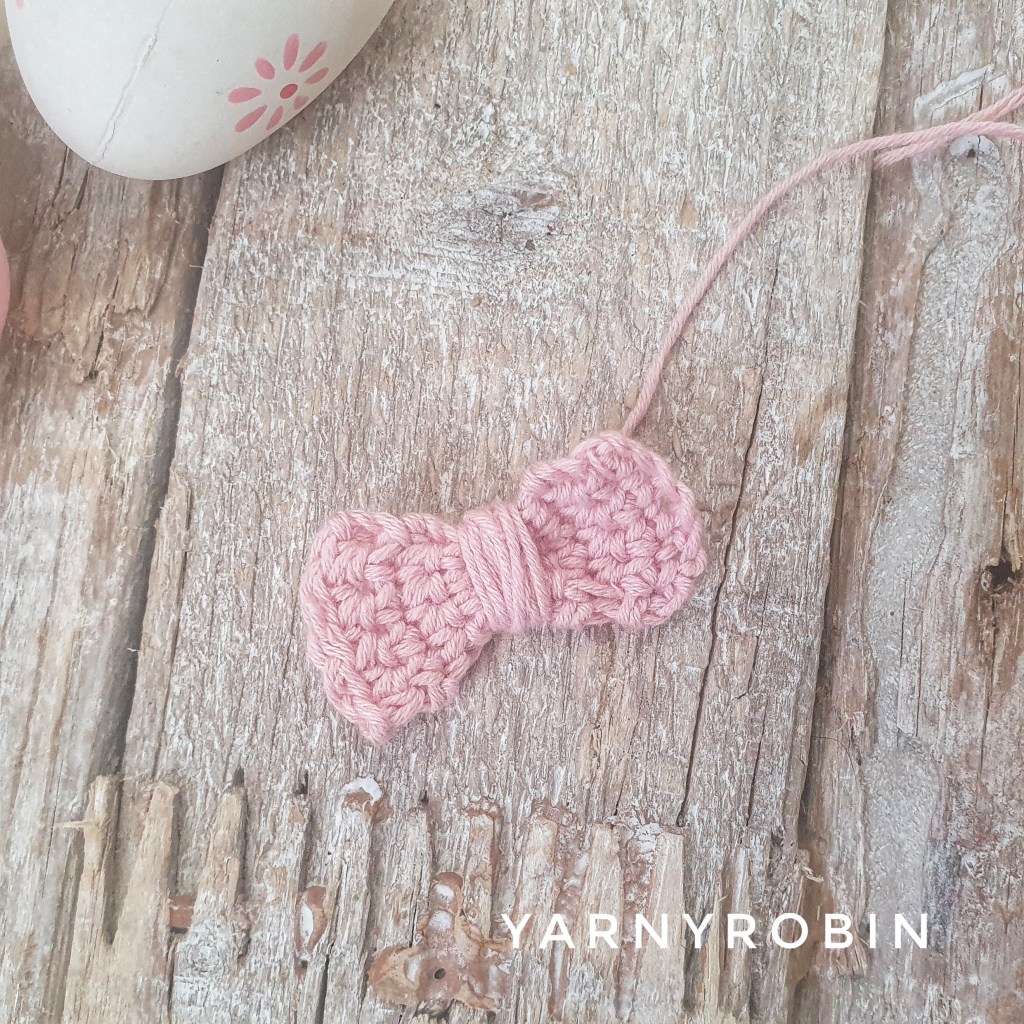
Bow
With pink cotton
Ch 6
Row 1: dc in 2nd ch from hook and in each ch along, turn (5dc / 5sc )
Row 2 – 10: dc in each st along, turn (5dc / 5sc )
Fasten off and weave in ends. Take long piece of cotton and tie a knot in the middle of bow, snipping short the shorter tail. Now wrap long tail several times around the middle of the bow taking care to cover the tail you snipped short. To finish take the cotton wrapped around the bow and thread needle. Finish by taking needle through the wrapped cotton on the backside and knot, leaving a long tail. Now with a darning needle, securely sew bow to the head and weave in any loose ends.
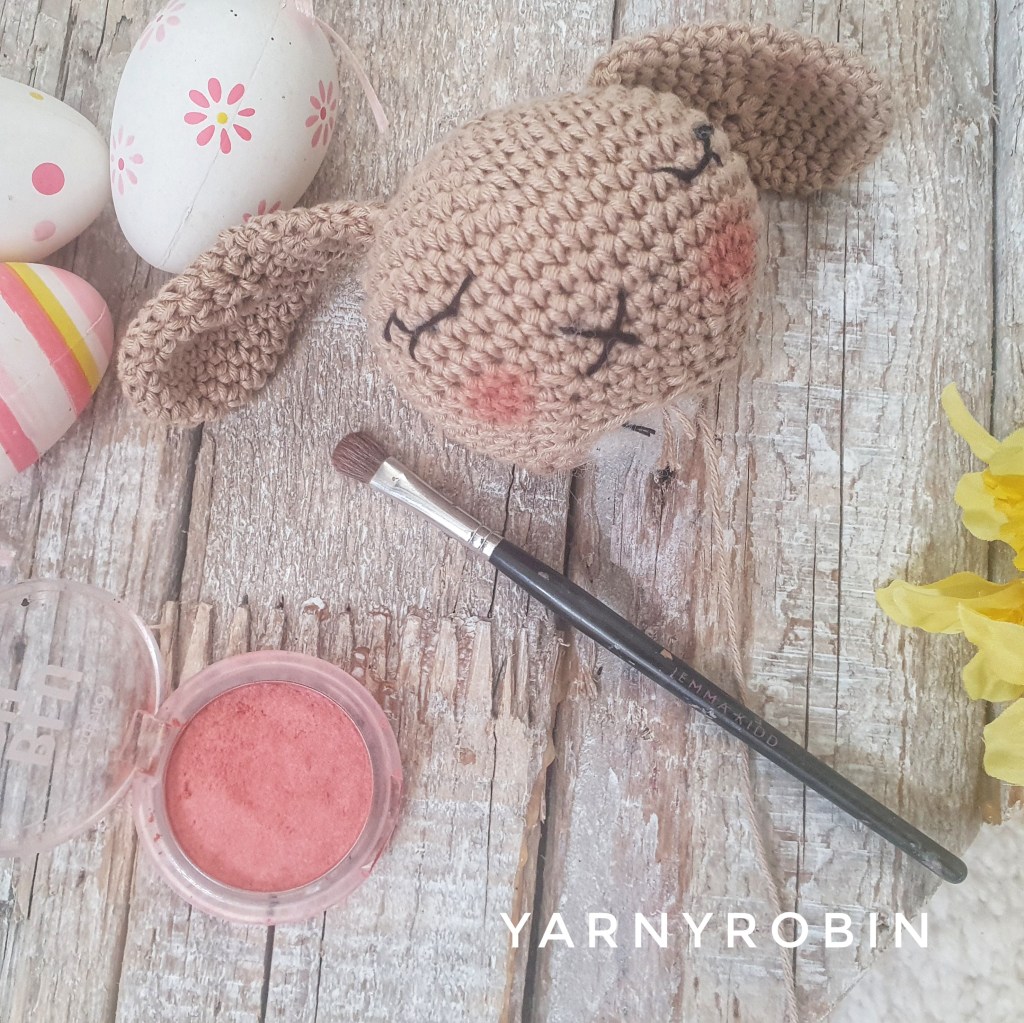
Now with a small amount of blusher on a brush add two little rosy cheeks to the face.
Fasten off leaving a long tail. With a darning needle attach to underside of head securely by sewing along both the outer side and under side of the arm, catching under the stitches of the head and the arm. You may find it helpful to pin the arms into position before you sew them on. Finish by sewing criss cross the bottom of head to close the gap.
Blanket
Ch 6, slst to 1st ch to form a ring
Round 1: Ch3 (counts as tr) 15tr into ring, join with a slst to top of ch3 (16tr / 16dc )
Round 2: ch3 (counts as a tr) tr in same space, ch1, 2tr in same space, *ch1, miss a st, 2tr in next st, ch1, miss a stitch, (2tr in next st, ch1, 2tr in same space)* repeat * – * twice, ch1, miss a st, 2tr in next st, ch1, slst to top of ch3, slst to corner space
Round 3: ch3 (counts as a tr) tr in same space, ch1, 2tr in same space, *ch1, 2tr in next ch space, ch1, 2tr in next ch space, ch1, (2tr in next ch space, ch1, 2tr in same space)* repeat * – * twice, ch1, 2tr in next ch space, ch1, 2tr in next ch space, ch1, slst to top of ch3, slst to corner space
Rounds 4 – 8: continue rounds as round 3, you will have an extra set of 2tr, ch1 along each side in each row.
Ie/ continue with corner spaces = 2tr, ch1, 2tr, ch1
Sides = 2tr, ch1
Rounds 9 – 14: Continue as rounds 4 – 8 but add 2ch in corner spaces
Ie/ continue with corner spaces = 2tr, ch2, 2tr, ch1
Sides = 2tr, ch1
Round 15: ch2 (counts as htr), htr in same space, ch2, 2htr in same space, htr in each st and in each space along edge
Corner space = 2htr, ch2, 2htr
Fasten off and weave in ends
Now with the long tail from the head, thread darning needle and position head in centre of blanket with the face pointing to a corner of the blanket (on the diagonal) sew securely all around utilising the front loops from round 19 of head. You will also need to sew blanket to the arms also. I like to sew around the head twice just for added security.
Thank you so much for crocheting along with me — I hope you enjoy making this pattern.
If you enjoyed this pattern, you may also like my crochet teether patterns. They are perfect for using leftover yarn. You can create a complete handmade baby gift with them.
And if you want to save this pattern for later why not use the image below to save to your Pinterest board
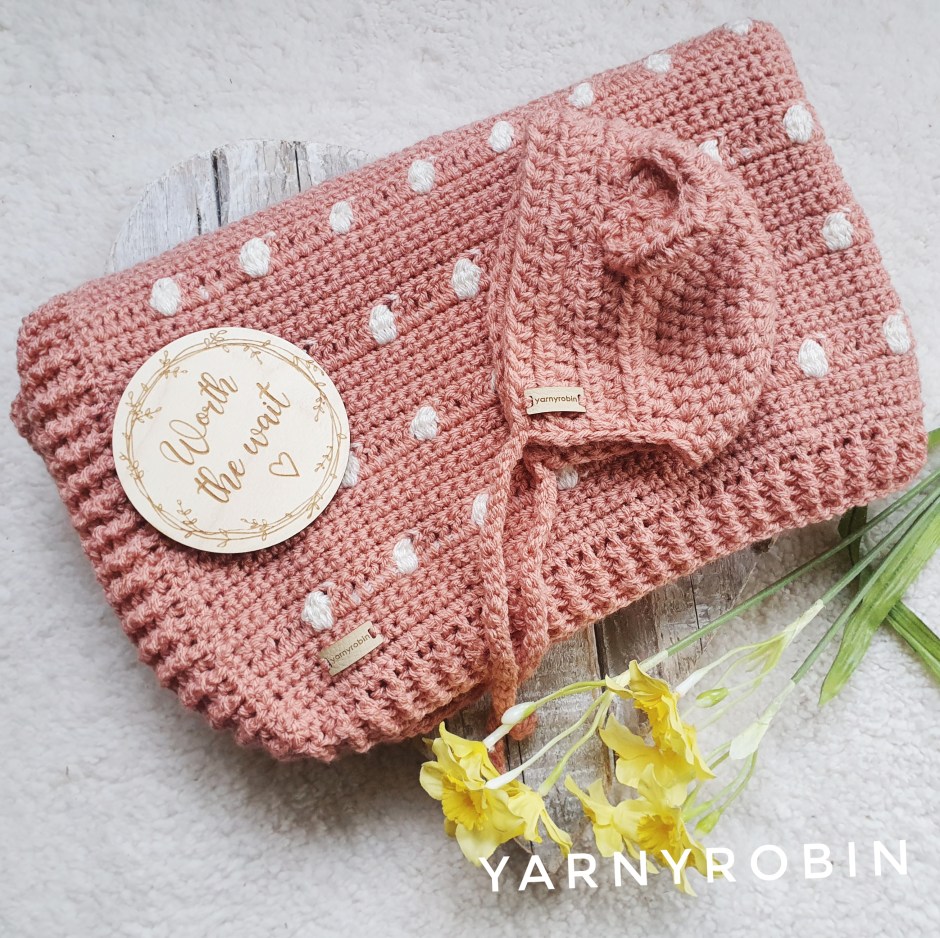
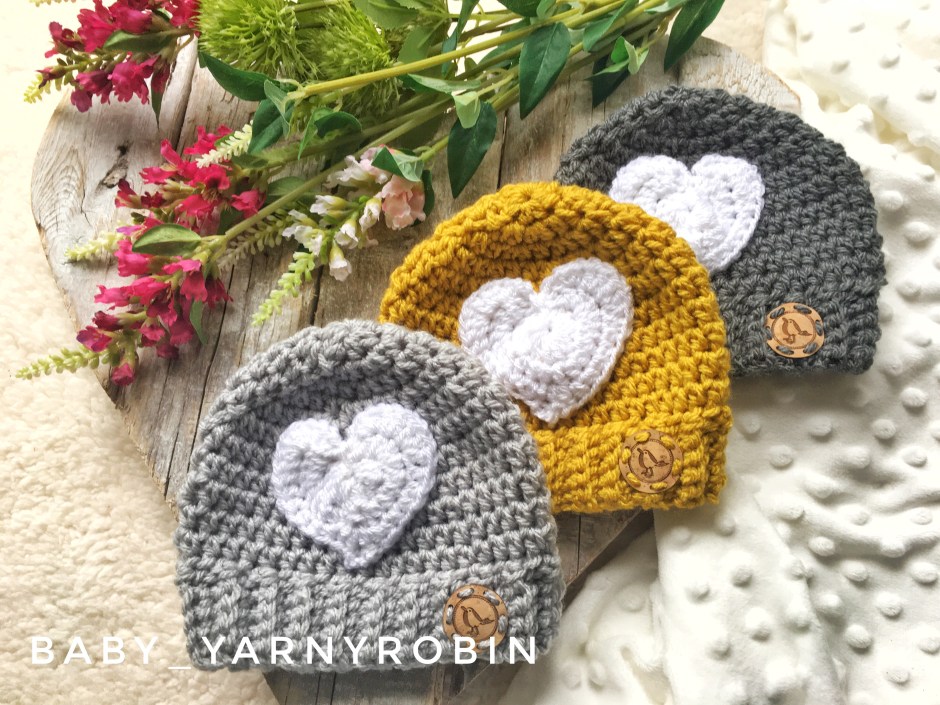
The Waiting for You baby blanket crochet pattern is now available in my Etsy store and comes in 2 sizes. You can purchase as a bundle and get the blanket and bonnet pattern for a discounted price, or you can buy them separately if you prefer. I have added a little bonus pattern for free too, which will be available to download with your purchase.
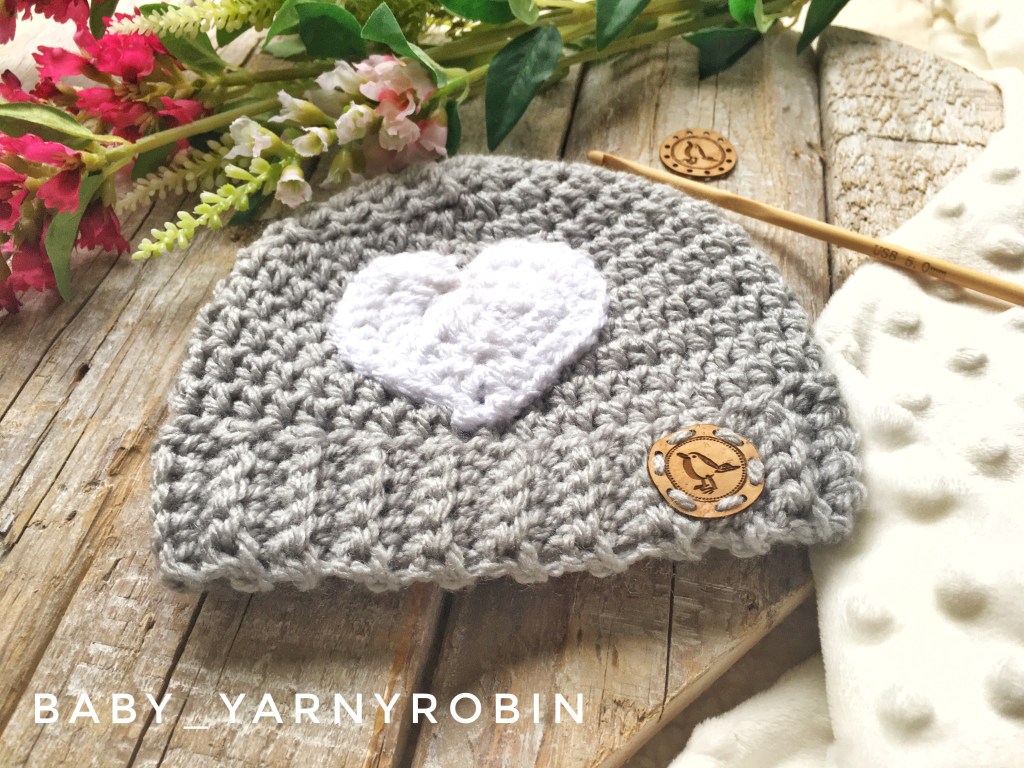
Although the bonnet pattern is written for aran weight yarn and the blanket suggests DK weight yarn, I suggest you hold two strands of DK together when making the bonnet if you want the blanket and bonnet made in the same yarn. That is what I did for the one in the picture above and it worked really well.
I would love to see your makes so don’t forget to tag me on your social media @yarnyrobin or use the #waitingforyoublanket
I am so pleased this baby blanket is off my hook, because I can’t wait to get another one on my hook but in a different colour. This beautiful vintage peach one is stroller size (33″ x 30″) and I would really like to make a slightly bigger version, so I’m not going to release the pattern just yet. I do have one pattern tester slot left for this blanket, so do get in touch with me if you fancy hooking this. If you have never pattern tested before that’s ok…it’s quite a simple process and I would be really grateful. You will get the edited pattern and another pattern of your choice for free as a thank you.
I have loved making this blanket, I love how the chunky rib border has those beautiful rounded edges and how those accent dots line up politely. The simplicity of this blanket is its charm and I have called it The Waiting for You blanket; because it is the perfect thing to make whilst you are waiting for a special arrival.
Incidentally, today happens to be random act of kindness day. I don’t think we should have a day dedicated to random kindness, I think that should be just a part of every day business. However, in the spirit of #randomactofkindnessday if you pop over to my instagram page (@yarnyrobin) you will find my pattern giveaway competition…but hurry as I will be drawing it on 18th Februaryy 2022 at 12noon GMT…that’s tomorrow!
So, I have a new blanket on my hooks. It has been a long time since I made anything bigger than a hat, so I am really enjoying the hooking and process of writing the pattern…even if I did have to frog an enormous amount…see here for the proof!
I am also on the hunt for a handful of pattern testers, so if you are interested here are the deets… there will be 2 sizes of blanket
baby blanket and stroller blanket
You need to provide your own yarn – dk weight (approx 400g in main colour and 100g in accent colour…I think…I’m still not done making the original!
Time – I need you to be able to complete the test within 4 weeks of receiving the pattern and i’m hoping to release in March.
Spot any typo’s, pattern mistakes or make suggestions if you have any.
Finally, be able to share with me a clear well lit shot…think insta worthy!
In return I will send you the full edited pattern and also another pattern of your choice from my designs and I will love you forever. So, if you are up for testing then dm me, leave a message or contact me via insta and let’s become hooky buddies.
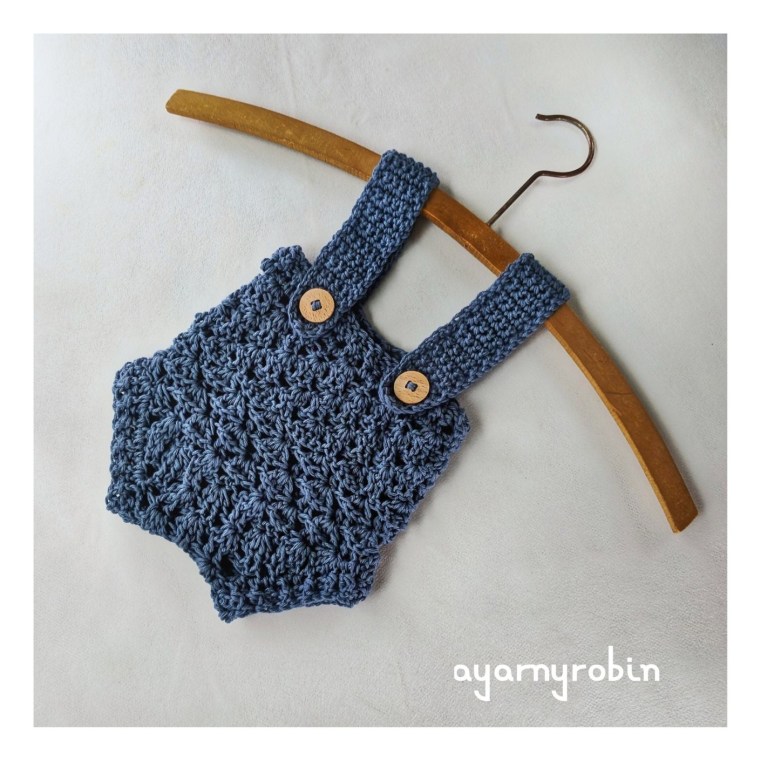
These beautiful baby bloomers just fell off my hook…what do you think?
I am totally in love with them, and that colour is looking mighty fine!
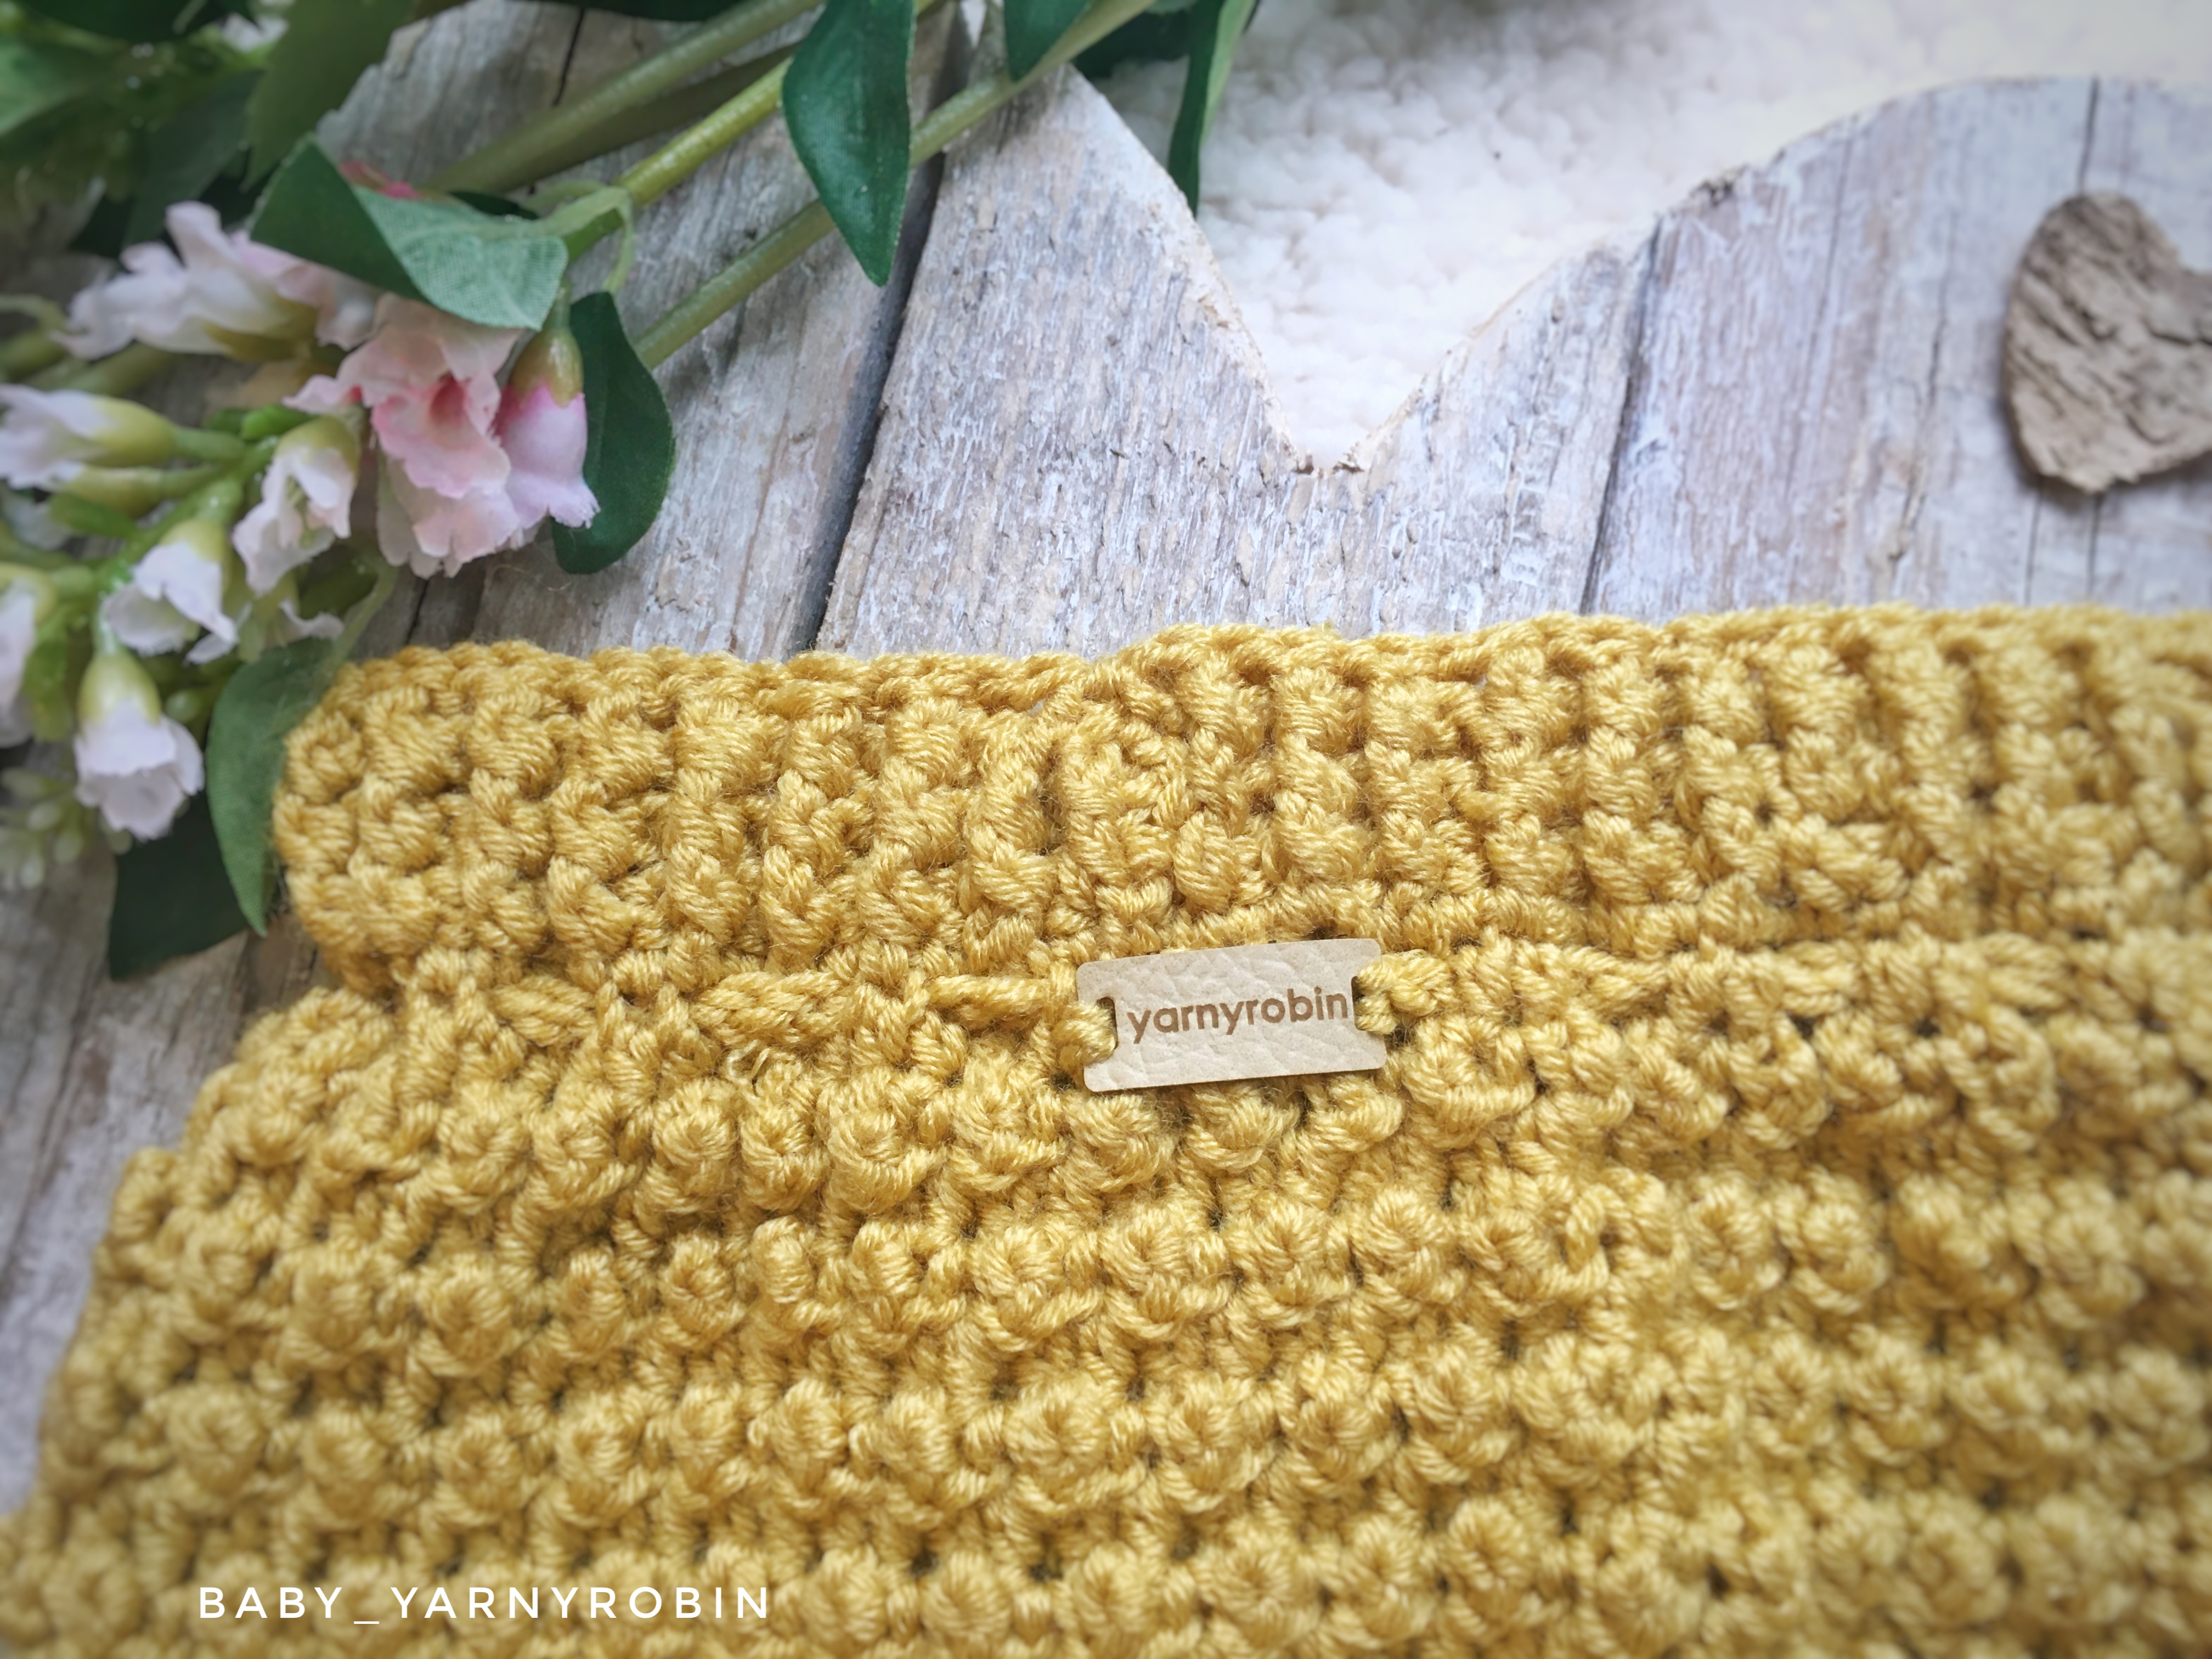
The textured pattern is a delight to hook and I adore the little cinched in waistband. I think these would look great paired with a simple pair of tights, but equally would suit a little boy also. The ribbed banding around the waist and legs finishes the pattern with a soft definition and you know me…I always love to crochet a rib.
You can just imagine a cute little baby bum in that can’t you?
The pattern was great to follow and I highly recommend you pop over and take a look at this designers patterns, she is certainly bossing the way in British crochet baby wear. I will pop all of the details at the bottom of this post as usual with all of the relevant linky things too.
And if you don’t fancy hooking your own pair I am happy to hook some for you…just click here and drop me a message.
The yarn was also a delight, super soft for baby’s skin and has a gentle sheen which compliments the textured pattern of these bloomers. This yarn is also practicle in that it is machine washable and anti-pilling and can even be popped into the tumble dryer!
This mustard has to be one of my favourite colours right now. It reminds me of fields of rape seed in the countryside and sunflowers and yet makes me think autumn will come again…and I can’t wait for the beautiful season that is Autumn.
Thank you for the lovely feedback I have received on my free baby blanket pattern; if you missed it you can find it by clicking on the link.
I had a lovely little hooking session yesterday evening, and this is what came off my hook. I am so in love with these sweet hats and I love the colours too!
Well the rain and the snow finally stopped for a little while and the sunshine made a cameo appearance last week.
It seems more rain and freezing temperatures are on there way again! But, the sunshine certainly influenced my hooking last week and I took my hook alfresco whenever I could. I have also enjoyed getting back outdoors and walking the dogs now my foot has finally healed.
Of course there were pit stops along the way!
I have also been keeping up to date with the seaside stashbusting CAL…this photo was taken at the trampoline park.
Not much has occurred on the knitting front, in fact it would be fairer to say nothing has happened. I am enjoying my hooking far too much to be slowed down by needles and I have a couple of commissions that I really must finish. One of which I can now show you…
Aren’t they just the sweetest?
I loved making these little baby shorts.
The pattern is by Mon Petit Violon Designs and I will definitely be hooking some more. I used Rico baby cotton soft yarn in a dk weight and a denim blue and finished them off with some little wooden buttons. Rico was a lovely yarn to hook with and has given a beautiful stitch definition to the garment. Of course it is soft enough for babies skin also and machine washable.
Finally, I just wanted to say a BIG thank you to everyone who has given me such encouraging feedback across my social media about the Sunshine Jelly Baby Blanket…
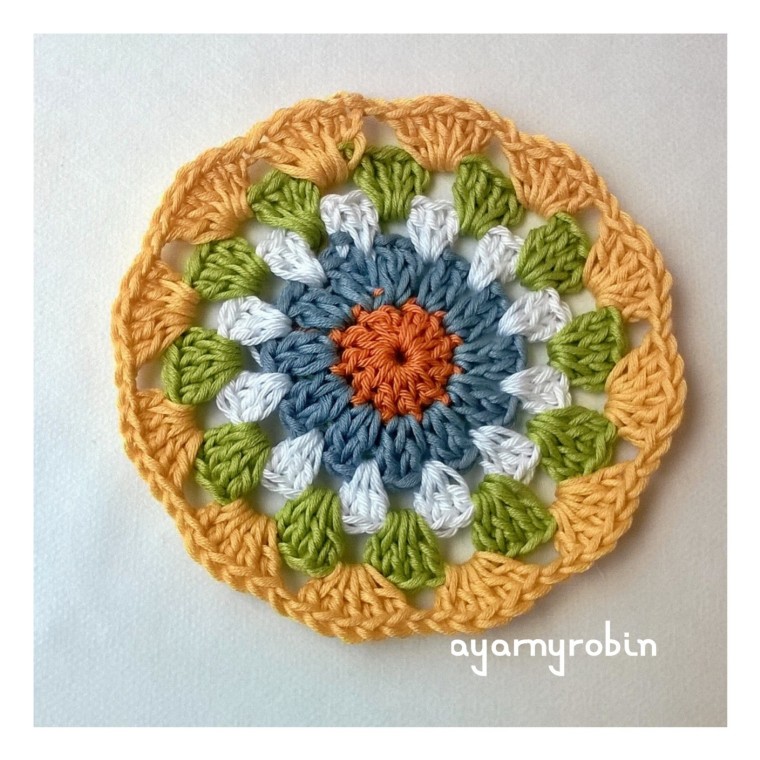
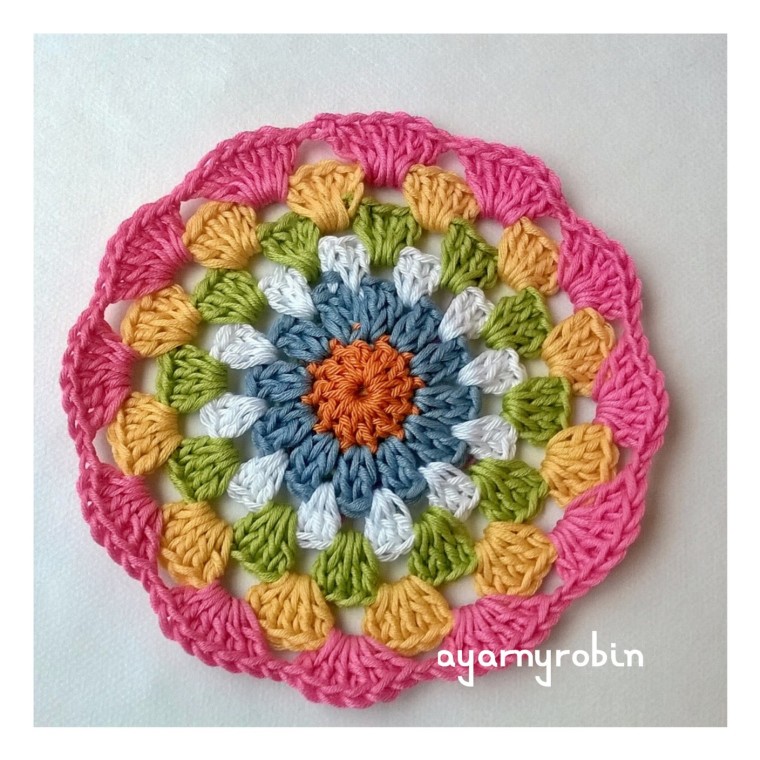
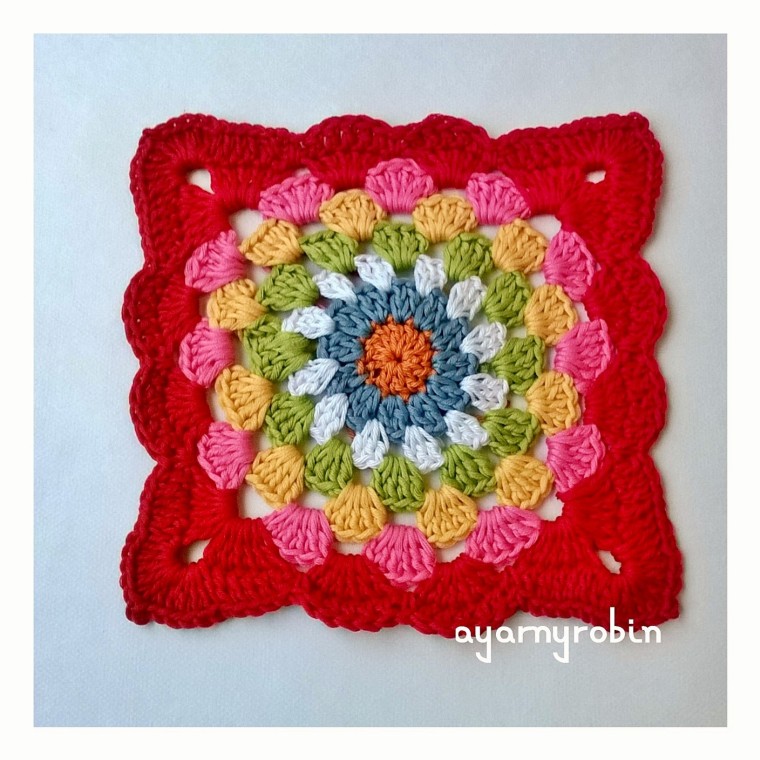
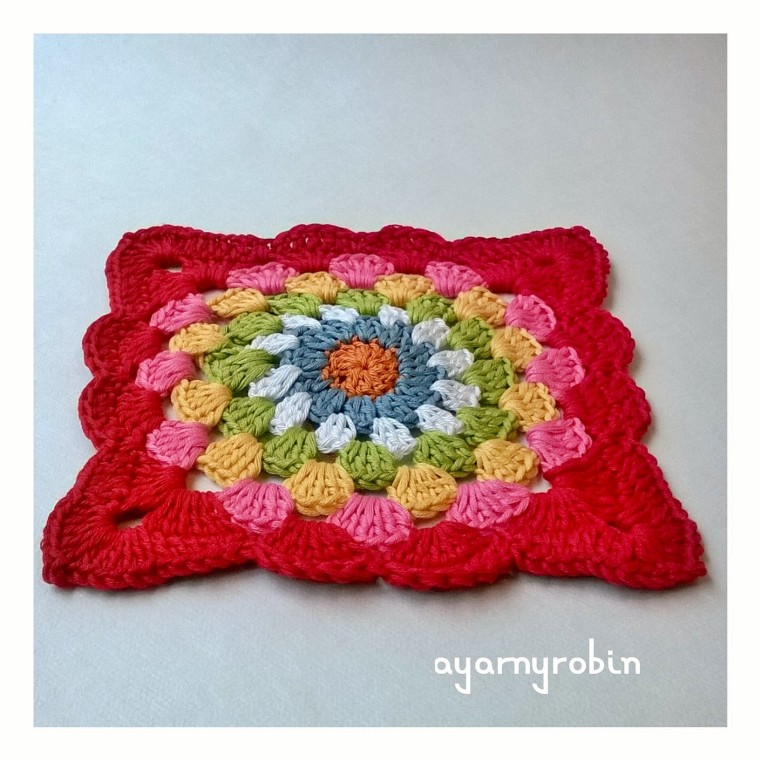
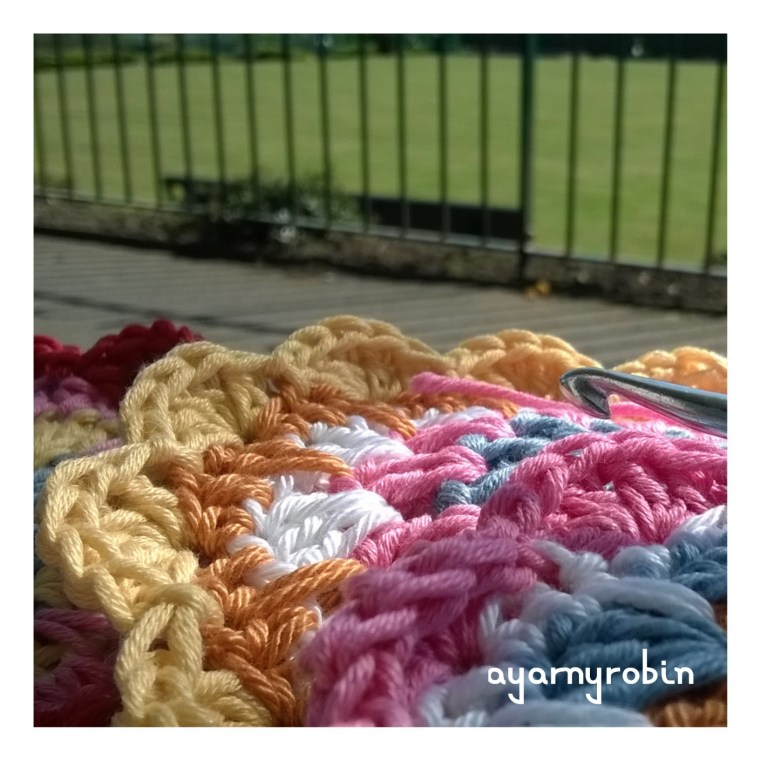
I am so thrilled to be able to introduce the Sunshine Jelly Baby blanket to you.
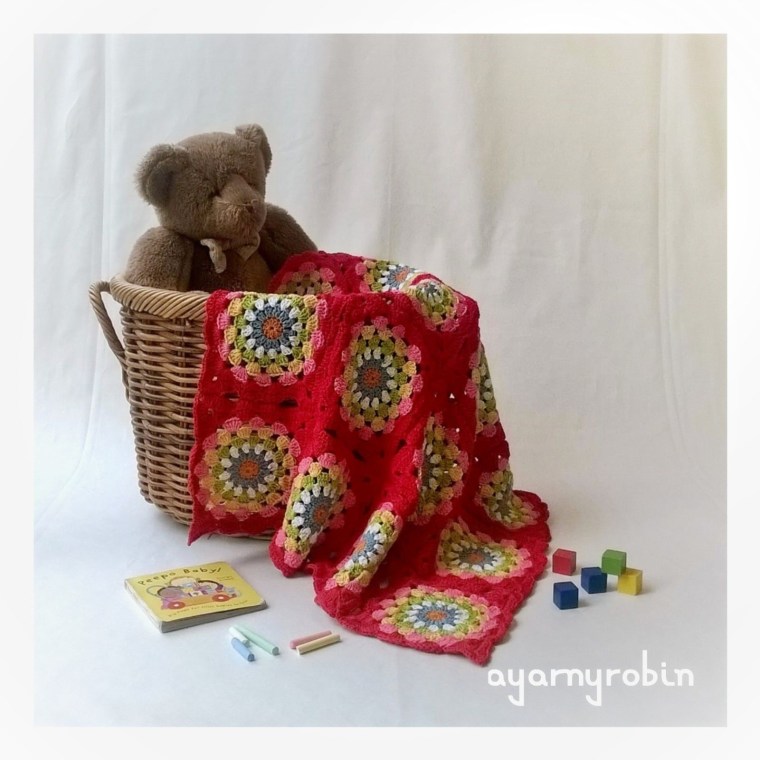
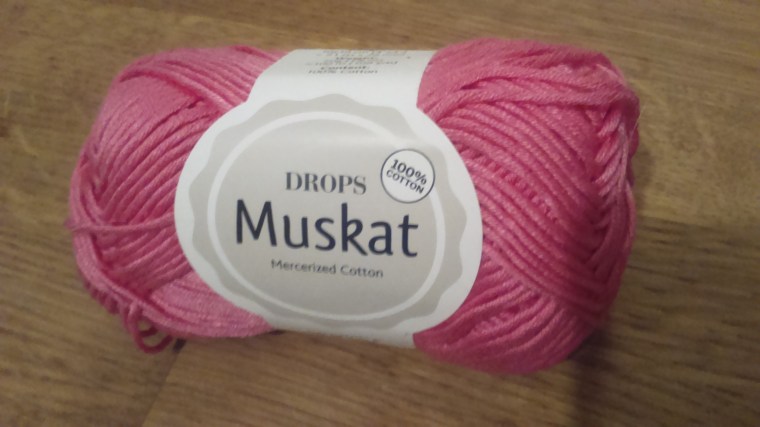
This delightful crochet blanket is vibrant and fun to hook and the pattern is available, complete with a photo tutorial just below. Made from Drops Muskat cotton, it measures 74cms x 74cms or 29″ x 29″…the perfect pram blanket size, of course you can make the blanket bigger by adding more squares if you wish. You can also check out my latest free baby blanket pattern…The Angelece Baby Blanket by clicking this link. This delicious blanket is made using the Robins Nest square which I designed a few years ago and if you are a regular here you will know that I have recently updated this pattern. When I firstdesigned this square I always intended to make a baby blanket…I guess somethings just take a while to come to pass.
As always I’m using English crochet terminology. Ch – chain Slst – slip stitch dc – double crochet tr – treble crochet
ch3 – counts as a treble unless otherwise stated. I’m using drops muskat cotton.
and I’m using the colours and quantities listed below red – 100g old pink – 80g white – 50g vanilla yellow – 65g dark orange -20g
sky blue – 35g
apple green – 50g
and a 4mm crochet hook and a 3.5mm crochet hook
Each lovely yarny square measures 7″ x 7″ or 18cm x 18cm once blocked.
You will need to make 16 squares to make this blanket arranged
4 x 4…
of course you can make more squares if you wish to make a larger version.
So here goes…
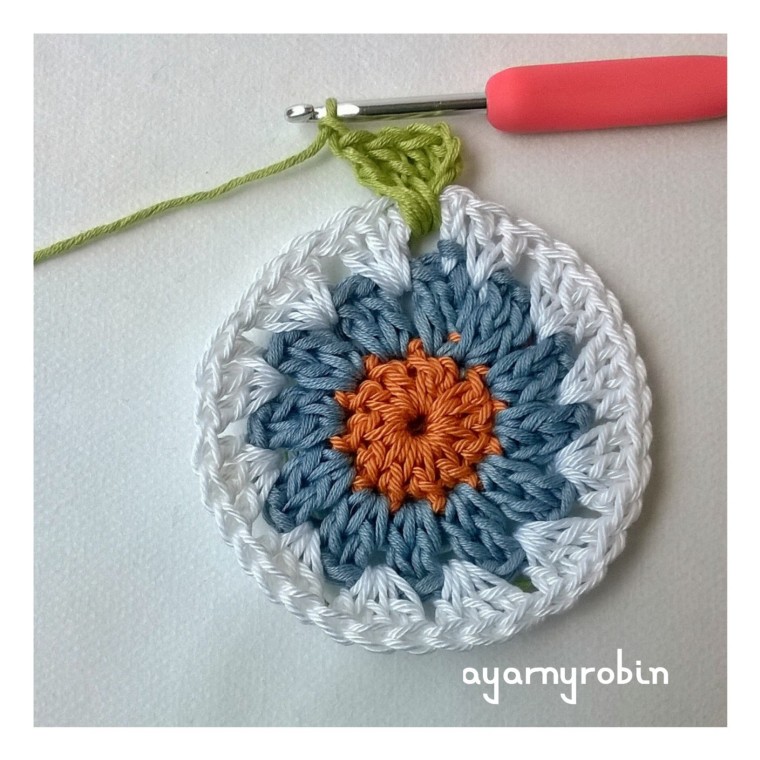
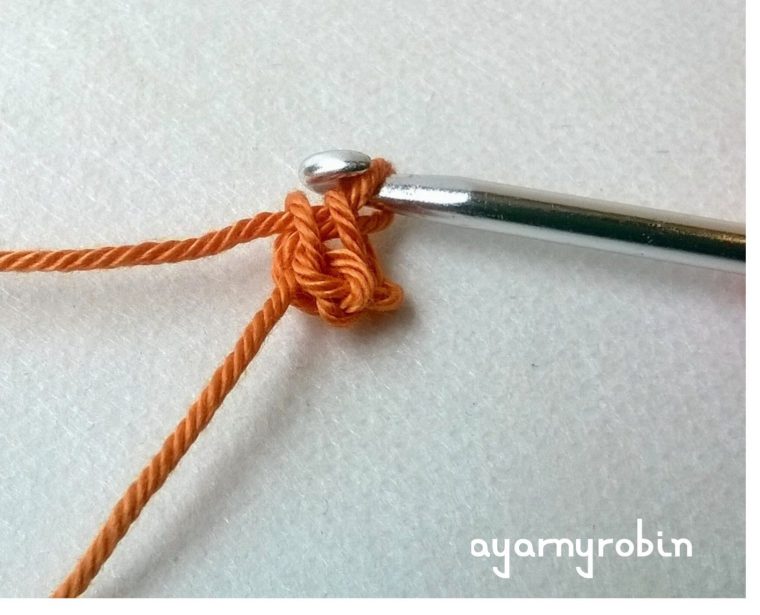
with a 4mmhook ch2, join with ss to form a tiny ring (you could make a magic circle instead if you prefer)
Row 1: ch3,
11tr into ring,
join blue yarn and slst into 3rd ch
(12tr in total).
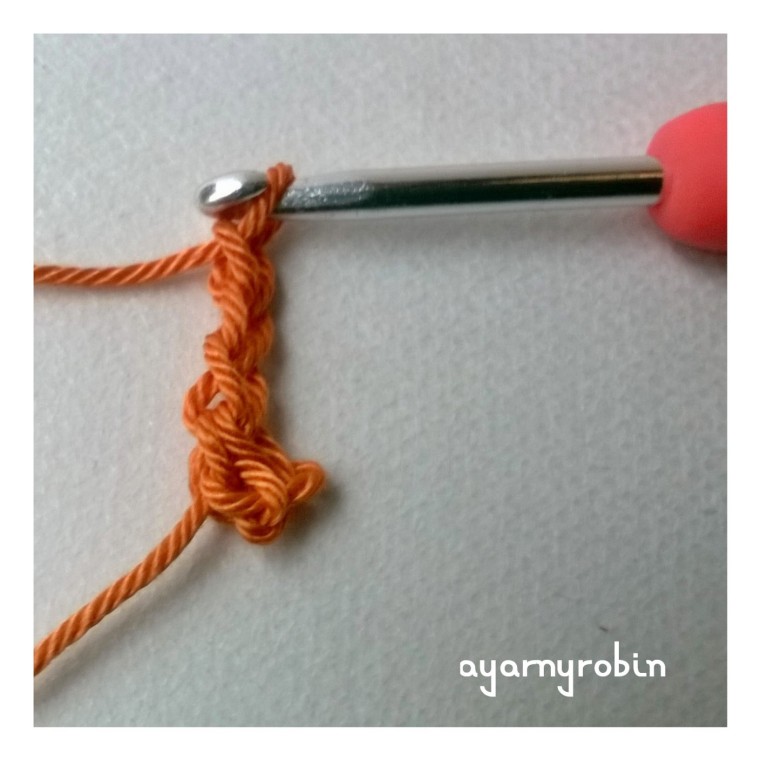
Row 2: ch3,
1tr in same space, ch1
2tr in next st, ch1
*2tr in next st, ch1*, repeat * * x10 times,
join white yarn and slst into 3rd ch
(12 clusters of 2tr and 12 ch spaces).
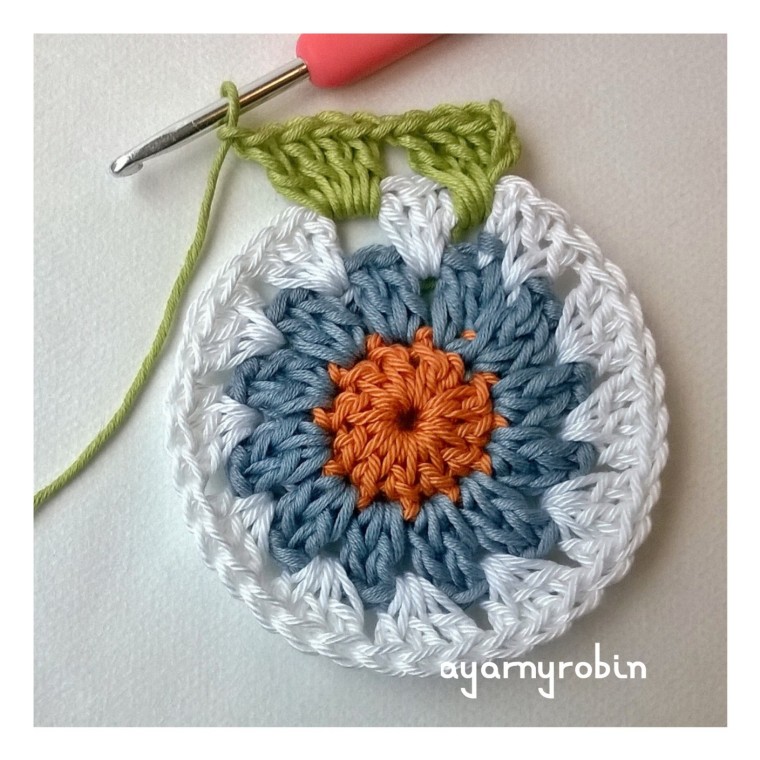
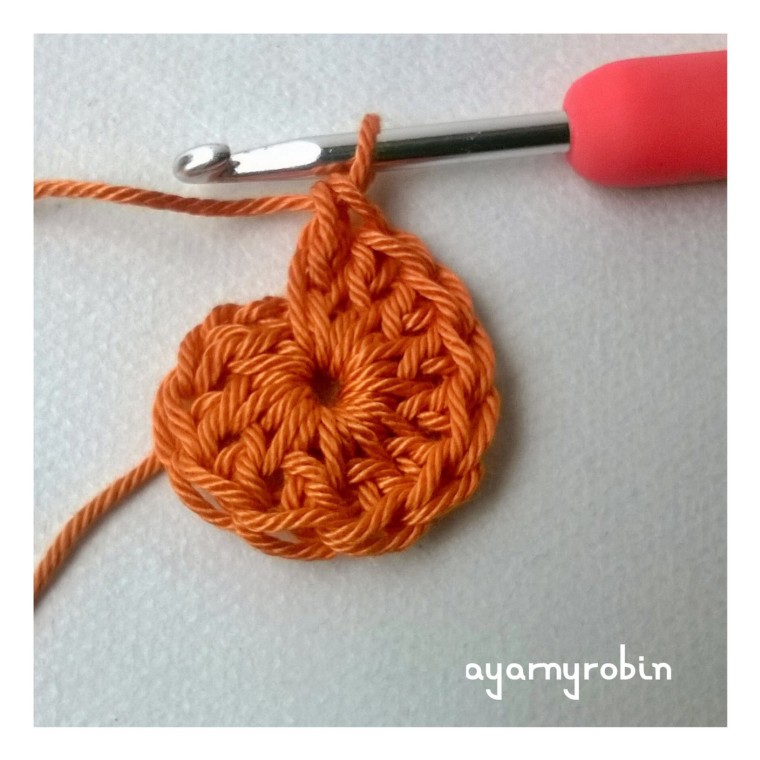
Row 3: ch3,
*3tr in next ch space*,
repeat * * x10 times, 2 tr in next ch space,
join with slst in top of ch3 and fasten off.
(12 clusters of 3tr).
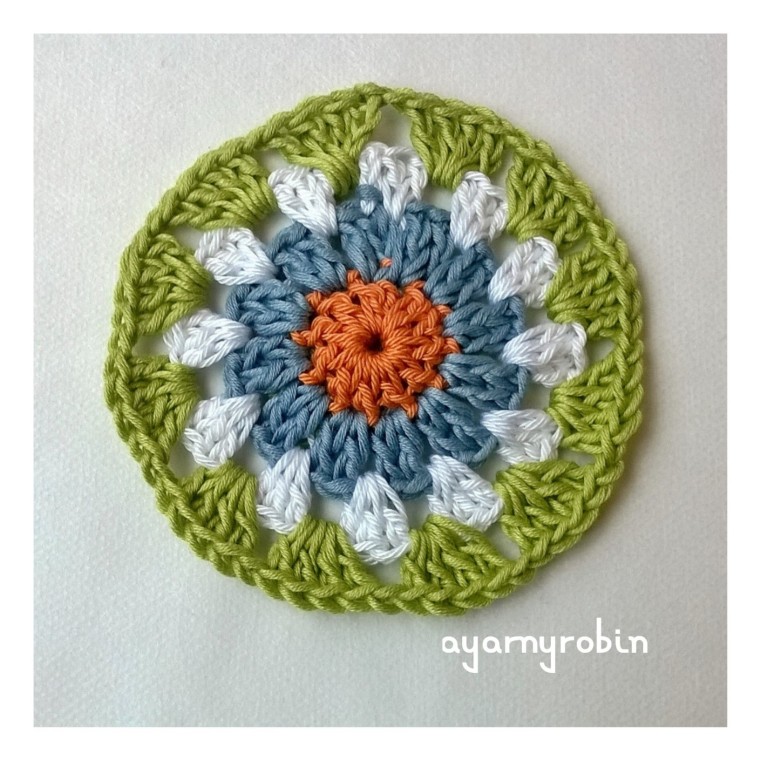
Row 4: join green yarn in between any cluster of 3tr of previous round and ch3,
3tr in same sp, ch1
*4tr in between next cluster of 3tr, ch1*,
repeat * * x10 times, join with slst in ch3 and fasten off. (12 clusters of 4tr and 12 ch spaces)
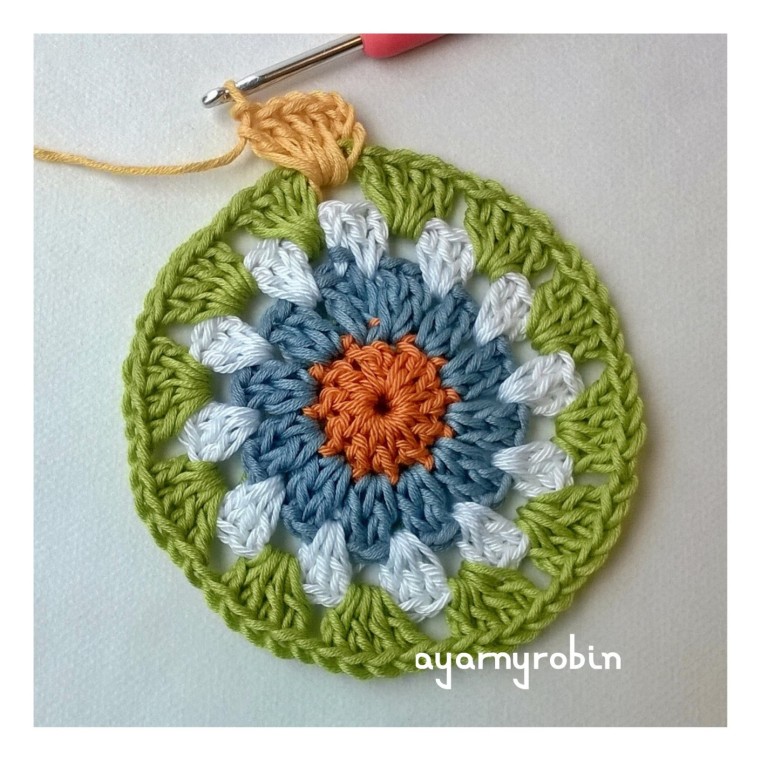
Row 5: join yellow yarn in any ch space and ch3, 4tr in same sp, ch1
*5tr in next ch space, ch1*, repeat * * x10 times, join with slst in ch3 and fasten off. (12 clusters of 5tr and 12 ch spaces)
Row 6: join pink yarn to any ch space and ch3, 5tr in same sp, ch1, *6tr in next ch space, ch1*, repeat * * x10 times, join with ss in ch3 and fasten off. (12 clusters of 6tr and 12 ch spaces)
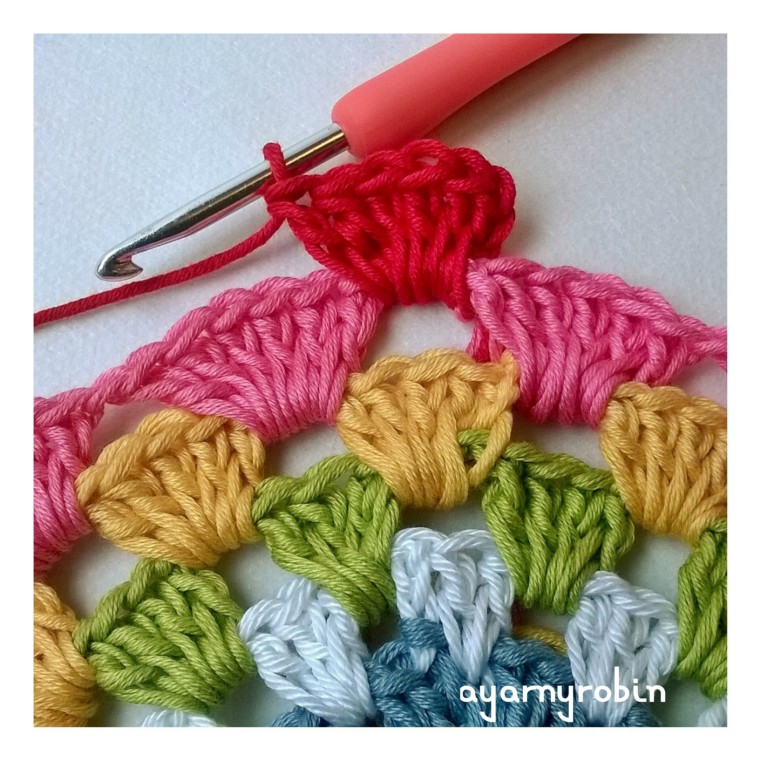
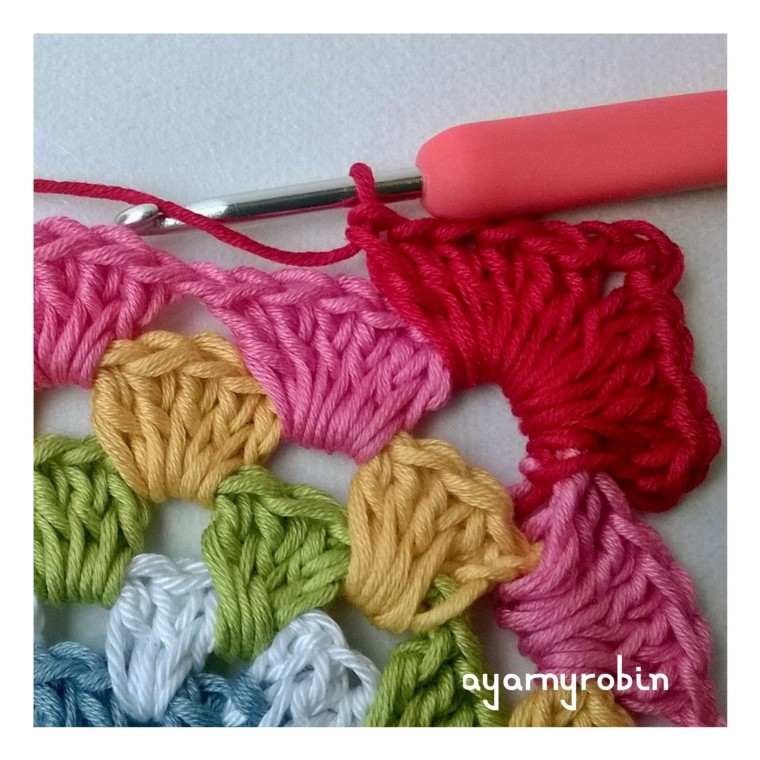
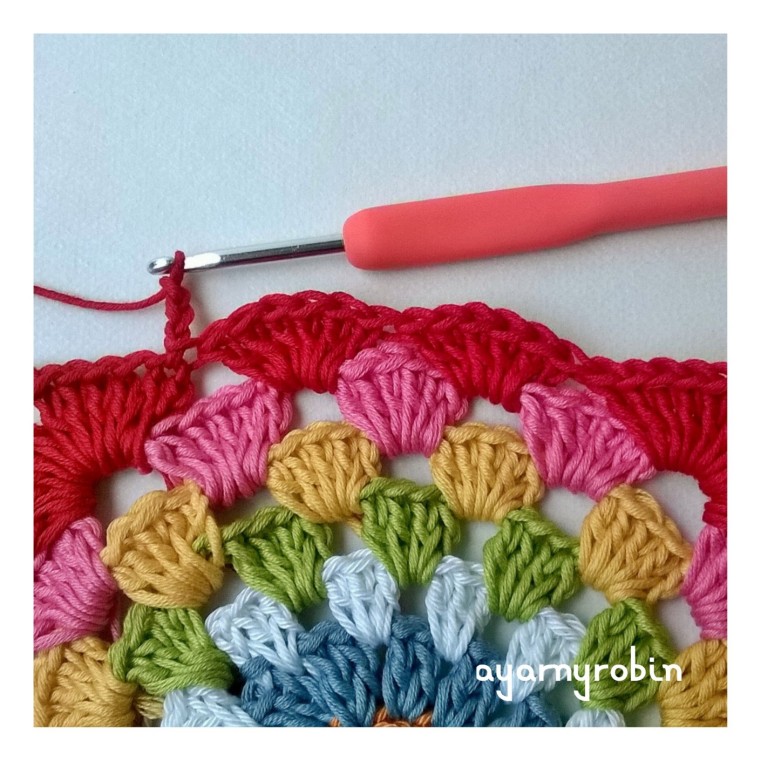
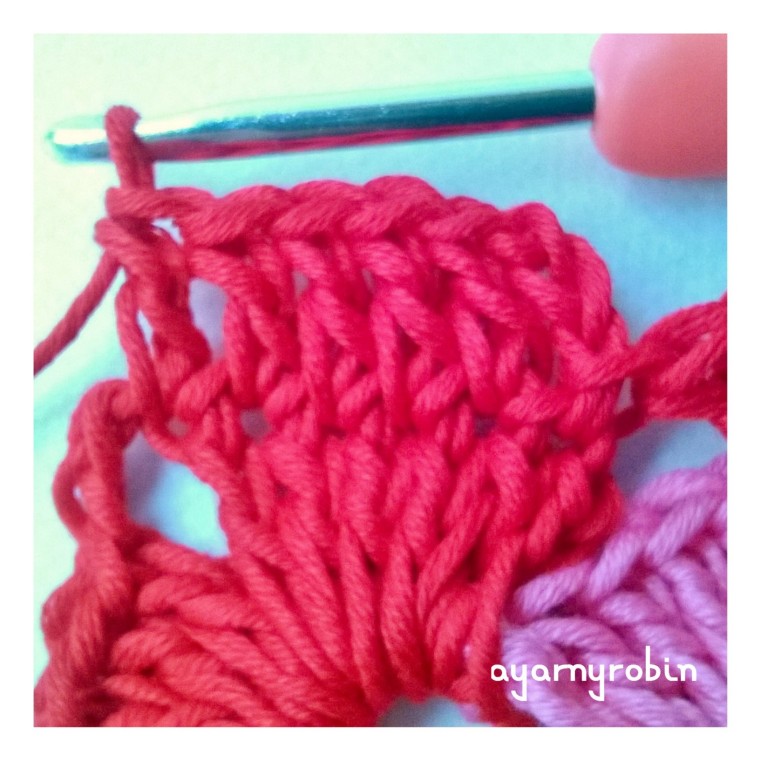
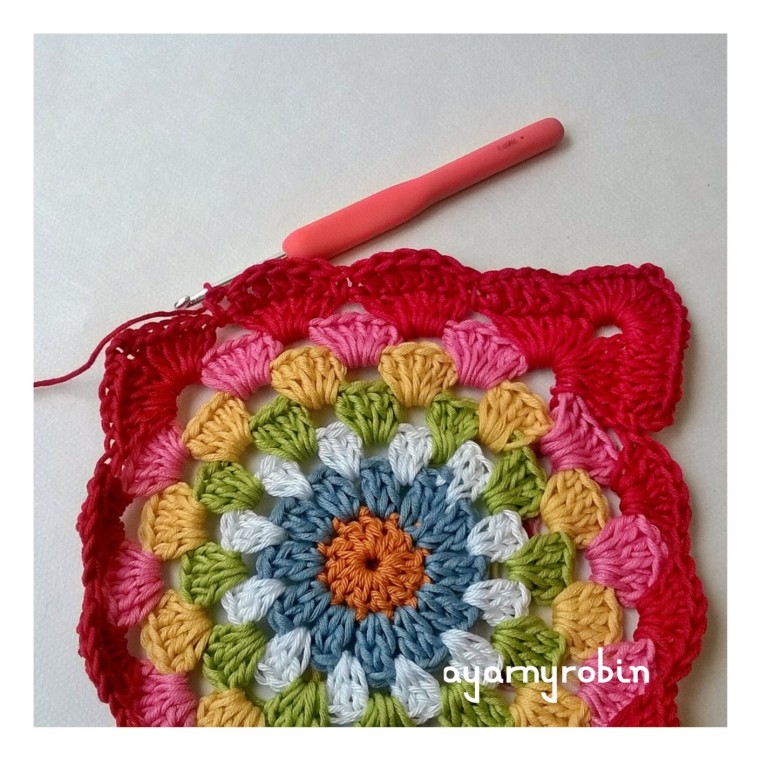
Row 7: join red yarn in any ch space, ch3, 5tr in same space,
ch3,
6tr in same space (corner made),
*6tr in next ch space, 6tr in next ch space,
6tr in next space, ch3, 6tr in same space* (2nd corner made) repeat * * x2 times
6tr in next space, 6tr in next space, join with slst in beginning ch3. Do not fasten off.
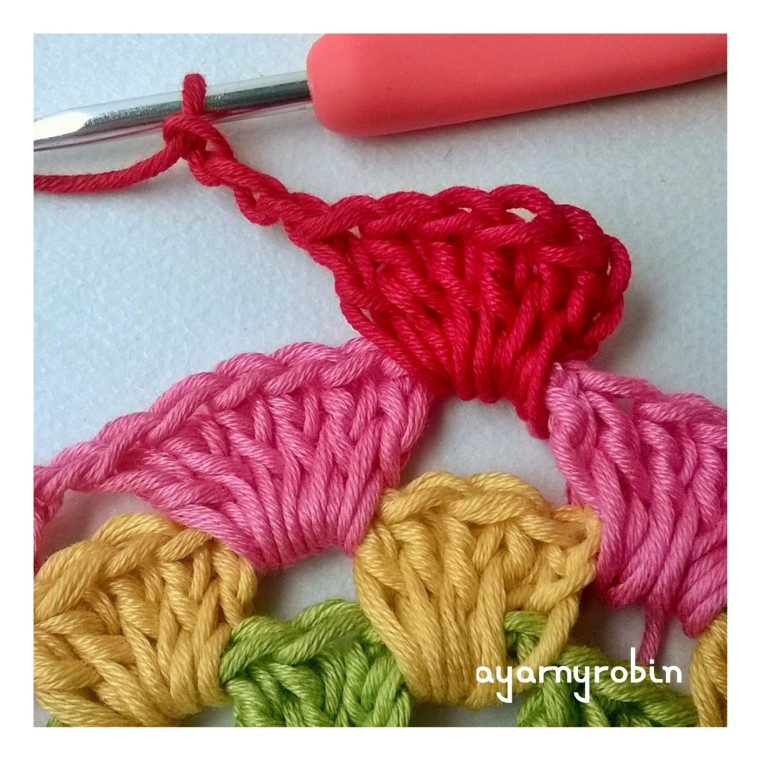
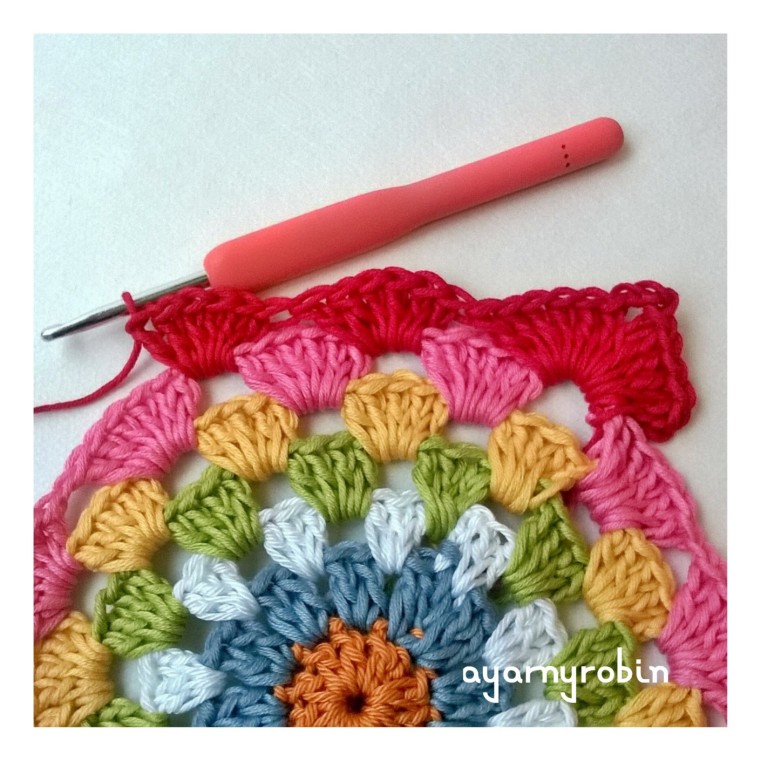
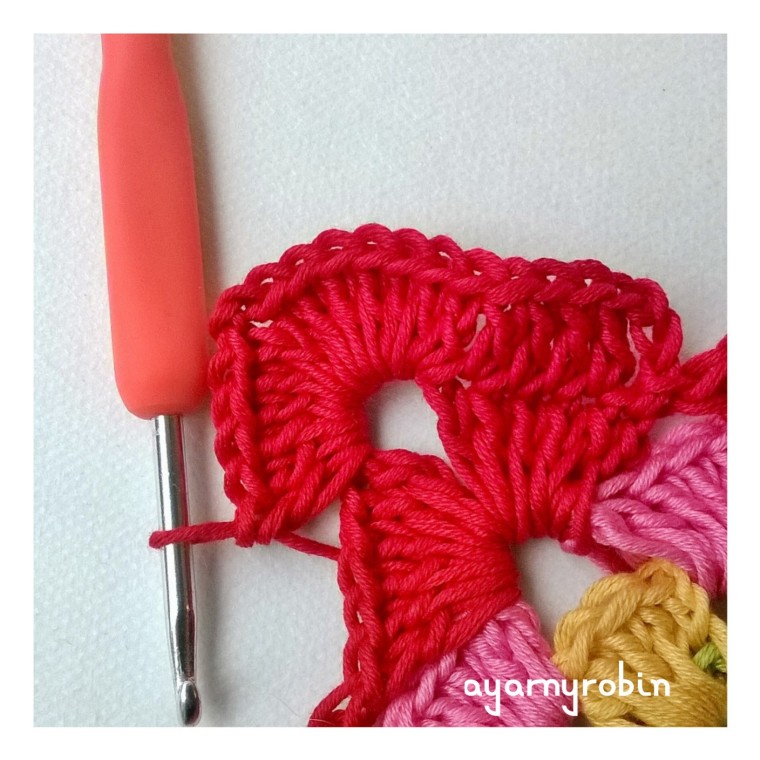
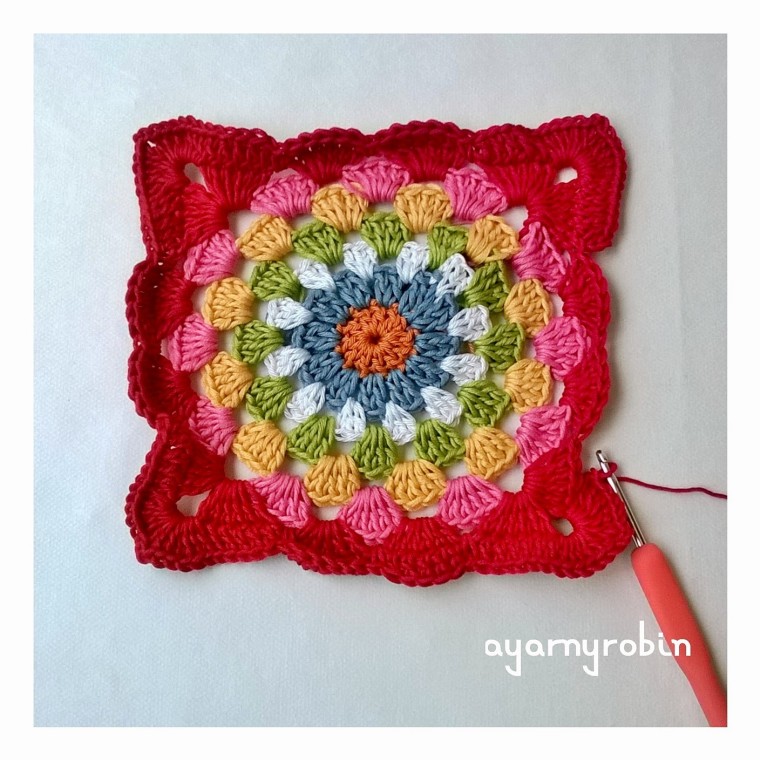
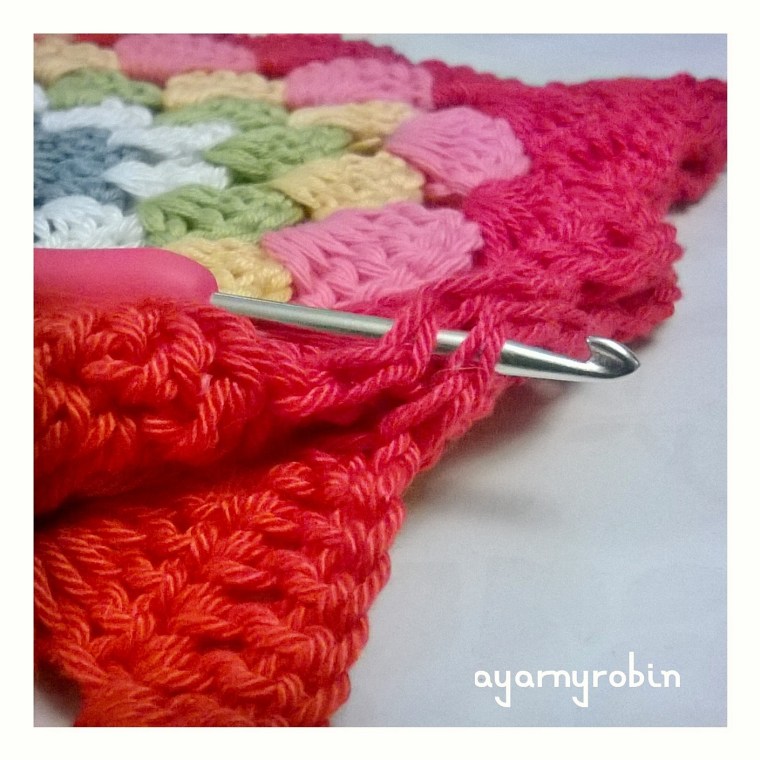
Row 8: ch3,
1tr in next 5sts,
*6tr in ch3 sp, ch2, 6tr in same space (corner made),
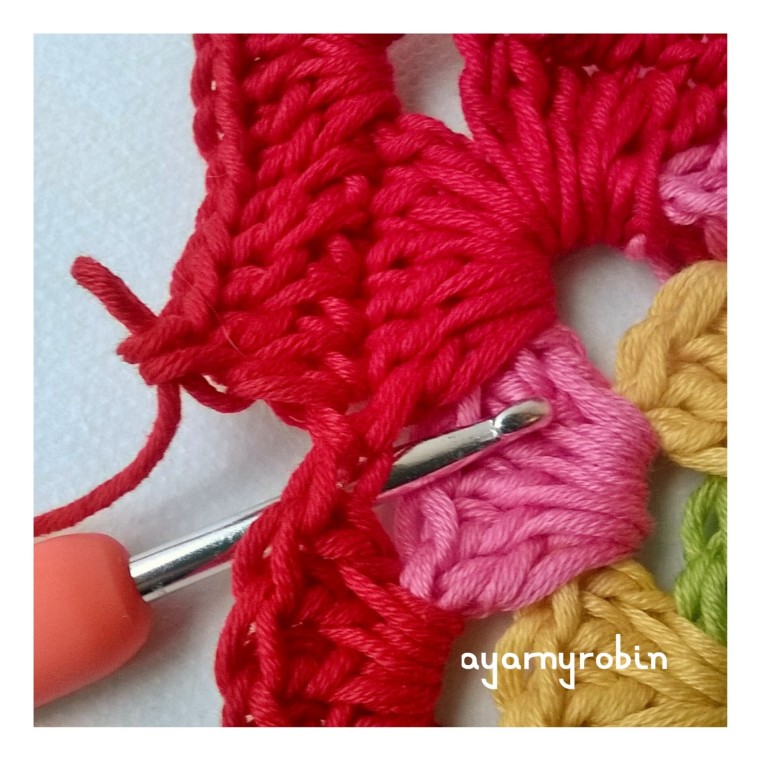
*1tr in next 5sts,
dc UNDER next stitch (indicated by the hook)
1tr in next 5sts, dc under next stitch, 1tr in next 5sts, dc under next stitch
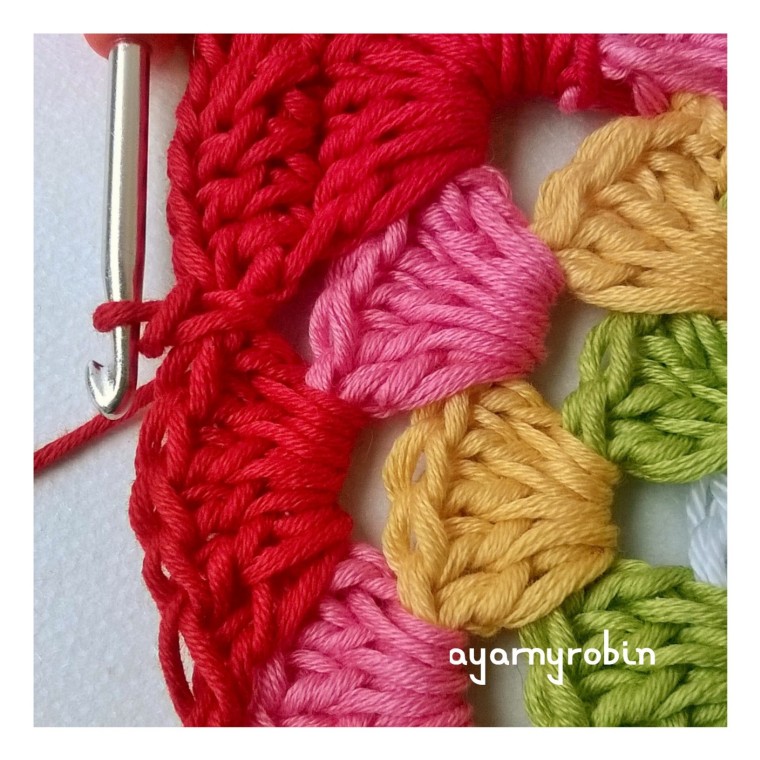
1tr in next 6sts, 6tr in ch sp, ch 2, 6tr in same space*
repeat * * x2times
1tr in next 5sts, dc under next stitch, 1tr in next 5 sts, dc under next stitch, 1tr in next 5 sts, dc under next stitch, slst to beginning 3rd ch to finish. Weave in ends.
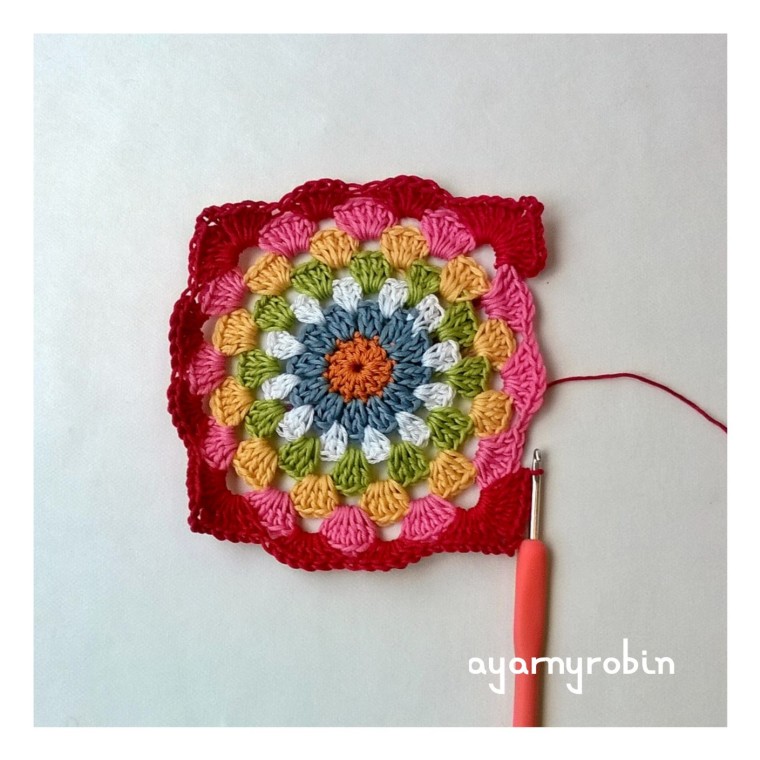
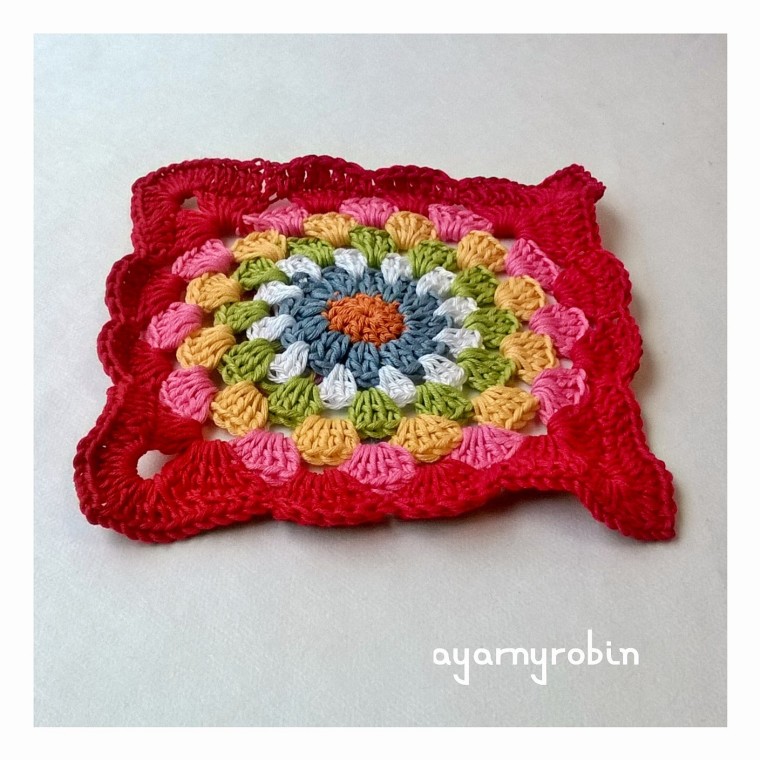
Blocking:
A word on blocking: Before blocking…
Your square will be wibbly. After blocking…
Your square will lie flat and will look much better. Blocking is really worth the extra effort and isn’t difficult or expensive to do. I just pinned this square to my ironing board so that it measured 7″ by 7″ and hovered my iron just above the square and blasted it with steam. Allow to cool before unpinning and store carefully. Alternatively, you could pin the square to the required measurements to a towel or a pin board, spritz with water and allow to dry.
Joining:
I have used a simple and easy slip stitch to join these squares. I have chosen this join for two reasons. The first reason is that it is secure and does not add anything to the squares, allowing them to showcase themselves.
The second reason is it uses the least amount of yarn and also creates less ends to weave in.
So to join the squares start by placing 2 squares with the right side to the right side…ie/ the wrong side of each square will be facing outwards.
Note that this join requires you to place slip stitches in the top of the stitches along the edge of the square and you should go under both loops of each stitch.
Some stitches will require you to slip stitch in both stitches of each square, these stitches should be the corresponding stitches for each square. Some stitches will require you to slip stitch in the top square only. This is because the squares are only joined to each other at each corner and in the middle of each scallop.
Join yarn in 2nd ch of any corner space and with a 3.5mm hook slst,
in both squares slst in the next 6sts,
in top square only slst in next 6 sts (tr), slst in next st (dc), slst in next st (1st tr of scallop),
*in both squares slst in next 3 sts (2nd, 3rd &4th st of scallop),
in top square only slst in next 3sts (tr,dc,tr)*
repeat * – *
in top square only slst in next 5sts,
in both squares slst in next 6 sts, miss chst, slst into 2nd ch of corner space.
Repeat this process for each side of the square which requires joining. You will not need to cut your yarn at the end of each side joined as you can continue round by adding another square. I started joining in the middle of the blanket. You will have to join in a new corner space for some of the joins, but the process remains the same.
I would love to see your makes and you can share on social media by using the following hashtags
#ayarnyrobin #yarnyrobin @yarnyrobin
This pattern to include the photos are the property of Nicola Florence @ayarnyrobin. You can’t modify, resell or share this pattern. You can sell finished items made from it, but please mention that the item is made using AYARNYROBIN pattern.
I have so many projects half done or PHD’s as I like to call them and I am enjoying hooking them all. The problem has been deciding which one to pick up and which one to put down!
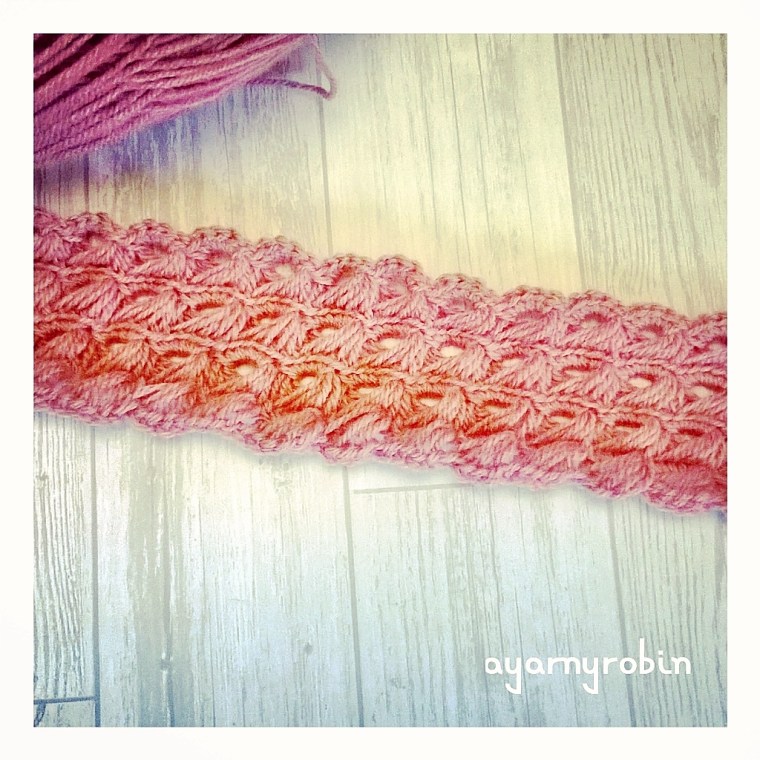
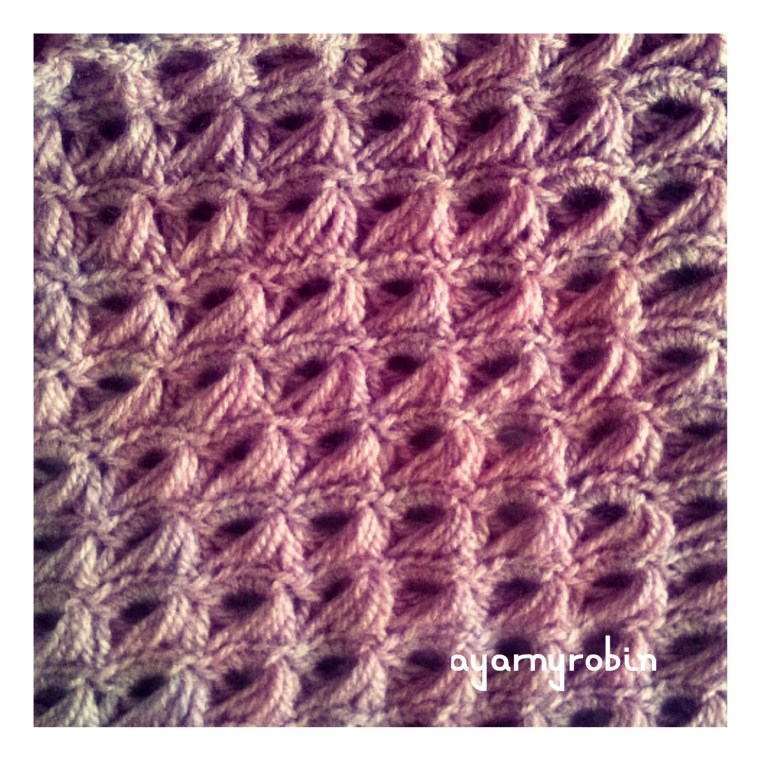
I have my Lazy Days broomstick lace blanket which is just divine to hook, but I have to keep count, so this is best hooked when I’m on my own. It has grown considerably since it was snapped here and looks more like this now…
It is so pretty.
I have decorated my bedroom now, so I really must make this a priority to finish.
The next PHD is this beauty…
crochet and coffee
Technically, this is a PHD, but it is also up to date as it is being hooked as a CAL (crochet a long) blanket, so this super #seasidestashbusting blanket has x4rows added to it each week and is growing fast. You can read about it just here.
making stash pretty…
Then, there is this lovely spiked stitch baby blanket, which I don’t think I have introduced you to yet. I will write a post about it soon complete with pattern details I promise. The important detail for now is I’m using up stash…yes, I’m on a mission!
I am still plodding on with my Charming Harbour blanket, although progress is slow as the lure of the brighter colour blankets call louder to me. However, this quiet and unassuming blanket thrills me once it is on my lap, it’s simplicity and beauty seduces me and I feel I should apologise to it for leaving it alone for so long.
Charming Harbour blanket in progress…
So, that’s four blankets on the go. I also have a flower fiesta commission that I should be getting along with. I have made a start…but I also have lots more to get done. Then there is a little baby romper that I need to start and several baby hats too!
You may have noticed some funny business going on here over the last week too…apologies if you have been affected. I have had a little reorganisation of this space and now have some of my patterns featuring at the top of the main page. I have also finally got my own logo which I am super pleased with.
I am also about to launch a new series called
‘My Yarny Knitting Adventure’
I can’t resist any longer and I have set myself the challenge of learning to knit. I am collecting my knitting needles from my Mom tomorrow and I’m going to see what happens, so look out for a lot of dropped stitches and some yarny tangles!
I also have a pattern release due out mid April. It is a free pattern for a beautiful crochet baby blanket, I just need to put the component pieces together…..
Wow, that seems like rather a lot now that I have written it down all in one place…I had better pull my hook out!


 join blue yarn and slst into 3rd ch
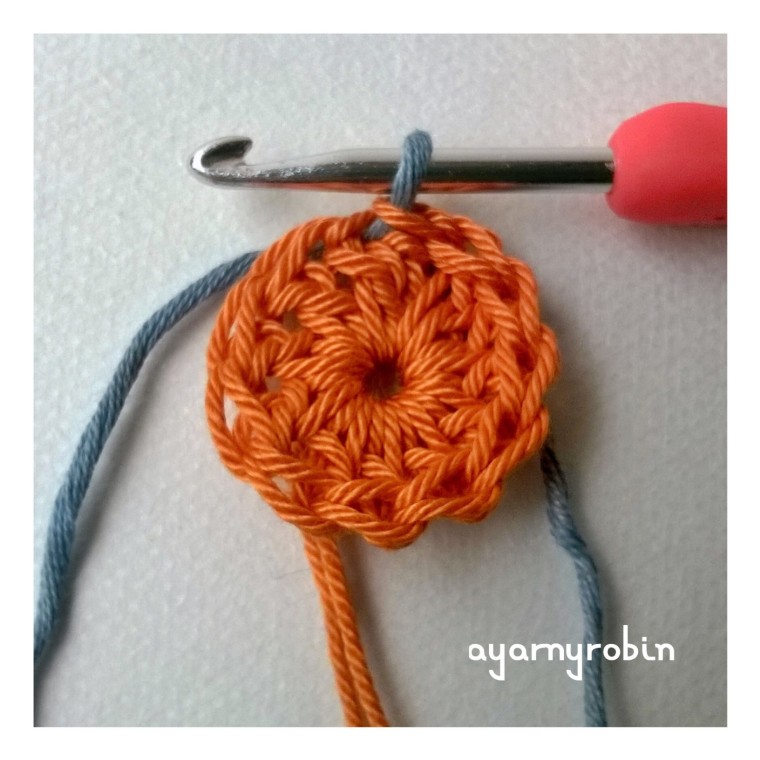 Row 2: ch3,
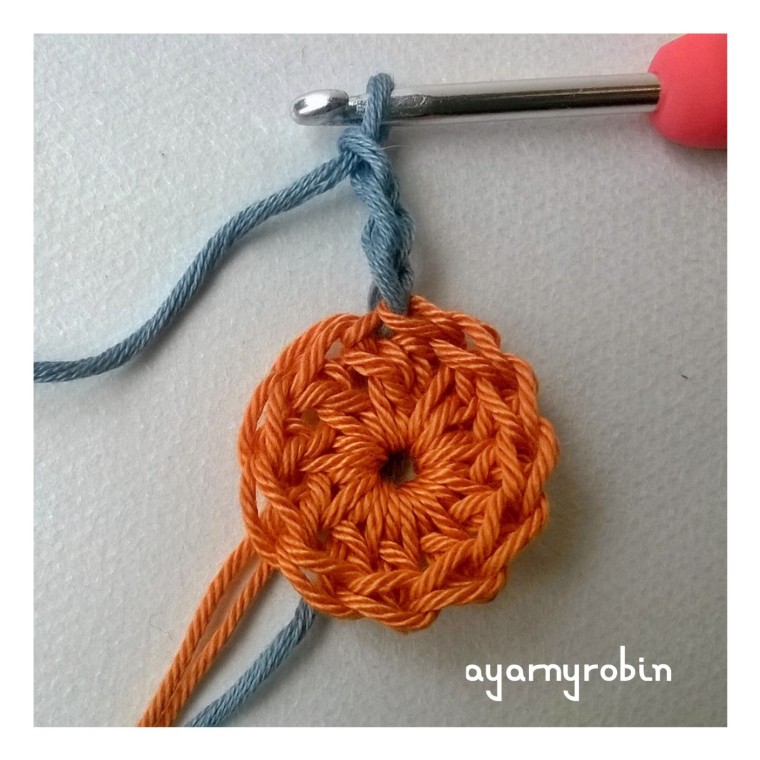 1tr in same space, ch1
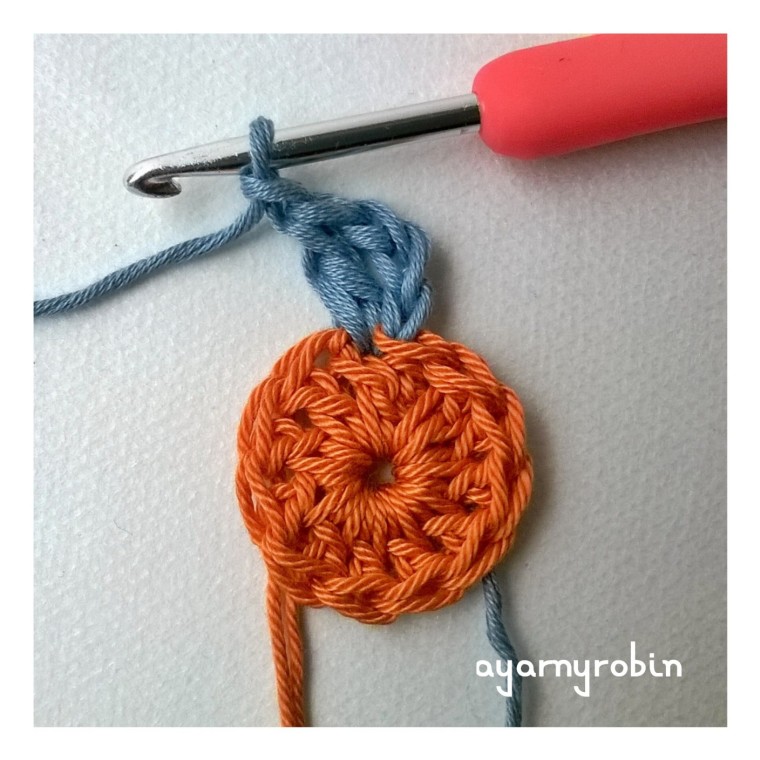 2tr in next st, ch1
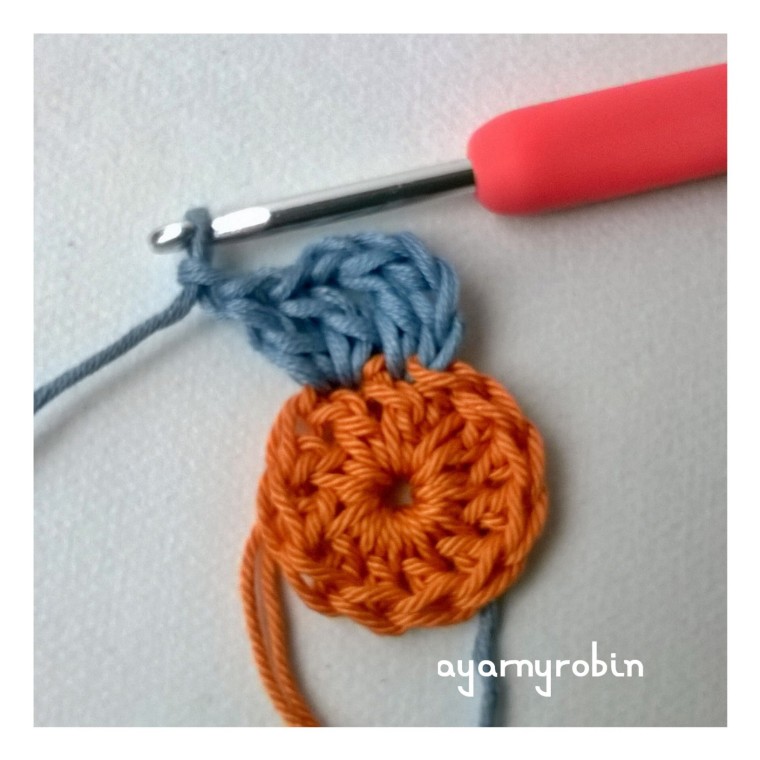 *2tr in next st, ch1*, repeat * * x10 times,
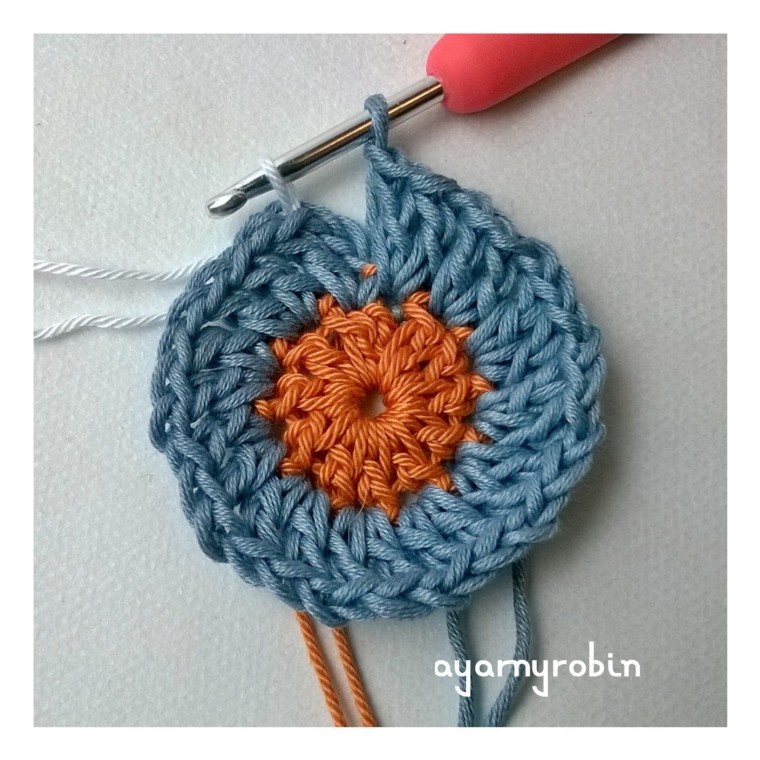 Row 3: ch3,
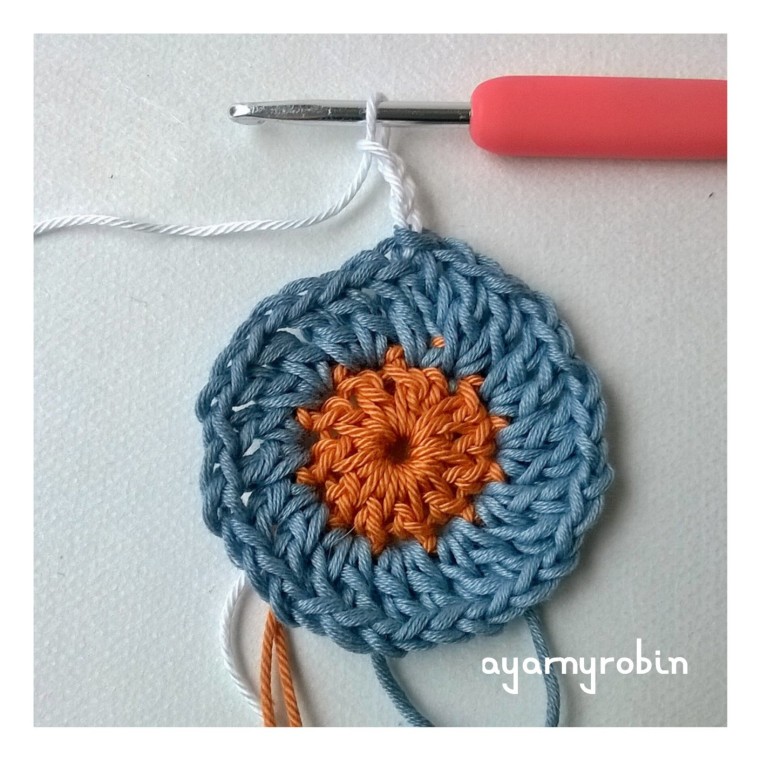 *3tr in next ch space*,
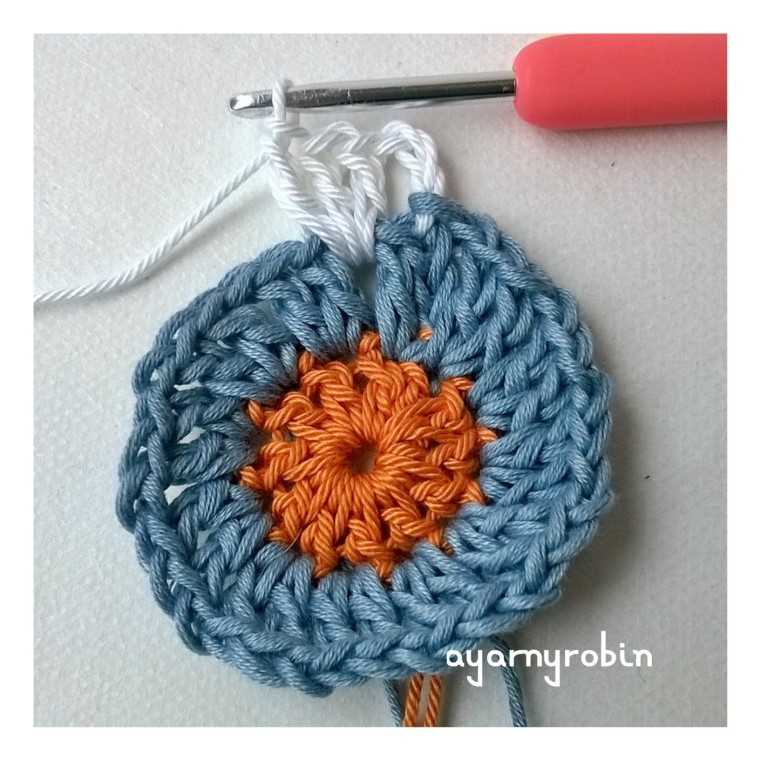 repeat * * x10 times, 2 tr in next ch space,
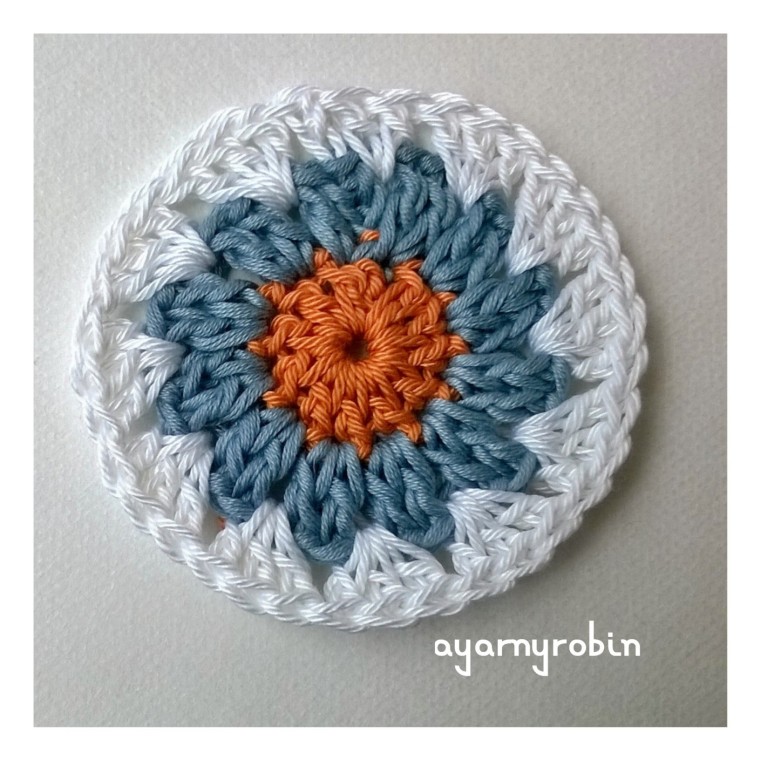 join with slst in top of ch3 and fasten off.