The January Beanie is now available for you to hook. This pattern is a bottom up construction and features a comfy ribbed brim and a beautiful ridged texture.
Suitable for all the family this beanie is quick to hook up and comes in sizes
There is also a section for adjusting for a custom fit if necessary.
Materials you will need: Double knit / light worsted weight yarn – pattern recommends Stylecraft Special DK, Papatya Batik, Scheepjes DK but you could substitute. (4.0mm) crochet hook or hook needed to acquire correct gauge Tapestry needle Tape measure stitch marker (optional) faux fur pom
The hat is designed to look great whether you choose to make it in one solid colour, or choose to to use a self striping yarn as in the picture below or in a fun colour fade as in the picture above.
It’s also a great stash busting project too, making these beanies a great addition to your stock if your a finished piece crochet seller or you sell at craft fairs, because you can make them from left over yarn from your other projects.
This crochet pattern has been fully pattern tested and is written in both UK and US crochet terminology. UK stitches used – DC, TR, FPTR, Dec and working in back loops US stitches used – SC, DC, FPDC, Dec and working in back loops You will have access to a 25 minute video tutorial also.
Why not subscribe to my brand new email list…where you will receive occasional emails with crochet inspiration, free crochet patterns and exclusive discount codes.
Processing…
Success! You're on the list.
Whoops! There was an error and we couldn't process your subscription. Please reload the page and try again.
It’s been a little while since I dropped by, but I have been busy pattern writing. I hope you are all well and being creative; and if you’re not then I’m sending you lots of love.
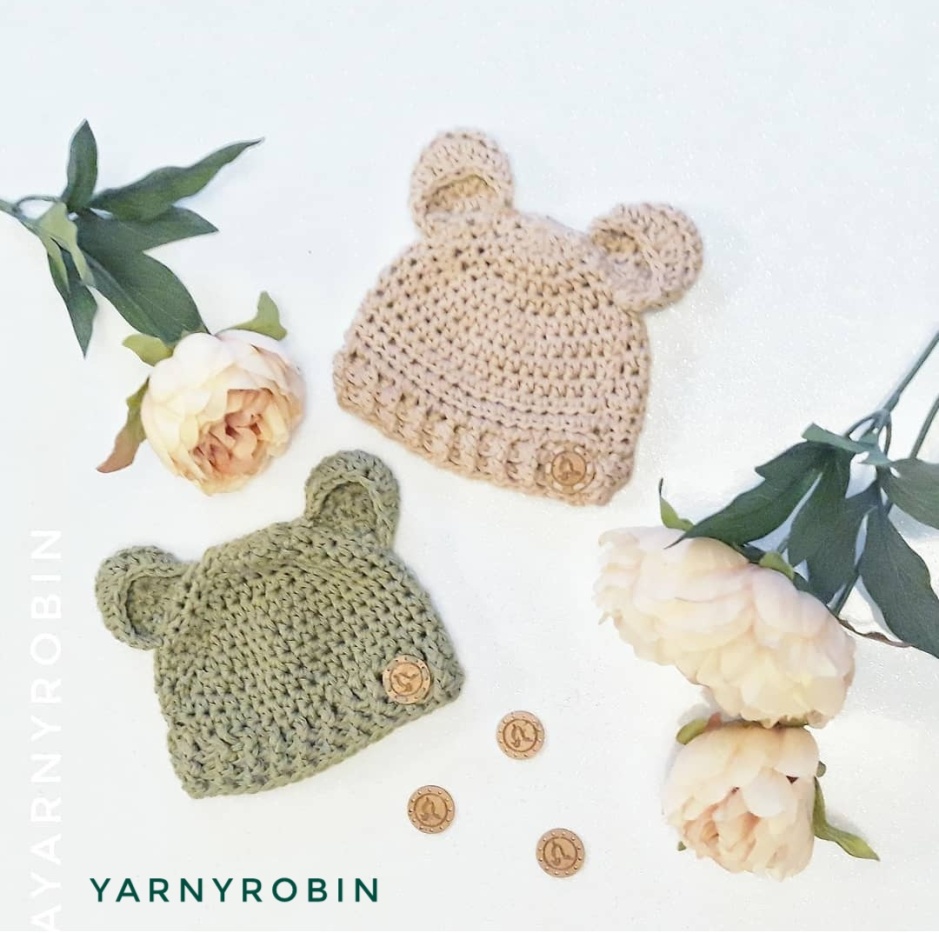
This beautiful Baby Bear Beanie, was actually one of the first hat patterns I ever scribbled down and I have made lots over the last few years. So it feels right that it is finally written up properly!
This pattern is a top down construction and has instructions for 2 different ways to finish the brim. Option 1 – features a ‘knit look’ ribbed crochet brim which is not bulky, unlike most crochet hats. I have provided a link within the pattern to a video tutorial on how to crochet the brim.
Option 2 is a chunky ribbed brim which uses front treble and back treble post stitches.
This beautiful pattern is quick to hook up, so just perfect if you need to whip one up quickly and it comes in sizes
Materials you will need: Aran / worsted weight yarn – pattern recommends Stylecraft special, but any aran/ worsted acryllic yarn may be used (5.0mm) crochet hook or hook needed to acquire correct gauge Tapestry needle Tape measure Pins stitch marker (optional)
A perfect little pattern to keep precious heads warm this Autumn.
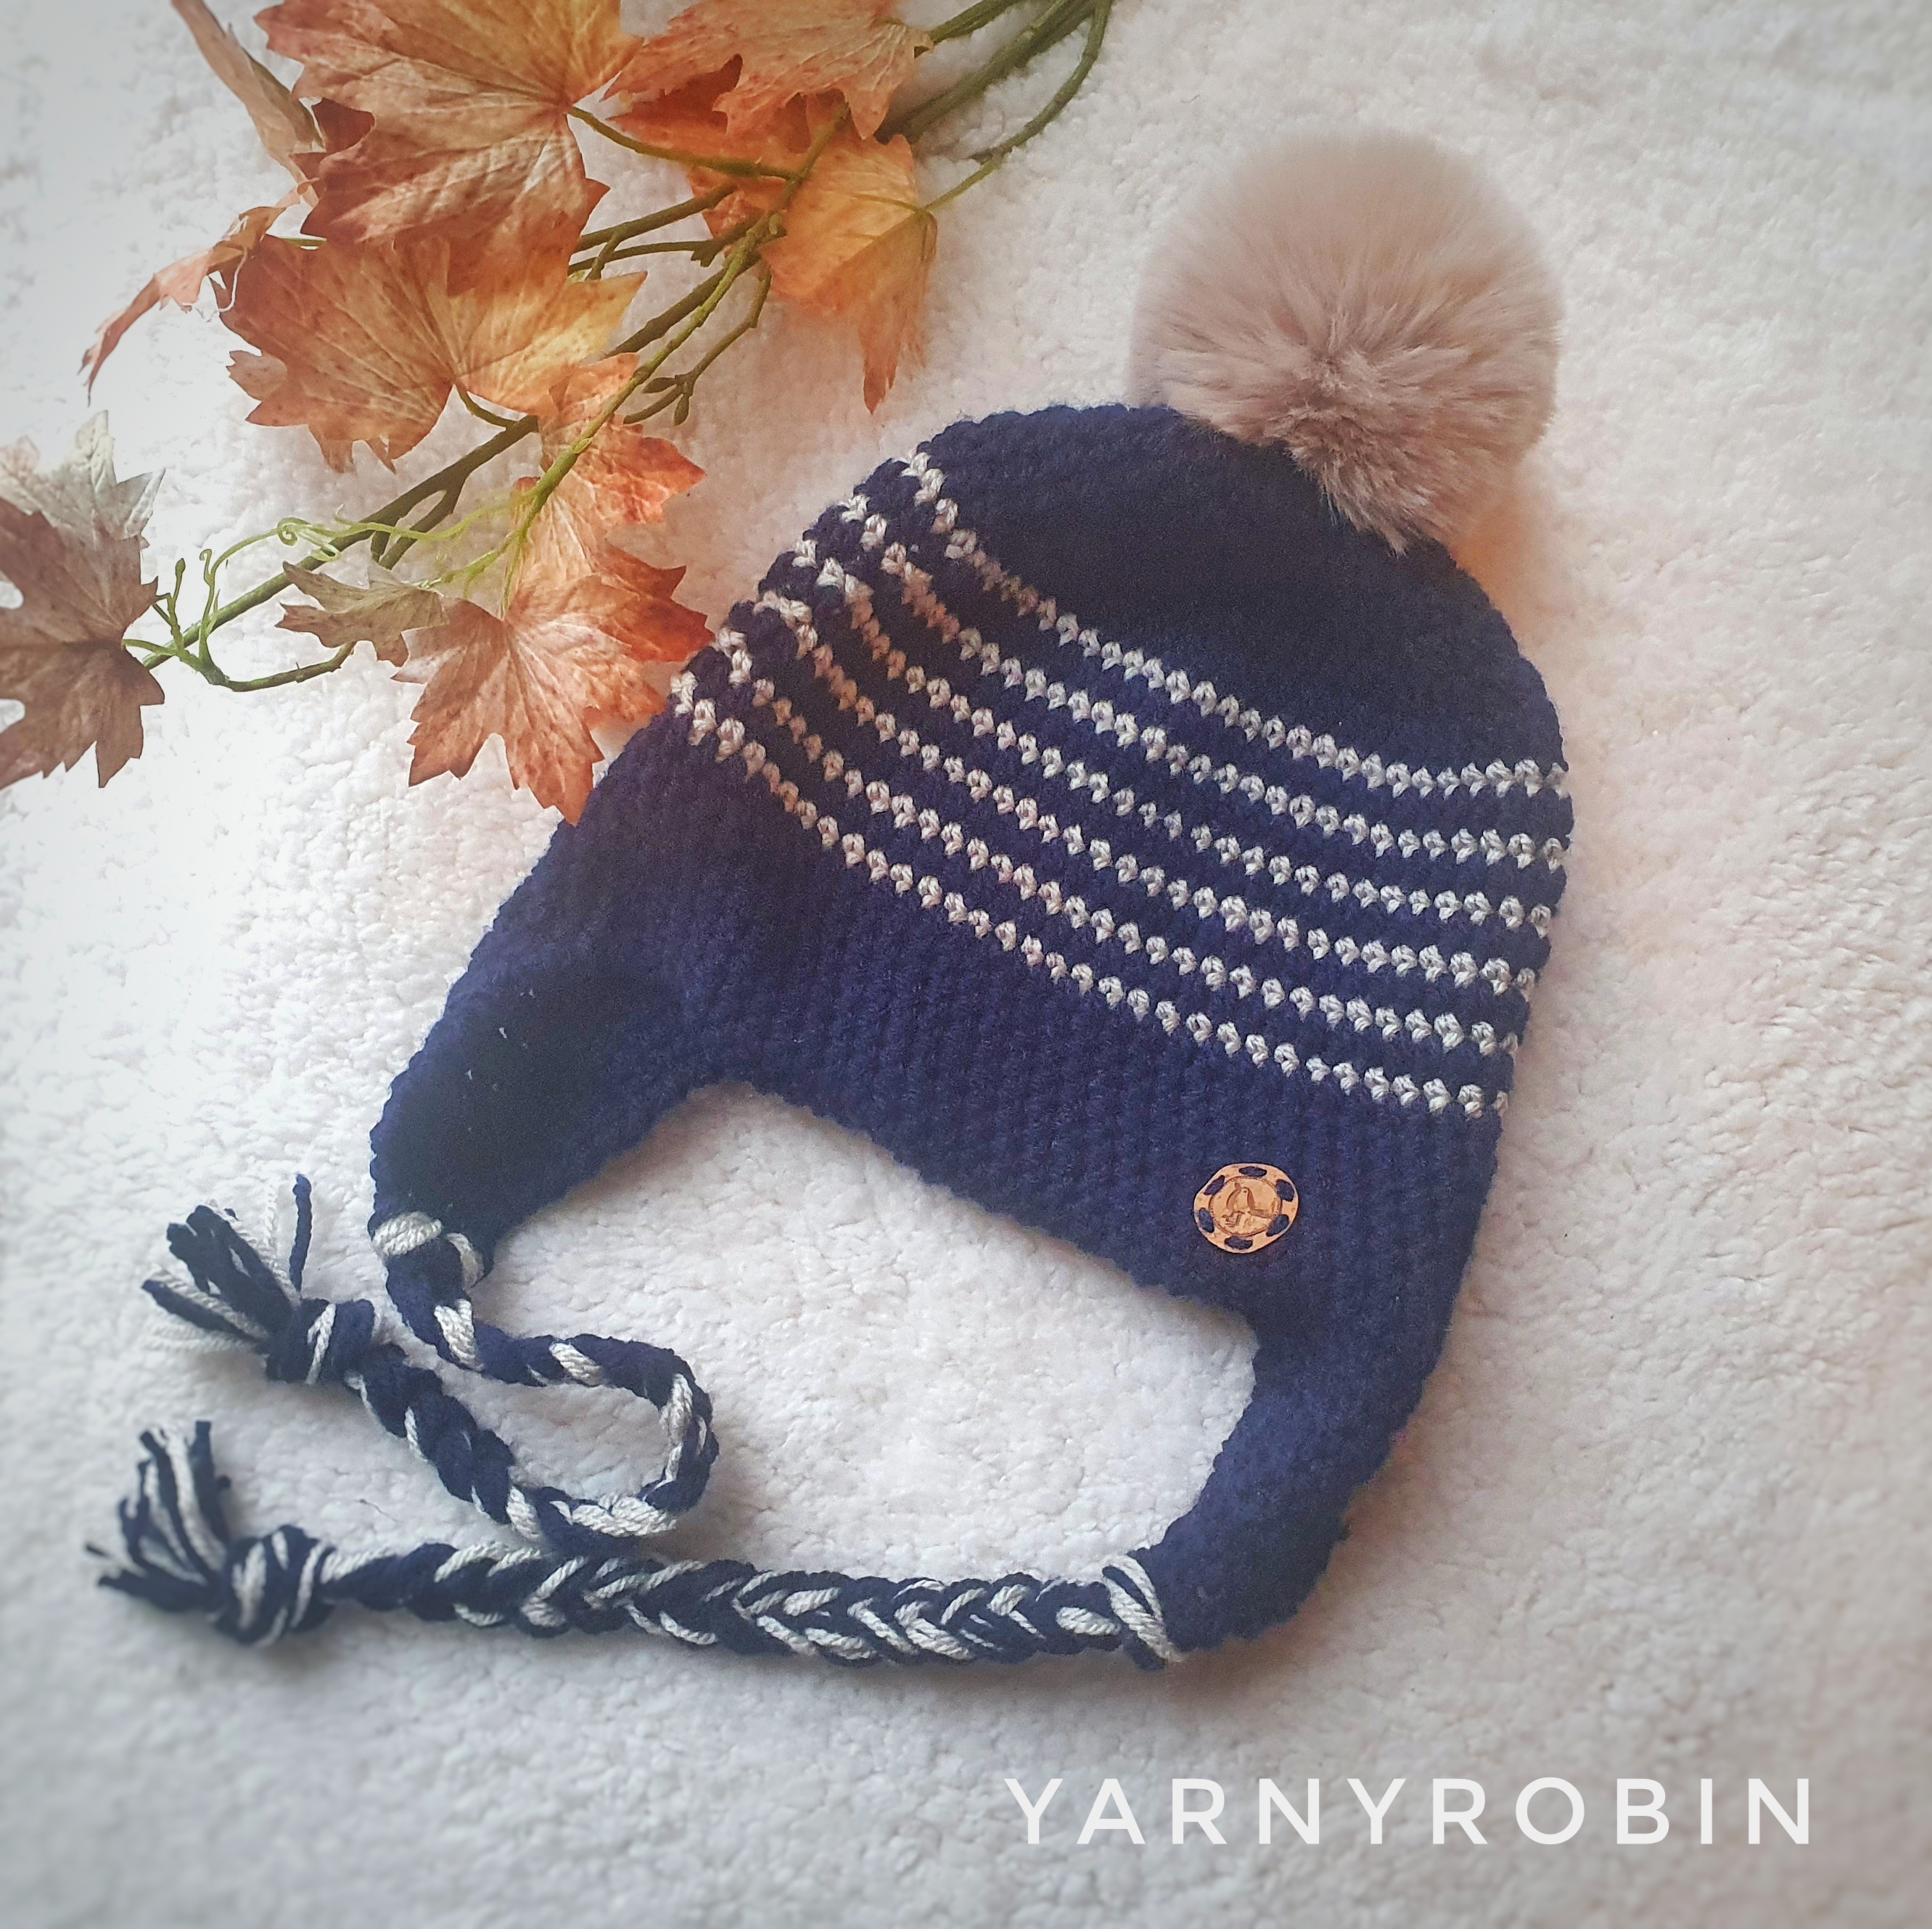
As promised my Toasty Earflap hat pattern is now available to purchase over in my etsy shop. Available in sizes newborn – large adult it really is a pattern suitable for the whole family. Grab 10% off all my patterns until Sunday 30th Jan 2022 using code HAPPY10
Hey lovelies, I’m in need of pattern testers again. This time for my Toasty Ear Flap Hat. Written for sizes newborn – large adult.
Here’s what I’m looking for.
Do I need to have test crochet before?
Nope… as long as you can crochet and read from a written pattern you are good to apply to be my tester. Infact, I am looking for people with varying abilities of crochet.
Is there a deadline?
Yes…if you are successful in applying for the role of tester I will require you to finish the test within a week of receiving the pattern.
Other than crochet the pattern on time what else do you need me to do? Good question! I will need you to give me lots of feedback, to include the good, the bad and the ugly! Spot typo’s and grammatical errors and make pattern corrections. I need you to keep in touch even if this means you can’t meet the deadline…life happens, I understand that.
I also require a good quality photo of the finished item that I will be able to use on all social media, my blog and in my Etsy shop…I will of course tag you. Photo’s need to be clear and free from a cluttered background…think insta worthy!
I will require you to be active on social media, ideally you need to be active on Instagram and or facebook with a public account….What does this mean? I would like you to share photo’s with specific hashtags for the pattern, both during and after testing and the pattern is available on general release,
Do I get paid to test a pattern?
Nope…I wish I could say yes, but sadly the answer is no! You also need to be able to provide your own materials…in this case a small quantity of aran / worsted weight yarn and fluffy pompom (or make your own woolly pompom) However, you will get the pattern fully edited for free and you can choose another of my patterns for free also. If your photo’s are of good quality I will use them here on my blog and in my social media / Etsy shop and I will always tag you so people can head your way!
So if you are interested and can turn this around for me within 7 days, and you are happy with the terms above, ideally send me a direct message on instagram…you will find me @yarnyrobin. I have about 4 spaces available and if you are successful I will be in touch within the next week.
Welcome to you, if you used to stop by here and spend some time with me, it’s good to have you here. And if this is your first time here, you are very welcome. Please stay, grab a cuppa and I will tell you what has happened here at the nest whilst the world has gone crazy!
It is sooooo good to be back here, in this lovely spot of the cyberspace. I have not dropped in for so long, but the time is right to start writing again. I think we can all agree that the world has changed so much over the last couple of years with Covid.
How are you?
Really, how are you? let me know in the comments below, I would really love to catch up with you.
I’ll start with a little nest update and then share my hooky plans for this year…I’ve got lots planned. So, if you want to skip the nest update and jump straight to the crochet, skip the next couple of paragraphs…I don’t mind.
The big news is the little Robins are not so little anymore and are now 18,17 and 14 years old… yep! how does that happen so quickly? The eldest is teetering on the nest edge and has pretty much fledged…I am full of pride and fear all rolled into one.
Our Alfie…
Our saddest news occured in October when we had to say a very hard goodbye to our beloved labrador, Alfie. He was the grand old age of 15 years, 9 months and 6 days old, when rainbow bridge finally called him. We buried him in our garden and I miss him so much. He will be in our hearts forever.
Little Jess was so good and seemed to understand where her pal had gone, but it wasn’t long before Mr R suggested we should find her another buddy as she has never been on her own before.
I felt like it would be a betrayal and couldn’t settle the idea in my heart. A couple of months later, Mr R had found a lovely little chap and had called to see if he was still available, but had to leave a message. That night as we waited for a call back, Alfie came to me in a dream and licked my hand. The following morning the lady called and said the handsome little fella was still available and we went to fetch him home… it felt with Alfie’s blessing.
Introducing Duke…
Let me introduce you to Duke, he is now 16 weeks old. He’s a cheeky chappy, who loves a cuddle and to zoom about the house. His Mother is an Italian greyhound and his Dad is a Beddlington terrier / Whippet mix, so he shouldn’t grow too much bigger. He has settled well and Jess seems to approve. Life has a way of being heartbreakingly, beautiful and hope is everywhere, if you just look for it.
So, you are up to date largely. Lockdown was full of Mr R renovating the garden whilst I worked through. I have impressively pinned an enormous amount to my pintrest boards, oh! and have wrestled a large dose of unwanted anxiety. I didn’t do a great deal of crochet, other than orders, which I was grateful for.
My big plan this year though is to get back to blogging and pattern writing and sharing it with you. That is what I enjoy and have come to realise, I have missed. My baby Etsy shop has been great fun over the last couple of years; and to my suprise has been quite successful. However, I have made the decision to make it a pattern shop as of now. There are several reasons for this, the first and main one being time!
Whilst crocheting to order is great and has been very satisfying it leaves me zero time to write patterns and to crochet other things…like the crochet angel at the top of this post (I will post about this separatley). I also don’t want to have to deal with orders getting lost in the mail (this seemed to happen several times last year).
So a pattern shop it is…and that, well that makes me happy, very happy indeed. I have lots of ideas and I have missed being here…it may be a bit old school but I aint’ getting tiktok and reels!
my toasty ear flap hat
This is what I am currently writing up…’my toasty earflap hat’. It will be available in sizes newborn to large adult. I made this one for me, for the bitingly cold dog walks I am taking every day. It is so warm and toasty, hence the name. It is perfect for those cold winter days and I’m looking forward to making it available.
I still need a couple of pattern testers, so if you have some aran yarn in a couple of colours (less than 100g) and you are able to turn this around within the next week or so, drop me a message. You would need to provide me with some good quality photo’s and in return I will send you the fully edited pattern.
Anyway, I’ve rambled enough. Now it’s your turn…let me know how you are doing by leaving a message below.
With only a week until Easter Sunday, I thought I would share the pattern for these Easter bunny ears I made yesterday. I was making a little newborn bunny photo shoot outfit and needed some cute floppy bunny ears to complete the look. I am using my Baby Bear Bonnet Pattern and my own diaper cover pattern which I have just not had chance to write up yet!
They are super simple to make. I used Stylecraft special Aran weight yarn in grey and cream and a 5mm hook and my finished floppy bunny ears measure approx.16cms long.
The outer ears are worked in the round, with the inner ears worked in rows and made separately then sewn into place. My pattern is written using UK terminology but I have provided a US stitch conversion below. Please note chain stitches do not count as a stitch unless otherwise stated in the pattern.
Processing…
Success! You're on the list.
Whoops! There was an error and we couldn't process your subscription. Please reload the page and try again.
Round 1: 6htr into 2nd ch from hook, join with a slst into top of 1st htr, ch1 . ( 6htr see pic 1.)
Round 2: 2htr in each st around, join with a slst into top of 1st htr, ch1. (12htr see pic 2.)
Round3: *2htr in next st, 1 htr in next st* repeat around, join with a slst into top of 1st htr, ch1. (18htr see pic 3.)
Round 4 – 9: htr in each st around, join with a slst into top of 1st htr, ch1. (18htr see pic 4.)
Round 10: htr2tog, htr in next 14sts, htr2tog, join with a slst in top of 1st htr, ch1 (16htr)
Round 11: htr2tog, htr in next 12sts, htr2tog, join with a slst in top of 1st htr, ch1 (14htr)
Round 12: htr2tog, htr in next 10sts, htr2tog, join with a slst in top of 1st htr, ch1 (12htr see pic 5.)
Rounds 13 – 17: htr in each st around, join with slst in 1st htr, ch1 (12htr see pic 6.)
Round 18: htr2tog all around, join with a slst in 1st htr, ch1 and turn (6htr)
Now flatten circle and slst edges together, fasten off and leave an extra long tail for sewing…longer than you normally would, trust me here as you will need the extra length later! (see pic 7)
Inner Ear is made in rows
make 2
In cream
Row 1: ch4, htr in 2nd ch from hook and in each st along, ch1 and turn (3htr)
Row 2: 2htr, htr, 2htr, ch1, turn (5htr)
Row 3: 2htr, htr in next 3sts, 2htr, ch1, turn (7htr)
Row 4 – 6: htr in each st, ch1, turn (7htr)
Row 7: htr2tog, htr in each st along, ch1, turn (6htr)
Row 8: htr2tog, htr in each st along, ch1, turn (5htr)
Row 9 -11: htr in each st, ch1, turn (5htr)
Row 12: htr2tog, htr in each st, ch1, turn (4htr see pic 8.)
Row 13: htr in each st along, ch1, turn (4htr)
slst all around inner ear to finish, fasten off and leave a long tail for sewing. Sew to outer ear (see pic 9)
To attach bunny ears to chosen bonnet/hat I found that giving the top of the ear a twist and securing with a couple of stitches, gives the ear a little bounce and allows the inner ear to peek out. If the ear is not twisted before attaching to bonnet / hat then you will not be able to see the inner ear…which seems a shame, been as you have just gone to the effort of hooking them. See Pic 10 to see where to twist and sew (indicated by red dots).
Finally pin and securely sew your bunny ears to your bonnet. If you prefer a hat why not checkout My Best Beanie Pattern available in sizes newborn to large adult.
Now all that’s left to do is enjoy all of that floppy bunny ear cuteness!
Please do let me know what you think by dropping me a sentence in the comments below…I love to get your feedback and a like or a share goes a long way too!
Thank you for the lovely feedback I have received on my free baby blanket pattern; if you missed it you can find it by clicking on the link.
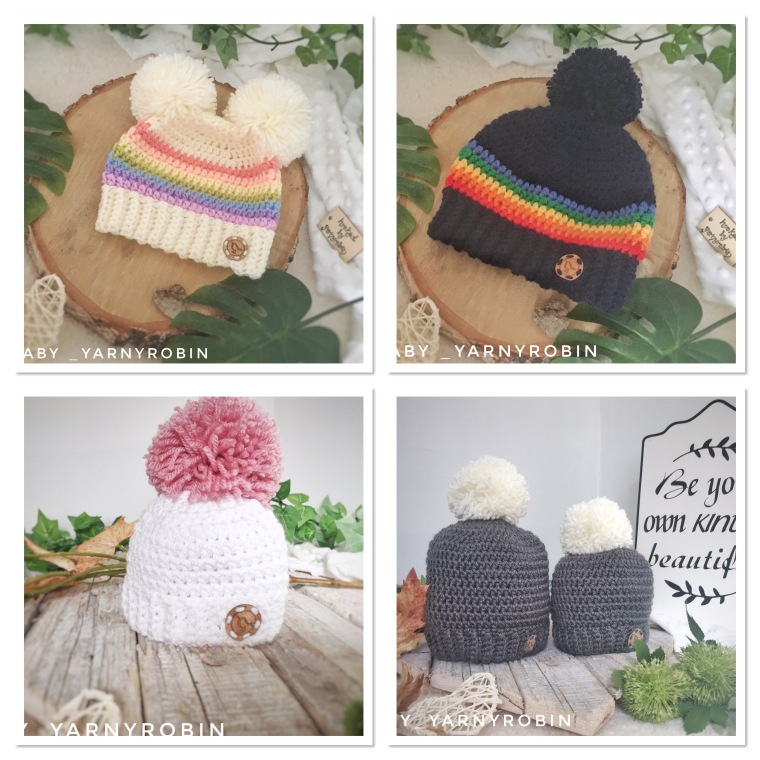
I had a lovely little hooking session yesterday evening, and this is what came off my hook. I am so in love with these sweet hats and I love the colours too!
Once you try this brim…you wont go back to chunky front post, back post brims!
Yes, that;s right…I love this crochet brim for my hats because it is less chunky, has a ‘knit look’ finish and makes my beanies have a lovely snug and comfortable fit and I will show you how to make your own ribbed brim for top down construction hats right here.
Now, if you have been with me a while you will know that a video tutorial is a first for me, so I would appreciate your feedback as it has taken forever to put together!
The pattern for ‘My Best Beanie’ has also taken me a long time to write and edit, and is now available just here. I have made this a pattern for all the family as it is written for sizes newborn right through to large adult. If you prefer a more traditional bonnet, I have a pattern for those too…just here.
photo credit @luandlo_x on instagram
Let me know what you think? Should I do other free crochet tutorials and if so what would you like tutorials on?