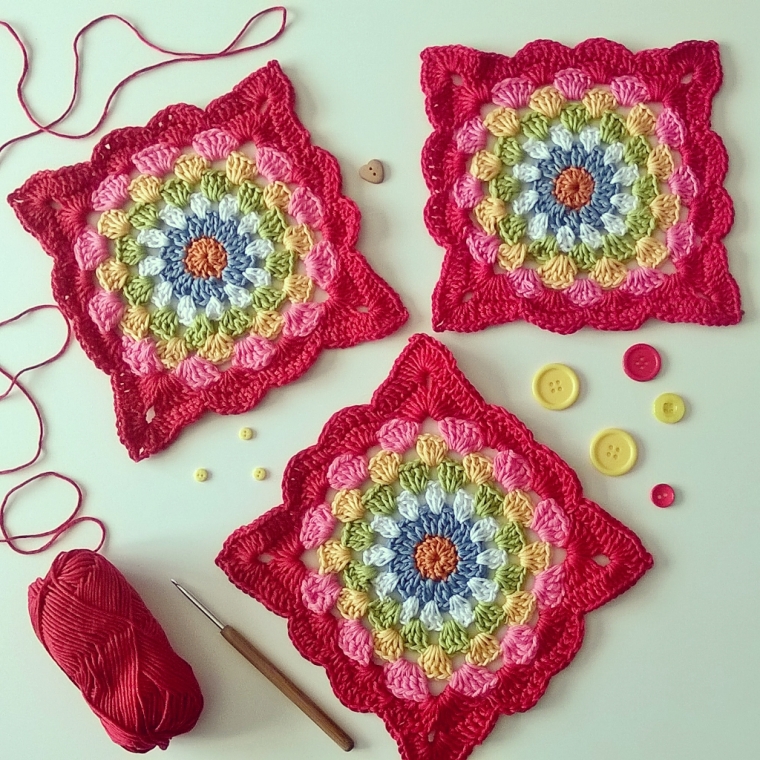
Introducing the ‘Grandma Dot’ tea cosy…the third in the Grandma Collection
Dedicated to my husband’s Nanna Dot who was a truly formidable woman.
Nanna Dot was a tiny woman in stature but a mighty woman non the less.
Strong, brave and wise with the most beautiful smile. No matter what was going on or how much hell was breaking loose round about; Nanna Dot would make a cuppa tea or something a wee bit stronger and in a way that I still do not really understand, she would put things into perspective with a gentle reassurance.
I wish I had known Nanna Dot for longer. I especially loved her love of family and Christmas. Family were so important to her. When my first son was born, we counted from Nanna Dot and Grandad Ernie that our son was number 50….a BIG family indeed!
So this cosy is covered in ‘dotty little flowers’
A meadow of ‘dotty little flowers’ to represent the growth and legacy of her family, which at last count is upwards of 60!
So that is the Grandma Dot tea cosy in all of its glory, here is the pattern linky thing which is free and has a photo tutorial also.
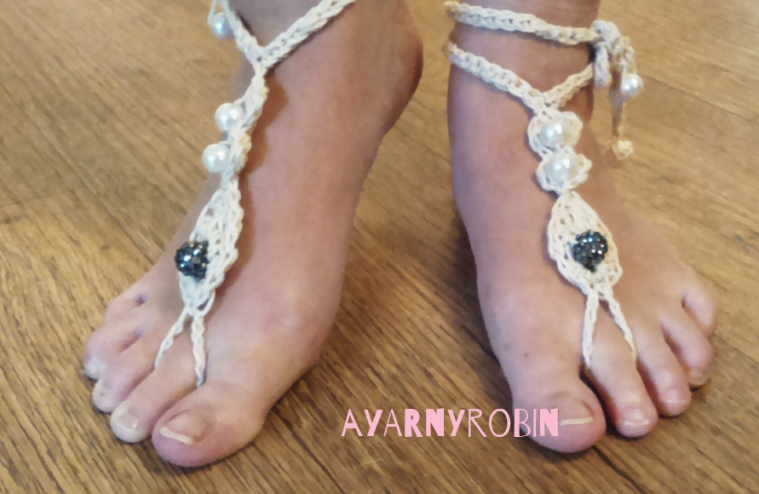
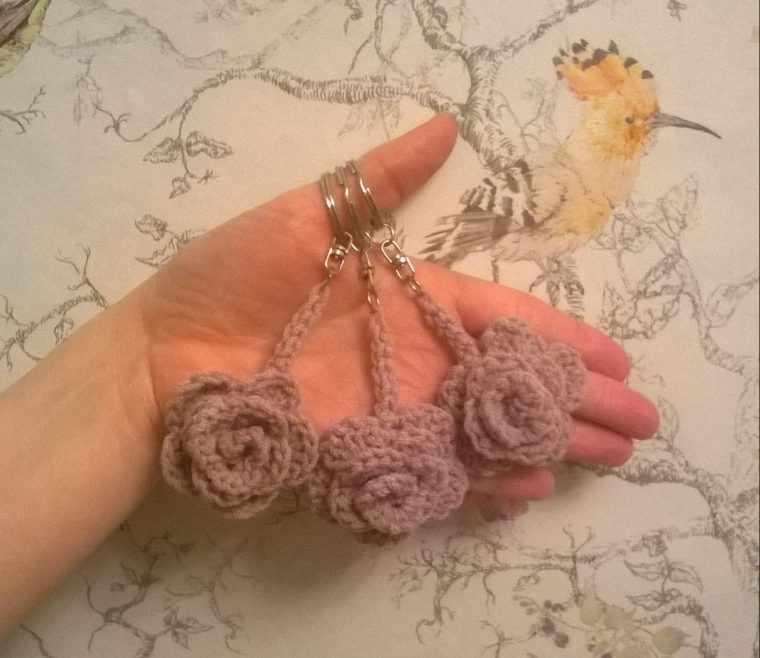
As promised Ginny, here is my pattern for these cute Corfu barefoot sandals.
You will need approx. 7m of yarn for each sandal, I used Paintbox dk cotton in cream and a 4mm hook.
You will also need x5 beads for each sandal, I used beads from a cheap bracelet. Just make sure the threading hole in the bead is large enough for your yarn.
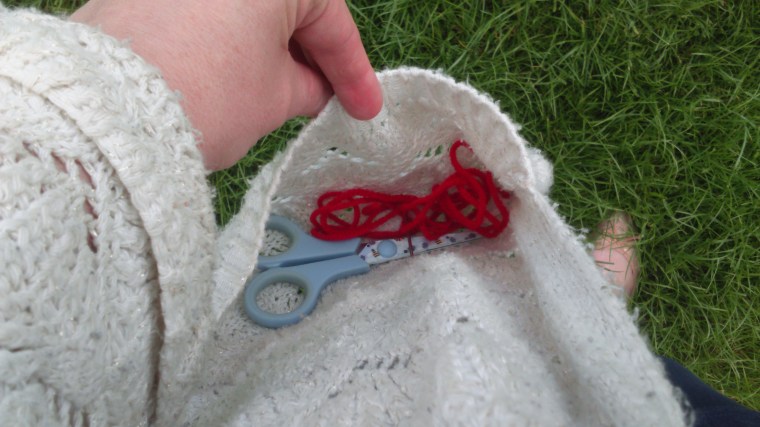
Other useful items you will need are a pair of scissors and a darning needle to weave in the ends.
This pattern uses English terminology and the following abbreviations:
Ch – chain stitch
st- stitch
slst – slip stitch
dc – double crochet
htr- half treble
tr – treble crochet
dtr – double treble crochet
By adjusting the number of chains in the ties, you can make them longer or shorter to suit. Additionally adjusting the number of chains in the toe loop for comfort may be required.
To skip photo tutorial, head to the end of the post for written pattern without photo’s.
So, assuming you have gathered your supplies cut at least 7m of yarn from the ball, knot one end and thread X5 beads on. The X2 beads nearest the knot will be located at the end of the ties of the sandal, the following X2 beads will be located, just before the tie chain starts, and the last bead you thread will be the bead nearest the toes (I used a different bead which was larger and sparkly for this)…the darker bead in the photo.
move the beads to the end of the yarn for later…
Now, starting at the other end of the yarn to the beads, leave a long length, approx. 50cms. You will use this at the end to make the toe loop. Make a loop
Chain 6 and bring first bead down
Join with a slip stitch into 1st chain – catching / incorporating the bead in the centre
Ch4 (counts as a dtr) As you make the next stitches around the bead be careful not to weave in the long tail that you are saving for your toe loop.
2dtr into loop (this can be a bit fiddly getting the hook in next to the bead)
Continue working in the loop around the bead as follows
2tr, 2htr, 2dc, 2htr, 2tr, 2dtr
and join with slst in top of beginning ch4 (feather made).
Now ch6,
in 2nd ch from hook *dc, 2tr,dc* (1st cluster)
miss a st and repeat *—* (2nd cluster), slst into top of feather.
Turn work so feather is on the your right hand side
The next set of stitches will be made in the base of the 1st cluster st, (see photo). But first, bring the second bead down and rest it on top of cluster, now slst in base of cluster st to secure.
*Dc,2tr,dc* in same space.
Bring down third bead and repeat *—* in second cluster.
To finish cluster slst in 1st ch at the start of 1st cluster (see photo above).
*Ch55, bring down 4th bead, slst into 4th ch from hook and pull tight to secure bead.
Dc in each ch back to cluster, slst into top of cluster* (tie made) repeat *—* to make second tie. Fasten off and weave in ends.
Returning to length of yarn left at start, weave end to bottom of feather
insert hook into top st of central dtr and pull up a loop
Ch12 and slst into top of central dtr which you started ch from. Tie off and weave in ends.
Now to make another!
I really hope you have enjoyed making these barefoot sandals, I would love to see some pictures if you have.
xxxxx
Written pattern without photo’s.
Corfu Barefoot sandal by ayarnyrobin.wordpress.com
cut at least 7m of yarn from the ball, knot one end and thread X5 beads on. The X2 beads nearest the knot will be located at the end of the ties of the sandal, the following X2 beads will be located, just before the tie chain starts, and the last bead you thread will be the bead nearest the toes
Now, starting at the other end of the yarn to the beads, leave a long length, approx. 50cms. You will use this at the end to make the toe loop.
Make a loop, Ch6 and bring first bead down, join with a slip stitch into 1st chain – catching / incorporating the bead in the centre.
Ch4 (counts as a dtr) As you make the next stitches around the bead be careful not to weave in the long tail that you are saving for your toe loop. 2dtr into loop (this can be a bit fiddly getting the hook in next to the bead).
Continue working in the loop around the bead as follows 2tr, 2htr, 2dc, 2htr, 2tr, 2dtr and join with slst in top of beginning ch4 (feather made).
Ch6, in 2ch from hook *dc, 2tr,dc* (1st cluster) miss a st and repeat *—* (2nd cluster), slst into top of feather.
Turn work so feather is on the your right hand side.
The next set of stitches will be made in the base of the 1st cluster st. But first, bring the second bead down and rest it on top of cluster, now slst in base of cluster st to secure. *Dc,2tr,dc* in same space.
Bring down third bead and repeat *—* in second cluster.
To finish cluster slst in 1st ch at the start of 1st cluster. *Ch55, bring down 4th bead, slst into 4th ch from hook and pull tight to secure bead.
Dc in each ch back to cluster, slst into top of cluster* (tie made), repeat *—* to make second tie. Fasten off and weave in ends.
Returning to length of yarn left at start, weave end to bottom of feather, insert hook into top st of central dtr and pull up a loop, Ch12 and slst into top of central dtr which you started ch from. Tie off and weave in ends.
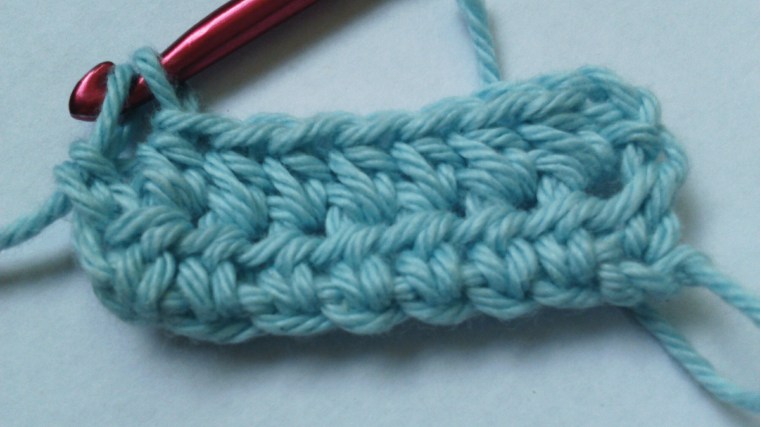
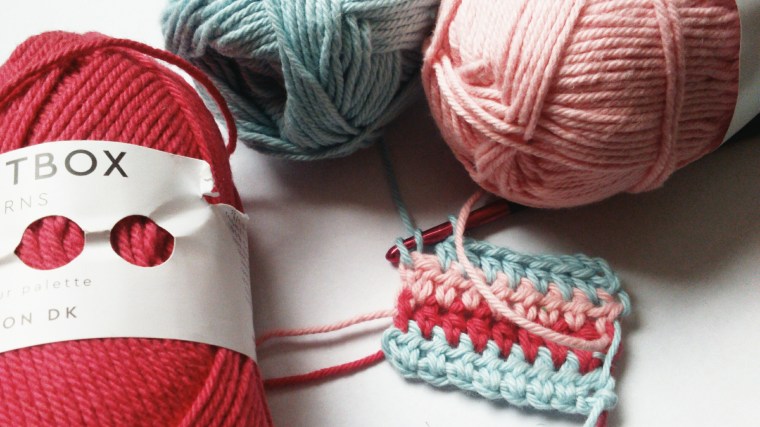
Do not cut yarn at the end of each row. Instead, work with 3 balls bringing the selected yarn up the side of the work. This will prevent lots of ends needing to be sewn in!
Row 1: With yarn a, ch 9, 1htr in 2nd chain from hook,
1htr in each st across (8htr).
Row 1
Row 2: Join yarn b, ch2 (does not count as a st), turn. 1htr in each st across (8htr).
Row 3: Repeat row 2 with yarn c.
Juggling 3 balls will reduce the number of ends to be sewn in at the end!
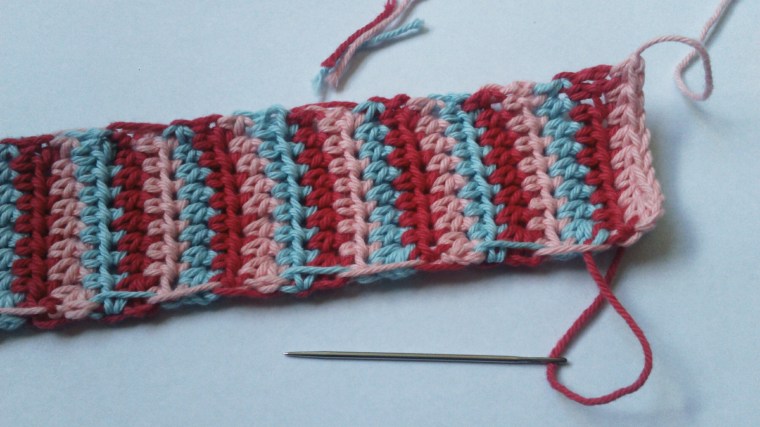
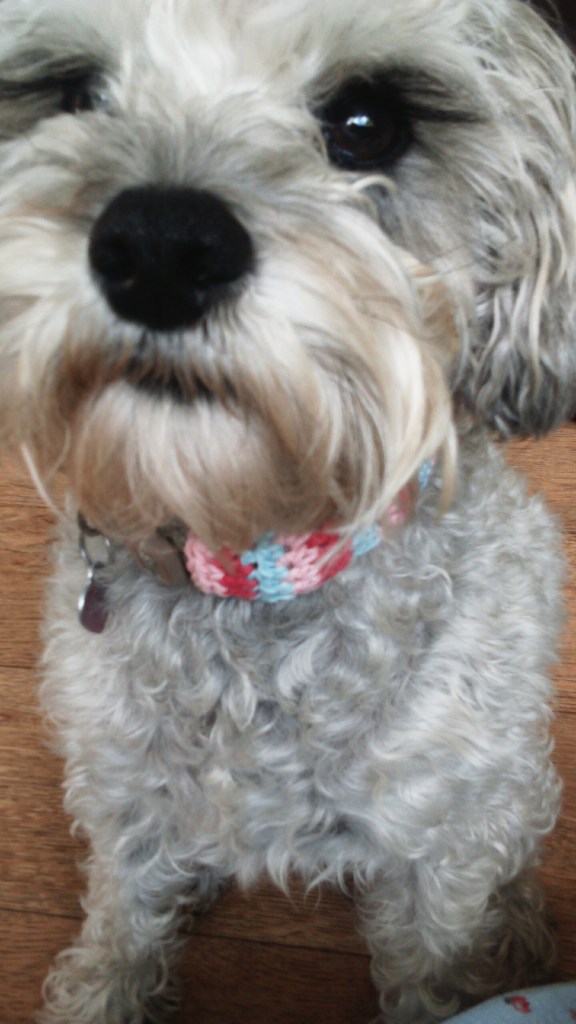
Rest of rows: Repeat row 2, colour repeat – Yarn a,b,c to end. Measure against your dogs collar for length.
sew in ends…
Sew in the ends and whip stitch around dog collar as shown.
Sew a seam with a simple whip stitch.
tOP TIP:
To increase or decrease width of collar you could use a larger or smaller hook or increase or decrease the number of starting chains accordingly.
Voila…all done.
Jess likes her new collar…I hope you do too!
Enjoy the pattern and send me photo’s of your cutie sporting a yarny collar if you make one won’t you?
We are not used to a long spell of hot weather here in the UK, but this week has seen our temperatures soar way above 30 degrees.
Heavenly blue skies
And oh how lovely it has been, it has meant an exodus into the outdoors, picnics and walks and a lot of sunscreen!
But, I found myself unprepared in the crochet stakes…it was just too hot to be sitting under a half made blanket or to be half draped in a shawl; sweltering under a wool blend.
So, I have compiled my yarny list of the top 5 things to crochet when the temperature starts rising.
Small, picnic portable, quick to hook… and you will have a lovely pair of mitts ready for when the sun disappears and the colder weather brings a chill.
Hook one, or two, or three or more..you can always join them in the autumn when the warm weather is a distant memory…and between you and me…what’s another PHD!
Top 5 things to crochet when it’s hot…#3
A splendid little tea cosy…the perfect finishing touch to a sunny afternoon tea…. al fresco of course.
So, whether you are currently in the middle of a scorcher or if it has been a while since the sun shone down on you, I hope I have inspired you to grab your hook and get outside.
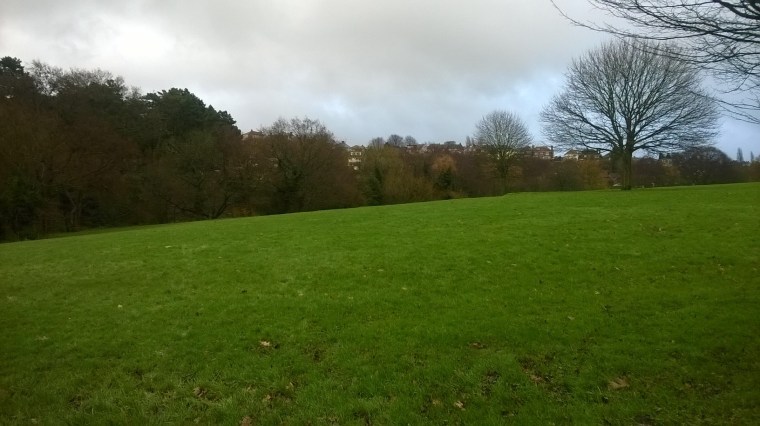
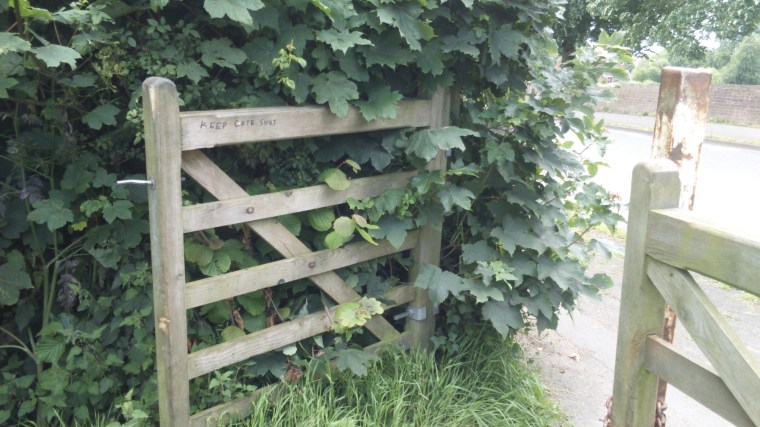
I have spent a lot of my time recently walking my dogs across the field that is behind our house.
I used to do this often when I worked less, so to be able to have space to do this again has been refreshing. However, this has been bothering me…
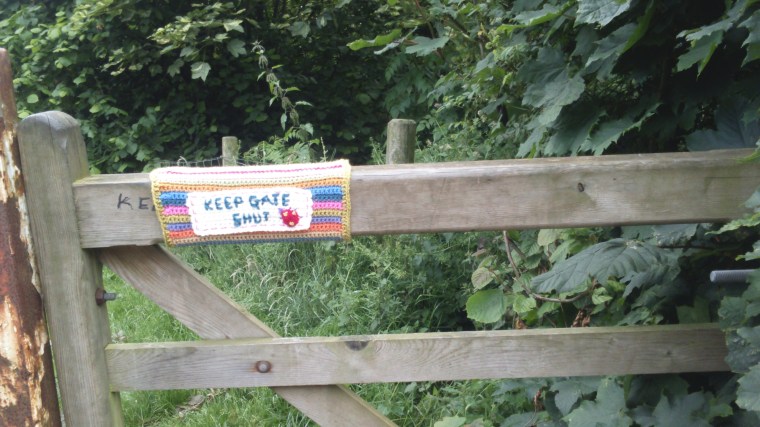
This gate opens onto a very busy road. You can just about see that some kind soul has taken a sharpie pen to ask that folk shut the gate…but, it was still bothering me.
It bothered me for two reasons. The first, the gate is still left open and the second reason, the sharpie pen instruction just didn’t look pretty!
So, I got out my stash and my hook
and began hooking a simple but very happy double crochet striped affair.
I added a sweet little sewn request
and a cute little ladybird
Then I headed off with a pocket full of yarn and a darning needle to complete this yarny gate installation.
I hope so much that this sign makes people smile and that it survives for a little while before someone takes it down.
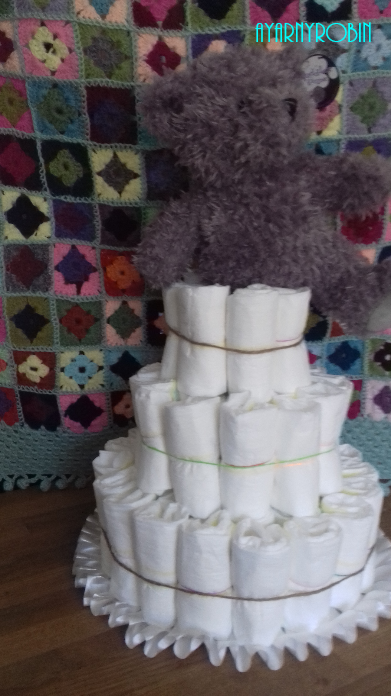
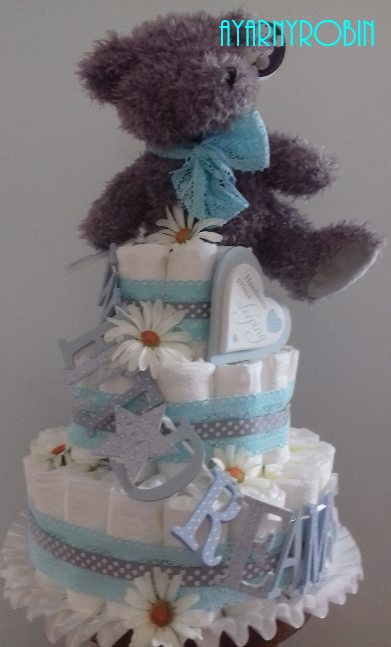
I would have adored one of these when I was expecting! So, I got to work constructing my diaper cake as soon as I received my friends baby shower invitation.
There are lots of tutorials on the web about how to make your own diaper cake, but I did take photo’s of each step and have included them below.
I found the hardest part of creating a diaper cake was deciding on the colours and of course a theme!
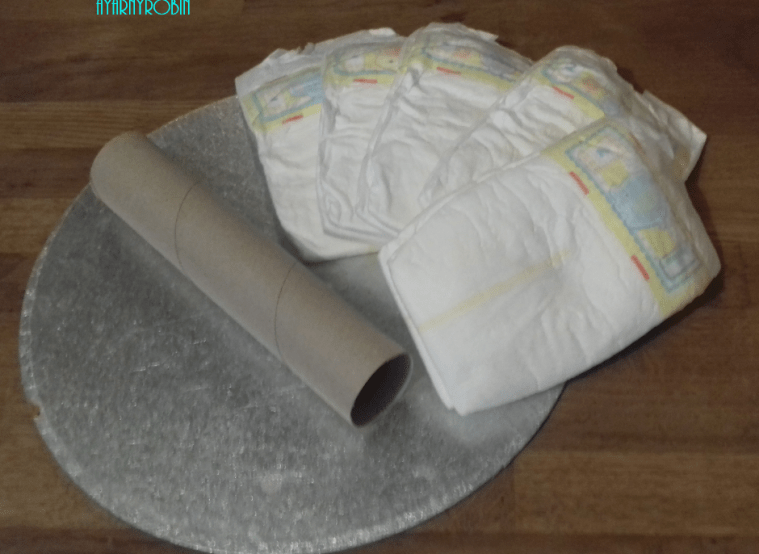
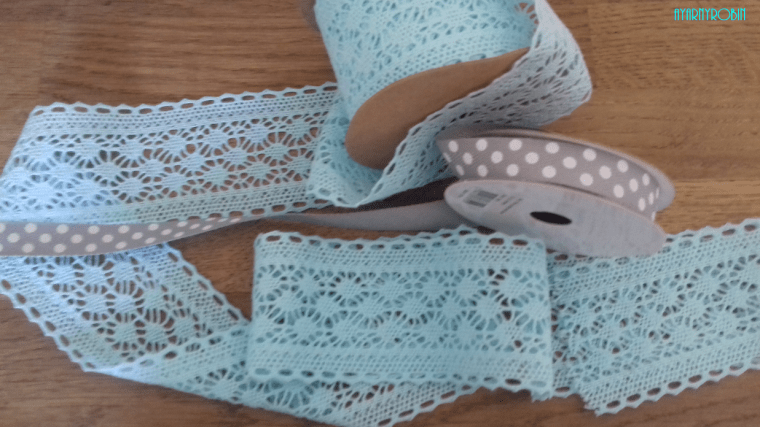
I used an old cake board, a kitchen roll tube, card, scissors, sticky tape, hot glue gun, elastic bands, string, ribbons, a teddy, ‘sweet dreams’ bunting and some artificial daisies and about 64 size 2 diapers (nappies).
So this is how I made mine…
Step 1:
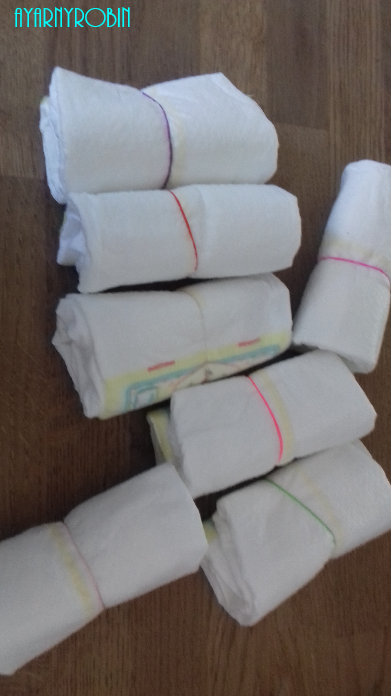
roll up your diapers…
I used the kids loom bands to secure, but elastic bands would work too.
Step 2:
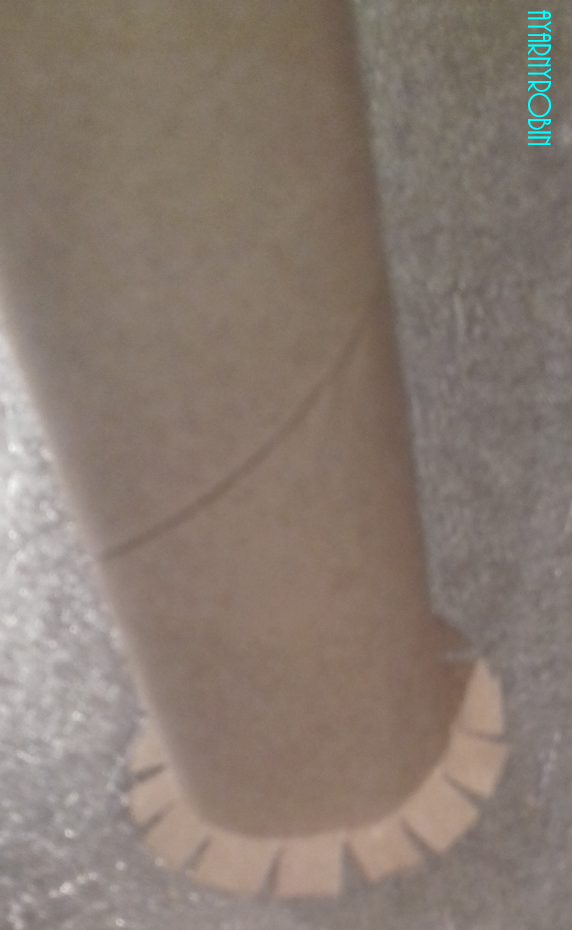
Using the scissors snip approx. 1cm around one end of the kitchen roll.
Step 3:
Secure the tube to the centre of the cake board with sticky tape.
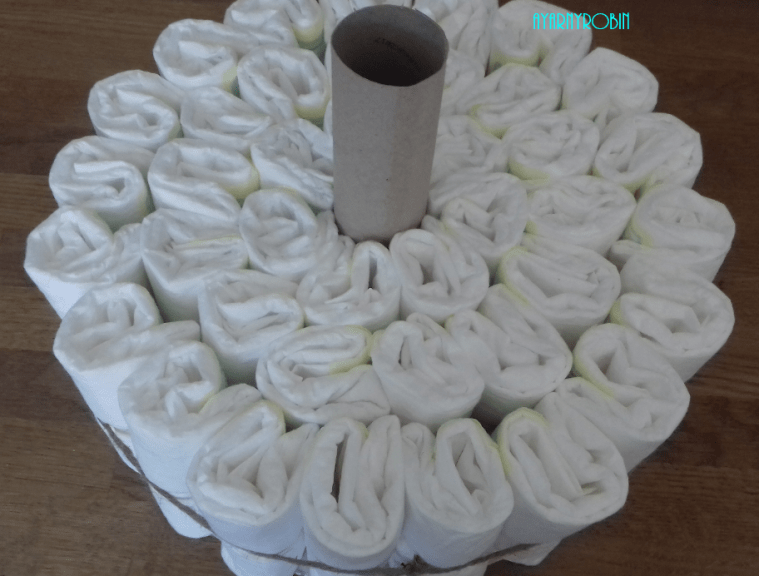
Step 4:
place rolled up diapers around the tube.
Begin placing rolled up diapers around the base of the tube, in x3 rounds. Secure each round with an elastic band or tie with string. If tying with string keep loose ends short and tuck any remaining ends in between the diapers as you go to keep your cake looking neat.
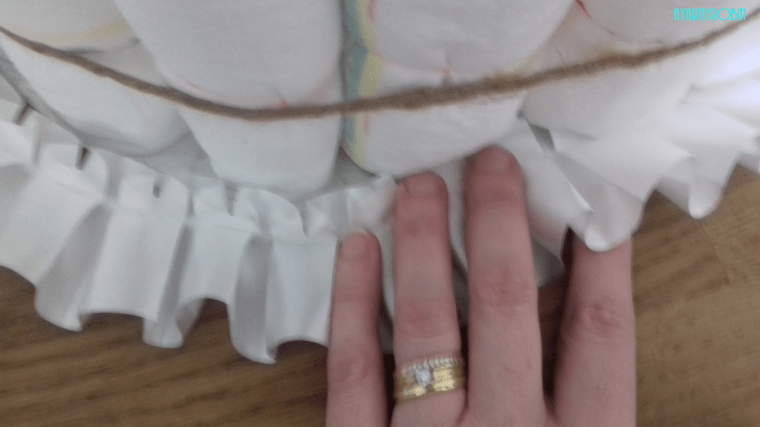
Step 5:
Hot Glue a ruffled ribbon around the base onto the cake board.
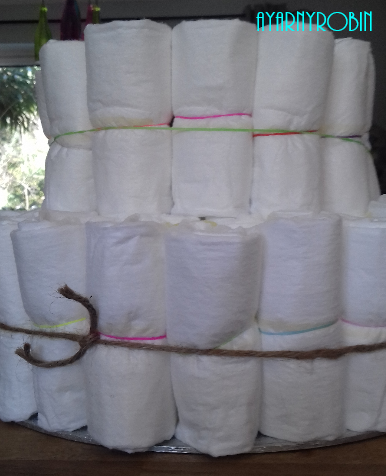
Step 6:
Repeat the process for the second tier, this time for 2 rounds only.
Now, at this point, the kitchen tube, disappeared as you can see in the photo above, as the height of the tube was equal to the height of the second tier.
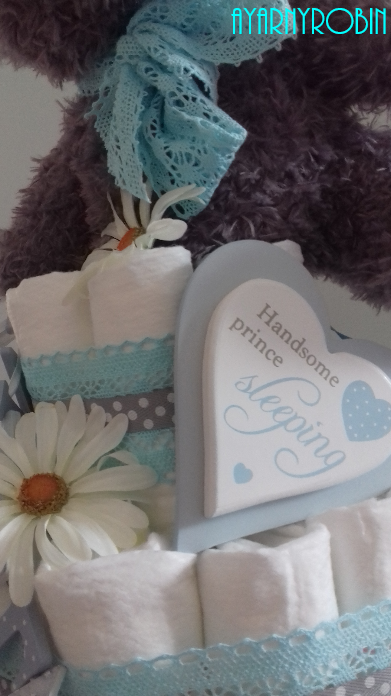
You don’t really need to worry if your cake topper is rigid or small. But, as my topper was a cute little bear, that was quite floppy and soft, I added an extension to my tube in the form of a bit of plastic pipe, Mr R had spare.
If you need to extend your tube, card would suffice at this point, but as I did not have any I went with the plastic pipe.
To secure Mr Bear, I tied his leg with a bit of string and threaded the string through the pipe, securing the string at the bottom of the pipe with sticky tape. I then placed the pipe inside the kitchen tube, before proceeding with step 7.
You may find you can go straight to tier 3 and decorate with your topper once tier three is insitu, it will just depend upon what you have chosen for your decoration.
Step 7:
The final Tier, just one round of diapers needed here.
Step 8:
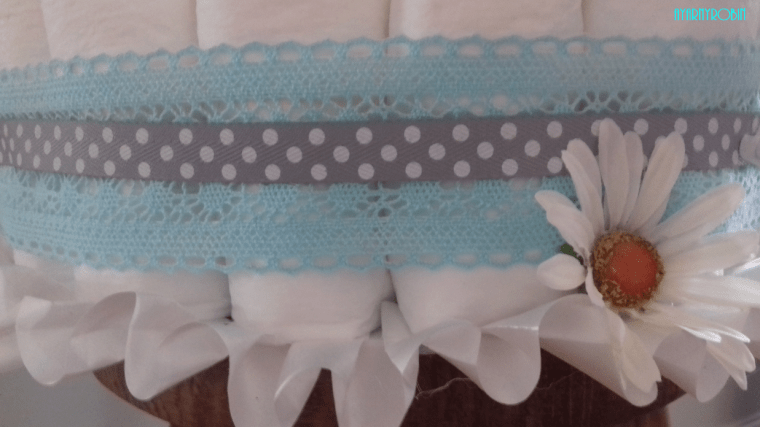
Using the hot glue gun secure your ribbon in place.
Just like so.
Step 9:
add your decorations.
Sweet Dreams Diaper Cake
And there you have it.
I just love this sweet dreams theme in aqua and grey. The little yellow centres in the daisies and Mr. Bears matching bow tie add a little extra zing!
It looks so elegant and I have had so many gushing comments about it and requests to make more I may just have to!
If this inspires you to make a diaper cake I would love to see your pictures, your colours and your themes and just how your imagination runs away with this quick and simple project.
A little later than I had anticipated, but operation Yarny H.U.G has begun.
H.U.G being a ‘Happy Unexpected Gift… a yarny one of course!
hooking happy…
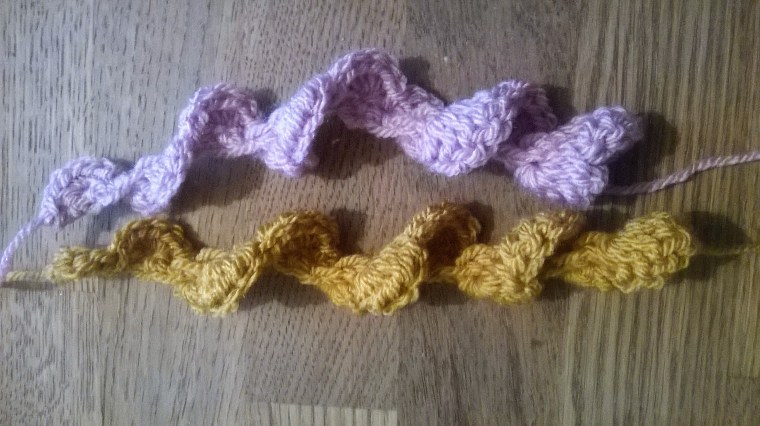
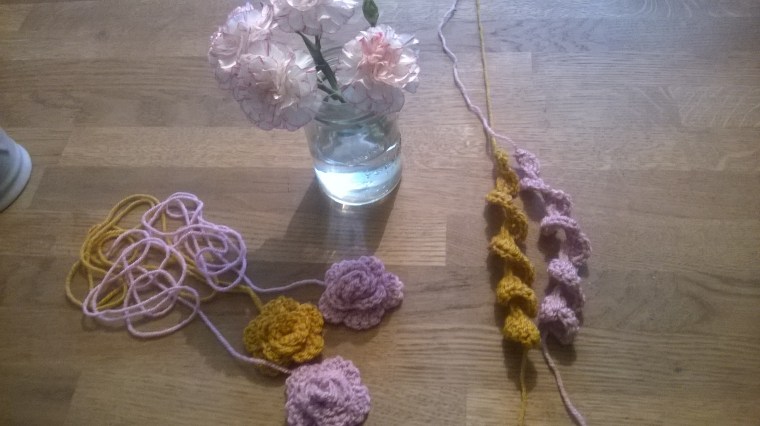
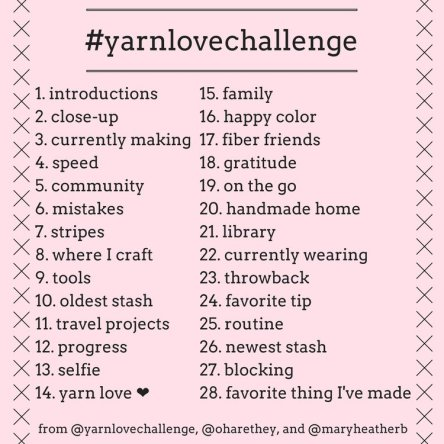
Whilst I was enjoying the short daily posts throughout February as part of #yarnlovechallenge I set to work with my hook and some scraps of yarn and made these beautiful may roses by Lucy @Attic24.
may roses in the making…
With the addition of a hanging loop and a clip, I soon had a little tree full…
Jess approved of course…
I also have a small shoe box full of half completed ones too.
With the cute little cards attached I am ready to leave them all over, just waiting, ready to be found…A Happy Unexpected Gift; a great big yarny HUG.
Why not join me in spreading a bit of yarny love. To get involved just leave me a message.
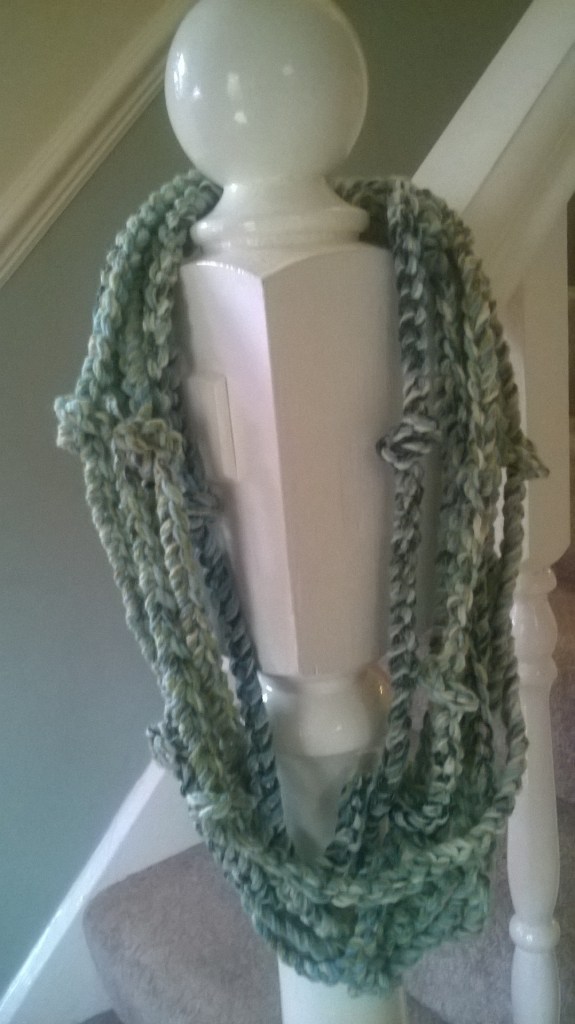
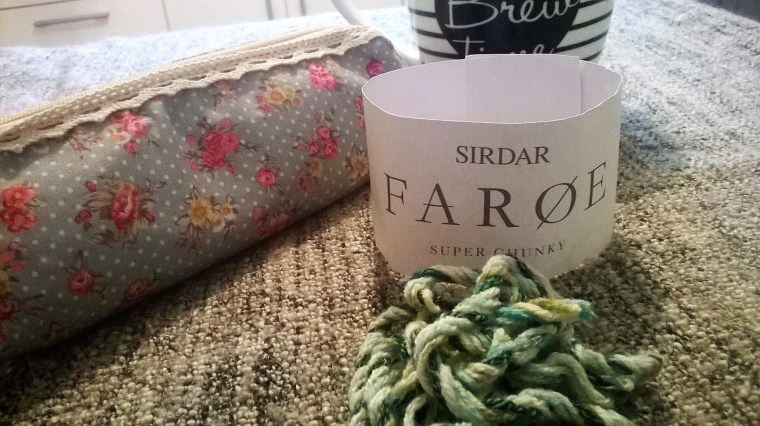
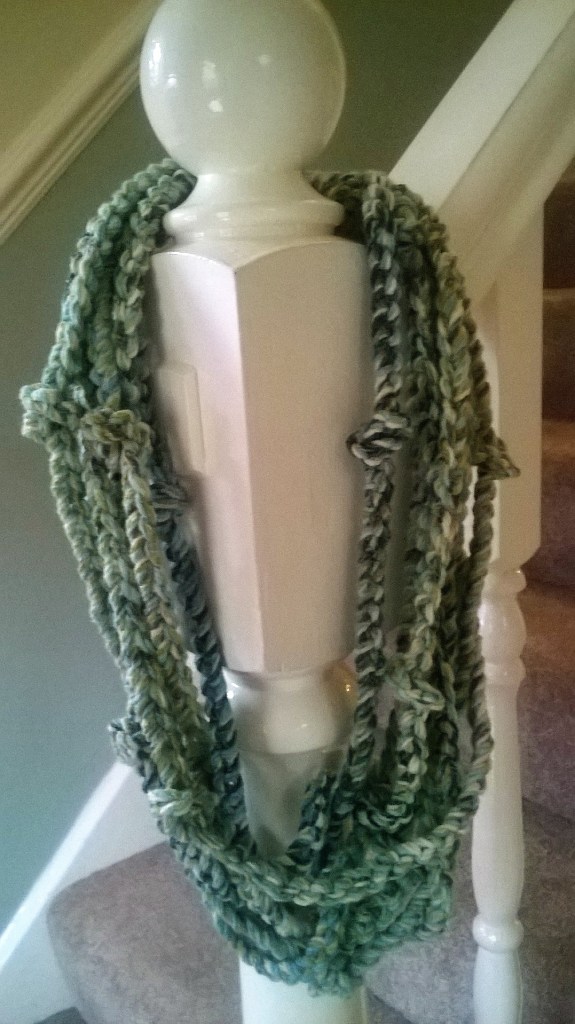
A simple but stunning item that you can make if you are new to crochet, or have an odd 50g ball of chunky yarn that your not sure what to do with, or if you need to hand make a present emergency style!
Yep, this beauty takes about an hour to make at most and the pattern (if you can call it that!) is just below.
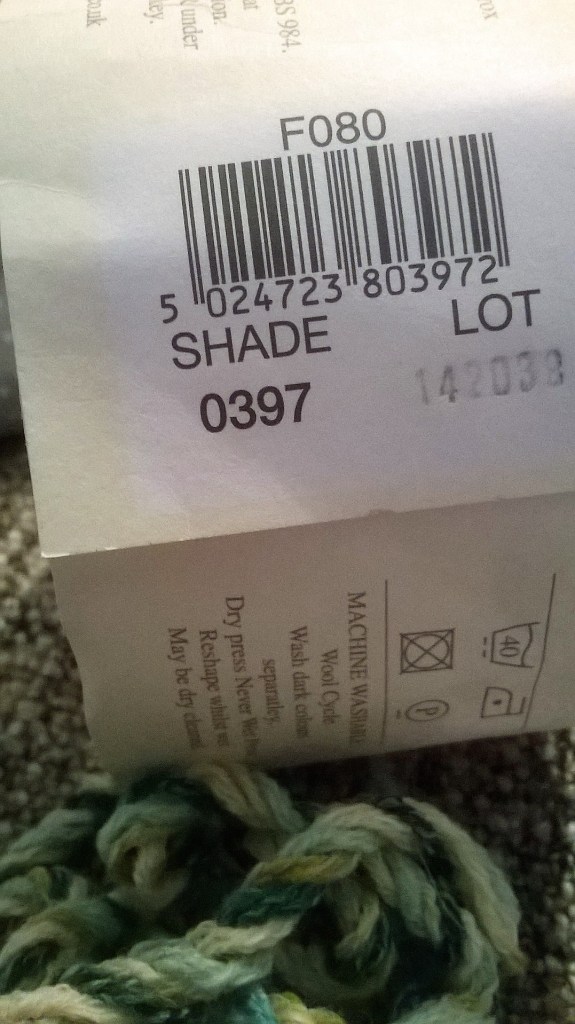
You will need 50g of chunky yarn and a large hook. I used
and a 6mm hook.
So you have probably guessed it….begin making chains and don’t stop until you have about 50cms of yarn left.
Randomly tie the first part of a bow to form a loose knot in your chains at random sections down its length.
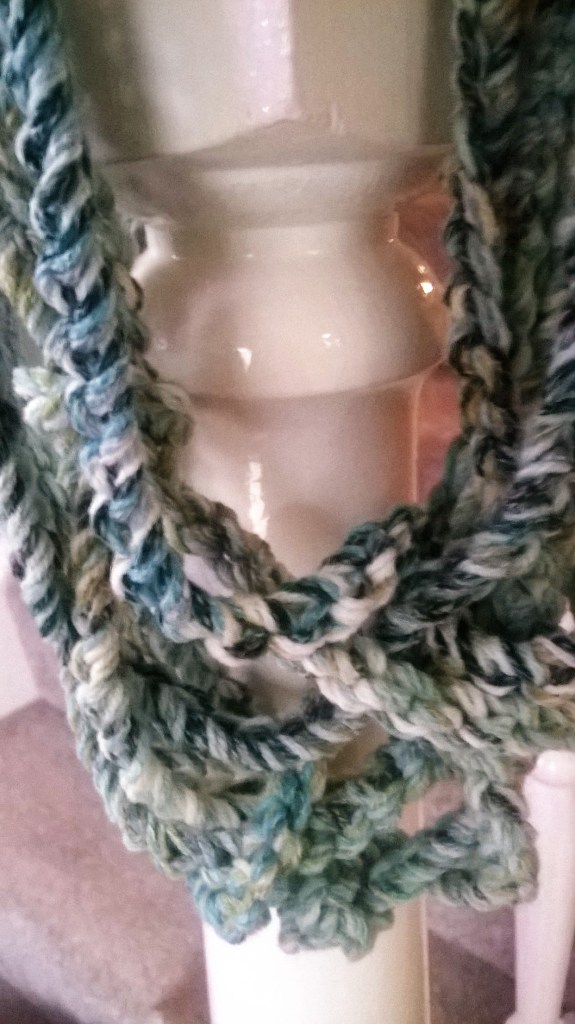
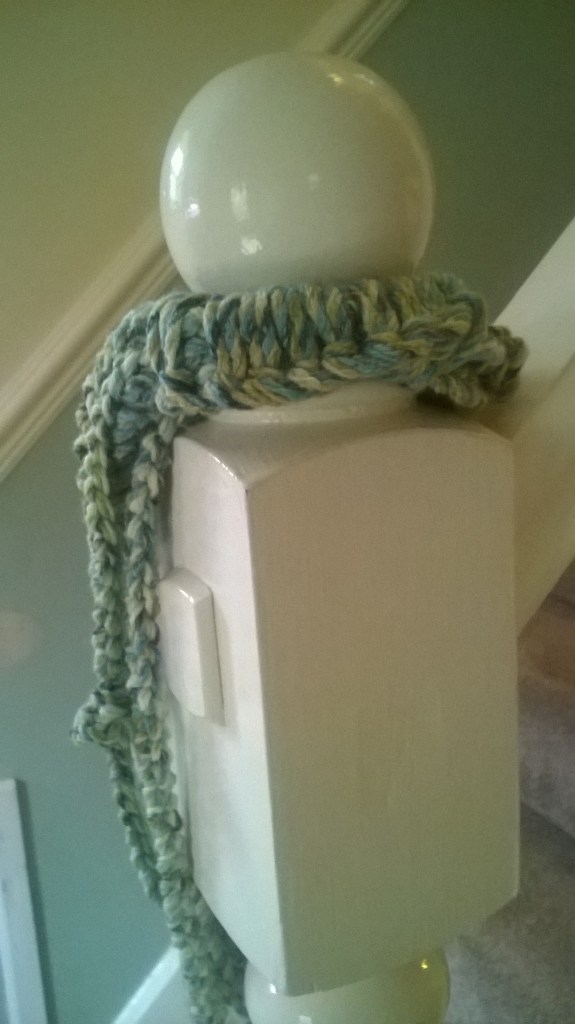
Chain reaction necklace scarf
Now join with a slip stitch into the very first chain to make an enormous loop.
It may be a good idea to secure the stitch with a stitch marker or safety pin so that your chains do not unravel during the next part.
Now find something to put your enormous loop of chains around… I used the stair post at the bottom of the stairs.
Start to make the loop smaller by crossing over the chains and hooking back over the post…or whatever you are using. Repeat the process until you have a handful of loops; that when placed around your neck fall just at the top of your tummy.
Next, you need to secure your loops together. To do this
remove the stitch marker / safety pin and reinsert your hook.
Pull the loop onto your hook to make the yarn looser. Now complete a giant double crochet (single crochet – American terms)… to do this take your hook under the handful of looped chains, yarn round hook and pull through, yarn round hook and pull through 2 loops on hook. Repeat x 9 more times. Fasten off and weave in any loose ends.


 Introducing the ‘Grandma Dot’ tea cosy…the third in the Grandma Collection
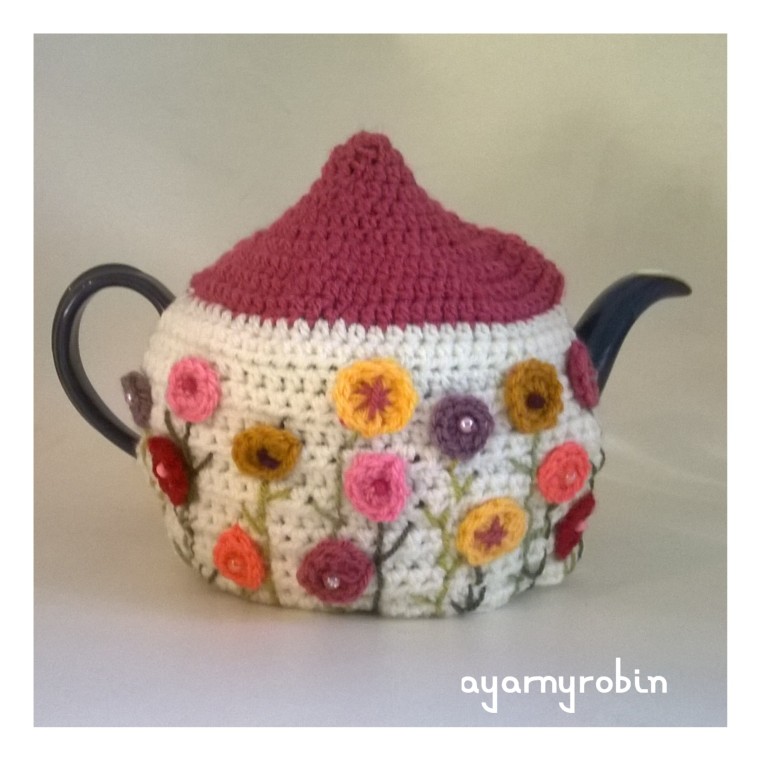


 I added a sweet little sewn request