Crochet Rainbow Pattern…


crochet rainbow

Hi, I just wanted to drop by to share with you this fabulous and free crochet sampler rainbow pattern by the amazing Sharon from The Stitch Foundary

It’s a quick make and looks fabulous hung up in the window to show support to all of our key workers at this unbelievable time and to add some cheer and unite in community spirit.

From a crochet point of view, the pattern is free, easy to follow and has several different stitches which give the rainbow some lovely textures.  There is no gauge to worry about and you can make it from scraps…what’s not to love!

I did alter mine slightly…sorry Sharon!

I used 5 stitches to complete my popcorns in the orange row, instead of the recommended 3 stitches…just because it made my popcorns fatter and I like nice fat popcorns!  Then on the last row of red I chained 5 and missed a stitch, instead of chain 3 between each stitch…just because it made the row less ruffled and more arched and I preferred the more simple finish.

Anyway, it’s a fabulous pattern and will make you smile if you hook it!

xxxxx


Advertisement

Oops April…

Apparently April 2020 has been and gone, it has seemingly slipped by silently…drowned out by the roar of Covid-19, and all without as much as a blog post from me.  My sincerest apologies, the NHS has been a crazy place to be employed of late and I have found it difficult to transition from there and slip into the rather relaxed mode at home…it feels like I am straddling two time zones!

baby romper

I have been productive however, and I have a few things to show you and some good patterns I have found to share with you.   The first of which is from one of my all time favourite designers…Mon petit violon.  I have a brand-new niece scheduled to arrive in this world at any moment and I fell in love with the ruffle romper by Mon Petit Violon.  So just before we were locked down I ordered 2 balls of Rico cotton soft in saffron.  As soon as they arrived through the letter box I got my hook out and, well pretty much got lost in the beautiful stitches and shape of this romper.  I oohed and aahhed as I hooked (no, I really did…out loud!).  The pattern is a wonderful hook, it is clearly written and comes in two size options  0 – 6 months and 6 -12 months.  I am hooking the 0 – 6 months as baby is due any day now.

There are plenty of helpful pictures included in the pattern too and although the stitches used are simple, I would suggest you would need some previous knowledge and experience of crochet and  reading patterns so as not to be overwhelmed.  Oh and of course it is very important to test swatch your gauge to begin with!

So there I was oohing and aahhing and hooking away merrily and what I should have done was read the partof the pattern which suggested amounts of yarn, because just as I got to the ruffle part…I ran out of yarn!

I should have ordered 3 balls!  No problem! I thought and hit the button to order more…but an ‘out of stock’ message appeared!  No problem! I thought as I checked the box that said ‘send email when back in stock’.

Three weeks passed and no email…a frantic search online found my heart sinking as shop after shop did not have any balls of saffron left.  In desperation last week I put an appeal out on Instagram to see if any lovely hooker, anywhere in the world had some in their stash to sell to me… and my wonderful #sidekicksistas came to the rescue.  The beautiful Karen alerted me to 3 balls that were available at Laughing Hens!  Now I had never come across this beautiful gem of  shop before…but I hit the order button and am now just waiting for my yarn to arrive, so I can get that ruffle hooked hopefully before my niece arrives!

Talking of patterns I just wanted to say a HUGE thank you for the support you have given to me with my recent pattern release.

You have really blessed me!

I promise I won’t leave it as long before I next drop by.

Stay safe.

xxxxx


#Sidekicksistas…

I wanted to stop by and show a beautiful shawl I made as a Secret Santa swap for one of my #sidekicksistas.

If you don’t know I am wonderfully blessed to be a part of a fabulous group of crafties that meets once a month. I met them online way back when I had my foot operation and I started the #seasidestashbustingblanket in 2018, and they kindly invited me along. They really are just the most supportive and creative women and we all share the same crafty kindred spirit.  Even though I don’t make the monthly meets and only get to about three a year, I just love these women so much.  The highlight is always our Christmas dinner in December where we all chip in and cook something for the table…here we are look…

This year for the secret Santa swap, I decided I was going to make a shawl and after a long trawl through ravelry, I set my heart on the Dragon Belly Shawl by Johanna Lindahl of Mijo Crochet.  It is a free pattern and has a simple 2 row repeat, which means it is the perfect pattern to hook up whilst indulging in a box set.  Perfect relaxing crochet.  The pattern is well written and I will definitely be making this again.

I decided to treat my recipient to a Scheepjes whirl to hook this shawl in…well to treat myself really as I had never hooked with this yarn before and I had wanted to for ages.  I chose the Blueberry Bambam which was my second choice.  I had originally chosen the Jaffa Pop colourway…but it was out of stock everywhere, and I mean everywhere and was not due to be re-stocked until after Christmas.  So Blueberry Bambam it was.

crochet shawl

The yarn was a beauty to hook with.  It is a beautifully soft cotton blend 4ply yarn which has a long gentle gradient. I used the whole 200g (1000m) and it made a great sized shawl.  The whirl was worth every penny, as it produced a really lovely quality fabric which drapes amazingly.  I love the raised rows of this shawl and it is aptly named the Dragon Belly for this reason.  So, if your looking for a fabulous make which won’t tax your brain; but will certainly scratch that creative itch and give you a real sense of hooky satisfaction…this is the pattern to go for.


xxxxx


My Charming Harbour Blanket is finally finished!

Wow…I have a finished blanket to show you!  You may want to take a seat at this point as it has probably come as quite a shock to you.  It may be even more shocking when I reveal that it has taken me over  18 months to get this stunner finished.

crochet blanket

You can read the original post I wrote way back, when I initially put it on my hook just here.  It has been neglected and unloved for much of that time, which is crazy because I have thoroughly enjoyed hooking every last stitch.   The new owner of this handsome blanket now has it in his possession and I am so thrilled as he always was the intended heritor of this creation.  I am also thrilled that I finished hooking the main body and border of this blanket in and around Brixham Harbour which seemed so fitting as I had named it the Charming Harbour Blanket.

crochet blanket

crochet blanketcrochet blanket

I couldn’t resist adding four enormous pom poms to each corner.  Mr R did not approve…but inside I squealed with delight at those fat poms!

crochet blanket

I love this blanket and I love that it is certain to have more seaside adventures in a happy little camper van…because every camper van needs a little (lot) of crochet!

crochet blanket

Now I’m pretty certain that a finished item equals buying more yarn…right?

xxxxx

Panda beanies…

One of my lovely crafty friends is having twins…very, very  soon.

I knew I wanted to make her something handmade for the little ones and I knew I wanted to make something panda…ery!

panda hats

I searched lots of sites for panda hats but, I just couldn’t find what I was looking for…surprise, surprise!  There was nothing else I could do but come up with my own version of a panda hat…

and now I am so pleased I did because this is what I came up with

panda baby hats

Just look at those panda eyes…

panda baby hats

I’m not sure if I should write the pattern up or not.  I would need to make a small charge as it would take me some time to work out all the sizes…What do you think?

Should I write up the pattern or not?

Let me know by casting your vote below.

xxxxx

A little crafty…

Hello lovelies, I thought you may like to see what I have been up to lately.  I have been busy crafting and hooking and I have also been busy ignoring my PHD projects in the hope I can convince myself it is ok to start more projects!

I have had this beautiful mustard coloured yarn for a little while and I knew I wanted to make a sweet little beanie for a little head.  I still need to pop on a pom pom to finish it off, I just cant decide whether it should be black or white!

Any thoughts?

crochet beanie

I even had enough left over to make a sweet little headband too…

baby crochet headband

I also made a large beanie for Papa’s birthday,  Mr R made him some domino’s; so his birthday present was a real homemade affair this year.

crochet beanie

The pattern for both the mustard beanie and Papa’s is my own, I just haven’t written it up yet.  I have also done some more embroidery hoop art…this is my favourite one so far…

embroidery hoop art

I also have some very exciting crochet news…but I can’t share that with you just yet, I promise I will do as soon as I am allowed.  So you see I have been quite crafty.  This afternoon though I am just deciding whether I really need this gorgeous shawl in my life and if so what colour yarns I should choose!

sunday relaxing

It’s a long weekend here in the UK, so I can spend some time crafting later and tomorrow too…Have a great week whatever you have planned.

xxxxx


Off Piste…

I said I would pop in and write about some recent makes…so here I am, I hope you are well.  My makes of late have been a little off piste, in that they are not yarny at all!  

Over Easter I had a little time away from work which was just delightful.  The weather was sunny and spring was most definitely flourishing.  The boys were off school too, so our days were lazy and quite carefree.  Amongst the laid back ways, I still had chores and it was whilst ironing of all things that I was overwhelmed with an urge to embroider. 

The urge just fell so heavy upon me whilst ironing an old but beloved blouse of mine.   The material had become thinned in areas and I sadly decided the blouse could no longer be worn.  I loved that blouse and some of the material was still good and this is what sparked my embroidery urge. 

Having never done any embroidery before I happily abandoned the ironing pile and exchanged it for a pinterest exploration and I was gone for several hours.  I gathered supplies and with a fabric sewing pen I sketched out my design.  Between consulting youtube clips and pinterest I ventured on my maiden embroidery voyage.  I loved it, it scratched that creative itch so well, I felt so deeply satisfied. 

I can only show you a little of this make as it is a gift and is still to be gifted. 

I embroidered at every opportunity, I just couldn’t put it down.

I made a second hoop which I can show you, as this has already been gifted.

Oh, how I adore French knots and satin stitching. What do you think?

xxxxx

Grandma Kathy Tea Cosy…Free Crochet Pattern and Tutorial.

captureThis is the fifth tea cosy in the Grandma collection, and is quite simply delightful.  The use of traditional granny stitches means that this pattern can be hooked within an evening.  Ideal for that last minute handmade present.  This cosy is sweetly uncomplicated and will cloak any tea pot with elegance.

Dedicated to the inspiration that is ‘Nanna Kathy’ 


crochet tea cosy free pattern

The pattern makes a tea cosy that fits a standard 6 cup teapot.

I used less than 50g of Stylecraft special dk yarn in gold and scraps of apricot.

You will also need a darning needle, pin or stitch marker and a pair of scissors.

crochet tea cosy free pattern and tutorial


Stitches used in this pattern refer to English terminology, however a conversion to US terminology is provided in brackets below.

Ch – chain stitch 

slst – slip stitch 

dc –  double crochet (single crochet)

htr– half treble crochet  (half double crochet)

tr – treble crochet (double crochet) 

dtr – double treble crochet (treble crochet)


You will also need:

a 5mm crochet hook for main body of teapot and a

4mm hook to complete picot edging trim.


Ok, here we go…

Using the gold yarn and 5mm hook, Ch 20

crochet tea cosy free pattern and tutorial

To adjust cosy size, the starting chain should be equivalent to the height from the base of teapot to the top of the body of the teapot or to put it another way, to the start of lid.  If adjusting the starting chain it must be a multiple of 3+2.

*********************

 Row 1: dc in 2nd ch from hook, dc in each st along, ch3, turn (ch3 counts as tr)  (19dc in total).

crochet tea cosy free pattern and tutorial


Row 2: 2tr in same space as ch3, *miss 2 sts, 3tr in next st (granny cluster)* 

repeat * – * til end of row, ch3 (counts as tr) turn. 

(x7 granny clusters / x6 spaces).


crochet tea cosy free pattern and tutorial


Row 3: miss 1st granny cluster, 3tr in space before next granny cluster, *miss granny cluster, 3tr in space before next granny cluster* Repeat * – * to last space, miss 2 sts, 1tr in last st of row, Ch3 (counts as tr), turn.

(20sts = x6 granny clusters / 7 spaces / 1tr on each end of row).

crochet tea cosy free pattern and tutorial

Rows 4: 2tr in same space as ch 3, *miss granny cluster, 3tr in space before next granny cluster* Repeat * – * to end.  Ch3 (counts as tr), turn.  ( 21sts = x7 granny clusters / x6 spaces).


Row 5: – 17: Repeat rows 3 and 4, but omit turning ch on row 17.

crochet tea cosy free pattern and tutorial

Row 18: turn, ch1 (does not count as st)dc in same space, dc in each st across, ch3 (counts as tr), turn.

(20sts). 

crochet tea cosy free pattern and tutorial

Now to make the spout hole!


Row 19: 2tr in same space as ch 3, miss 2sts, 3tr in next st, ch 10, miss next x5 granny clusters / x4 spaces, 3tr in last st. 

(20sts).

crochet tea cosy free pattern and tutorial Row 20: ch1 (does not count as dc), dc into same space, dc in next 2sts, dc in next 10 chain sts, dc in next 6sts, ch3 (counts as tr), turn. (19dc).

crochet tea cosy free pattern and tutorial


Row 21: Repeat Row 2. 

Crochet tea cosy free pattern and tutorialRow 22 – 32: Repeat rows 3 and 4 but omit turning ch on row 32.

If adjusting cosy size make sure to finish this section on a row that is the same as row 3 in the pattern ie/ starts and finishes with 1tr.

*********************

  Row 33: ch1 (does not count as dc), dc in same space, dc in each st along and fasten off and weave in ends

(20dc).

crochet tea cosy free pattern and tutorialnb/ top and bottom – x1 granny cluster underneath spout

crochet tea cosy free pattern and tutorialNoting top and bottom correctly, attach gold yarn to top right side.

crochet tea cosy free pattern and tutorialNow to complete the petals.

Row 34: ch1 (does not count as dc), dc in same space, dc in each st across – ( the term sts here is used loosely as they are actually the side posts of the trebles and double crochet sts of the previous rounds.  It may look a bit ambiguous, but we are aiming to get 36dc across this top edge), turn.

crochet tea cosy free pattern and tutorial
try to space these sts as evenly as you can… its just a case of getting them in!

crochet tea cosy free pattern and tutorial

Row 35: ch1, *miss 2 sts, in next st place dc, htr, tr, 2dtr, in next st  place 2dtr, tr, htr, dc*

crochet tea cosy - The Grandma Collection

Repeat * – * to end of row

crochet tea cosy free pattern and tutorial

slst to beginning ch1 to join cosy in a circle.  

crochet tea cosy free pattern and tutorial

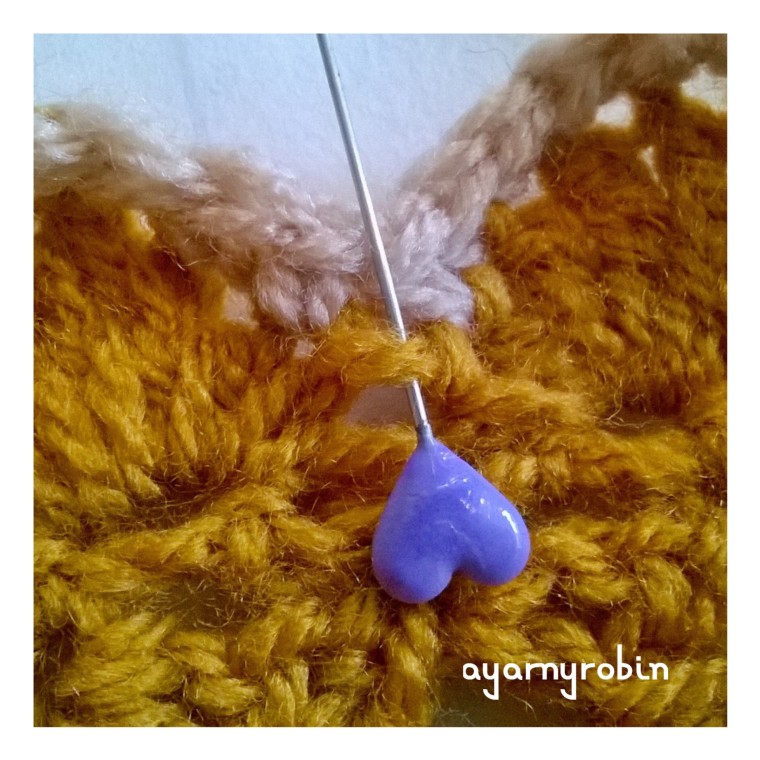
Side Seam: Place cosy on teapot and mark with a pin across top of handle, slst from top of cosy down to this point (approx. 1.5cms).

crochet tea cosy free pattern an tutorial

Return cosy to the teapot and repeat process, this time marking below the handle.  Remove cosy leaving marker in place, continue to slst along one edge (not both) until you reach marker for the bottom of the handle.  Now slst both edges together to bottom of cosy, fasten off and weave in all loose ends. 

crochet tea cosy free pattern and tutorial

Picot trim: Finally, attach apricot yarn in any beginning dc of petal (ie. dc to the right hand side of petal).

crochet tea cosy free pattern and tutorial

  With a 4mm hook, ch1 (counts as dc), dc in next 3sts, dc in next st, ch3, slst into 1st ch (picot made),

crochet tea cosy free pattern and tutorial

dc into same space as previous dc, dc in next 4sts…1st petal edged. 

For next petal and for all petals around, dc in next 4sts, dc in next st, ch3, slst into 1st ch, dc in same space as previous dc, dc in next 4sts.

NB/ do not crochet in this space by mistake  

crochet tea cosy free pattern and tutorial
Do not crochet in this space by mistake else your picot will not be central!

To finish slst to beginning ch of trim, fasten off and weave in ends.

crochet tea cosy free patternNow I think it’s time for a brew…don’t you?

xxxxx

I REALLY HOPE YOU HAVE ENJOYED MAKING THIS PATTERN AS MUCH AS I HAVE ENJOYED CREATING IT FOR YOU.  IF YOU ARE NOT SURE ABOUT SOMETHING OR NOTICE ANY ERRORS PLEASE SHOUT UP.  EQUALLY PLEASE FEEL FREE TO SHARE YOUR Grandma Kathy Tea cosy CREATIONS IN THE COMMENTS BELOW or with the #THEGRANDMACOLLECTION #AYARNYROBIN ON SOCIAL MEDIA…I WOULD LOVE TO SEE THEM!

THE Grandma Kathy Tea Cosy IS part of the Grandma Collection ©2018 designed by Nicola Florence @ayarnyrobin  


The Grandma Florence Tea Cosy

captureIn my haste to release the fourth gorgeous tea cosy of the Grandma Collection…The Grandma Florence tea cosy; I realised that I hadn’t posted the formal introduction.  So here it is…

crochet tea cosy free pattern and tutorial


Dedicated to my lovely Momma…Florence.

My Mom: the woman who raised me and  who has quietly influenced me throughout my life.  

crochet tea cosy free pattern and tutorialI followed in her duty shoes and trained as a nurse, inspired by memories of her putting on her nurses hat and cape…of course that style of uniform has long since gone…but I wanted to help people just like her.

Crochet tea cosy free pattern and tutorial


My Mom has been such a creative influence in my life too, for as long as I can remember she has made stuff.  Clothes, flower arrangements, knitting,  patchwork quilts…no wonder I have the desire to create and craft.

crochet tea cosy free pattern and tutorial

  My Momma has also taught me how to be a Momma to my boys…and if I do half as good as her then I’ll do alright by them!  But most of all she is always there and she is kind and that is just what I want to be.

Crchet tea cosy free pattern and tutorial  So this is the Grandma Florence tea cosy, a pretty cosy woven with bright ribbons to represent the encouragement, love and inspiration that my Momma has woven throughout my life… Thanks Mom!

xxxxx


crochet tea cosy free pattern and tutorial


So that is the Grandma Florence tea cosy in all of her glory, here is the pattern linky thing which is free and has a photo tutorial also.

xxxxx

Grandma Florence Tea Cosy…Free Pattern and Tutorial.

crochet tea cosy free pattern

This is the fourth tea cosy in the Grandma collection, and is sure to charm.  The crochet mesh design means this pattern makes for a very quick hook up.  Ideal for beginners using just a half treble crochet stitch, this cosy is abidingly delightful and will trim any tea pot with joy.

Dedicated to the inspiration that is ‘Nanna Florence’ otherwise known as my Mom! 

Crchet tea cosy free pattern and tutorial

The pattern makes a tea cosy that fits a standard 6 cup teapot.

I used less than 50g of Stylecraft special dk yarn in cream.    Please note that I have used a different colour yarn in the beginning of the photo tutorial below. 

You will also need a darning needle, a selection of 5mm wide ribbon, a 50cm length of fluff, a button, a pair of scissors and x4 stitch markers (or small safety pins or scraps of different colour yarn).  The use of a hot glue gun is optional, ribbons can either be glued into position or stitched.

ribbons, ayarnyrobin free pattern


Stitches used in this pattern refer to English terminology, however a conversion to US terminology is provided in brackets.

Ch – chain stitch 

slst – slip stitch 

dc –  double crochet (single crochet)

htr– half treble crochet  (half double crochet)

You will also need:

a 4mm crochet hook


Ok, here we go…

Using the cream yarn  Ch 4

text636248704563960209

Join with a slst to form a ring.

Row 1: Ch1 (does not count as a st), 6hdc into ring,

finish with a slst in 1st hdc. (6hdc).


Row 2: Ch1, (does not count as a st) 2hdc in same space, 2hdc in each st around, finish with a slst in 1st hdc. (12hdc).


Row 3: Ch1 (does not count as a st), 2hdc in same space, 1hdc in next st, *2hdc in next st, 1hdc in next st* . Repeat * – * to end,  finish with a slst in 1st hdc. (18hdc).


Rows 4: Ch 1 (does not count as a st), 2hdc in same space, 1hdc in next 2 sts, *2hdc in next st, 1hdc in next 2 sts*. Repeat *-* to end, finish with a slst in 1st hdc. (24hdc).


Row 5: Ch1 (does not count as st), 2hdc in same space, 1hdc in next 3 sts, *2hdc in next st, 1hdc in next 3 sts*. Repeat *-* to end, finish with a slst in 1st hdc. (30hdc).


Row 6: Ch 1 (does not count as a st),   2hdc in same space, 1hdc in next 4 sts, *2hdcin next st, 1hdc in next 4 sts*.  Repeat *-* to end, finish with a slst in 1st hdc. (36hdc).


Row 7: ch1 ( does not count as a st), 1hdc in same space and in each st around, finish with a slst in 1st hdc. (36hdc).  


Row 8: ch1 (does not count as a st), 2hdc in same space andin each st around, finish with a slst in 1st hdc. (72hdc).


Row 9 and 10: Repeat row 7, finish with a slst in 1st hdc. (72hdc).  

You should have something that is starting to look a bit like a flying saucer!  This is a good point to check your measurements with your intended teapot.  Place your hooked disc on top of your teapot. You want the edges of the circle to be approx. 1cm from the handle of the teapot.

To mark out handle and spout holes, simply take x4 st markers (or cut short pieces of yarn in a different  colour as I did) and place/ tie first marker in the st behind where you joined last row.

Counting backwards (or to the right)miss x3 sts and place/tie second marker in next st.  This marks out your handle. 


From this second marker count backwards (or to the right) 30sts and place 3rd marker in the next st (31st st).  Return to the first marker and count forwards 30 sts (or to the left) and place 4th marker in the next st.


 You have now marked out the handle and spout positions for your cosy.  Marker #1 and #2 indicate the handle space and markers #3 and #4 indicate the spout space.

The next stage of the cosy is to construct the sides.  So, for the purposes of the pattern these will be referred to as side A  (between marker #1 and #4) and side B between marker #2 and #3). 

crochet tea cosy by a ayarnyrobin

Side A row 1: In Cream yarn Ch 4 (counts as 1htr and 2ch), miss 2sts *htr in next  st, ch2, miss 2sts*

repeat * -* until you reach marker/ tie #4. 

NB/ last htr is completed in st marked by marker / tie #4

(x11htr, x10 ch2spaces)

Grandma Florence tea cosy, photo tutorial free pattern

Side A row 2: ch4 (counts as htr and 2 ch) turn work. 

Miss 2 sts, *htr in next st, ch2, miss 2 sts*

repeat * – * to end of row, placing last htr in top of ch2.

(x11htr, x10 ch2 spaces).


Side A row 3: We are going to increase the mesh at each end of the row. 

Ch 4 ( counts as htr and 2ch, turn work, htr into same st ( increase made), ch2, miss 2sts, *htr in next st, ch2, miss 2 sts*

repeat from * – * til end of row placing htr in ch2 of previous row, ch2, htr in same space (increase made). 

(x13htr, x12 ch2 spaces).

 Side A row 4: ch 4 (counts as  htr and 2ch), turn work, miss 2 sts, *htr in next st, ch2, miss 2sts* 

repeat * – * til end of row. (x13htr, x12 ch2 spaces).


Side A row 5 – 15: repeat side A row 4.  Fasten off.  Side A completed.

Grandma Florence Tea Cosy free pattern photo tutorial

 Side B: Join cream yarn in st to the left of st marker #2

Grandma Florence tea cosy free pattern photo tutorial

repeat Side A instructions between markers 2 and 3.  Fasten off and sew in all loose ends.

Remove stitch markers. 

Place on your teapot to check the fit.

Grandma Florence tea cosy free pattern photo tutorial crochetNow for the fun part! Weave the ribbons in and out of the mesh.

ayarnyrobin free crochet tea cosy pattern
weave the ribbons in and out of the mesh…

alternate each row ie, start weaving from under the post on one row and over the post on the next row.  NB/ on row 3 you will not need to alternate in order to keep the pattern of covered and exposed posts.

crochet tea cosy pattern available at ayarnyrobin
This gives me another idea!!!

Repeat weaving ribbons for both Side A and Side B.  Once completed you need to secure the ribbons.  I used a hot glue gun to do this but you could just as easily machine sew. 

Turn work so that the wrong side is facing upwards and begin by securing the ribbons that end by going behind the post. In the picture below this would be the green ribbon, followed by the blue then the red ribbon.  Secure both sides being careful not to pull the ends of the ribbon to tight, you need to allow a little give in the ribbon.

Crochet tea cosy free pattern and tutorial

Continue to secure the ribbons in this way.  You should now only have ribbons that  go over the post left to secure.  To do this split the side of the post stitch with your nail and thread through the ribbon.  In the photo below the top picture shows the blue ribbon already threaded and the bottom picture shows the red ribbon yet to be threaded with the place for it to be threaded through  indicated by the safety pin. 

NB/ this can be a bit tricky and may require a wee bit of patience! 

Once threaded, secure as before. 

Crochet tea cosy free pattern and tutorial

Edging:  join cream yarn to the bottom corner (any side).

Crochet tea cosy free pattern and tutorial

Ch2 (does not count as a st), htr into same space (to the right side of ribbon), ch1. 

NB/The next st is to be placed in between ribbon).

*ch1,htr in between ribbon*

Crochet tea cosy free pattern and tutorial

repeat *- * until last ribbon at the top. Don’t worry too much about the ribbon seeming loose at the sides, just keep placing those htr’s between the ribbons! The last htr being placed to the left side of the last ribbon.

Dc in the sts across the lid of the cosy.

crochet tea cosy free pattern and tutorial

Now place htr to right of top ribbon on opposite side,*ch1, htr in between ribbon*. 

Repeat * – * to end. Fasten off and weave in ends.

Repeat the whole of the edging process on the other side of the cosy, but do not fasten off as this is where the tab is created.. 

Tab: To complete the tab ch2 (does not count as st) turn work, 

Tab Row 1: *htr in ch sp, htr in next st* repeat * – * x3 more times (8htr in total) 

Tab Row 2: ch2 (does not count as a st) turn work, htr in each st along (8htr) 

Tab Row 3: repeat Tab Row 2.

crochet tea cosy free pattern and tutorial

Tab Row 4: Turn work, slst in next 2 sts, ch8, miss 4 sts, slst in next 2sts, fasten off and weave in ends.

crochet tea cosy free pattern and tutorial

Attach button centrally on opposite side to tab.

crochet tea cosy free pattern and tutorialNow to sew handle opening.  To do this sew the two edges on opposite side of cosy to tab and button.  Sew from bottom up to the 4th or 5th ribbon or until the bottom of your handle.

Finally to neaten the edges around the spout, join cream yarn to st just above the tab. 

crochet tea cosy free pattern and tutorial

Ch2, htr in each st around until st just above button, fasten off and weave in ends. 

crochet tea cosy free pattren and tutorial

Repeat the process to neaten the edges around the handle, this time joining the cream yarn to any st in the opening for the handle, ch2, htr in each st around, joining with a slst in top of ch2 to finish.  Fasten off. 

crochet tea cosy free pattern and tutorial

Finally to add the pompom. 

crochet tea cosy free pattern and tutorial

Now you could just make a pompom, but I just tied the first part of a bow over and over until I had a fluffy ball.

crochet Tea cosy free pattern and tutorial

I threaded some yarn through it and secured it to the top of the tea cosy where it looked rather quite proud.

crochet tea cosy free pattern and tutorialEt voila! A beautiful tea cosy to warm your brew!  

crochet tea cosy free pattern and tutorial


Crchet tea cosy free pattern and tutorial

xxxxx

I REALLY HOPE YOU HAVE ENJOYED MAKING THIS PATTERN AS MUCH AS I HAVE ENJOYED CREATING IT FOR YOU.  IF YOU ARE NOT SURE ABOUT SOMETHING OR NOTICE ANY ERRORS PLEASE SHOUT UP.  EQUALLY PLEASE FEEL FREE TO SHARE YOUR Grandma Florence Tea cosy CREATIONS IN THE COMMENTS BELOW or on social media using the hashtags #ayarnyrobin or @yarnyrobin…I WOULD LOVE TO SEE THEM!

Grandma Florence Tea Cosy is part of the Grandma Collection ©2018 designed by Nicola Florence @ayarnyrobin