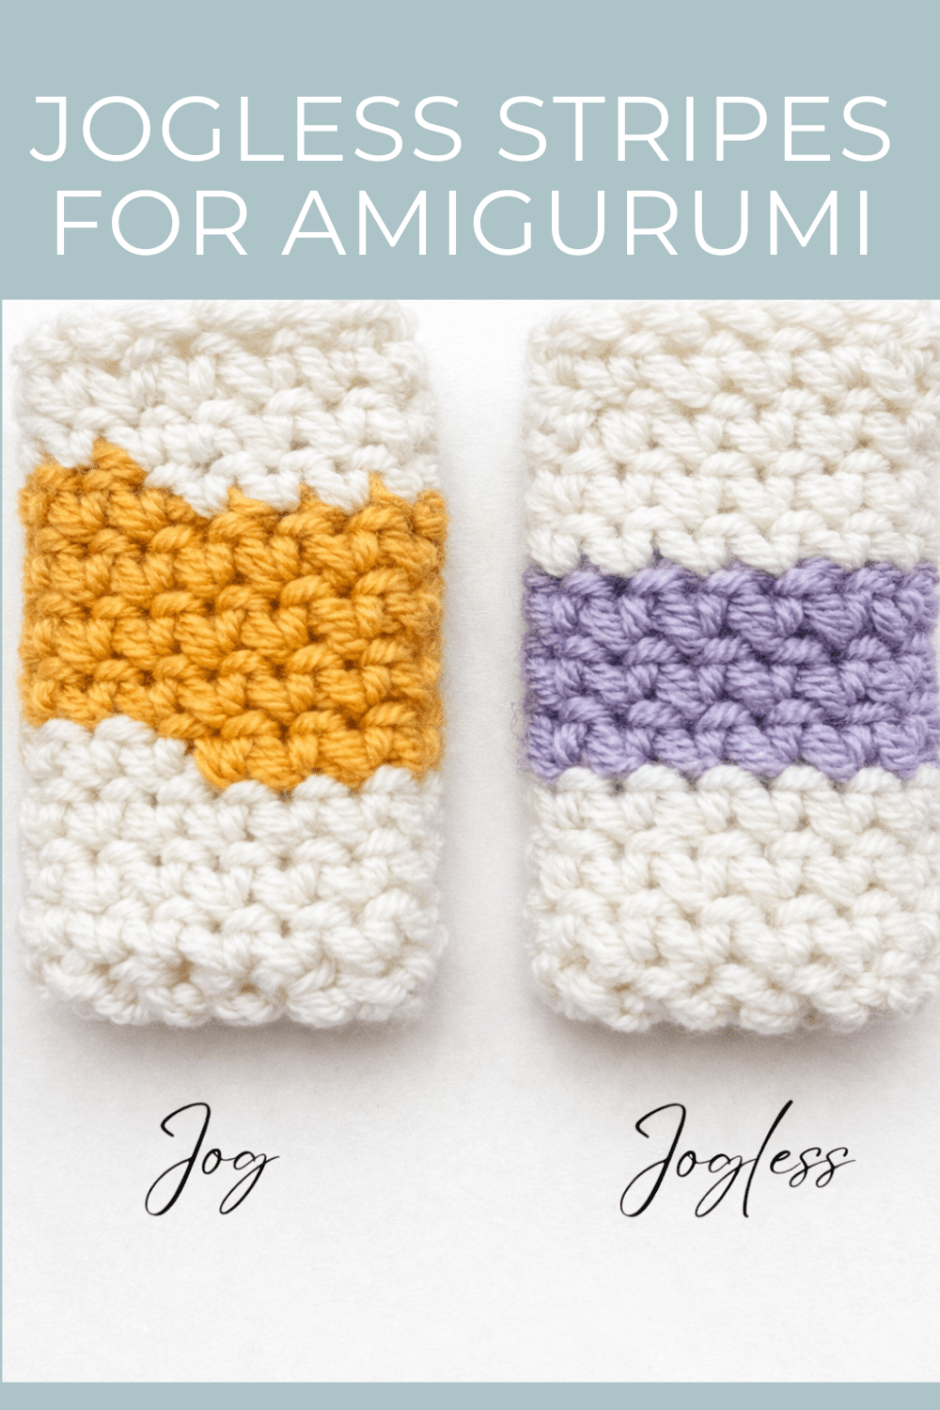
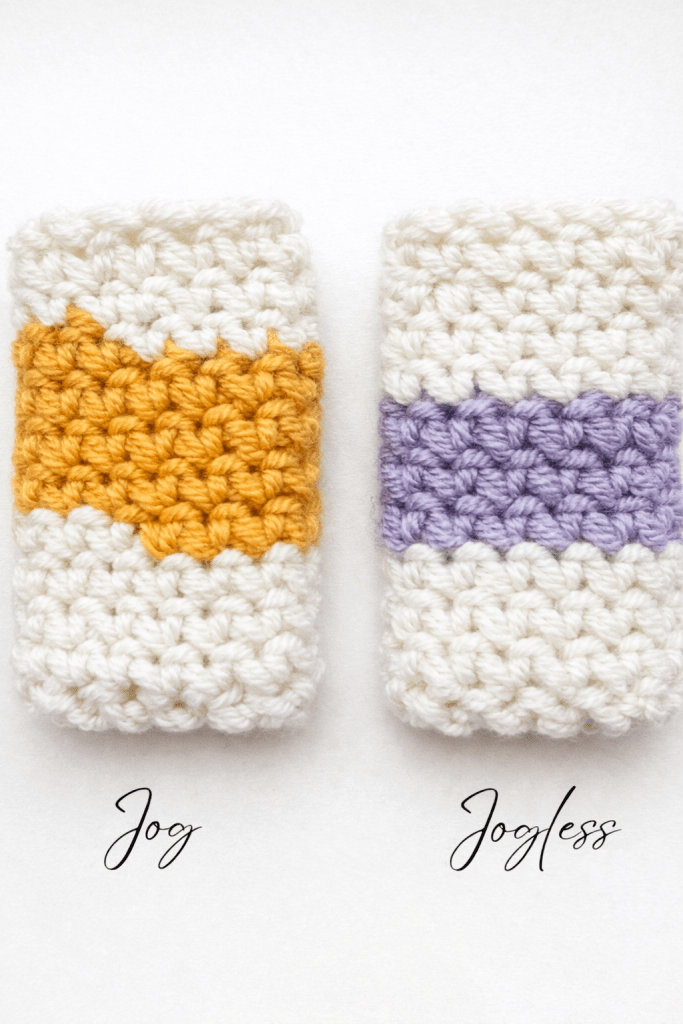
If you’ve ever added colour changes to amigurumi and spotted a visible step or “jog” where the stripe joins, you’re definitely not doing anything wrong. It’s a really common crochet quirk. This is especially true in small, tightly stitched amigurumi. However, it can be a little annoying once you notice it. That tiny step can make your stripes look less smooth and slightly more homemade than you’d like, particularly on high-contrast colour changes or gift-worthy pieces.
The good news? There’s a simple way to create smooth, jogless stripes in amigurumi that instantly makes your work look more polished; and I’m going to share with you how I do it.
Why Do Stripes Jog in Amigurumi?
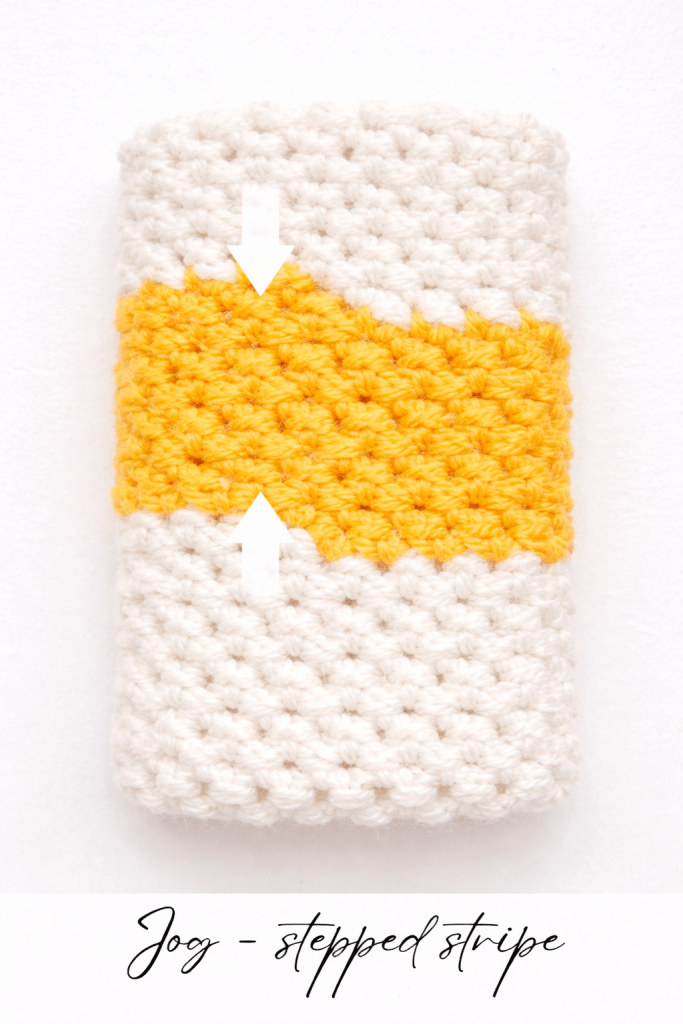
Amigurumi is usually worked in continuous spiral rounds (without joining). Because crochet stitches naturally lean, colour changes slowly drift upward, creating that stepped look.
This is most noticeable when:
Using contrasting colours
Making narrow stripes
Working on small plushies
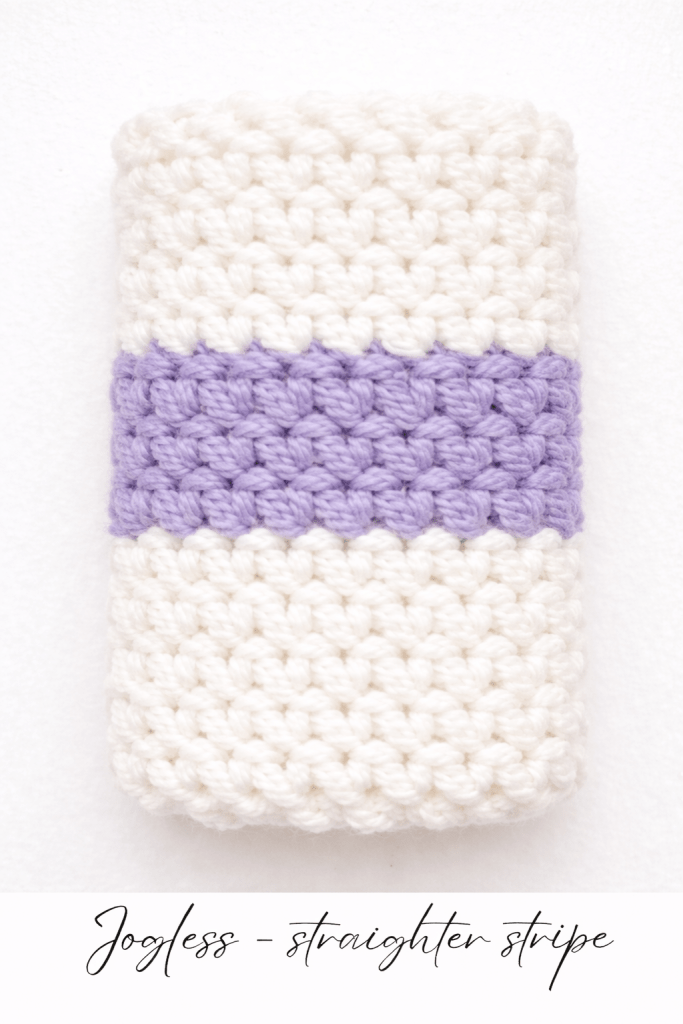
A jogless stripe technique helps visually realign the colour change, even though you’re still crocheting in a spiral.
Crochet swatch showing a stepped jog in a yellow stripe worked in the round, with white arrows highlighting where the colour change shifts between rounds.
When to Use a Jogless Stripe Technique
This method is perfect for:
Amigurumi toys
Crochet plushies
Striped limbs, bodies, and accessories
Any project worked in continuous rounds where colour changes matter
How to Crochet a Jogless Stripe in Amigurumi (UK Terms)
Step 1: Finish the Last Stitch of the Old Colour
Work the final stitch of the round until the last yarn over.
Step 2: Change to the New Colour
Yarn over with the new colour and pull through to complete the stitch. This ensures the stitch belongs to the new colour.
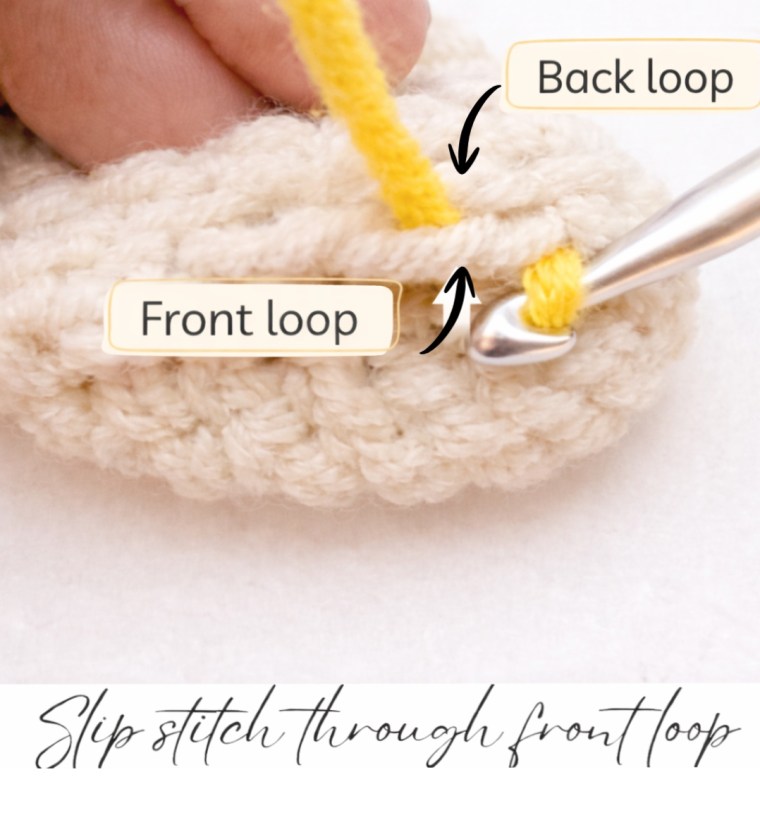
Step 3: Slip Stitch in the Front Loop
Slip stitch into the front loop only of the next stitch using the new colour. This counts as the first stitch. This is the key step that softens the jog.
Step 4: Continue Crocheting as Normal
Carry on crocheting in continuous rounds, working into both loops as usual unless your pattern says otherwise.
Why the Front Loop Slip Stitch Works
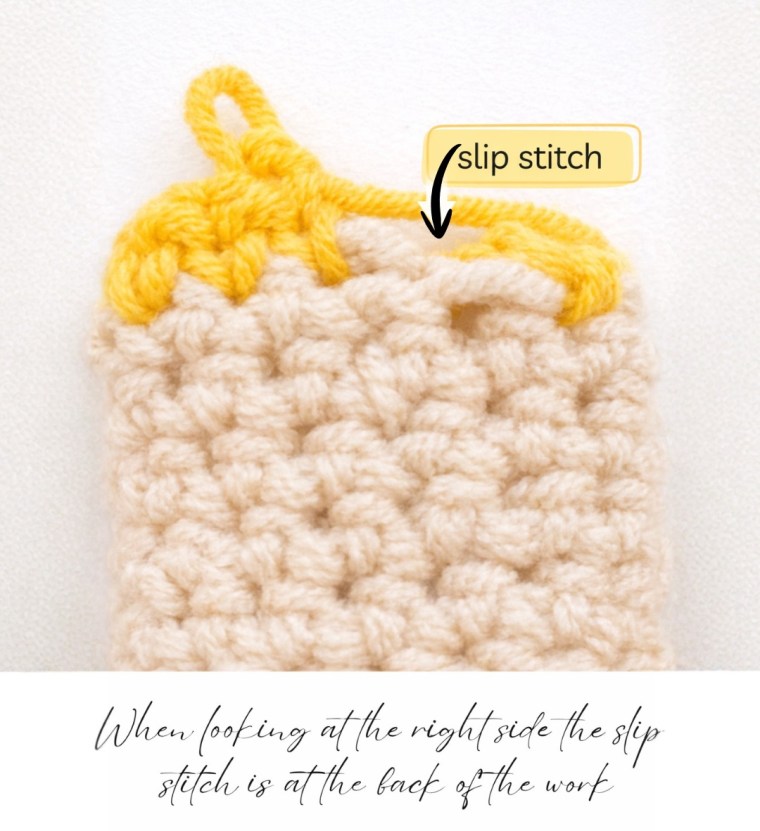
The front loop sits inside the amigurmi, meaning the join visually lies towards the back of the work when viewed from the right side.
Slip stitching here subtly pulls the colour change backward
This visually levels the stripe without disrupting shaping
It’s especially effective on tightly stitched amigurumi fabric.
Tips for the Neatest Stripes
Keep the slip stitch relaxed, not tight
Place a stitch marker in the slip stitch to remind you that this counts as your first stitch
Always place slip stitch in front loop and work rest of stitches in both loops unless the pattern states otherwise.
Use this technique only at colour changes, not every round
Common Mistakes to Avoid
Slip stitching through both loops (less effective)
Not counting the slip stitch as the first st of the round
Pulling the slip stitch too tight
Forgetting you’re still working in a spiral
Final Thoughts
This jogless stripe method is a brilliant little finishing trick — subtle, simple, and perfect for amigurumi. It keeps your stitch count steady. It gives your stripes a cleaner, more intentional look, helping to level up your work — ideal for market stock, custom orders and gifting.
Save this post for later so you can come back to it whenever you’re adding stripes to your makes
If you have enjoyed this post you can help support what I do by
• leave me a like or a comment below
• Join me here and hit follow so you don’t miss new free patterns and all the crochet goodness I share along the way.
Best-Selling Crochet Items That Shoppers Actually Buy
this post contains affiliate links, which means i may earn a small commission if you purchase via them, at no extra cost to yourself. This helps to support this blog.
Spring craft markets are some of the loveliest to prepare for — lighter yarns, softer colours, and shoppers who are ready to browse, linger, and treat themselves after winter.
But if you’ve ever sat staring at your yarn stash wondering what on earth should I make, you’re not alone.
When time, yarn, and energy are limited, the goal isn’t to make everything — it’s to make the right things. Items that are quick to produce, easy to price, and genuinely appealing to spring market shoppers.
This guide shares tried-and-tested crochet items that consistently sell well at spring craft fairs. There are also practical tips to help you present, price and stock your table without burning out.
I’ve organised this post into easy sections. These include small giftable makes, baby items, and spring home décor. Other sections cover light wearables, taking orders using samples, and pricing crochet fairly. I also discuss how to help customers understand the value of your work without over-explaining, as well as tips on stocking your table. I have also included a FREE Mini Market Bundle printable. It comes with an order form and handmade labels, look for the sage coloured box below to download. Feel free to skip straight to the parts most helpful for you.
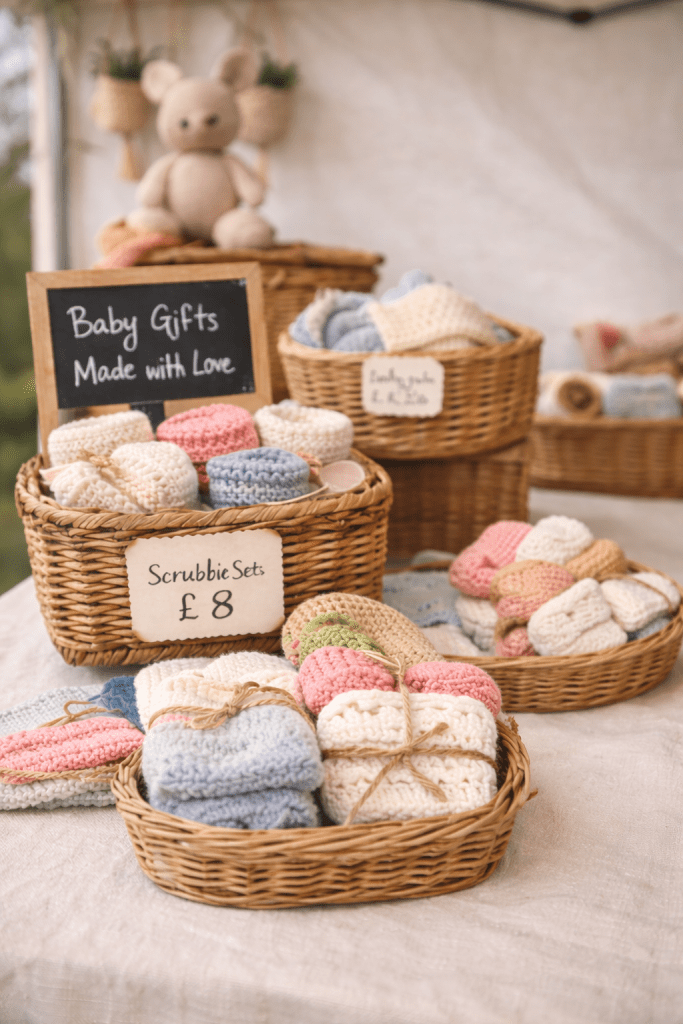
Small, Giftable Crochet Items (Your Spring Staples)
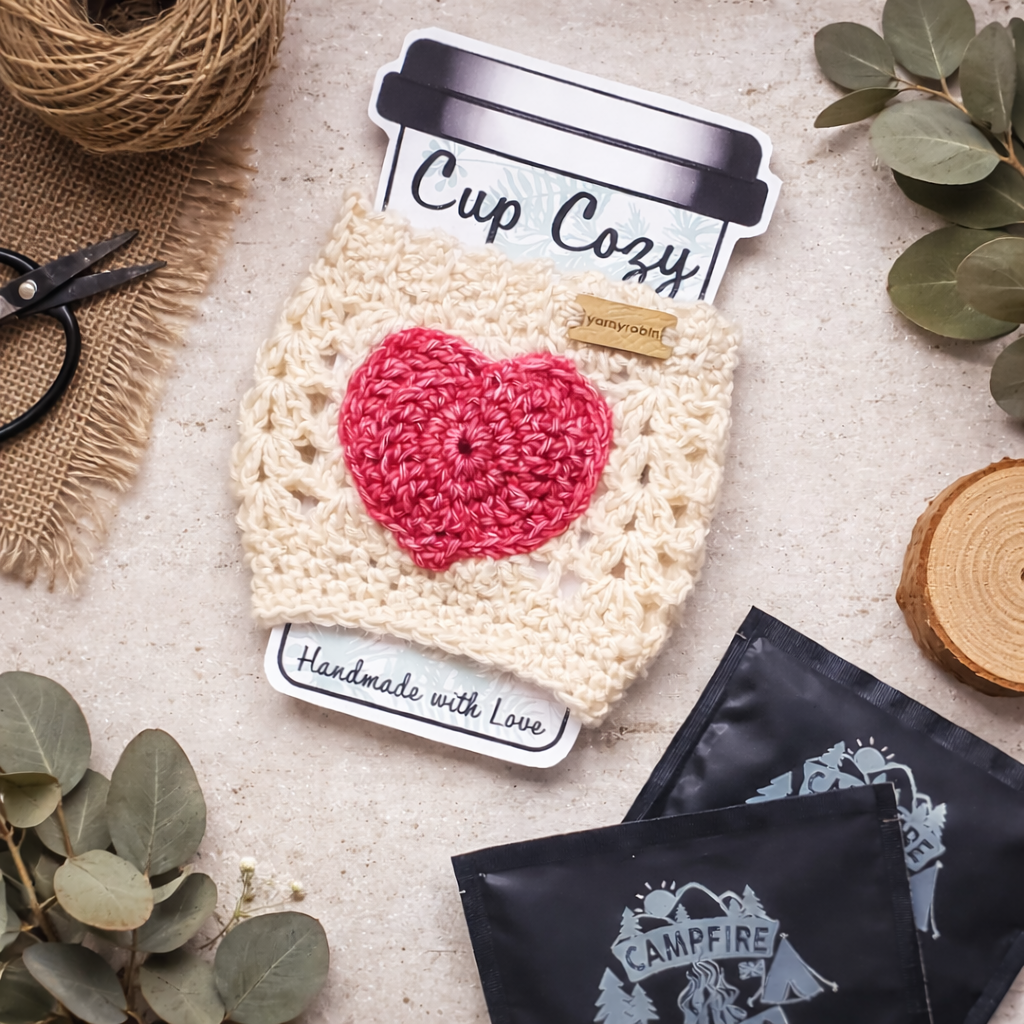
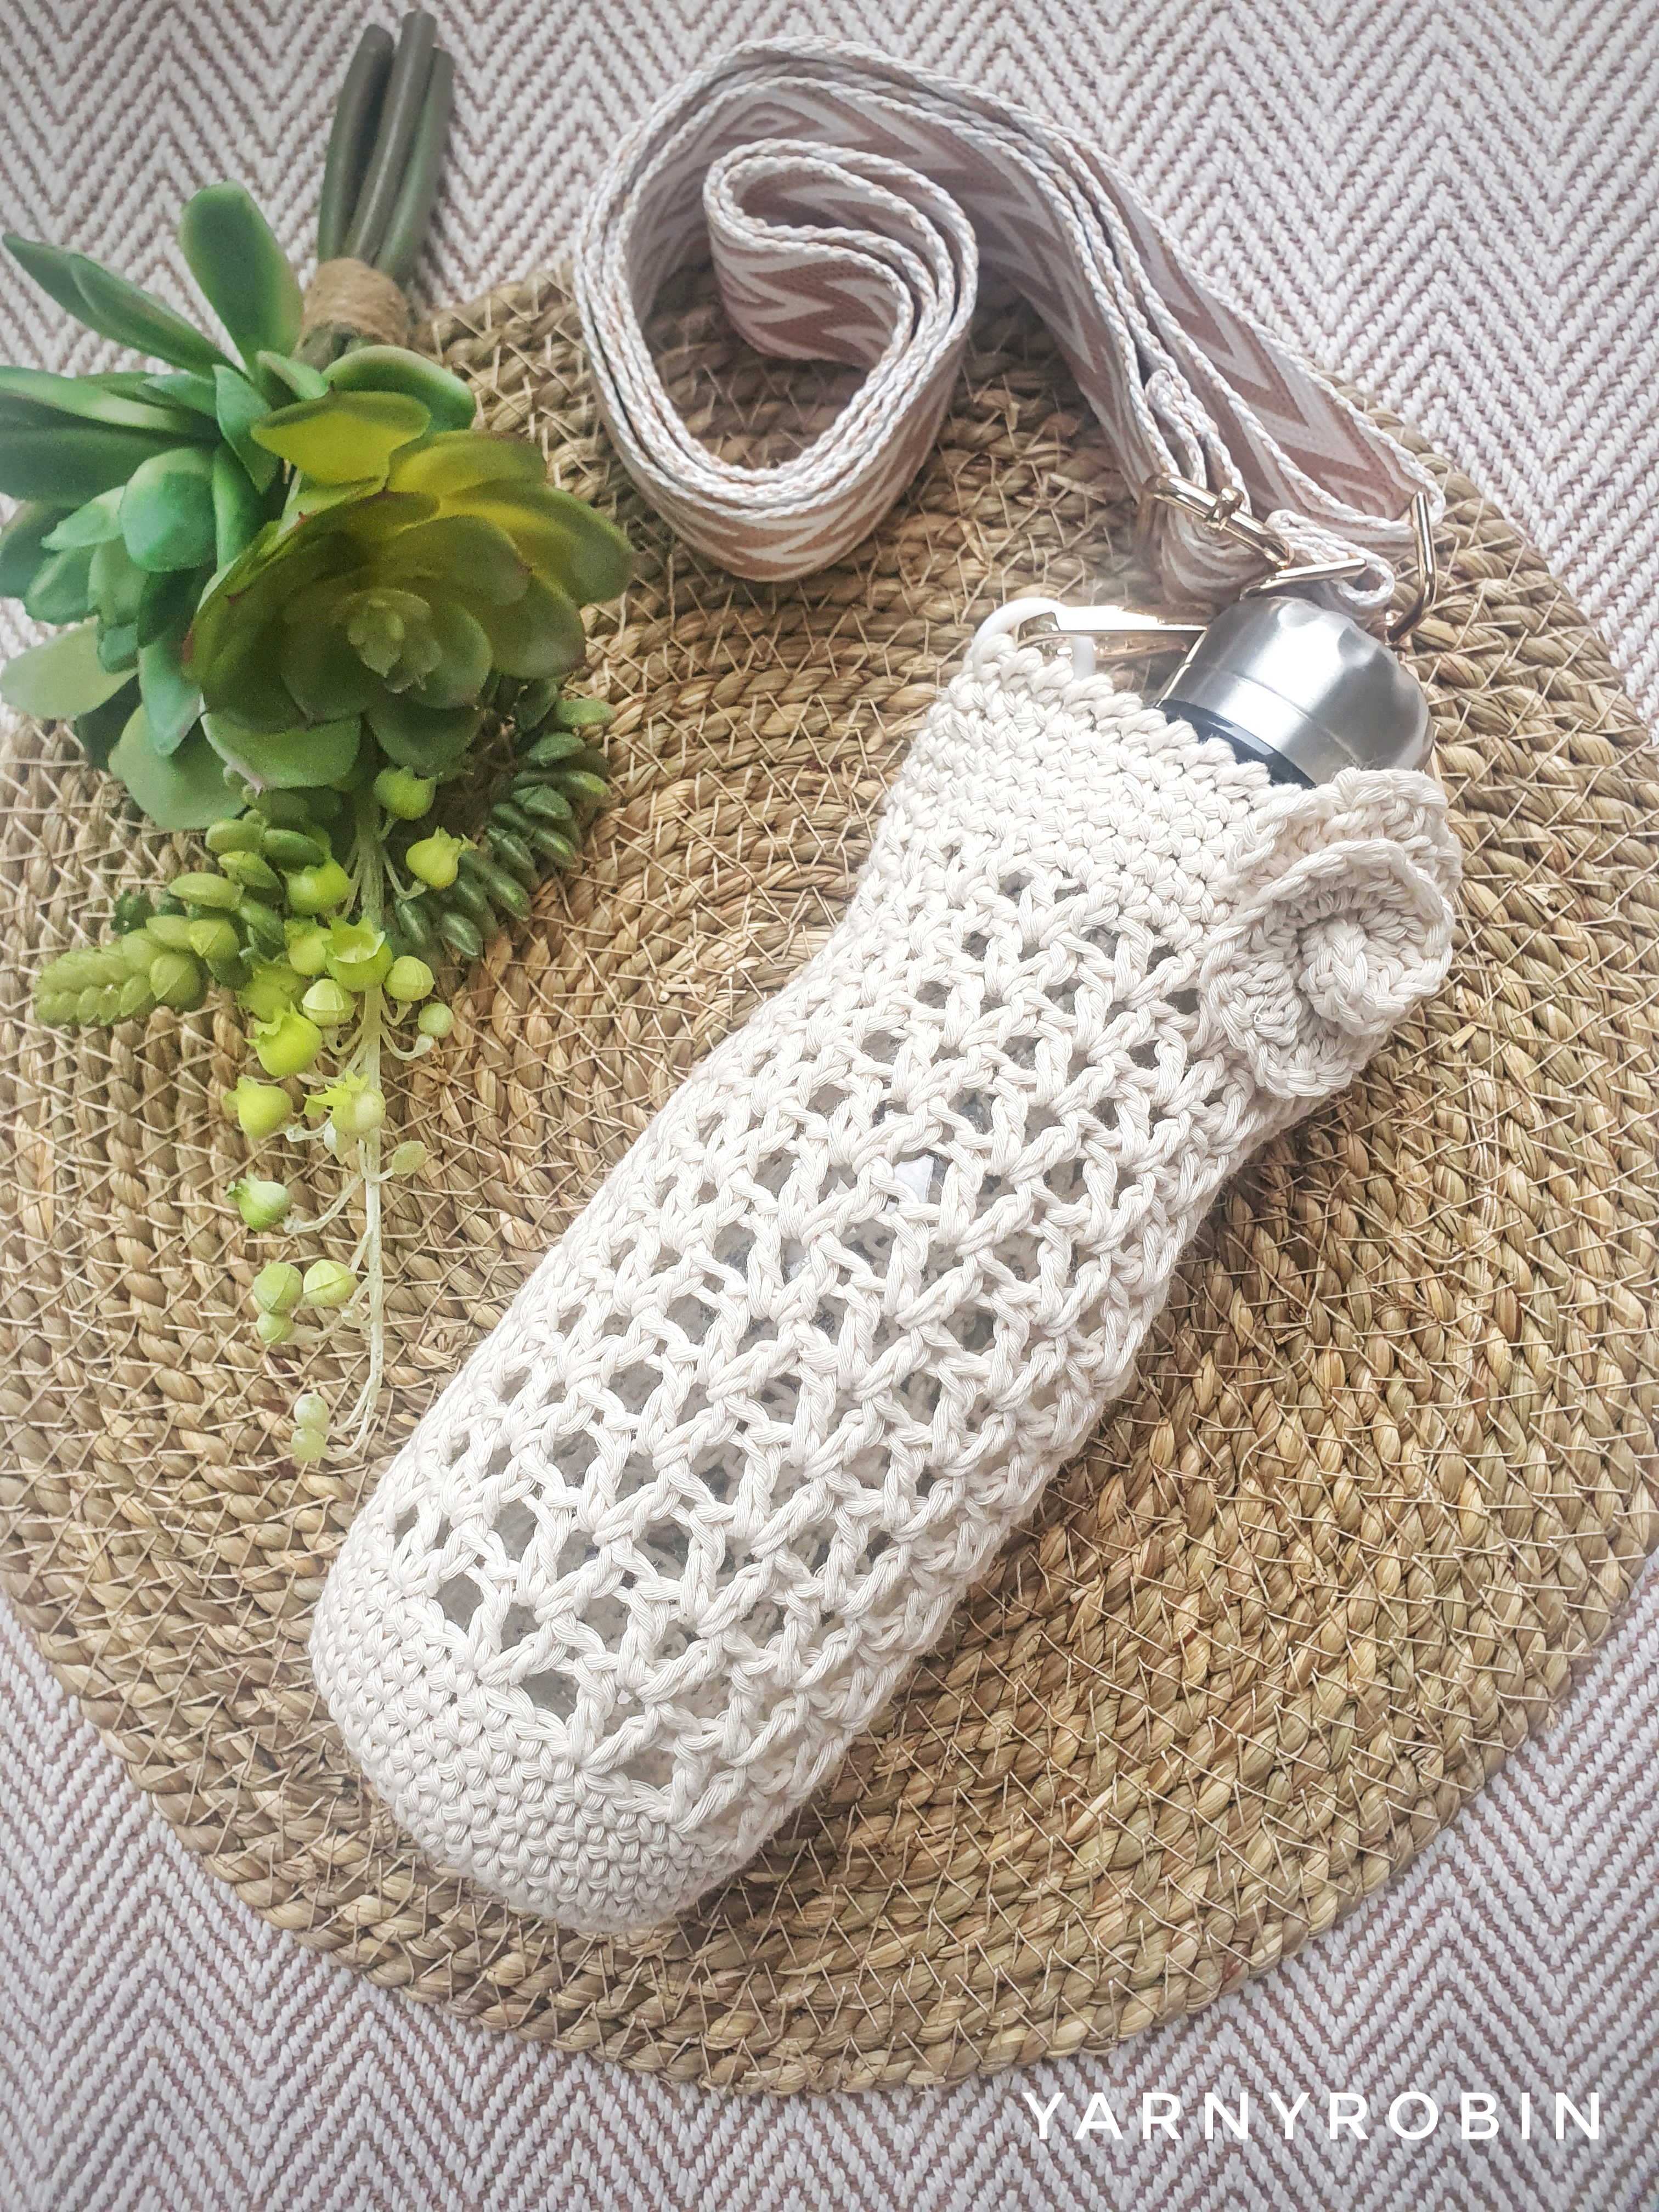
crochet cup cozy patterns
crochet scrubbie pattern
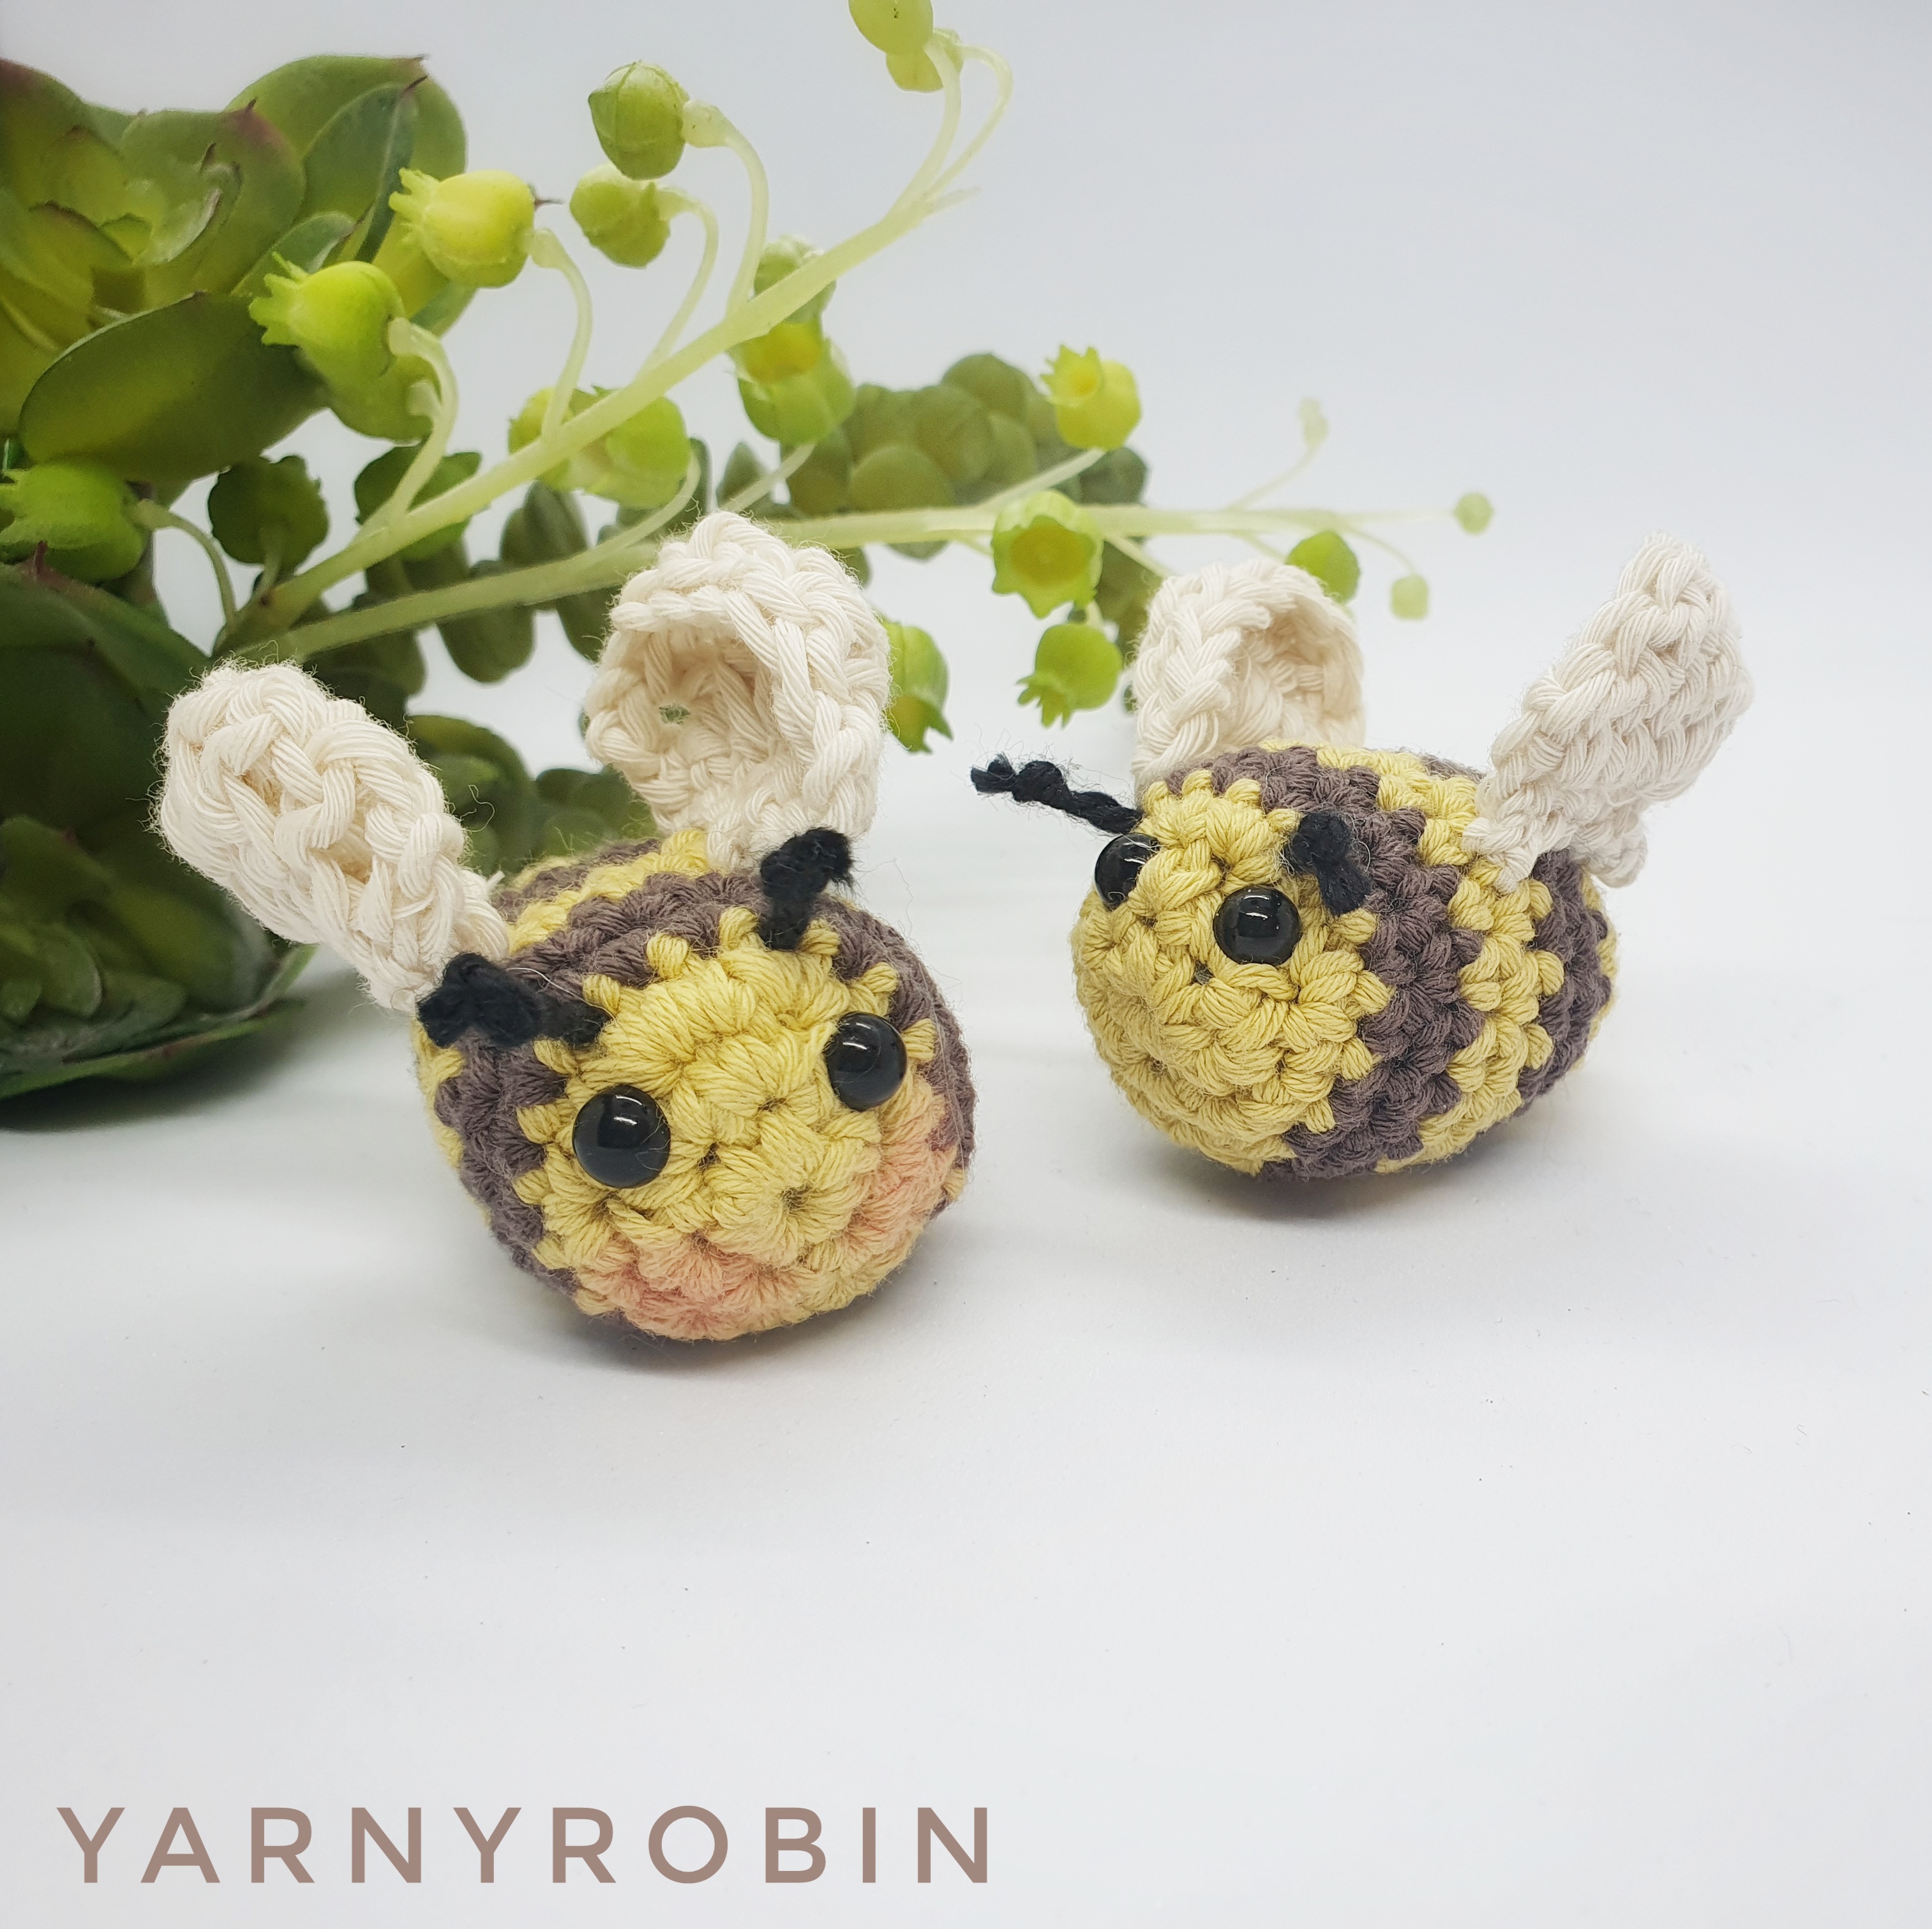
Crochet bag charm patterns
Small crochet items are often the quiet heroes of a market stall.
They’re affordable, easy to gift, and perfect for shoppers who want “just one little thing” — which often turns into two or three.
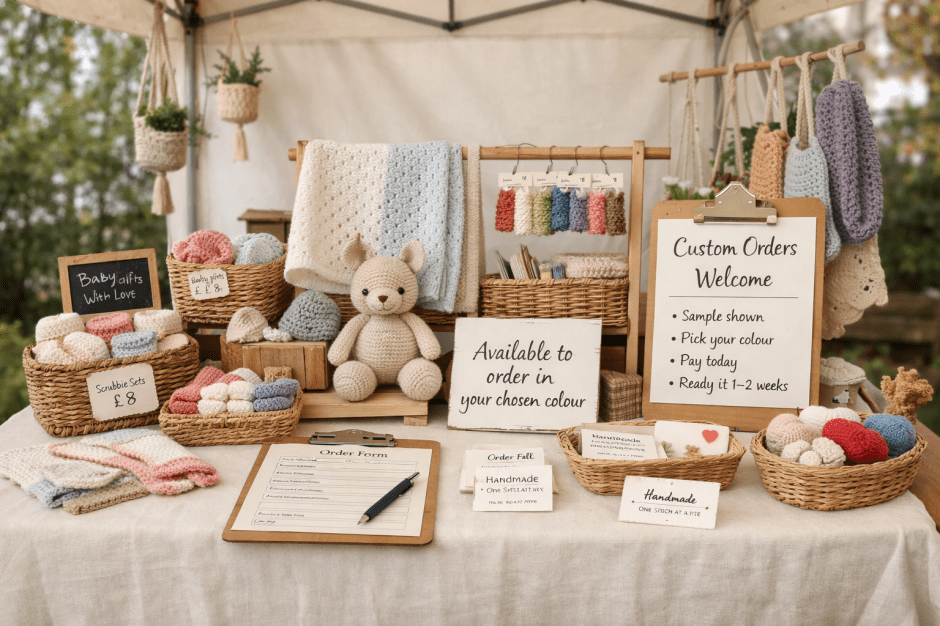
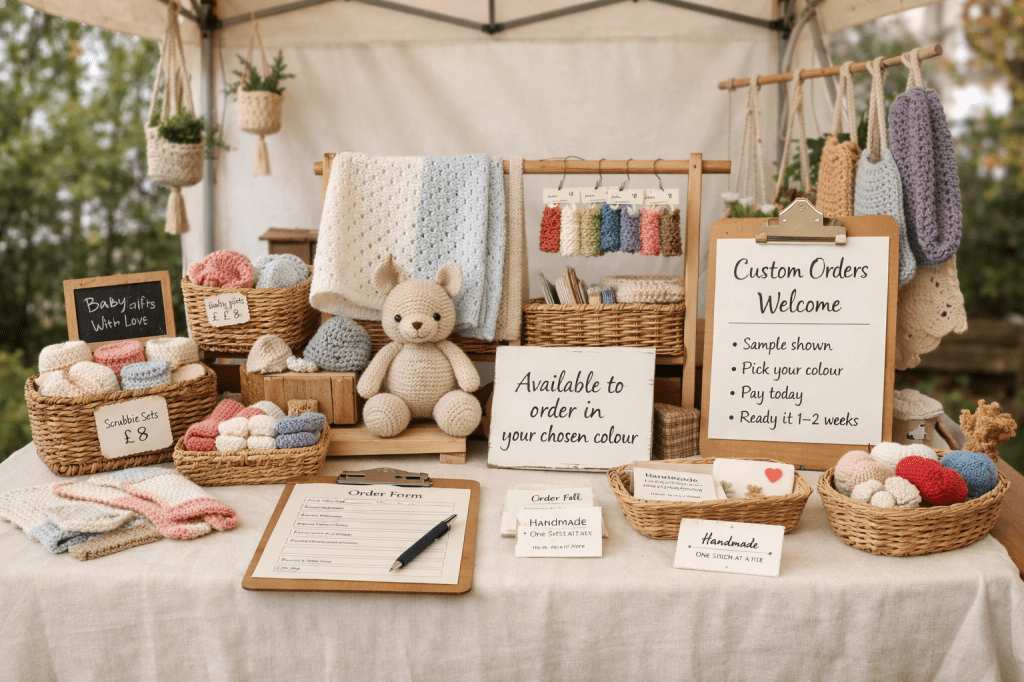
Using Sample Pieces to Take Orders (Without Overloading Your Stock)
crochet market stall
One of the smartest ways to prepare for a spring craft market is to use sample pieces and take orders, rather than trying to pre-make every size or colour.
Instead of filling your table with multiples, you can display:
One finished sample
Clear colour options (small swatches or photos)
A sign stating that the item is made to order
This approach works especially well for:
Baby blankets
Cardigans or jumpers
Larger plushies
Home décor items in custom colours
Take payment at the time of order
Taking full payment when the order is placed keeps things clear and professional for both you and the customer. It confirms commitment, avoids awkward follow-ups, and ensures you’re not left out of pocket for yarn or time.
Be clear about:
What the customer is ordering
Their chosen colour or variation
Your estimated turnaround time
Get you FREE Market Prep Mini Pack below and stay professional and organised on the day
Screenshot
Decide how orders will be delivered
Before the market, decide how you’ll deliver finished orders and make this clear at the point of sale.
Common options include:
Postal delivery (build postage into the price or charge separately)
Local collection if appropriate
If offering local collection, always put personal safety first. Choose public, well-lit locations, bring someone with you where possible, and never feel pressured to share private details. It’s absolutely fine to limit collections or offer postal delivery only.
A simple sign such as “Sample shown — available to order in your chosen colour” reassures shoppers. It opens the conversation naturally.
Pricing Crochet Fairly at Spring Craft Markets
Crochet takes time, skill, and physical effort — and it deserves to be priced accordingly.
While it can be tempting to lower prices to “compete,” consistently under-pricing handmade work benefits no one. Fair pricing protects your time, your body, and the long-term sustainability of your craft.
Rather than focusing on being cheap, focus on being well-made, intentional, and clearly valued.
A more realistic pricing framework (UK)
These are starting points, not limits — and your prices should always reflect your materials, time, and experience.
Small crochet items (hair accessories, keyrings): £6–£10
Bundled gift sets (2–3 coordinated items): £12–£25
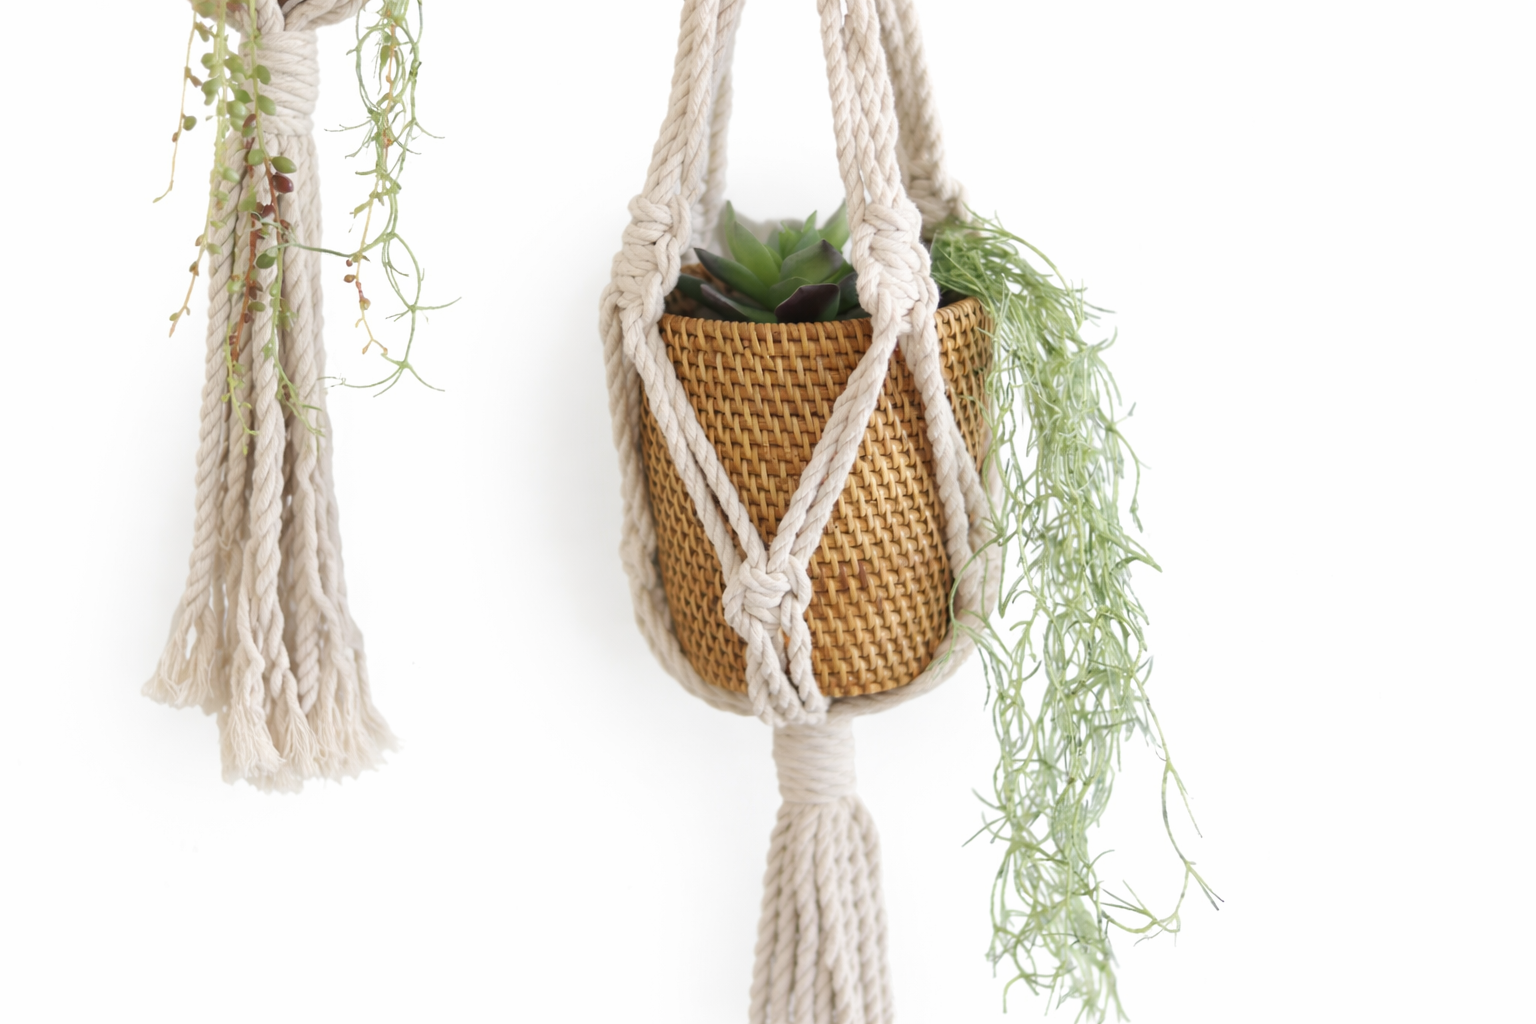
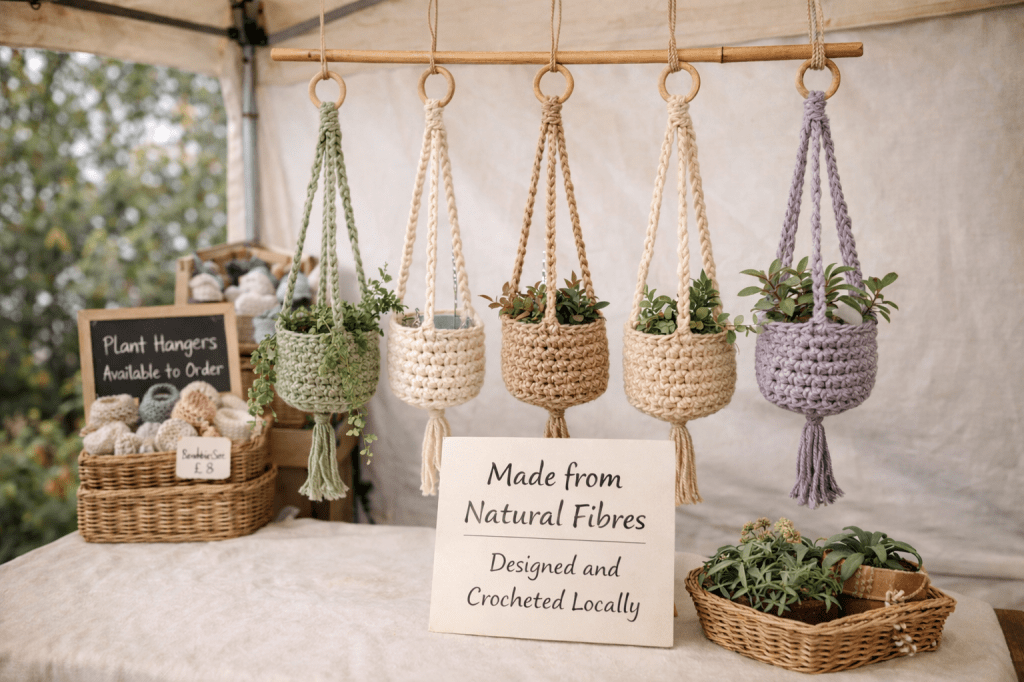
Home décor & accessories (plant hangers, coasters, baskets): £18–£40
Wearables & made-to-order pieces: £25–£60+
If those numbers feel uncomfortable at first, that’s often a sign we’ve been conditioned to underprice. It doesn’t mean they’re unreasonable.
Why higher pricing often works better
Shoppers at craft markets expect to pay more for handmade
Fewer sales at a fair price can be better than many sales at burnout prices
Clear pricing signals confidence and professionalism
Your work stands out as considered, not rushed
A Gentle but Important Word on Pricing & Experience
If you’re a newer crocheter, it’s completely normal for your work to still be finding its rhythm. Your tension may be uneven. Amigurumi stitches might be a little holey. Or, baskets may not yet hold their shape as intended. We’ve all been there.
That doesn’t mean you shouldn’t sell your work. However, it does mean pricing realistically. Set prices that are appropriate for your current skill level.
Pricing beginner-level pieces at the same price as highly refined, professional-quality crochet can lead to disappointment. Customers may feel let down, and you could experience frustration. Craft market shoppers may not have the technical language for what they’re noticing. However, they can usually sense differences in finish. They can also detect variations in structure and polish.
Being realistic protects everyone involved.
If you’re just starting out:
Price accessibly while you build confidence and consistency
Choose simpler designs that showcase neatness rather than complexity
Treat markets as valuable experience, not just income
As your skills grow — and they will — your pricing should grow with you.
Equally important: Don’t let being a beginner stop you from taking part. Selling your work, receiving feedback, and building confidence are all part of becoming a skilled maker. Every experienced crocheter started exactly where you are now. The goal isn’t perfection — it’s progress, honesty, and pride in what you’re offering.
Help customers understand the value (without over-explaining)
Simple cues make a big difference:
“Handmade using natural fibres”
“Designed and crocheted locally”
“Made slowly and with care”
These statements quietly reinforce value without apology.
Important reminder: You are not pricing for everyone. You are pricing for the customer who values handmade, thoughtful work — and those customers do exist.
Stocking Tips for Spring Markets
Stock smarter
Focus on variety rather than volume
Repeat your top three sellers
Use samples to test higher-value items without over-committing
Seasonal pieces, such as Easter makes, are best produced in limited quantities. Having a few special items creates interest. This avoids the risk of leftover stock that’s hard to resell later. A calm, well-curated table almost always outperforms an overcrowded one.
Final Thoughts: Keep It Enjoyable
Spring craft markets should feel exciting, not exhausting.
Choose crochet items that:
You enjoy making
You can repeat comfortably
Fit your time, energy, and schedule
Simple, well-made crochet always finds the right home — especially when it’s made with care.
If you’re preparing for spring markets this year, I hope this guide helps you feel confident, organised, and inspired. If you’re planning spring markets, you might like to save this post on Pinterest. That way, it’s easy to come back to when you’re preparing your stock.
This post includes affiliate links. If you choose to purchase through them, I earn a small commission at no extra cost to you, which helps support my blog.
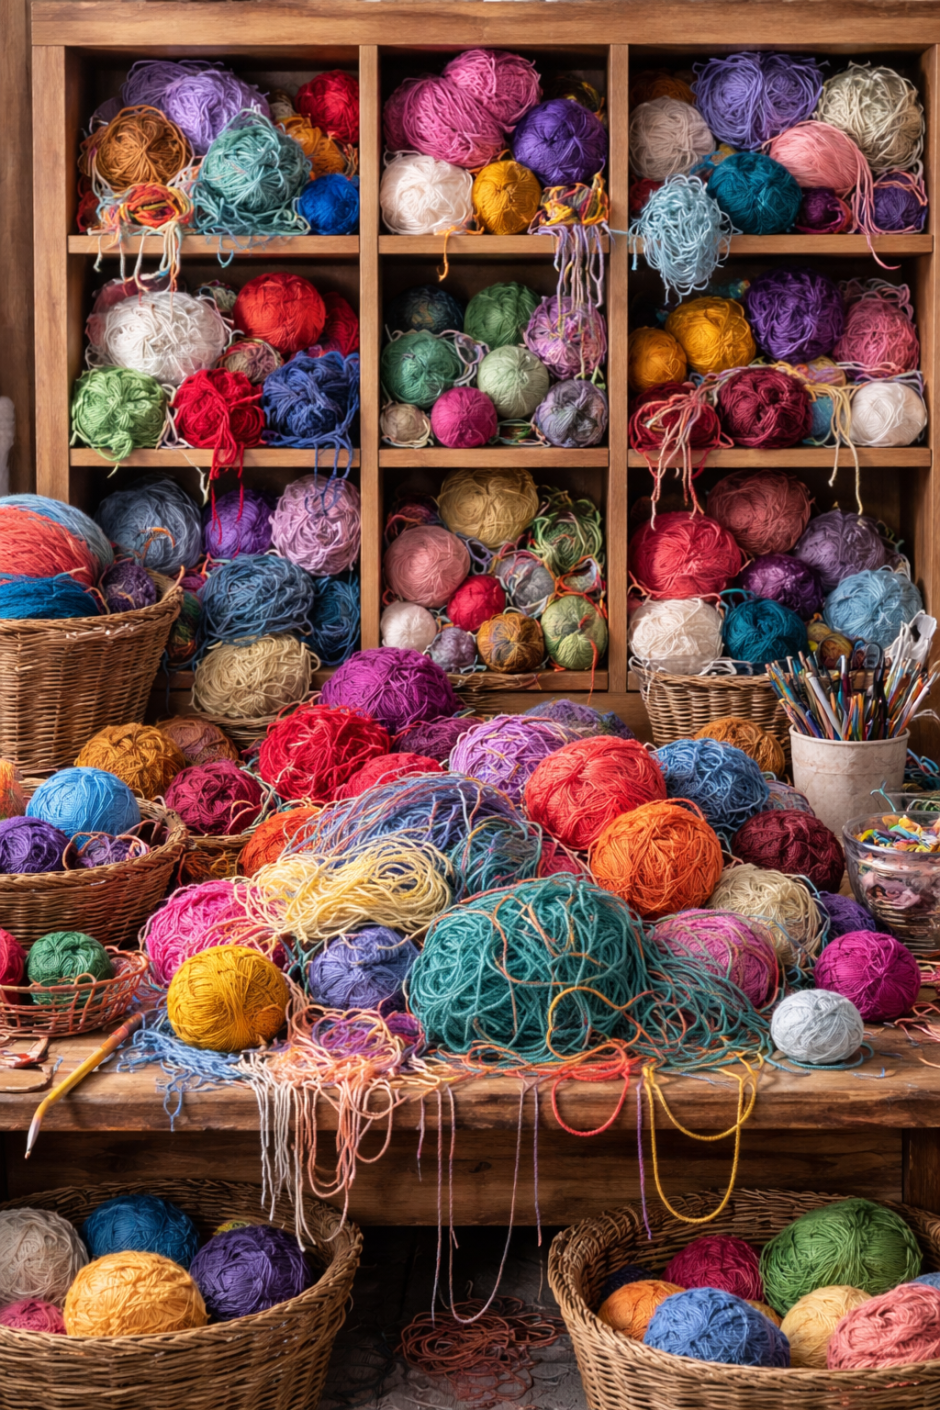
If your yarn stash has slowly (or suddenly) taken over cupboards, baskets, drawers and possibly the dining room table… you’re not alone. Most crocheters don’t set out to create chaos — it just happens one skein at a time!
The good news? You don’t need a full craft room or expensive storage to get your yarn under control. You just need a system that works for how you actually crochet.
If your yarn stash feels overwhelming, I’ve created a free printable Yarn Stash Tidy Checklist to help. You’ll find the link further down in this post.
Here are practical, realistic ways to keep your yarn stash tidy — without over-organising the joy right out of it.
1. Sort First, Store Second (This Is the Game Changer)
Before buying storage, take everything out and sort your yarn into simple groups:
By fibre (acrylic, cotton, wool, blends)
By weight (DK, aran, chunky, etc.)
By project (active WIPs vs “one day” yarn)
This step alone often cuts visual clutter in half.
Top Tip
Keep your current project yarn in a dedicated project bag or basket to make it easy to pick up and put down without losing momentum.
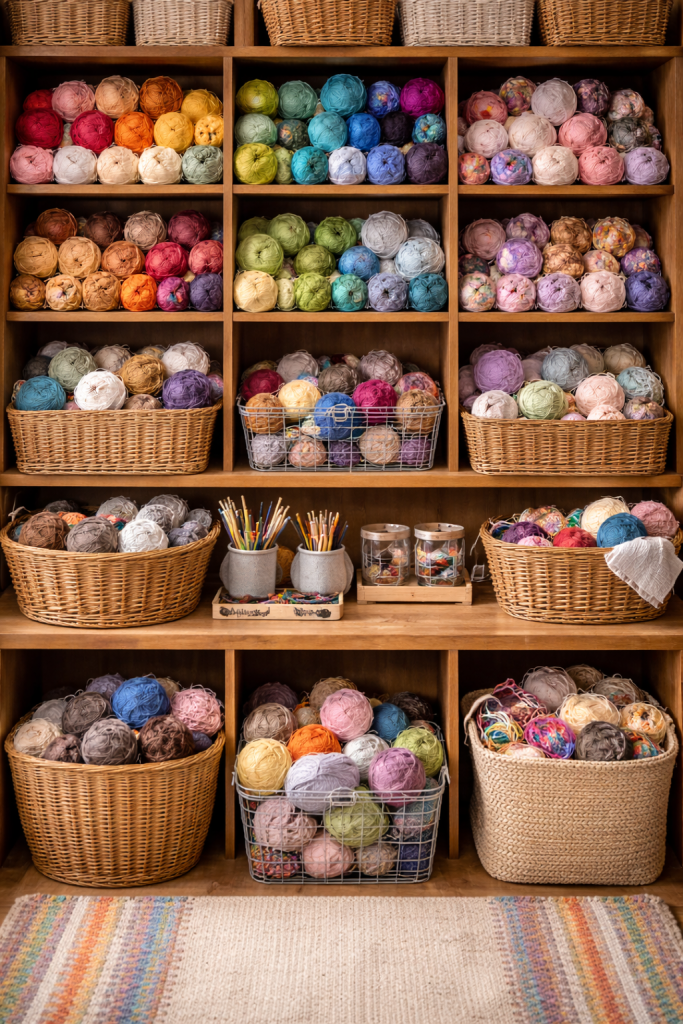
2. Use Clear Storage So You Can See What You Own
Out of sight = forgotten yarn.
Clear boxes, open baskets, or shelving lets you see colours and quantities at a glance — which helps prevent buying duplicates (because we’ve all done that!).
Look for:
Stackable clear boxes
Open-front storage cubes
Breathable baskets for natural fibres
3. Store Yarn by How You Use It (Not How Social Media Says)
Instead of “pretty” systems, choose functional ones:
Colour lovers: store by colour family
Pattern makers: store by weight
Gift crocheters: store by project type (baby, blankets, toys)
There’s no wrong way — the right way is the one that makes you want to crochet
4. Keep Yarn Labels (Future You Will Thank You)
Yarn without a label is mystery yarn.
Simple solutions:
Slip labels into the centre of the skein
Store labels in a small envelope or pouch
Take a quick photo of the yarn + label
This is especially helpful where you may want to re-order the same yarn later.
5. Create a “Yarn In / Yarn Out” Rule
To stop stash creep:
Try to finish one project before starting another
Match new yarn purchases to a planned project
Do a quick stash check before shopping
This doesn’t mean no new yarn — just more intentional yarn.
Yes, yarn shopping is still totally justifiable!
6. Protect Yarn From Dust, Pets & Sunlight
Keep yarn away from direct sunlight
Use lids or fabric covers if stored openly
Avoid damp areas (lofts and garages are risky)
Natural fibres especially benefit from breathable, enclosed storage.
A tidy stash is also a protected stash.
One of my favourite stash-tidying tricks is turning leftover yarn into the solution. Keep reading for more on this.
7. Do a Mini Stash Reset Every Season
Instead of one massive de-clutter, do a quick seasonal tidy:
Donate yarn you no longer love – do not let yarn guilt trip you!
Pull out yarn perfect for the season
Plan 1–2 projects using what you already have
This keeps your stash inspiring instead of overwhelming.
Top Tip
Use Your Stash to Make Storage (Yes, Really!)
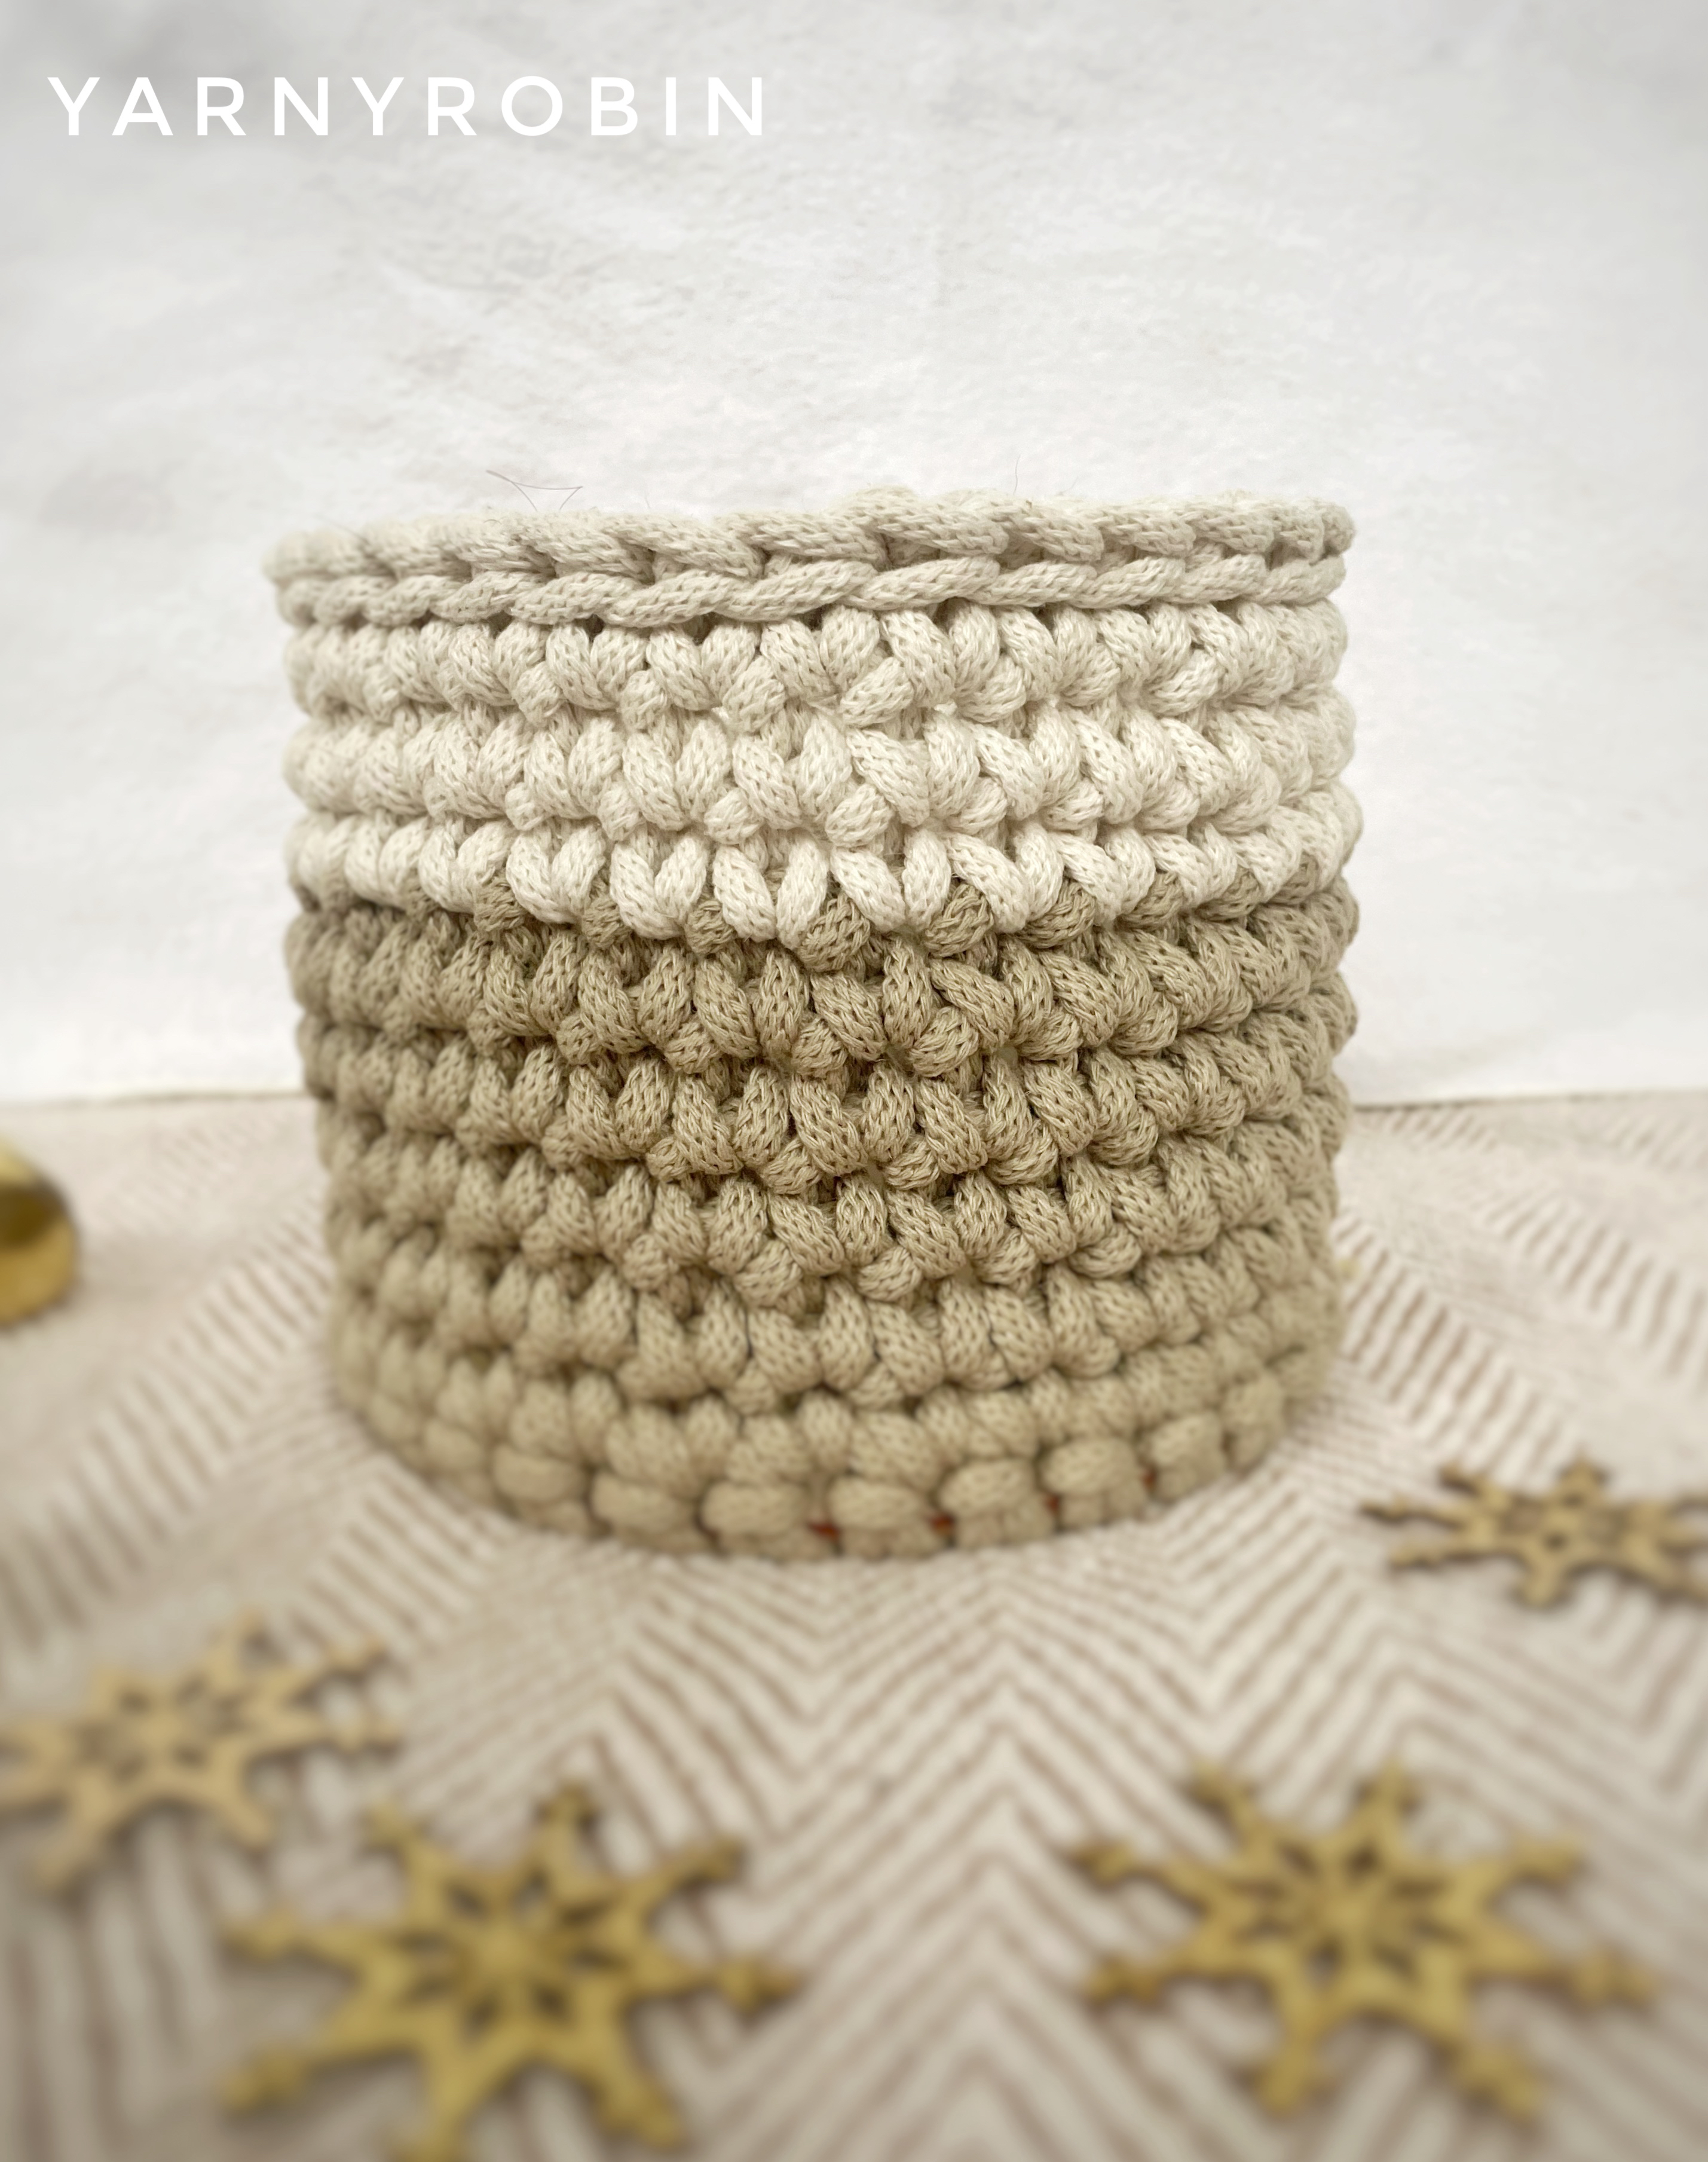
If you have partial balls or yarn you’re not quite sure what to do with, consider crocheting your own yarn storage baskets. Not only does this help reduce stash guilt, but it also creates practical storage that’s perfectly sized for your space.
Holding mini yarn balls and leftover yarn you’re not quite ready to let go of
Keeping smaller WIPs contained
Organising hooks, notions, and other crochet accessories
LoveCrafts also has a great selection of yarn storage patterns, including crochet baskets and project bags, designed specifically with crafters and yarn organisation in mind.
Using your yarn to make storage for your yarn might sound a little meta — but it’s incredibly satisfying and keeps everything feeling intentional rather than cluttered.
A Tidy Stash = More Crochet Joy
You don’t need perfection — you need ease.
When your yarn is tidy:
You start projects faster
You waste less money
You crochet more joyfully
And that’s the whole point, really.
Once your yarn stash feels calmer and more intentional, it’s often helpful to think about how you’ll keep that feeling going.
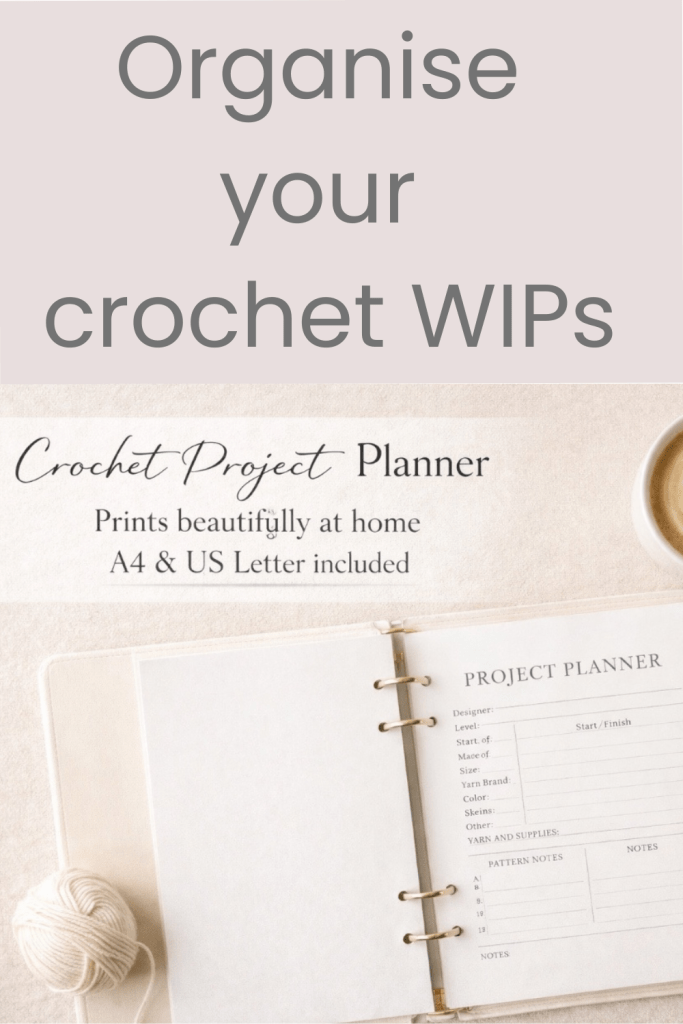
There’s a free Yarn Stash Tidy Checklist linked earlier in this post if you’d like something printable to work through alongside these tips — it pulls everything together into one simple place.And if, once your yarn feels calmer, you’d like a way to keep projects and ideas organised as you go, my Crochet Project Planner is there to support that next stage, helping turn tidy yarn into finished pieces.
If this post was helpful, feel free to pin it for later so you can come back to it when your yarn stash needs a little reset.
If you crochet regularly, chances are you have more than one project on the go. A half-finished blanket tucked into a basket, an amigurumi waiting for stuffing, a cardigan that only needs one sleeve… sound familiar?
Crochet is creative, calming, and deeply satisfying — but without a little organisation, it can also become overwhelming. That’s where a crochet project planner can make a real difference.
The hidden problem with unfinished projects
Most crocheters don’t abandon projects because they lose interest. They stop because:
Yarn details get forgotten
Hook sizes aren’t written down
Pattern notes are scattered across notebooks or phones
Life gets busy and projects lose momentum
A planner isn’t about being rigid or overly structured. It’s about gently supporting your creativity so you can actually enjoy the making process — and finish what you start.
What a crochet project planner helps you do
A good crochet planner brings everything together in one calm, intentional place. Instead of searching through notes or trying to remember what you did last time, you can sit down and pick up right where you left off.
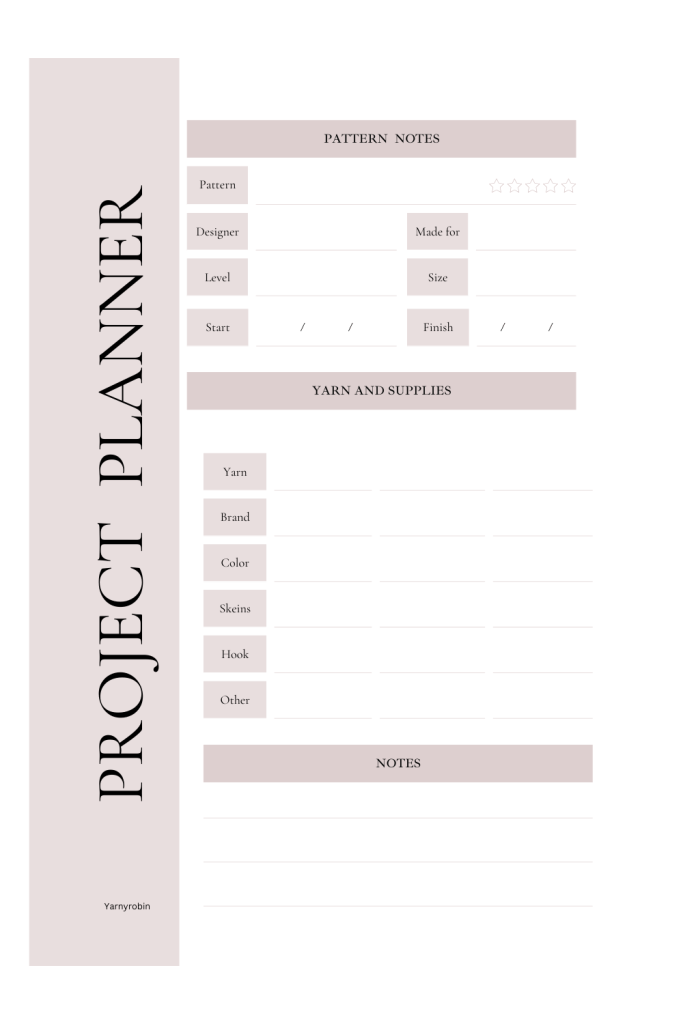
With dedicated project planning pages, you can:
Record pattern names, designers, and difficulty levels
Note yarn brands, colours, and quantities
Track hook sizes and gauge
Jot down adjustments, ideas, and reminders
This small habit saves time, reduces frustration, and keeps crochet relaxing rather than stressful.
Keeping track of WIPs without guilt
Work-in-progress projects (WIPs) are a natural part of crocheting. A planner doesn’t judge how many you have — it simply helps you keep track of them.
When each project has its own page, WIPs feel intentional instead of chaotic. You can see what’s active, what’s paused, and what’s ready to be finished when the mood strikes.
The value of built-in crochet reference pages
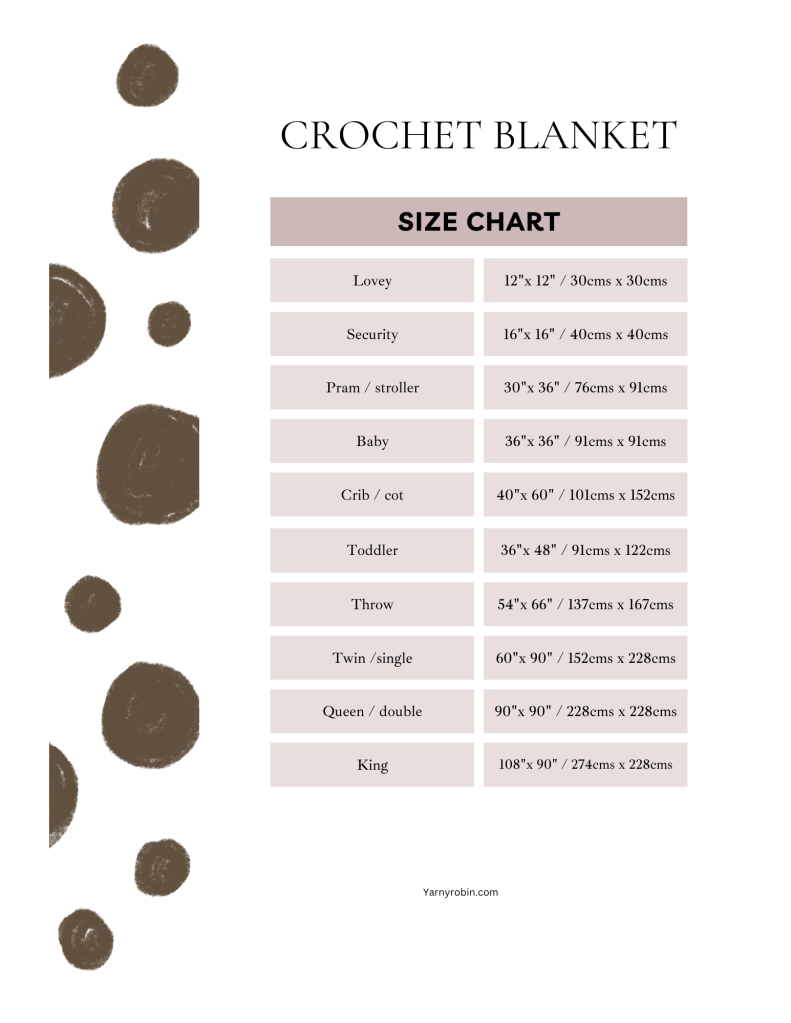
One of the most useful parts of a crochet planner is having reference information close at hand. Instead of opening multiple tabs or searching online mid-project, you can quickly check:
UK and US stitch conversions
Yarn weight and hook size guides
Standard blanket and hat sizes
Common crochet abbreviations and slang
Having these pages printed and nearby keeps your creative flow uninterrupted.
Why printables work so well for crocheters
Printable planners are flexible and practical. You can:
Print only the pages you need
Reprint favourites as often as you like
Use them in a binder, folder, or clipboard
Adjust your setup as your projects change
Whether you prefer a minimal system or a cosy, creative workspace, a printable planner adapts to you.
Crochet should feel calm, not chaotic
At its heart, crochet is about slowing down and making something with your hands. A project planner doesn’t take away from that — it supports it.
By keeping your projects organised, your ideas clear, and your notes in one place, you give yourself permission to enjoy crochet fully, without the mental clutter.
If you’ve ever felt overwhelmed by unfinished projects or forgotten details, a crochet project planner might be the gentle tool you didn’t know you needed.
Happy hooking
Ready to Get Organised?
If you’re looking for a calm, practical way to keep your crochet projects organised, my Printable Crochet Project Planner is designed to gently support your making. It will do so without pressure or overwhelm.
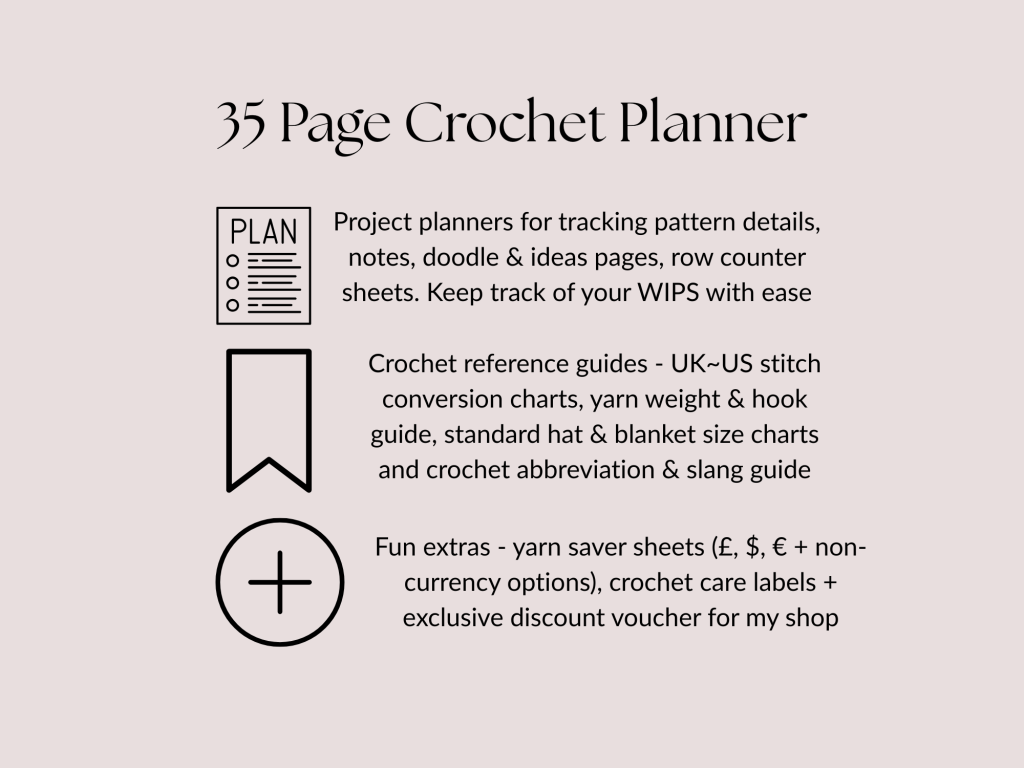
It includes project planning pages, notes and ideas sheets, crochet reference charts, all in a soft, cosy aesthetic. I have included some bonus printable crochet care labels to help you level up your gifting. There are also some fun savings sheets to help you buy more yarn! You can print only the pages you need and reuse them as often as you like.
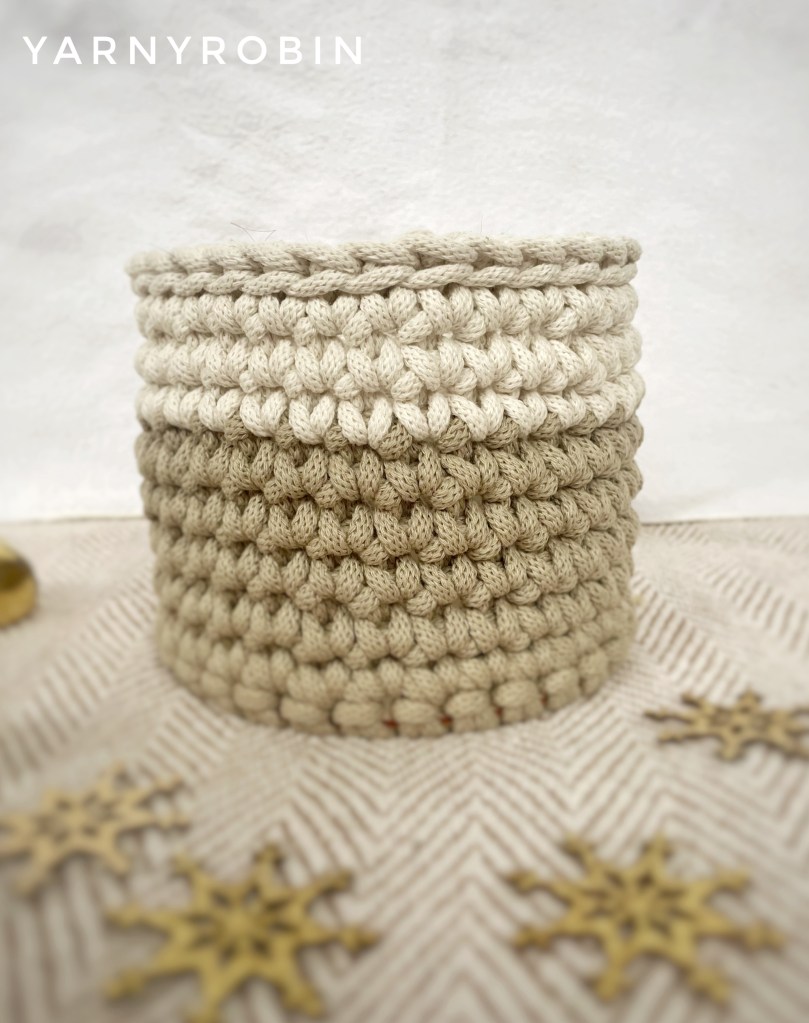
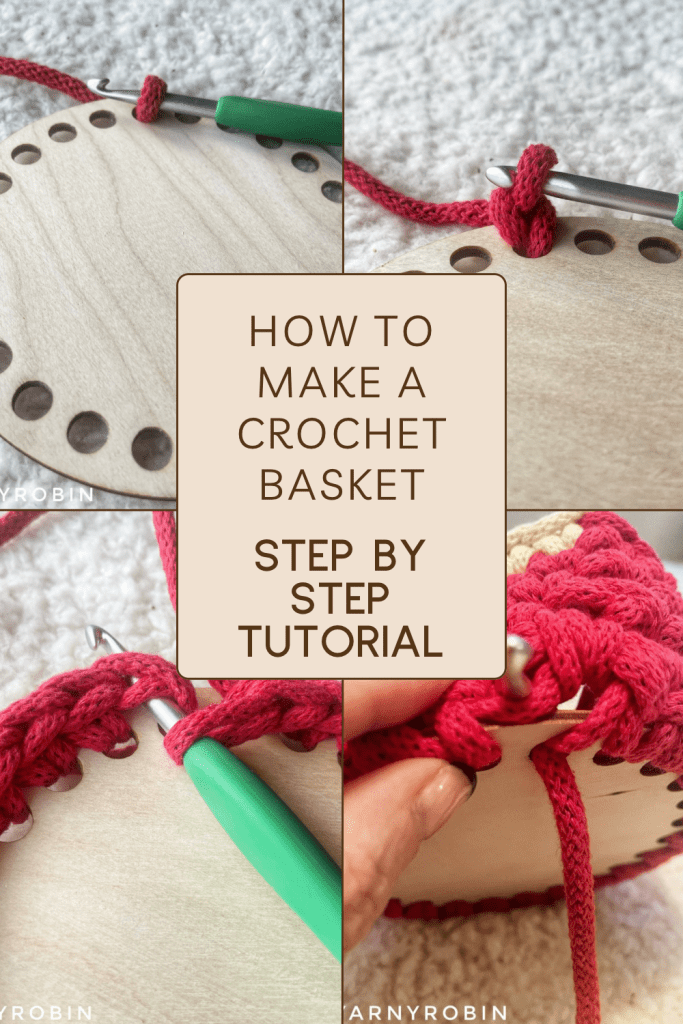
With Christmas fast approaching I wanted to share with you a fabulous and practical step by step tutorial, perfect for this festive season (or for any other time of the year!). These handy baskets can be used to gift or store festive chocolates or just add a little seasonal decor around the home.
These baskets are super versatile. You can swap the colours to suit your own style and add whatever decorations you choose, here I have chosen to add a sweet wooden snowflake, but ribbons, bows and bells would look just as good. The best bit about these baskets is the wooden base.
The wooden base makes this a super quick make and means the basket has a great shape and is sturdy…all good elements for a useful basket to have. You will find bases in all sorts of shapes and sizes on lots of different shopping sites. I got mine from Etsy, as I like to support small business owners when I can. Take a look here to get started
I would just like to talk about your choice of yarn or cord for a moment also. I purchased several versions before I settled on one I was happy with. Some were too splitty, or dull, or just didn’t crochet well. I highly recommend using this 5mm braided recycled cotton cord because it is economical, comes in a great colour range and is easy to work with.
Pattern notes
The pattern that follows can be adapted to any size or shape base. The pattern uses English crochet terminology, but you can find US crochet terminology in brackets just below.
I strongly advise that you mark the 1st chain 1 of each round with a stitch marker. Repeats are marked by *
What you will need
5mm braided cotton cord in colour of your choice
wooden base(s)
scissors
hooks – see below
stitch marker
decorations of your choice – bows / bells / small tree ornaments
Stitches used
DC – double crochet ( SC – single crochet)
slst – slip stitch
Ch – chain stitch
Dc: Insert hook into chain or under both loops of stitch, yarn over and pull through so there are 2 loops on hook, yarn over again and pull through both loops on hook.
Hooks used
5mm and 8mm
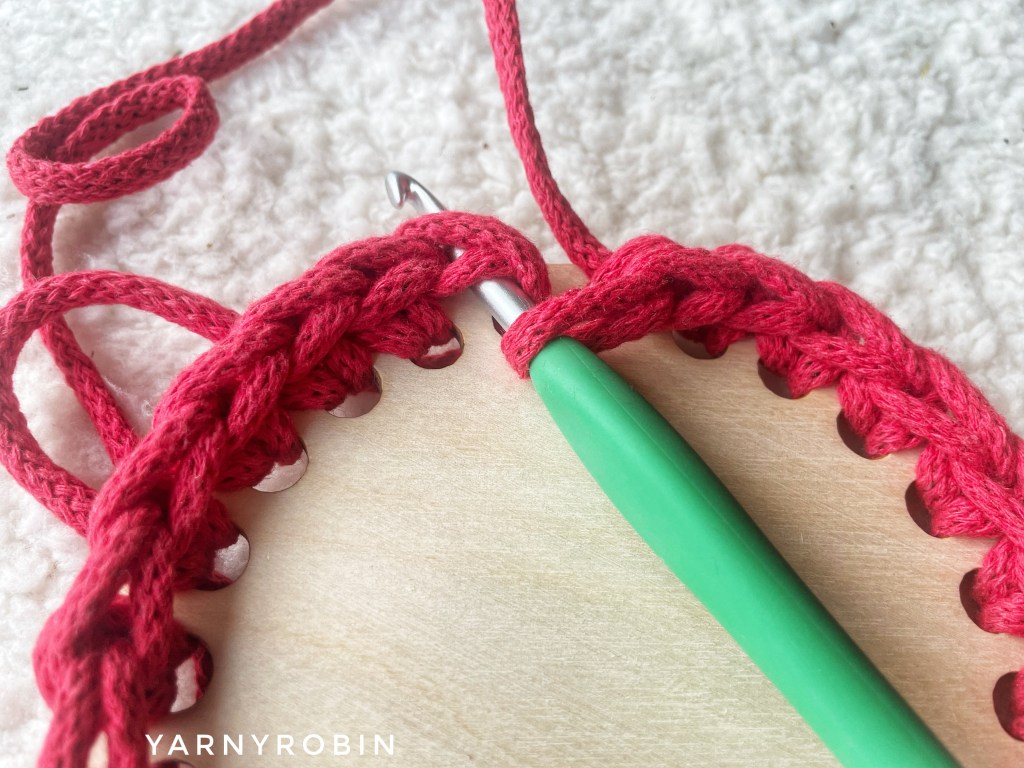
To start
Start by holding cord underneath the base. Using smaller hook pull up a loop through the first hole in the base.
Yarn over and pull through loop on your hook.
*Pull up next loop from the underside of base through next hole and complete DC* Repeat around base to last hole. Slst in 1st st.
Now turn work so outside of the basket is facing you.
Round 2: Using larger hook. Ch1 (counts as a st) place marker. DC in next stitch and in each st around.
Round 3: ch 1, continue to place DC in each st for desired height of basket, placing marker in ch1 of each round. Change colours as desired.
eg/ large basket pictured had a base with 37 holes / 17cm diameter. I completed rounds 1 – 8 in candy red and rounds 9 – 11 in natural. Final round in natural also. My basket measures 14cms tall.
Final round: Do not ch1, slst in each st around. Fasten off.
With smaller hook weave in loose ends. Weave starting tail at base so that it fills in the gap.
Now decorate your basket as desired.
Next steps
If you have enjoyed this pattern you can help support what I do by
• Pin the image below for later on your Pinterest board
Spring is upon us, although I’m bracing for the Spring showers, which seem to have started early here! Whether you’re looking for a quick Easter make, for that last minute gift or Easter basket filler, I’ve got some patterns to tempt you…and most of them are FREE… Hurrah!
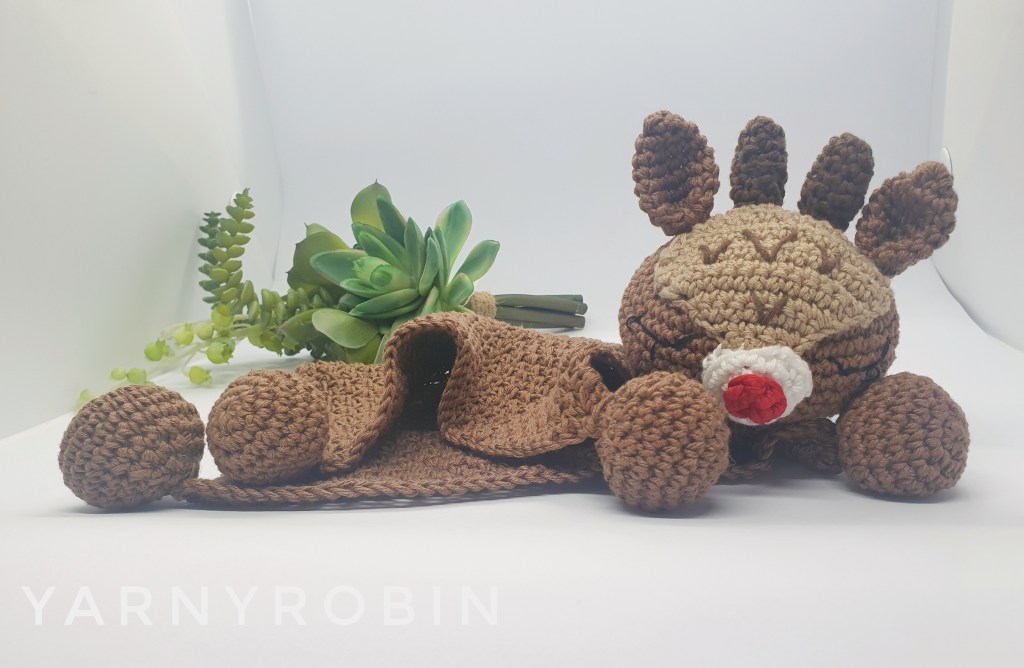
How about this as a sweet Easter basket filler for baby. Using Oeko Tex standard 100 approved 100% cotton in a 4ply; these lovey’s are soft to snuggle and safe to chew on…and are sure to become baby’s best friend.
This luxurious set of reusable soft textured facecloths and squishy scrubbies would make the perfect Easter gift for baby, Mom’s-to-be, or just that special girl in your life. They are quick and easy to make, so are perfect to add that handmade touch to gift baskets.
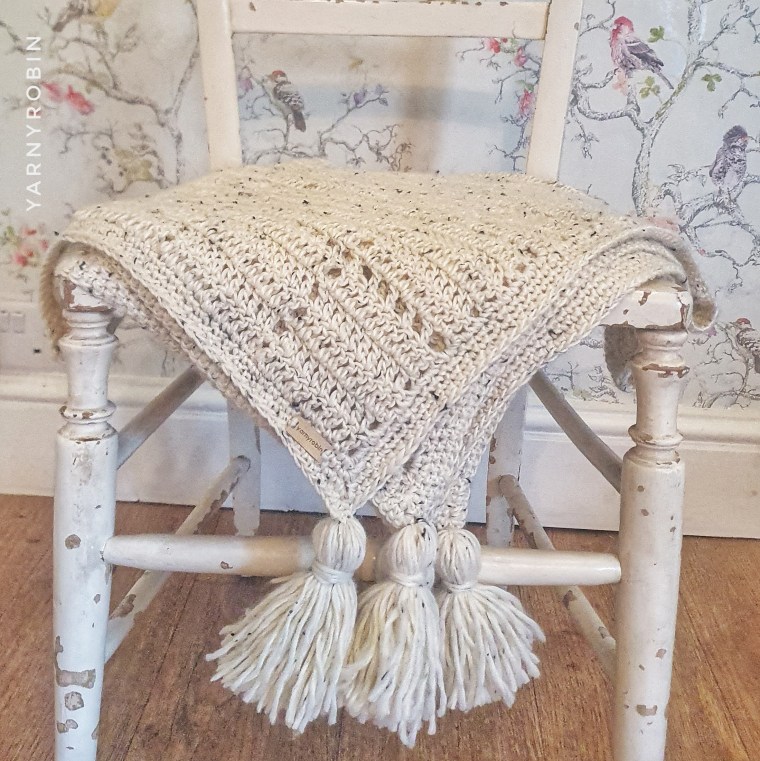
Why not hook this beautiful baby blanket, ideal for the spring / summer. A beginner’s introduction to filet crochet, the pattern is free and gives instructions on how to size up for a bigger blanket too!
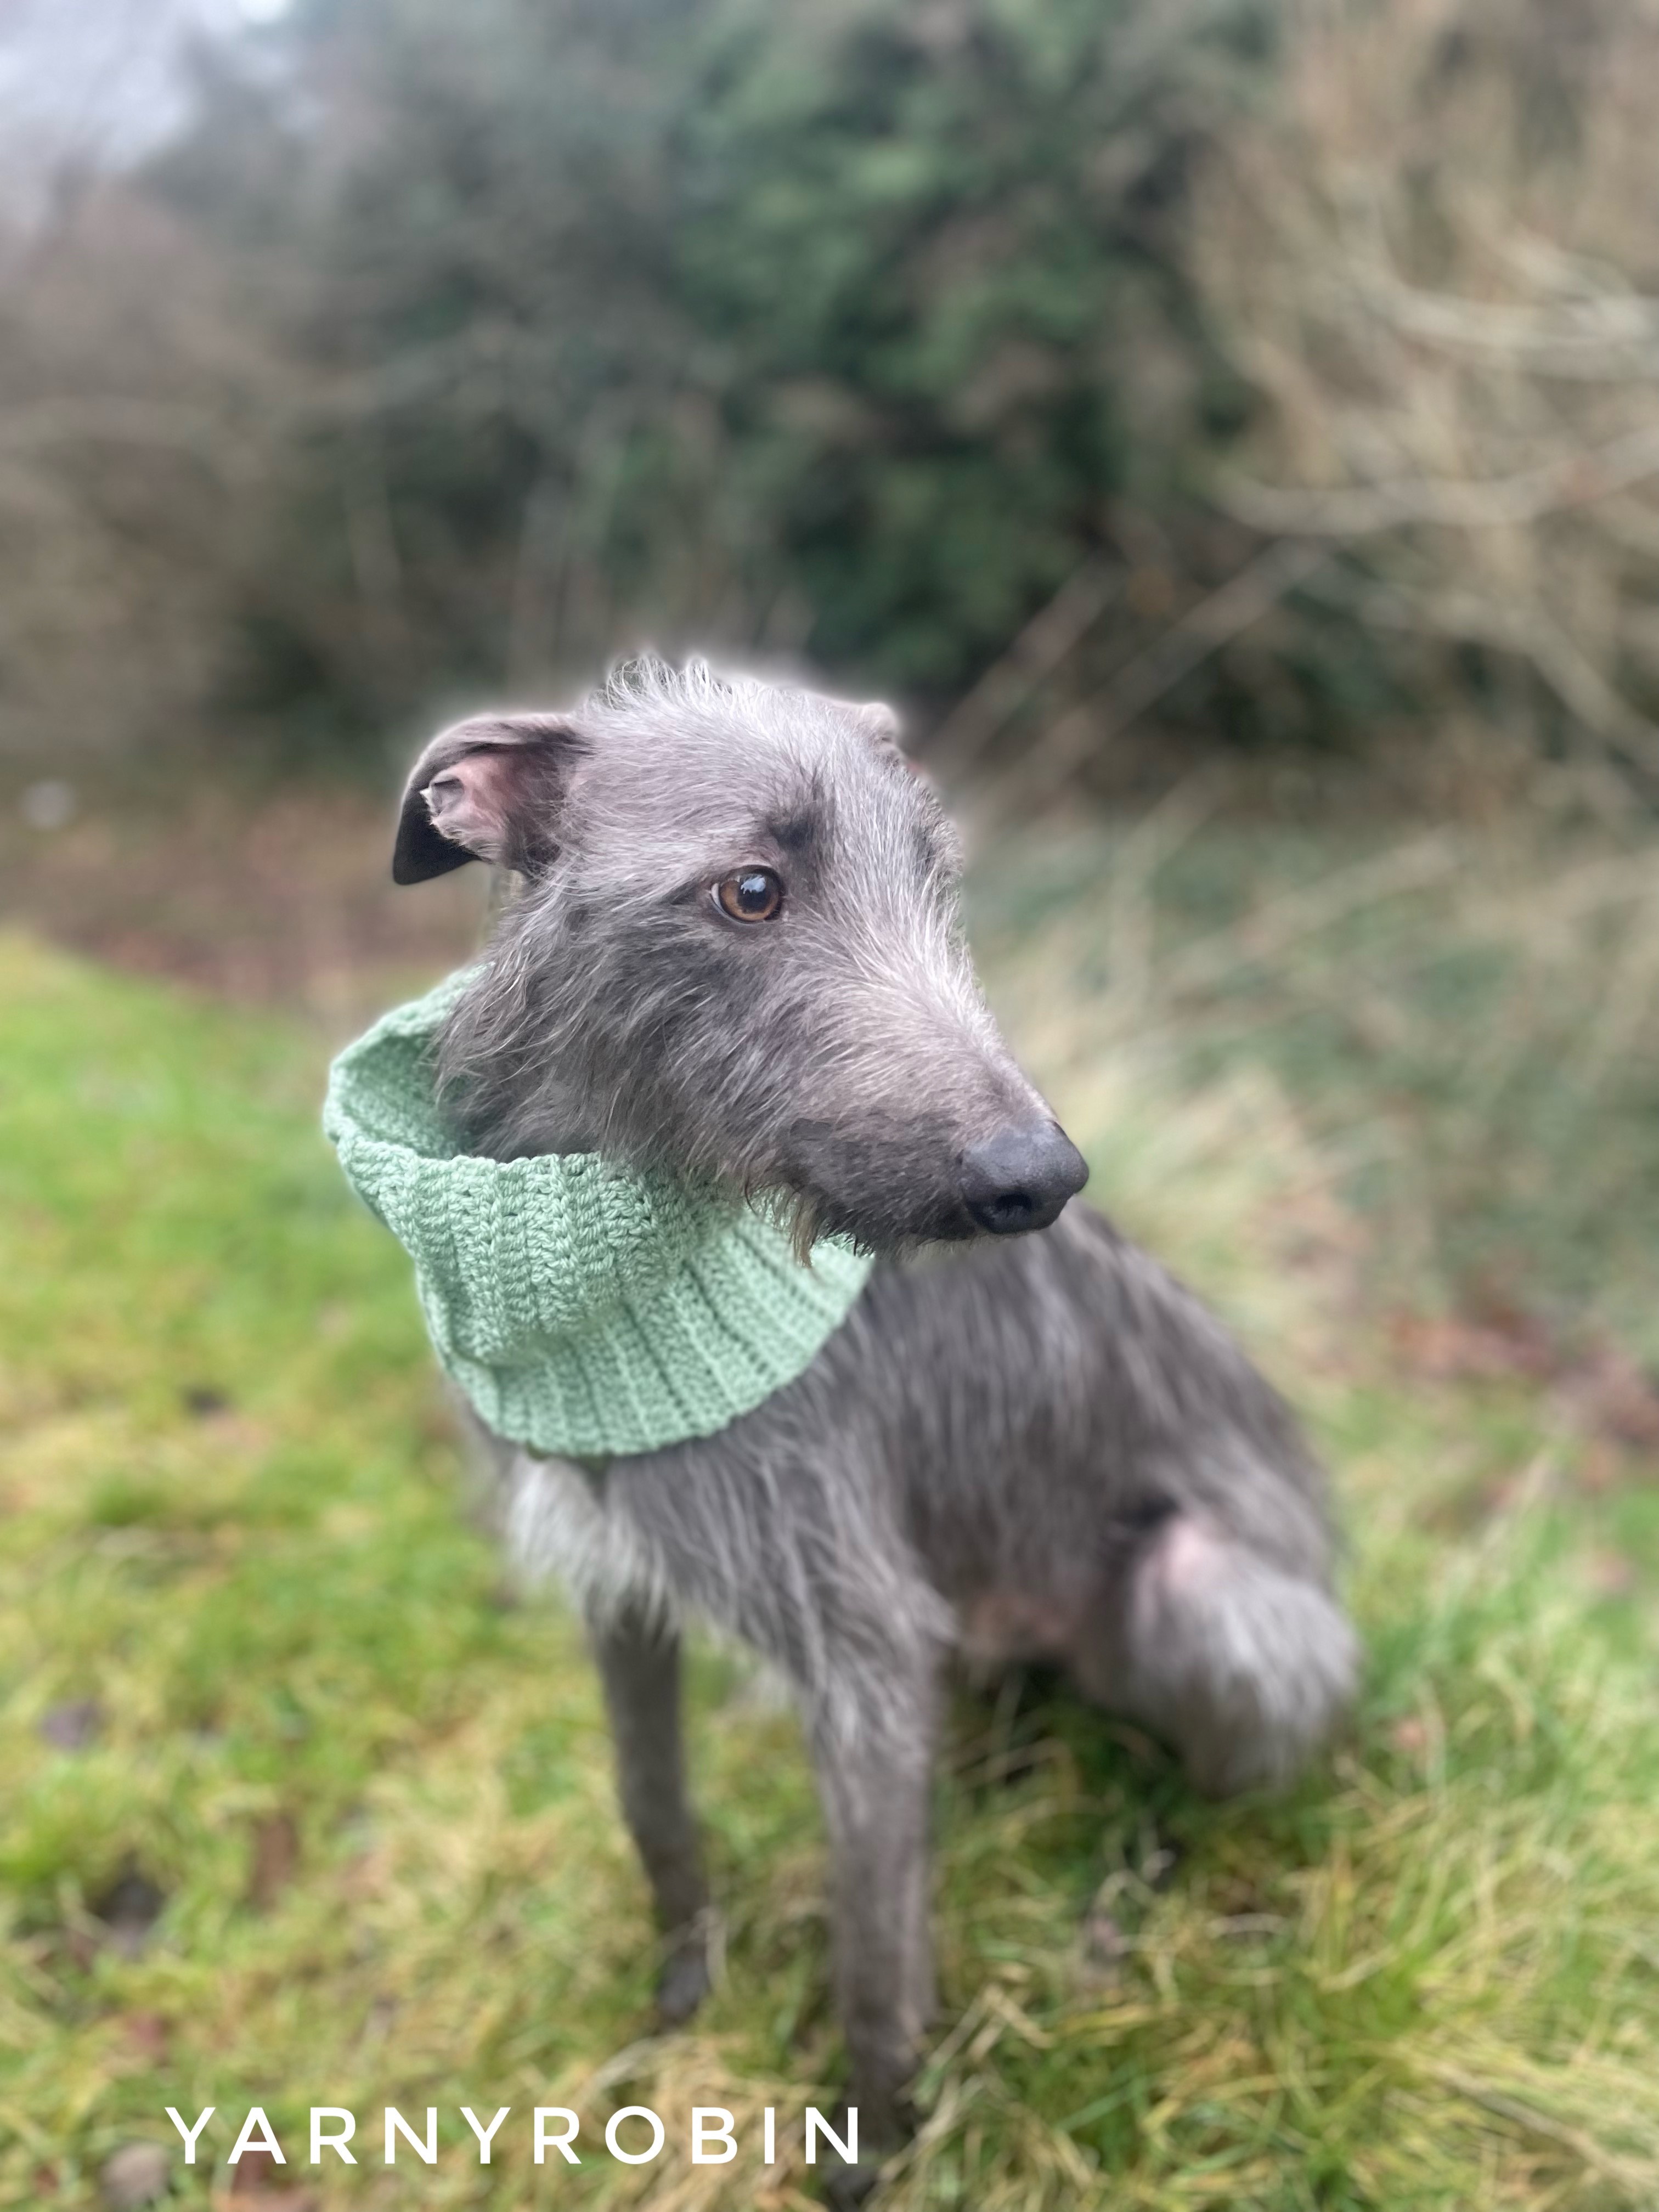
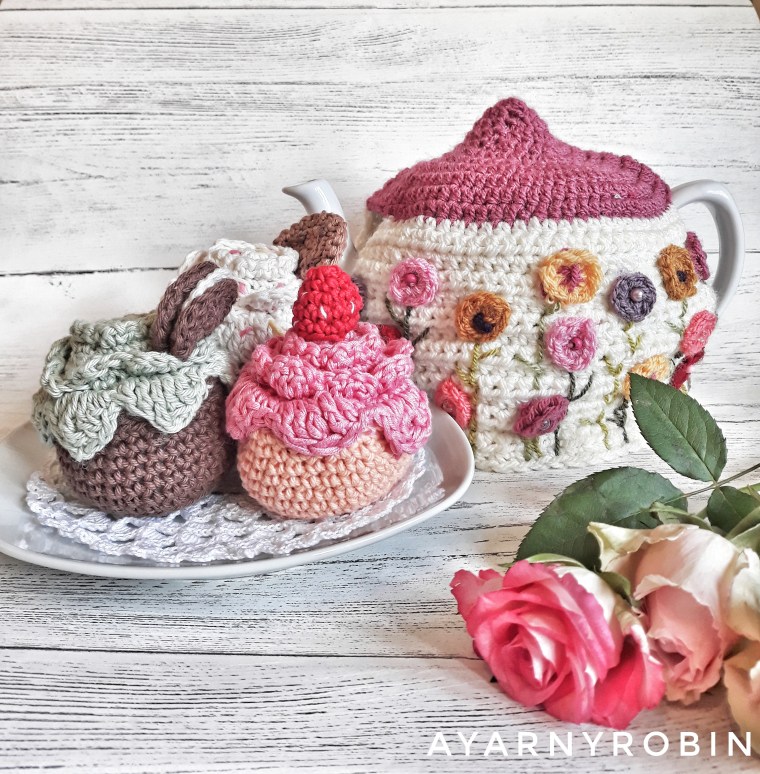
The simplicity and sweetness of this beautiful Spring tea cosy, makes it quick to make. Suitable for a beginner with a little experience of working in the round, this tea cosy is sure to keep your Easter cup of tea as warm as your freshly toasted hot cross bun!
Don’t forget to pop over to my socials to say hi…I would love to see what’s on your hook. @yarnyrobin
Happy Hooking!
Processing…
Success! You're on the list.
Whoops! There was an error and we couldn't process your subscription. Please reload the page and try again.
Master the Craft: Crochet Hexagon Made Easy is your ultimate guide to creating beautiful, vintage crochet motifs. Whether you’re a seasoned pro or just starting out, this comprehensive video tutorial is your step by step guide to help you crochet the perfect hexagon.
So, what are you waiting for? Start your crochet hexagon journey right here!
If your stuck for any last minute homemade gifts, I’ve got you! There’s 15% off all patterns in my Etsy shop until Christmas Eve and there’s lots of Christmassy patterns that can be made in an evening, so don’t sweat it! Just use code JINGLEBELLS at the checkout!
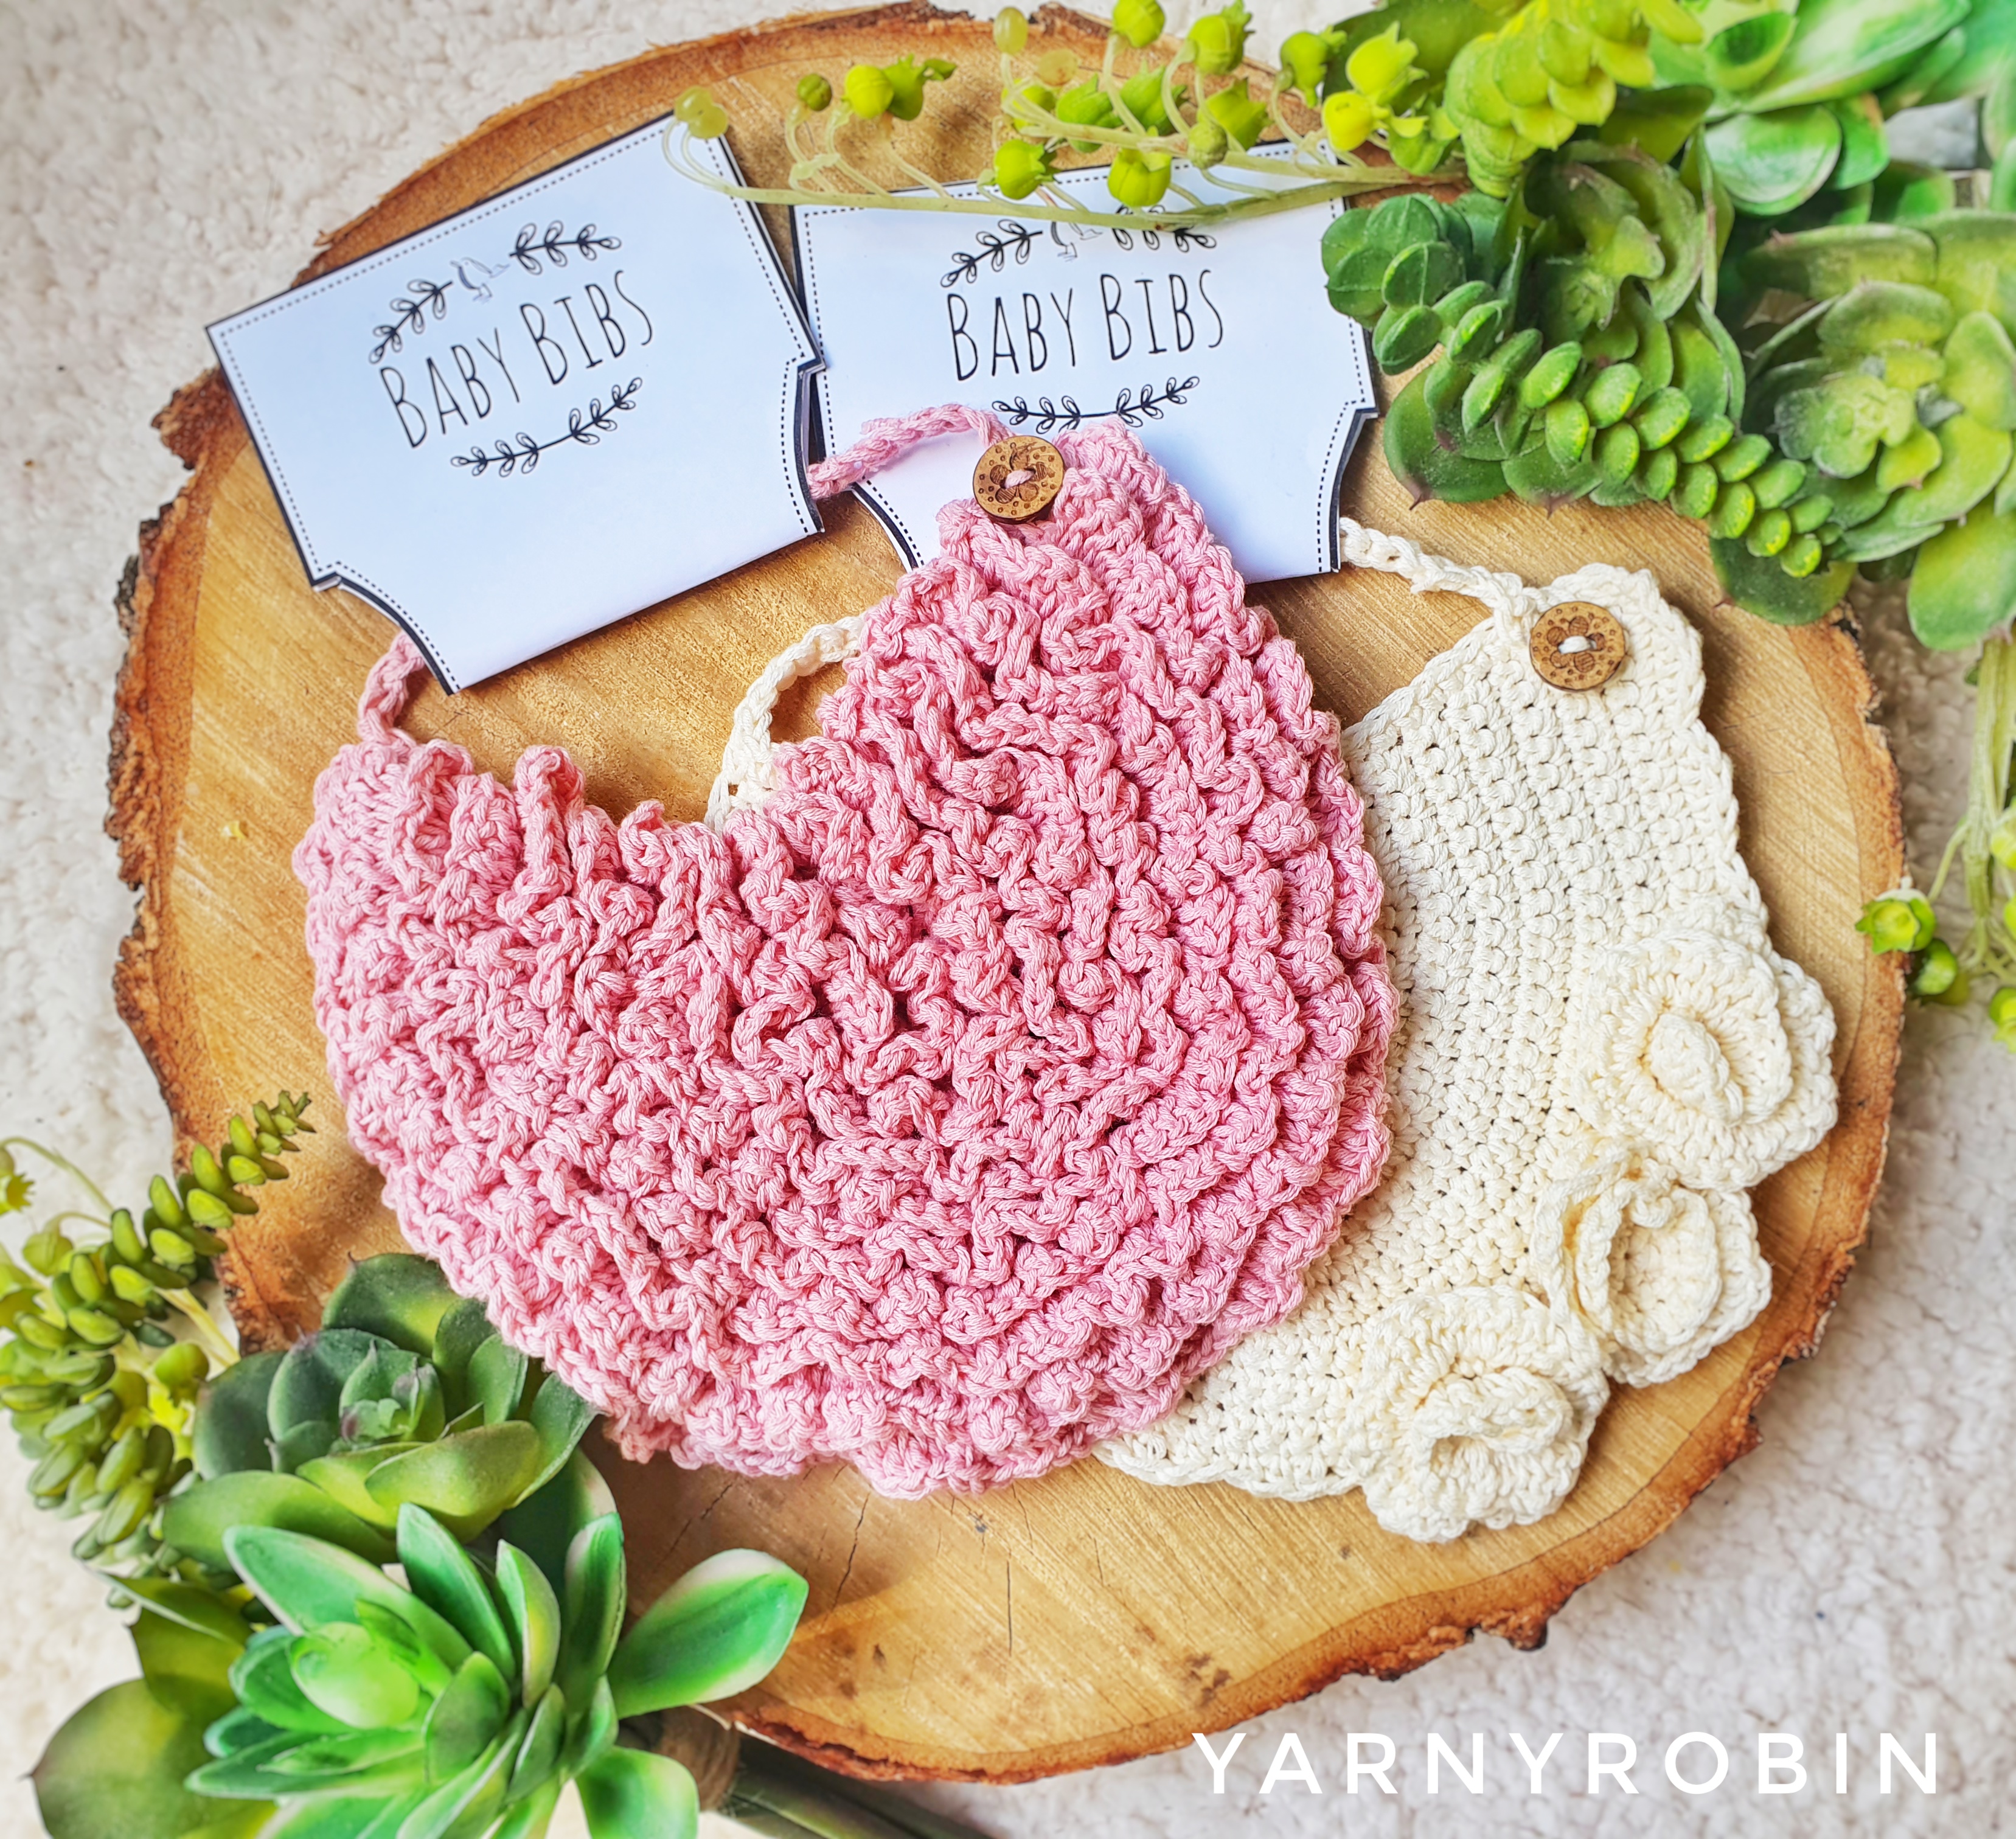
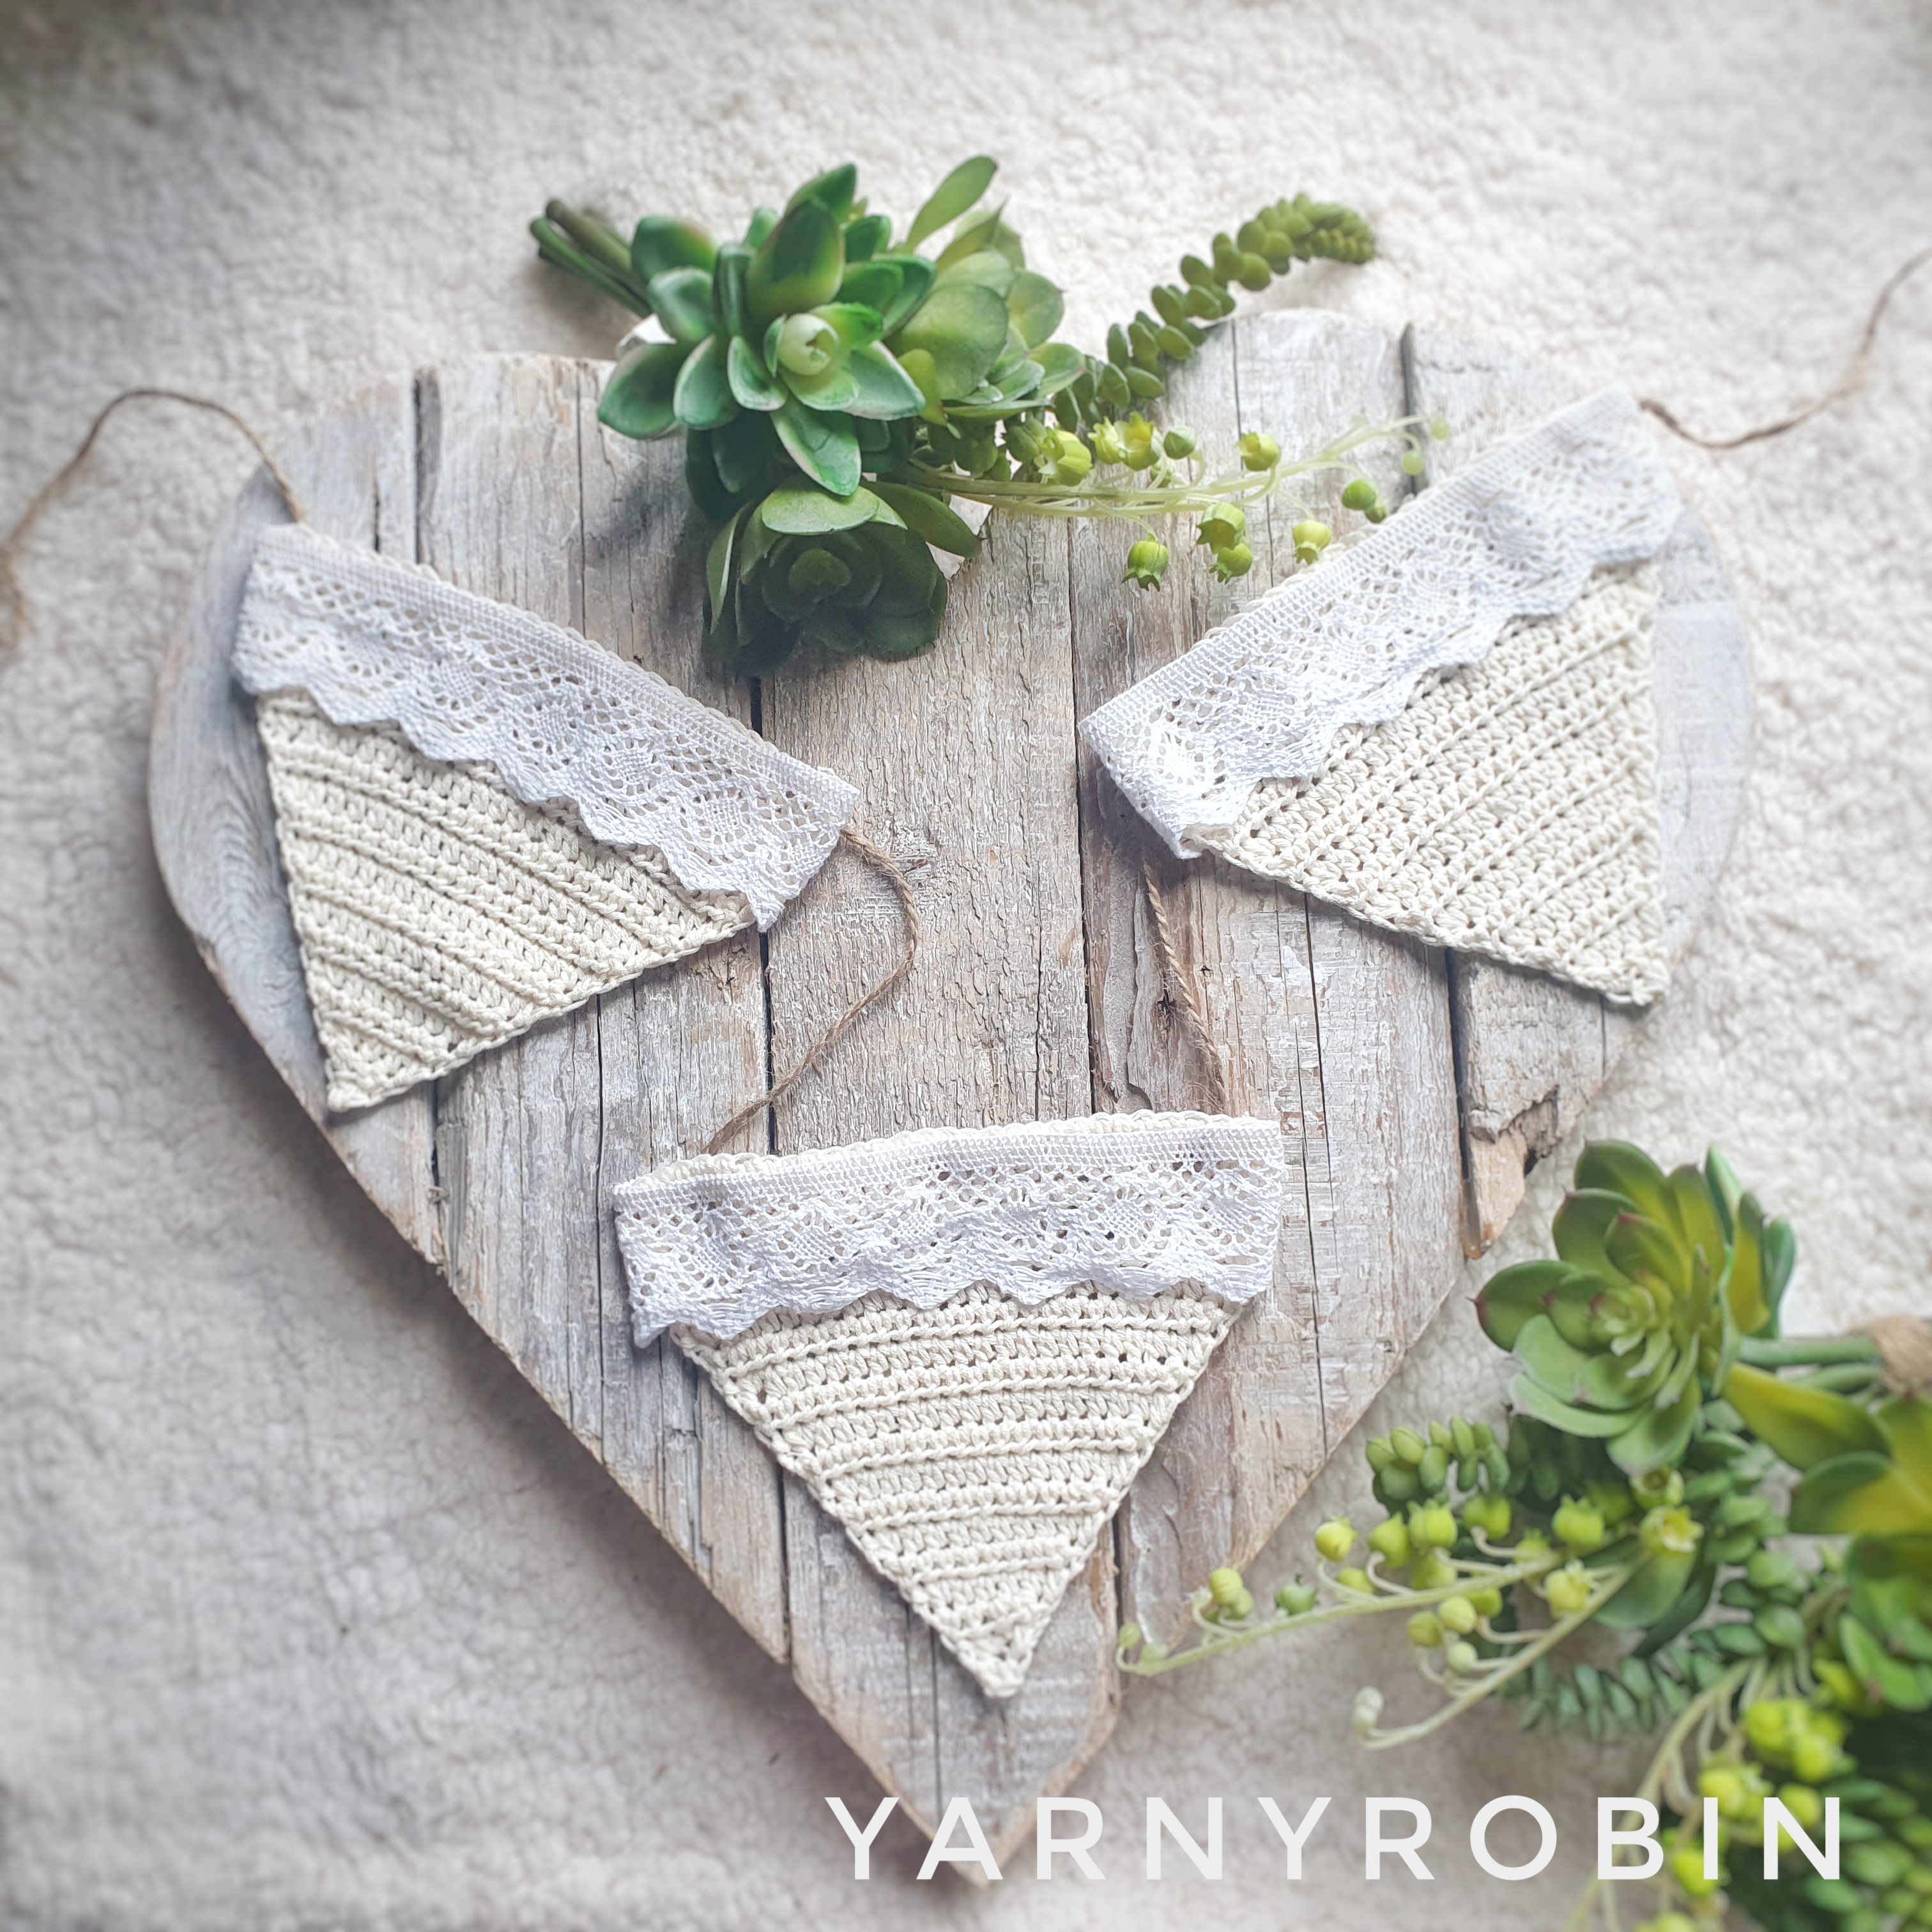
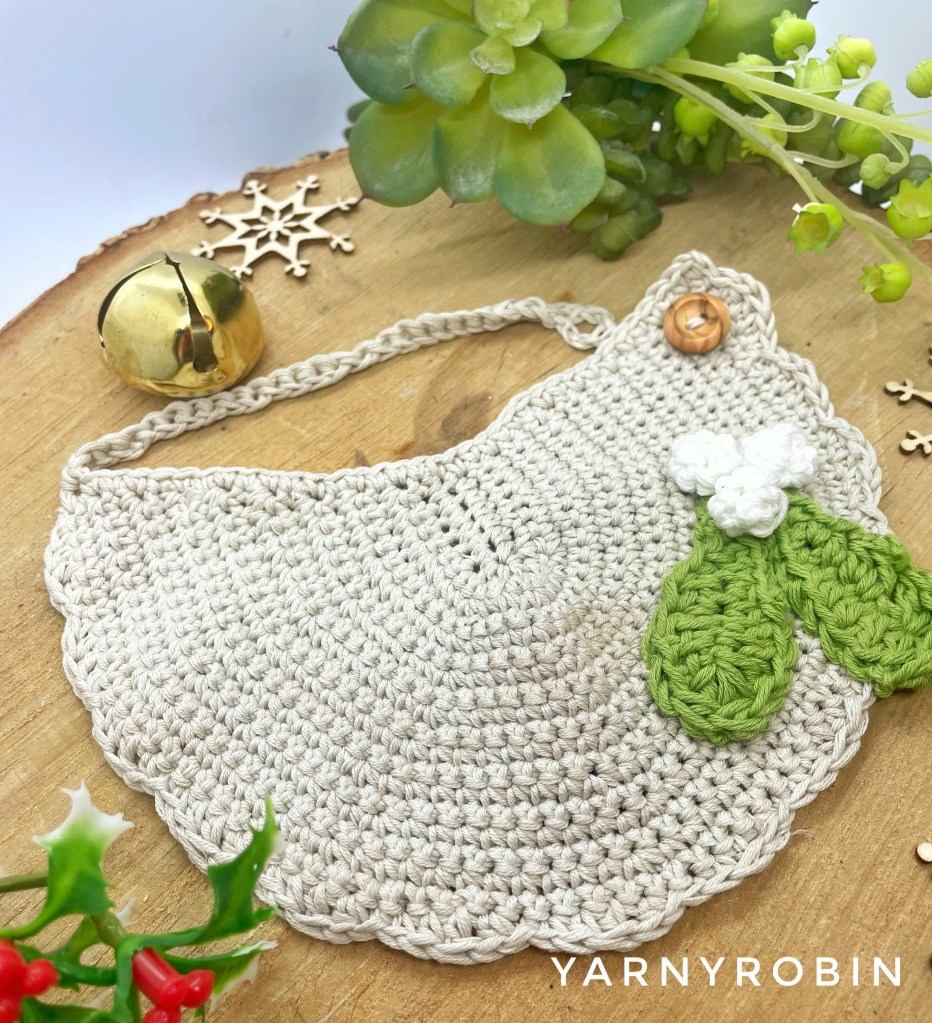
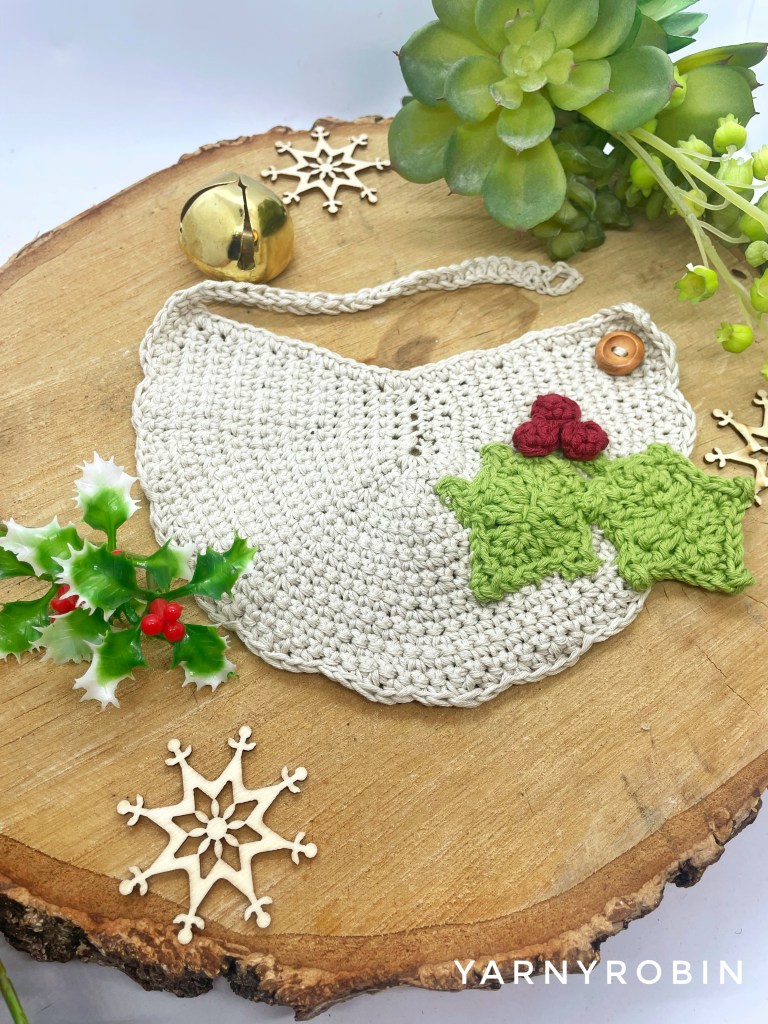
They are just the sweetest festive accessory for a little one this Season; with a pretty scalloped edge and whimsical festive foliage. These bibs are not only perfect for Christmas photo’s they are practical too. Made from 100% cotton, these bibs are super absorbent making them ideal for dribblers!
I have really enjoyed designing this bib set and I hope that you love them just as much as I do. The pattern is available for download in both UK and US crochet terminology, so there is no need for any pesky converting and is suitable for intermediate crochet with each bib using less than 50g of Cotton.
I have used DMC Natura Just Cotton which is a 4 ply yarn as I just adored the colour range they offered and felt the colours gave the vintage vibe I was hoping for. Not only is this cotton absorbent, but it is Oeko Tex standard 100 approved; which means the cotton has been certified to be free of harmful chemicals and is safe for human use, as well as being verified as both safe and non irritating to human skin. This element of the design was very important to me as baby will most likely chew on the bib, so this certification gives me peace of mind.
I think these bibs would make ideal festive themed baby gifts or stocking fillers and what’s more you can easily make a bib in an evening, so if you are a last minute gifted these bibs are ideal.
Why not couple them with my FREE teething ring pattern to make the perfect festive handmade gift for that special little someone in your life.
If you like this post, please leave me a like and comment below as this is a great way to support me and don’t forget to tag me in your makes using
If you are anything like me you will have a crochet to-do list as long as your arm and with Christmas fast approaching you will probably have had several thoughts of what to hand make and gift this December. I can remember more than several occasions, sitting up into the small, wee hours desperately hooking and that deadline looming and it kind of stole the joy.
With that in mind I have put together my top 10 best tips for keeping your crafting time and gifting this Season, super organised and efficient and most importantly stress-free! Leaving you feeling in control and calm in the festive run-up and bossing the hand-made gifting, leaving you plenty of time to enjoy the festivities.
What’s more I have put together a FREE editable 10 page Christmas Crochet organiser, so you can keep track of your progress and pattern notes and conquer your hand-made gifting this year. Simply sign up to get your Christmas Crochet Organiser delivered straight to your inbox (offer available until 30th November 2023) Already subscribed? Then check your inbox now (please check your spam folder if you cannot find your email)
Processing…
Success! You're on the list.
Whoops! There was an error and we couldn't process your subscription. Please reload the page and try again.
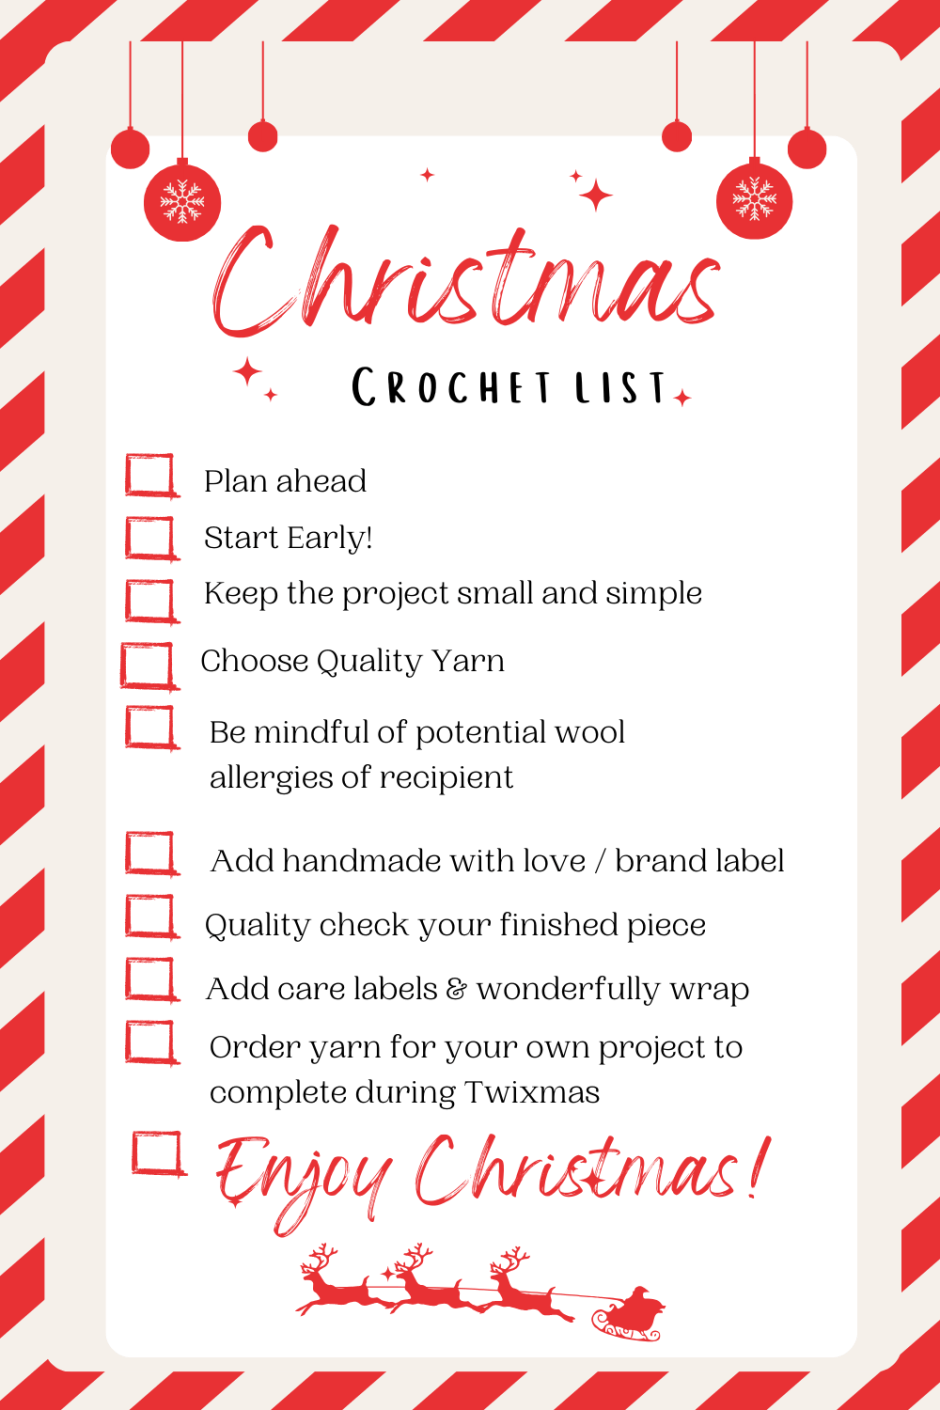
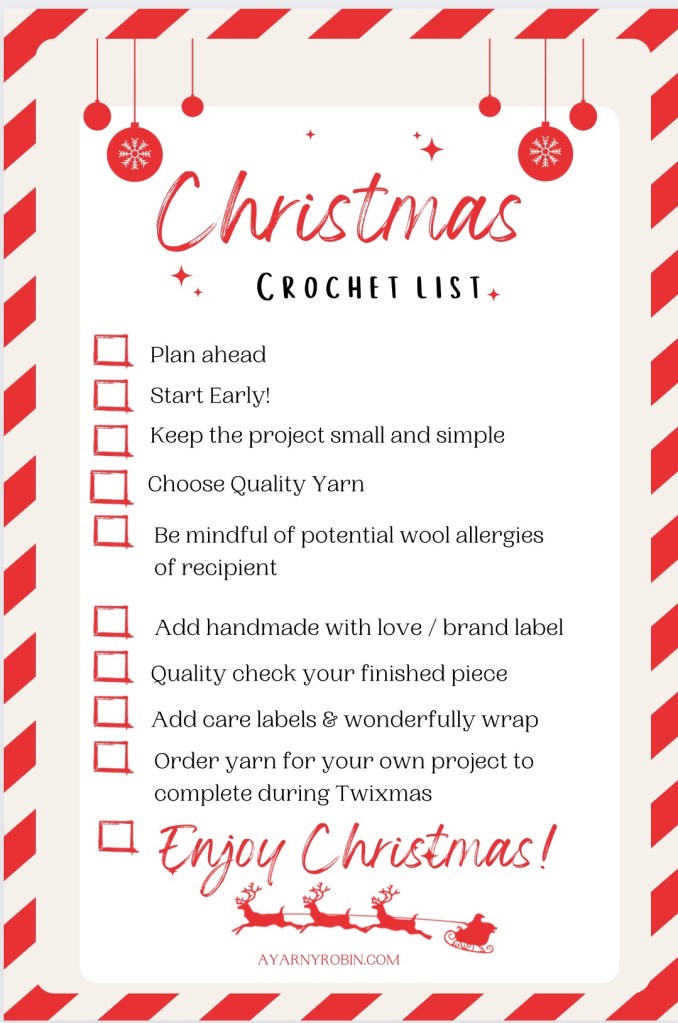
1. Plan Ahead
I can’t state this enough! I am guilty of thinking I can get a project done more quickly than I actually can and this leads to trouble and tears…trust me! It is really worthwhile writing a list of who you are going to make for and what you want to make for them. Sign up for my 10 page Crochet Christmas Organiser to help you plan ahead, you will find the links above and below.
If your list is looking too long, you may have to re-think. Work within your own capacity is the golden rule here. Make a plan and keep track of it for those festive wins. Once you have got your crochet plans finalised get your patterns sorted and order your yarn; making sure you’ve got enough…you don’t want to be losing a game of yarn chicken on Christmas Eve!
2. Start Early
By early, I mean start as early in the year as you can. It is not a great idea to start a blanket for that special someone at the beginning of December, if you are also working full time, running the home and entertaining relatives who have come to visit. On the other hand, if you can dedicate large chunks of time each day, this might work. If you want to make something like a blanket, start well in advance and this is why planning ahead really works.
3. Keep projects small and simple
This is one of my favourite tips. By keeping projects small you will be able to gift hand-made to more people. Keeping projects small also keeps the cost of each gift down and that has to be a win. You will also get that finished feeling buzz and, with smaller projects that bell will get rung more often. Meaning you can tick off that to do list more quickly; giving you that sense of satisfaction and achievement.
4. Choose quality yarn
If you can make your gifts with fabulous yarn, your gift will not only ooze quality and charm but it will give you much joy whilst you make. Think hand dyed yarns, local yarns, supporting small yarn traders and ethical companies when choosing your yarns and keep the recipient in mind when choosing too.
5. Be mindful of wool allergies
Talking of said recipient, be mindful that some folk have allergies to high content wool mixes. It would be highly disappointing if you poured all of your time, love and creativity into your gift if your recipient comes out in hives just unwrapping it!
6. Add brand labels / handmade labels
Where suitable add labels / logo’s or tags to your gifts with your brand name on or if this is not applicable then labels / buttons or tags which say something like ‘Handmade with Love’ or ‘made by…..’ It is really worth investing in these for your finished items as it really levels -up your work and makes it look more professional. There are numerous choices from buttons, leather, cork and metal tags and labels which can be personalised to suit your vibe. Check out Etsy.
7. Quality check your finished piece
It is really worth just inspecting your gift before you excitedly wrap it up and put it under the Christmas tree. Give it the once over for any rogue loose ends which may have been missed and if you have pets make sure it is pet hair / fur free too! If you have made a gift for a little person, just check everything is secure and fit for purpose.
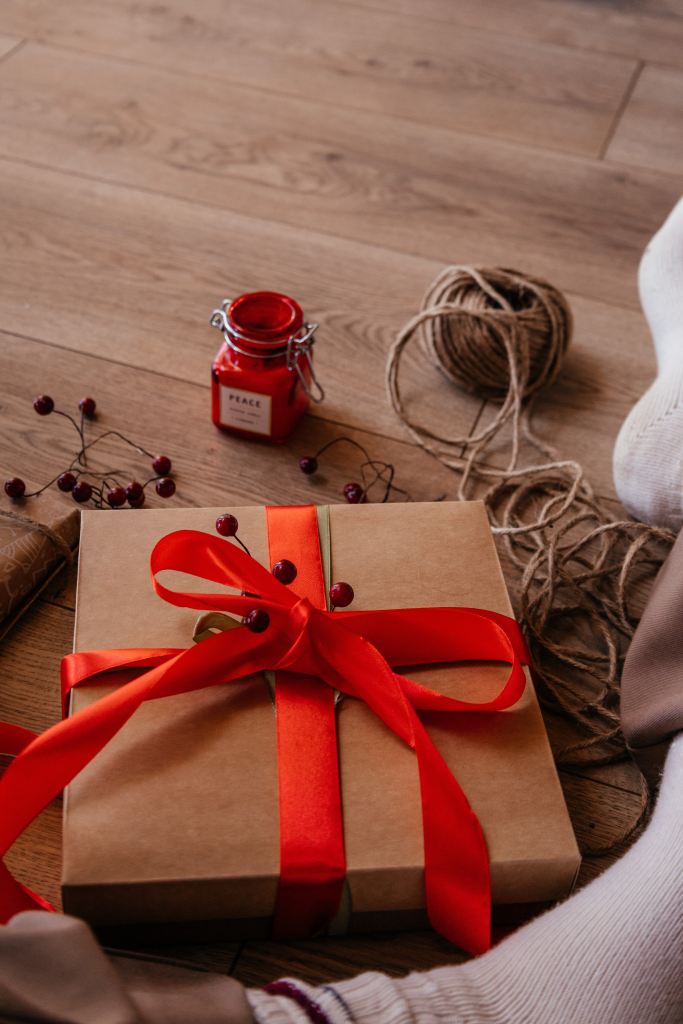
8. Add care labels and wonderfully wrap
Now you can prepare for wrapping. It is a good idea to let your recipient know how to care for their hand-made gift, especially if it will be washed in the future. You could just include the yarn ball band with the washing instructions on or, you could add some pzazz with care labels which advise on how to look after the item. I recommend the latter which you can attach to the item with some pretty ribbon or string before you wrap. Check out my print at home care labels. Now you are almost there choose how you will present your gift. Will you box it or wrap it with pretty paper and a glorious big ribbon or maybe some brown paper and string and a sprig of holly??
With your Christmas gifts all made and wrapped, it’s time to dust yourself down and think about you. Choose something you would like to crochet for yourself, order your yarn and pop it in a project bag ready to pull out on Boxing Day and you can crochet happy between Christmas and New Year (we call this Twixmas here at the Nest). Alternatively, put the yarn on your Christmas List and let someone else splash the cash!
10. Enjoy Christmas
The great thing about crochet is that it is the perfect companion for a Christmas movie or 24, so whilst you are making your way through your handmade list, don’t forget to soak up Advent with the odd mince pie, some carols on the radio, your favourite Christmas movie and a Christmas hot chocolate or two.
So, there you have my best top 10 tips for stress-free Christmas crochet. Don’t forget if you would like my FREE fully editable 10 page Christmas crochet organiser sign up to my email list (offer valid until 30.11.2023)
Processing…
Success! You're on the list.
Whoops! There was an error and we couldn't process your subscription. Please reload the page and try again.