

Tag: pattern


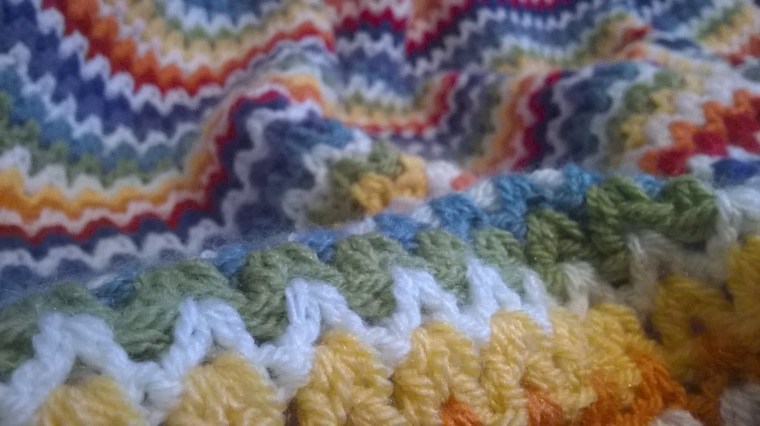
Very V blanket tutorial
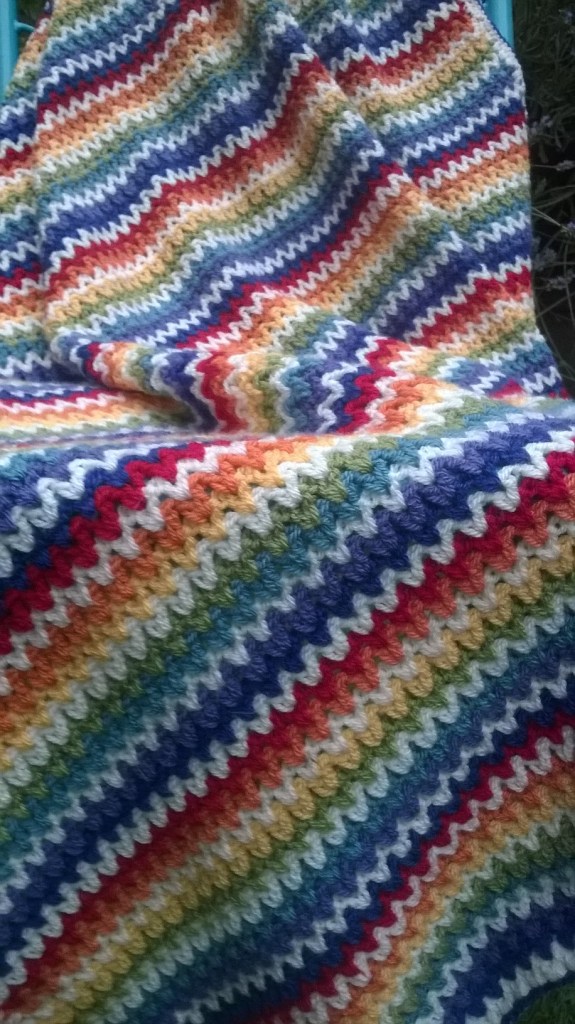
Thank you for your lovely comments about my latest blanket off the hook…the ‘Very V’ blanket.
It really is very simple to hook, so I thought I would put together a little tutorial, as I have not done one for a while and because I have some rare time off on my own. The tutorial can be found below. You can also check out my latest free pattern The Angelece baby blanket by clicking on this link.
 So, clearly this is not an original pattern. I say that from the offset because of copyright and all of that. Let’s be honest…the humble ‘v stitch’ has been around for years. But this is my tutorial in case you want to have a crack for yourself and you have never done a ‘v stitch’ and you are a visual kinda gal or guy.
Processing…
Success! You're on the list.
Whoops! There was an error and we couldn't process your subscription. Please reload the page and try again.
Here we go!
Final measurements: 132cms x 120cms / 52″ x47″
I used Stylecraft special dk , for it’s durability, softness and price! The colorway I used:
Lipstick x 1 ball
Meadow x1 ball
Saffron x 1 ball
Violet x 1 ball
Spice x 1 ball
Lobelia x 1 ball
Storm blue x 1 ball
Cream x 3 balls
You will also need a 4mm hook and a darning needle to weave in those ends!
Of course if you are using different yarn then you may need to use the recommended hook size for your chosen yarn; and of course you can alter the finished size by hooking more or less chains to start.
Your hooking tension (we are all different) may also mean you need more or less chains to start with.
Lets start, are you ready?
Abbreviations used are below and are English terminology.
Ch = chain stitch
Chs = chains
Tr = treble stitch (double crochet in US terminology!)
St = stitch
Slst = slip stitch
Sp = space
Pattern order I used:
Row 1: Cream
Row 2: Lobelia
Row 3: Violet
Row 4: Cream
Row 5: Storm blue
Row 6: Meadow
Row 7: Cream
Row 8: Saffron
Row 9: Spice
Row 10: Cream
Row 11: Lipstick
Row 12: Indigo
Row 13: Cream
Row 14: Violet
Row 15: Storm blue
Row 16: Cream
Row 17: Meadow
Row 18: Saffron
Row 19: Cream
Row 20: Spice
Row 21: Lipstick
Row 22: Cream
NB/ the first and last row form the edging for the top and bottom of the blanket so use the colour you wish to edge the blanket in, for row 1.
Chain 175 in cream
(This gave me about a 1m 15cm /42″ length of Ch. But any odd number of Chs will work to suit the size blanket you are wishing to hook!).
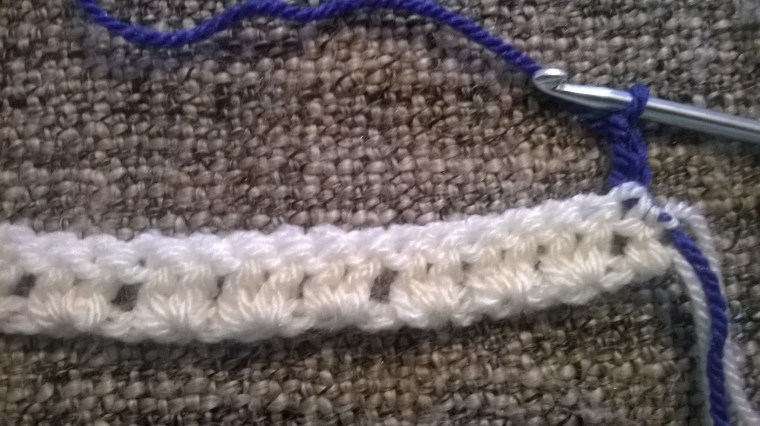
2tr in 5th ch from hook,
 miss a ch, 2tr in next ch
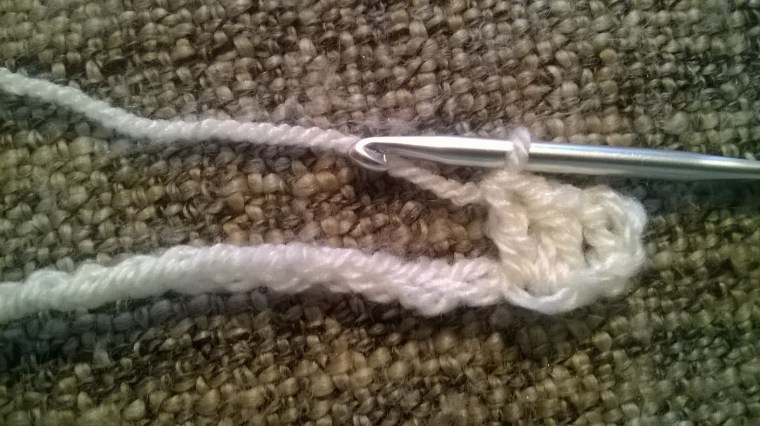
miss a ch, 2tr in next ch

*miss a ch, 2tr in next ch*
Repeat * – * across the row.
Finishing with 1tr in last ch. Change colour. As shown below, I change colour by completing half of the process for the last tr (ie/ leave two loops on the hook). Complete last part of tr in new colour as shown.
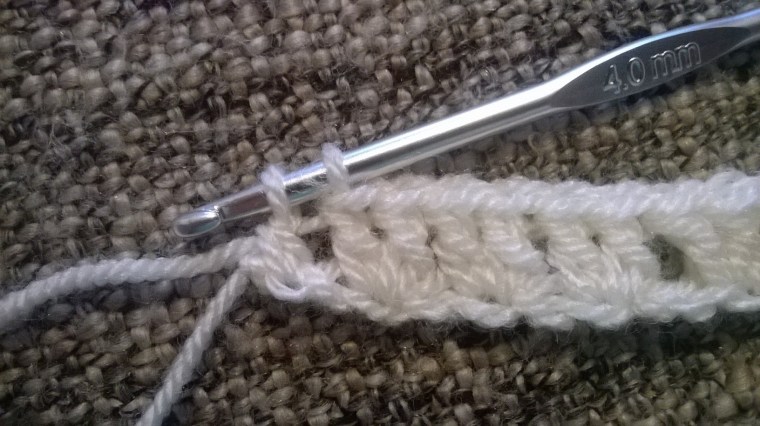
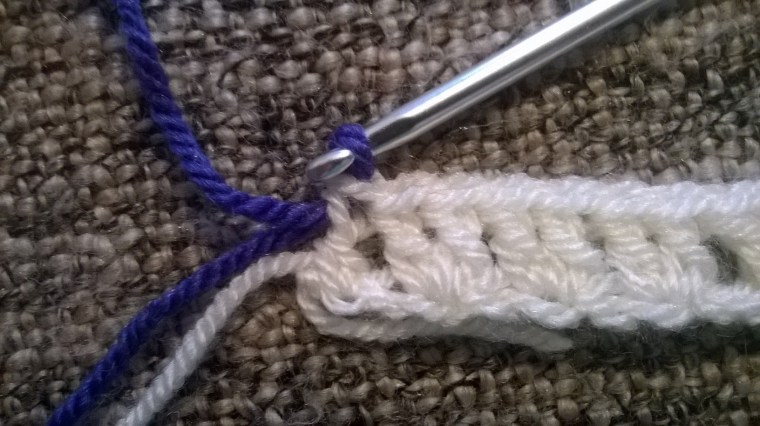 I find this makes colour changes more secure. These ends should be tied to secure further. Top tip! leave the ends long (approx. 10cms) so that weaving in is easier.
Turn. Ch3 (counts as 1tr)
 2tr in the middle of set of tr’s of previous row

Continue along the row.


finishing with 1tr in top of 3rd ch on previous row.

Change colour. Turn.
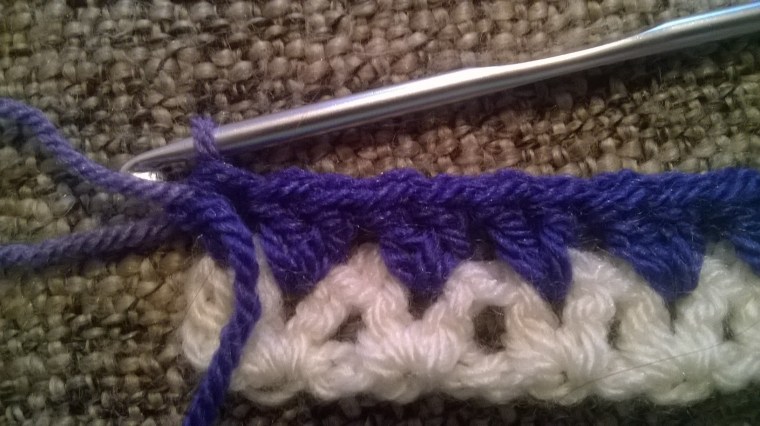
And that’s it!
Top Tip!! Weave in the ends every few rows.
Repeat rows 1-22 x5 times.
Then repeat rows 1 – 13 to finish body of blanket. And if you did not adhere to the top tip above…now is the time to weave in those ends!

I’ve gone all minimalistic for the edging because the blanket itself is simply stunning in this colourway and I did not feel like it needed something fussy to detract from its beauty.

This is what I did.
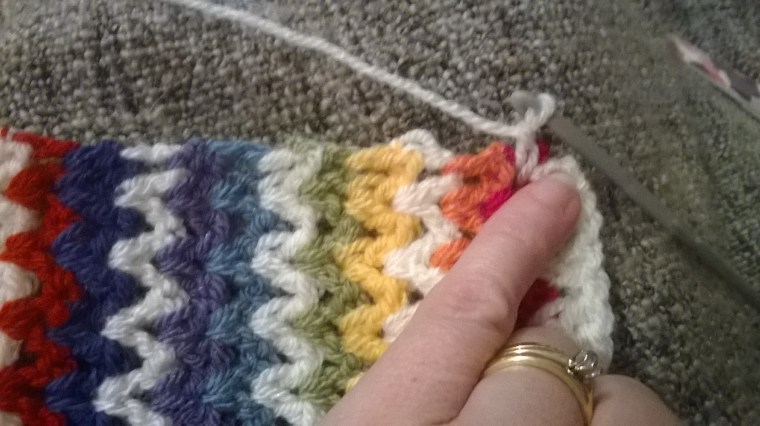
The first and last row (in cream if you have been following this colourway) form the edging for the top and bottom of this blanket. In cream / your chosen edging colour join in the space at the bottom right of your blanket as shown.
Ch 3 and slst into the top st of the first tr/ch3 of 1st row.
Ch1, 2tr in same sp
 2tr in next sp (the sp is the gap between the side of the first sts of each row), 2tr in next sp.
 Continue along the edge until you come to the top corner. 2tr in last sp, ch 1, 1tr in same sp.

Then slst into the top st of the first tr/ch3 of last row as shown. Fasten off. Repeat for the other side of the blanket.
Finally, in Lobelia (or your chosen colour) join in any st of edge with a slst.

Slst in each st around edge of blanket. Fasten off and weave in loose ends. And that is it, you should now have one of these to snuggle under…or reluctantly gift.
Well done if you got this far.
I really hope you have found this tutorial easy to follow. I welcome feedback, so let me know how you got on and if you want to share your picture of your finished make you can in the comment section below.
I would love to see what you have made.
xxxxx
Share this:


A Yarny Giveaway…
Yes, that’s right I’m having a little yarny giveaway here at the Nest. The purpose for such frivolity I hear you ask?
Well, it is a belated celebration of my 2 year blogging anniversary; which was actually back in June. Whilst I was aware this occasion had come and gone, life was a little too hectic to mark the occasion. So, I parked the celebration temporarily and am now ready with a little yarny give-a-way.

This year has been frantic and I want to thank all of my regular readers for being patient with me along this journey and for all of your cheering on! It has really helped me and if you’re relatively new around here consider it a welcome.
So before I get to the give-a-way, I thought I would just highlight some of my favourite posts from the last 12 months.
The 100 patch granny blanket…
blog post here
joining tutorial here
 A hooky bake off
 The world’s smallest library
 A yarny little leaf pattern
Robins nest square pattern
I love a little look back, don’t you?
So Give-a-way time…cue the party poppers!!! It’s easy to enter and is open to all. The prize to covet is this…
 A gorgeous hank of beautifully soft baby alpaca wool in Lichen by Louisa Harding; which has an added touch of sparkle with a fine gold metallic thread.
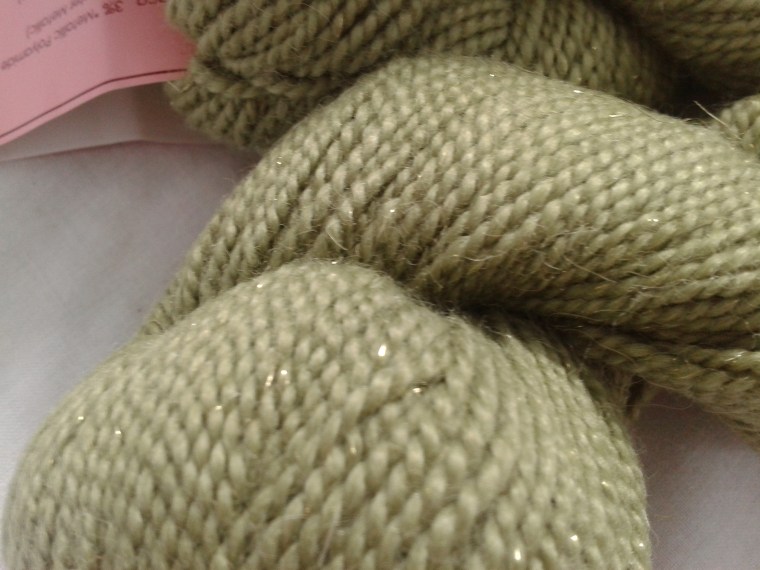

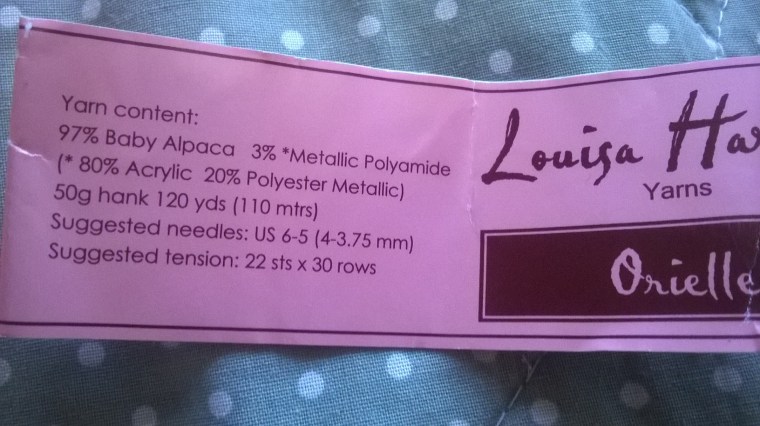

This yarn is gorgeous, I hooked with it a while ago…remember?

So the entry rules are simple.
All you have to do to be in with a chance of winning is leave a comment below. If you are reading this on facebook then like the page and leave a comment also. Simples! Closing date for entries is 22nd August 2016.
xxxxx
Share this:


Easter yarn shortage…
Following some much needed soul restoration on Friday, the theme has lingered here at the nest over the Easter weekend; and I can deleriously report is continuing today too. However, hooking came to a very abrupt halt yesterday!

After a chaotic but funny Easter egg hunt, in which I muddled the clues up somehow; and hearty singing of praises in church. Followed a mixed weather walk just down by the brook,
 up over the big field and back home through the daffodils…my favourite flowers in the whole world.

I love carefully picking my way back home through this flowery path…

Back home for some quiet hooking
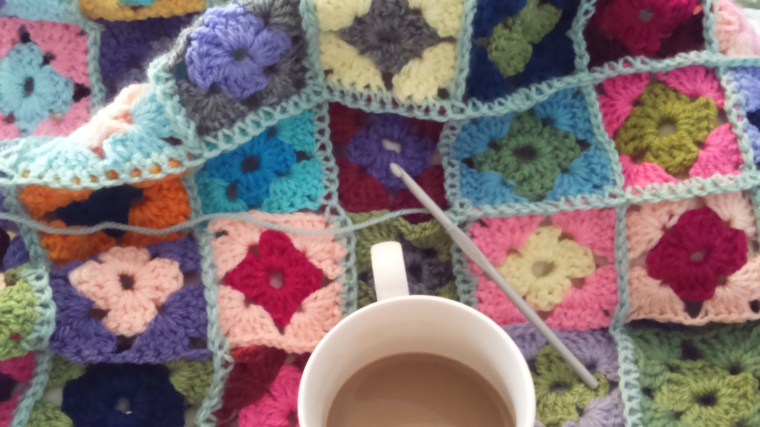
which was fine until…
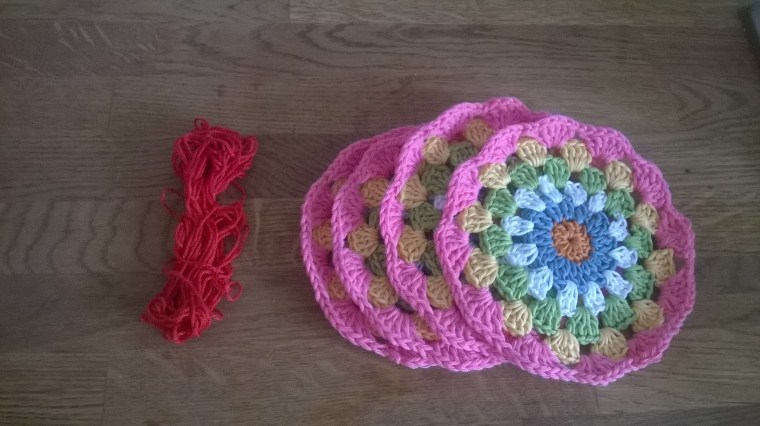
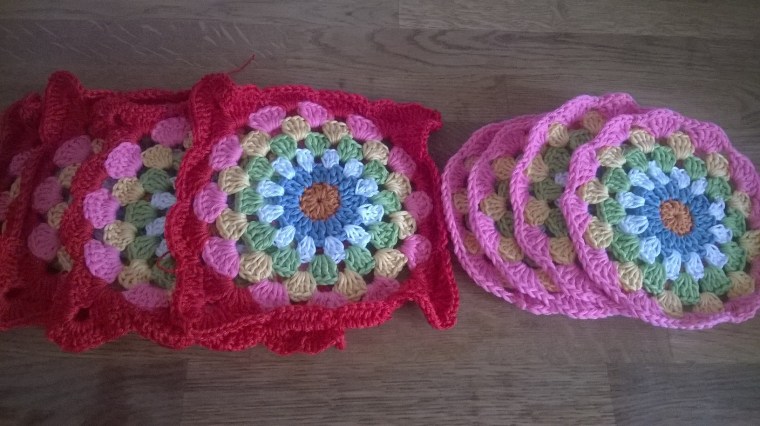
I realised I had only this much red cotton left and four robins nest motifs left to square…I told you the hooking came to an abrupt halt! Which was only soothed by this wonderful Easter tray that I received from my lovely brother and Sister in Law (Thank you Kate xx)
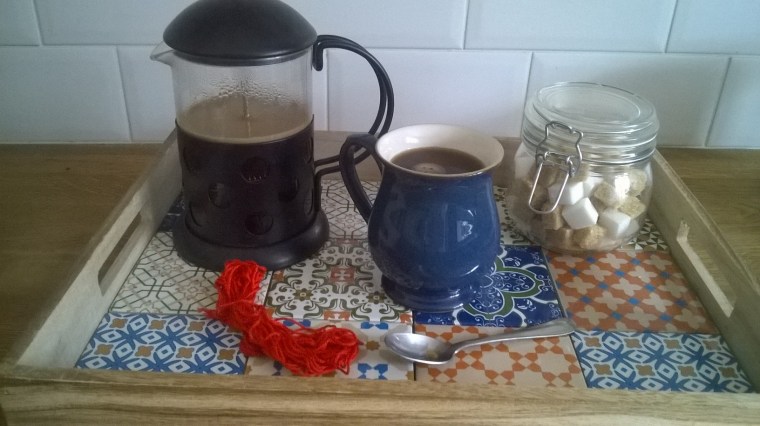
Which proved just perfect to hold my coffee whilst I ordered more yarn
xxxxx
Share this:


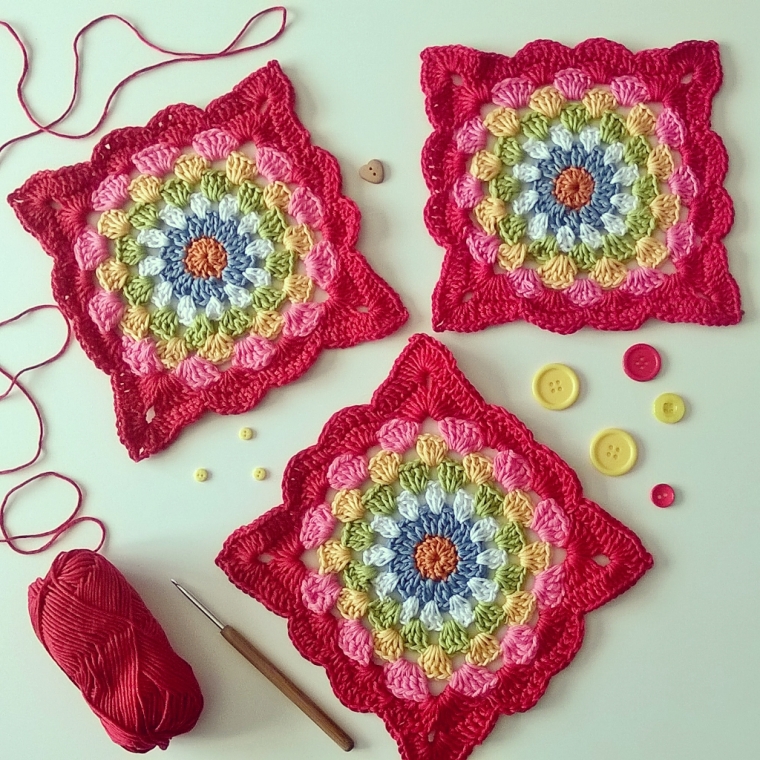
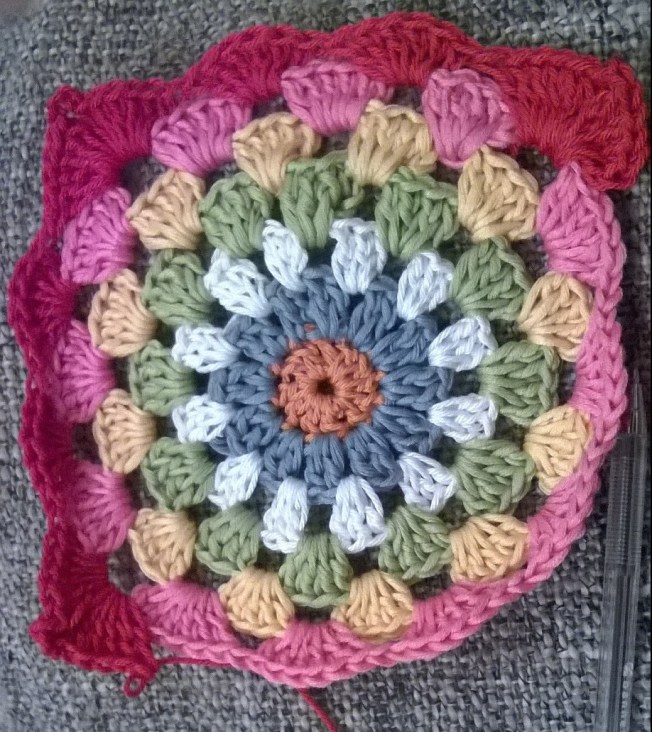
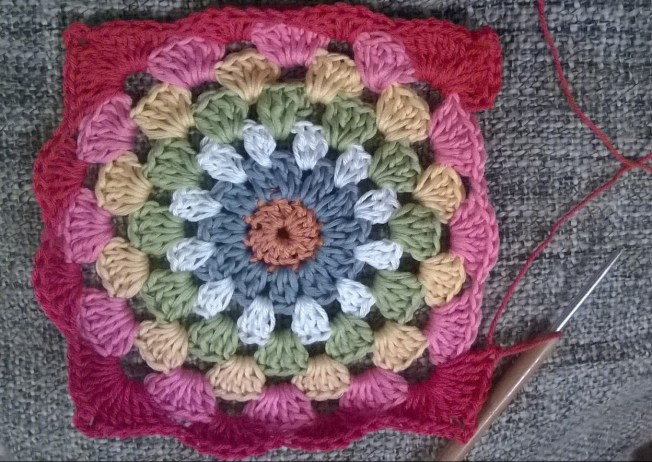
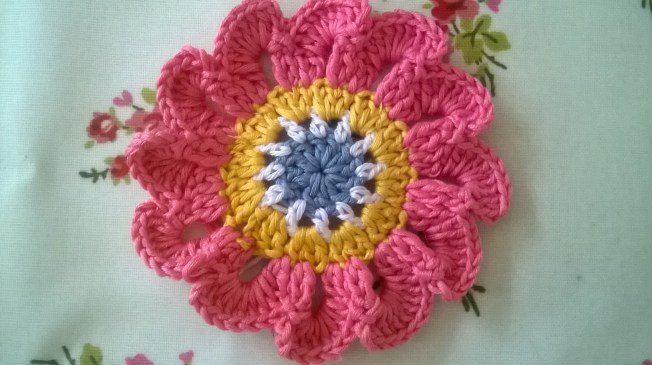
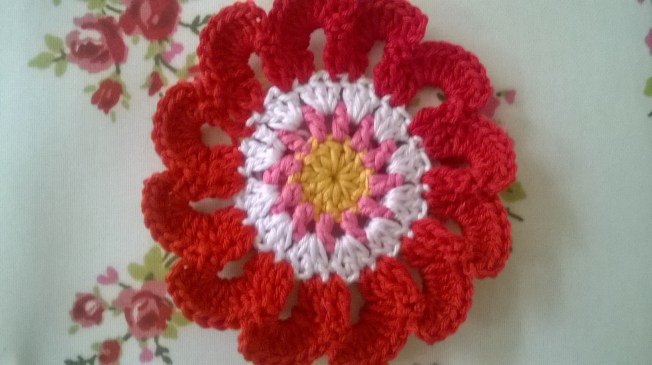
Robin’s nest square
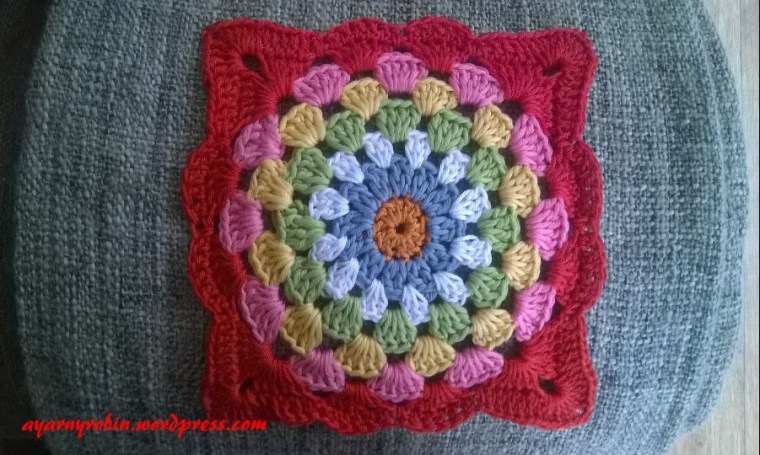
How can x2 part completed quilts just get mislaid???? That is the question I am pondering this week. Several years ago I started on two lovely quilts and I cant find them anywhere. However I did find this…
A square I hooked several years ago… along with my scribbled notes on the pattern. So I hooked up a new one and thought I’d share.
As always I’m using English crochet terminology.
Ch – chain
Slst – slip stitch
dc – double crochet
tr – treble crochet
ch3 – counts as a treble unless otherwise stated.
I’m using drops muskat cotton
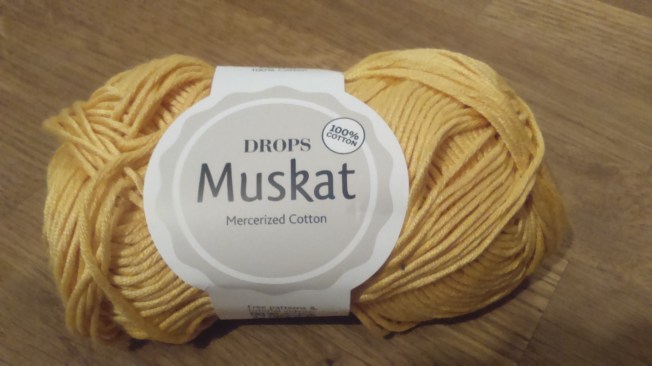
and I’m using the colours listed below
red
old pink
white
vanilla yellow
dark orange
sky blue
apple green
and a 4mm crochet hook. This lovely yarny square measures 7″ x 7″ or 18cm x 18cm once blocked. To download a pdf version click here, otherwise full instructions are below.
So here goes…
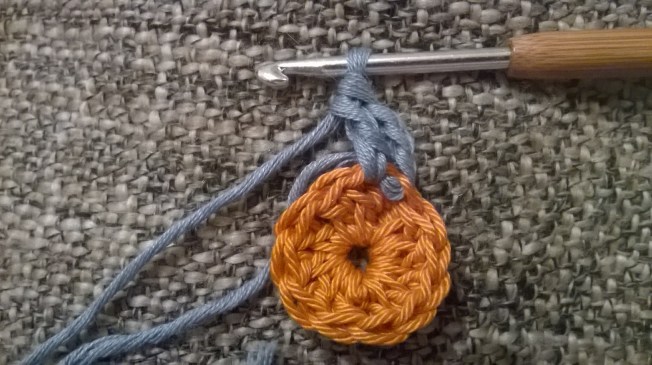
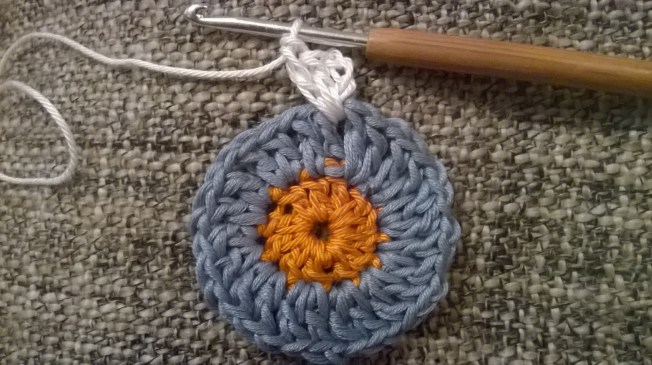
ch2, join with ss to form a tiny ring
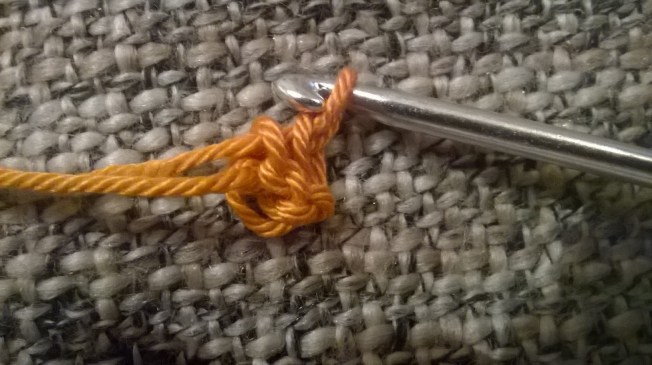
Row 1: ch3,
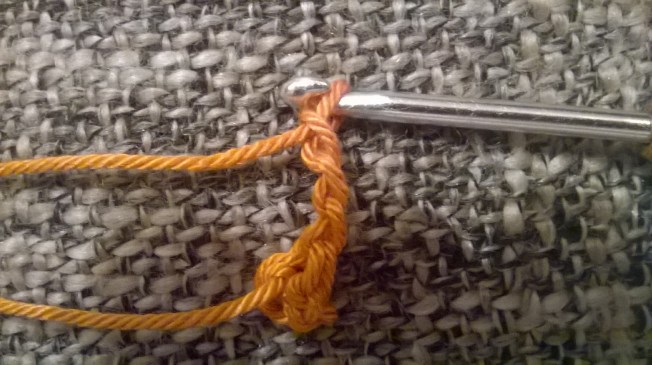
11tr into ring,
join blue yarn and slst into 3rd ch
(12tr in total).
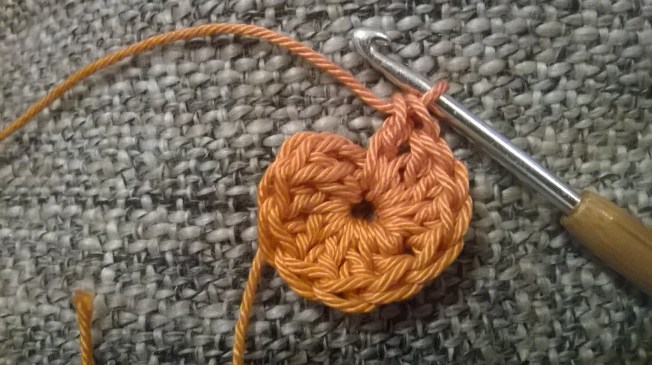
Row 2: ch3,
1tr in same space, ch1
2tr in next st, ch1
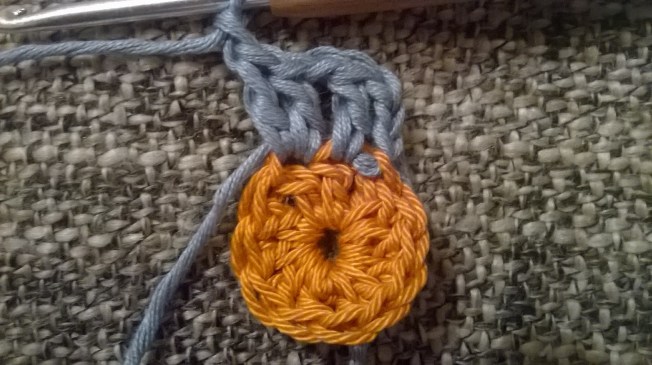
*2tr in next st, ch1*, repeat * * x10 times,
slst into 3rd ch
(12 clusters of 2tr).
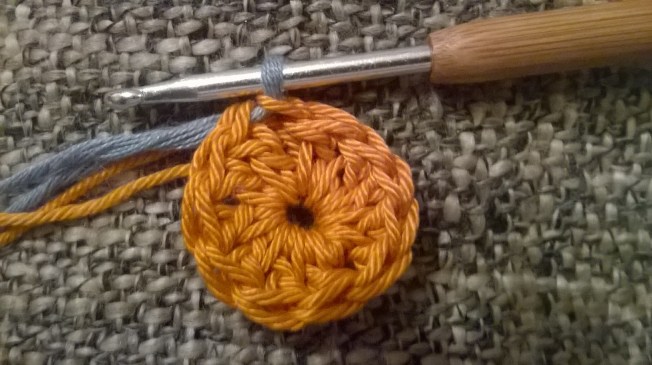
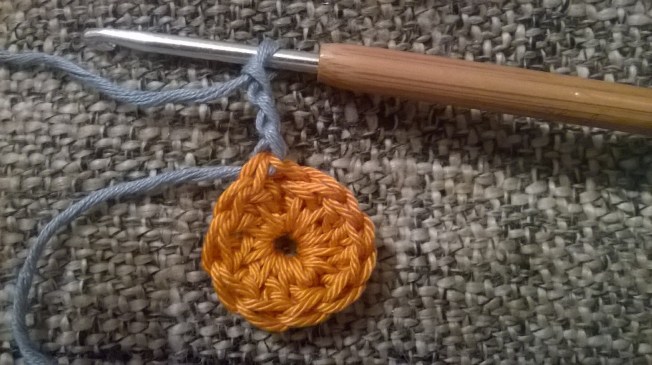
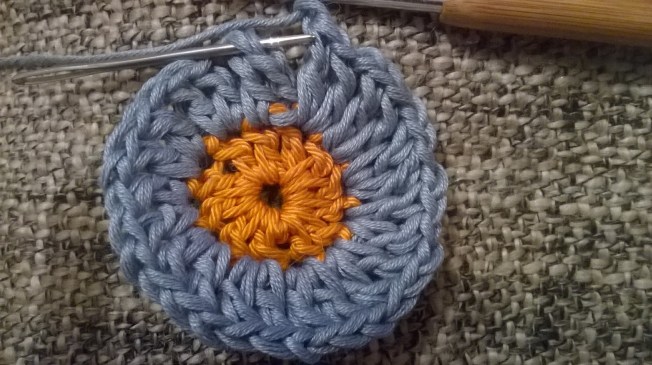
Row 3: join white yarn in any ch space, ch3,
2tr in same sp, ch1
*3tr in next ch space, ch1*
repeat * * x10 times
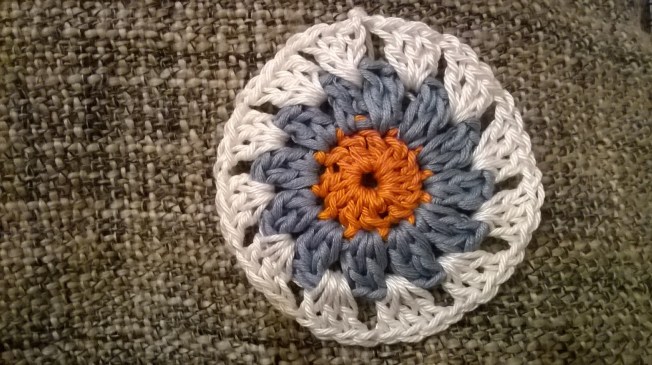
join with slst in ch3
(12 clusters of 3tr).
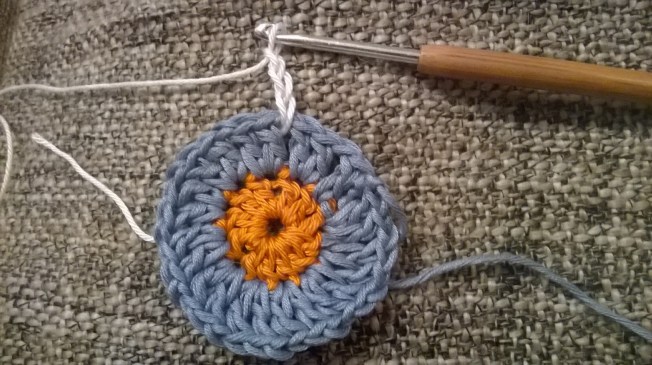
Row 4: join green yarn in any space and ch3,
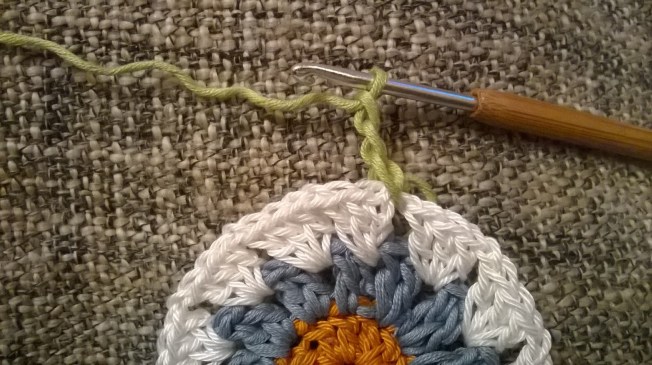
3tr in same sp, ch1
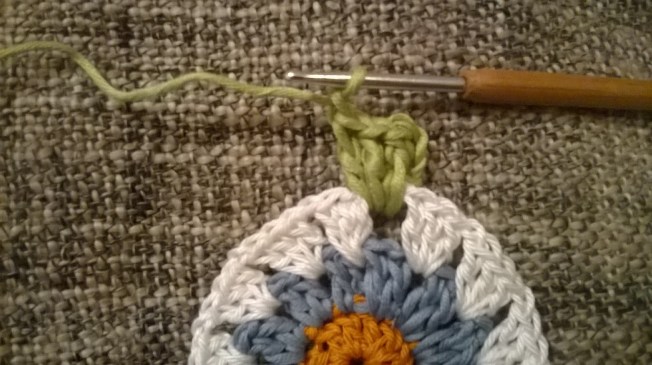
*4tr in next space, ch1*,
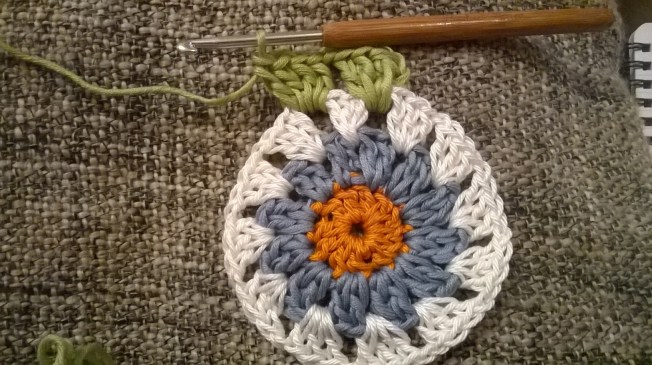
repeat * * x10 times, join with slst in ch3
(12 clusters of 4tr)
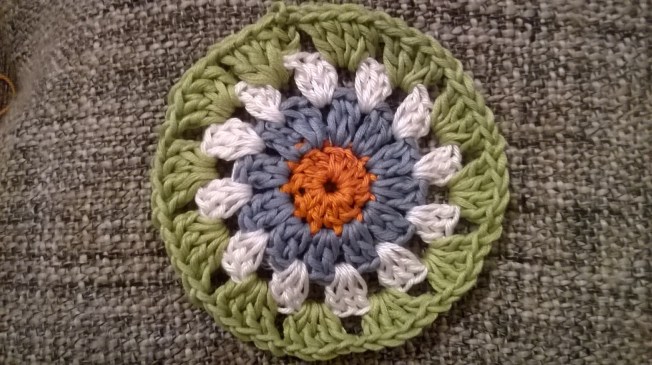
Row 5: join yellow yarn in any space and ch3,
4tr in same sp, ch1
*5tr in next space, ch1*,
repeat * * x10 times, join with slst in ch3
(12 clusters of 5tr)
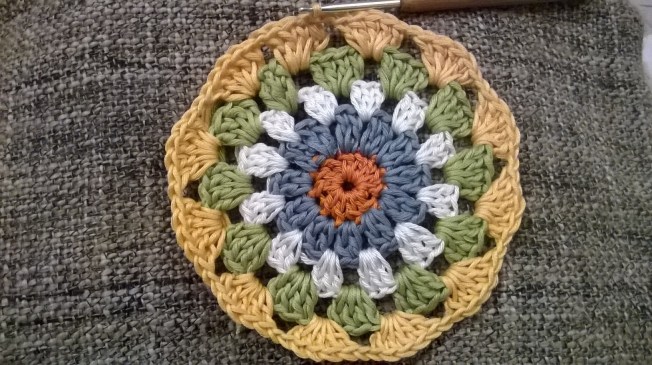
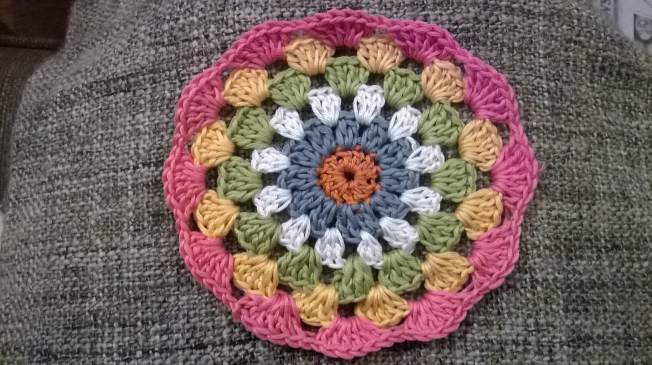
Row 6: join pink yarn to any space and ch3,
5tr in same sp, ch1,
*6tr in next sp, ch1*,
repeat * * x10 times, join with ss in ch3
(12 clusters of 6tr)
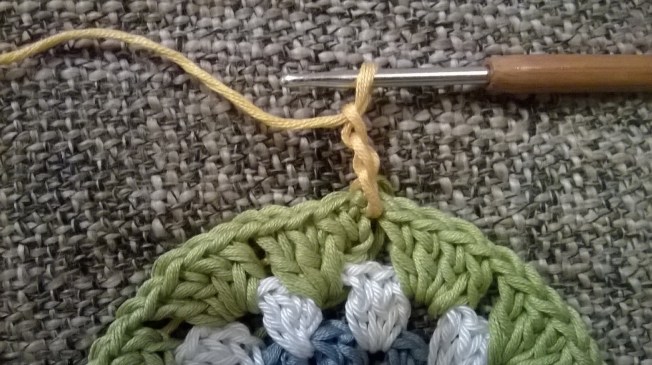
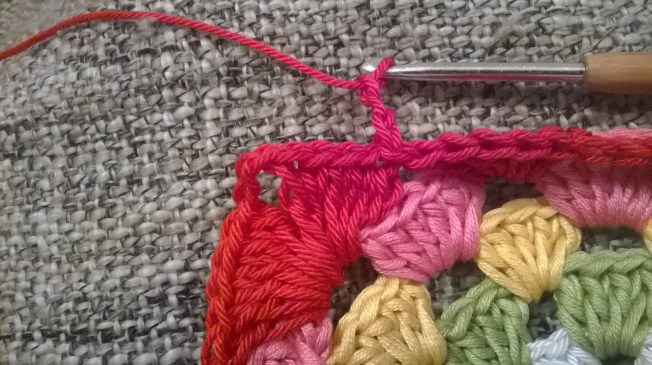
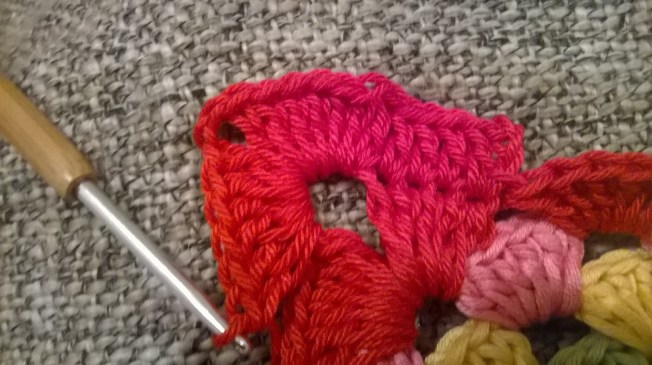
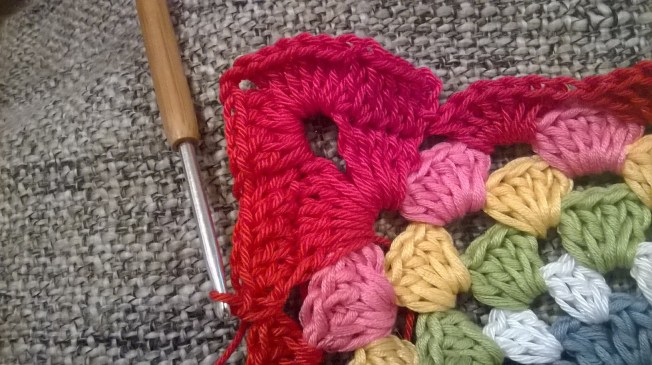
Row 7: join red yarn in any space, ch3,
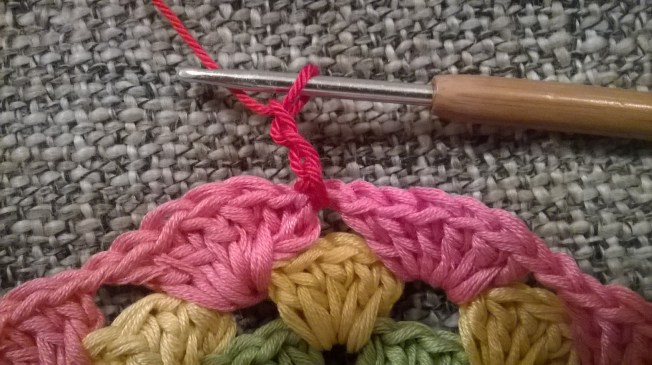
5tr in same space,
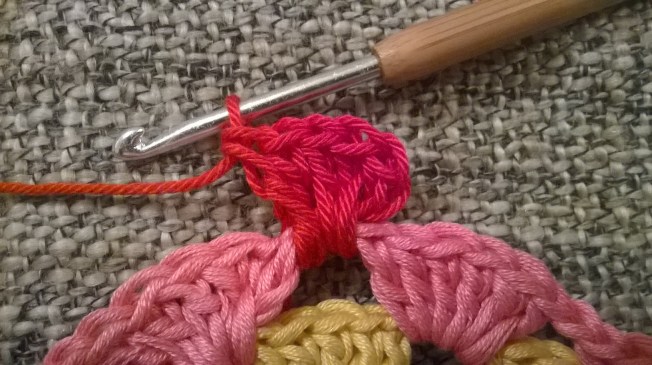
ch3,
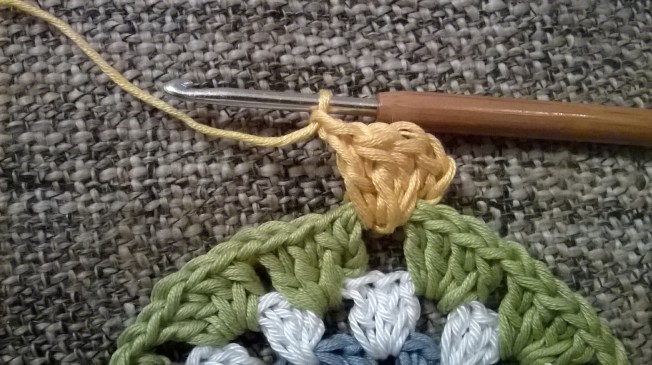
6tr in same space (corner made),

*6tr in next space, 6tr in next space,

6tr in next space, ch3,

6tr in same space* (2nd corner made),
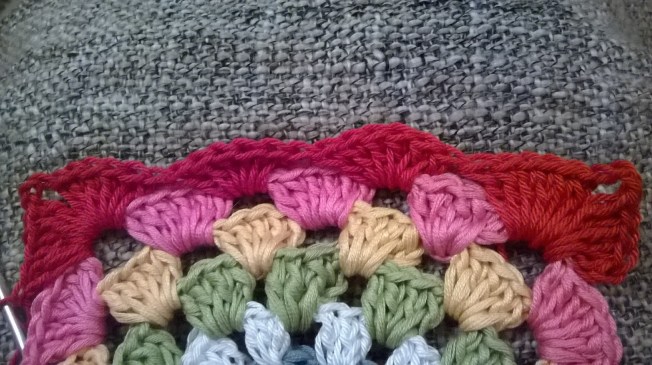
repeat * * x2 times
6tr in next space, 6tr in next space, join with slst in beginning ch3. Do not fasten off.
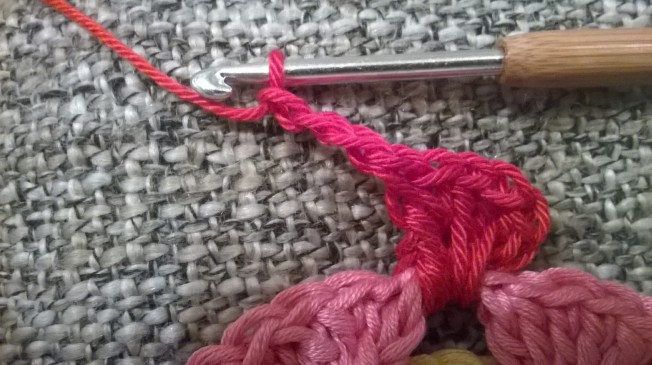
Row 8: ch3,
1tr in next 5sts,

*6tr in ch3 sp,
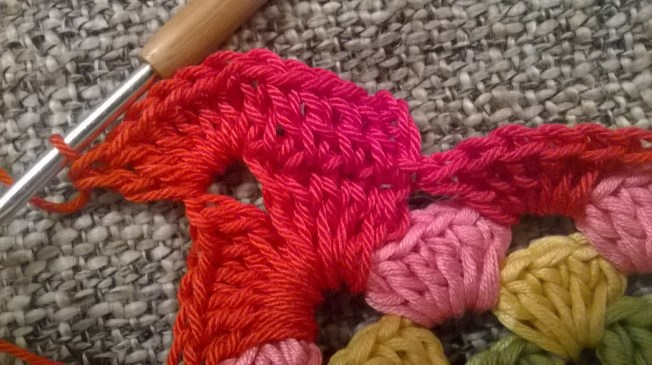
ch2
6tr in same space (corner made),
1tr in next 5sts,
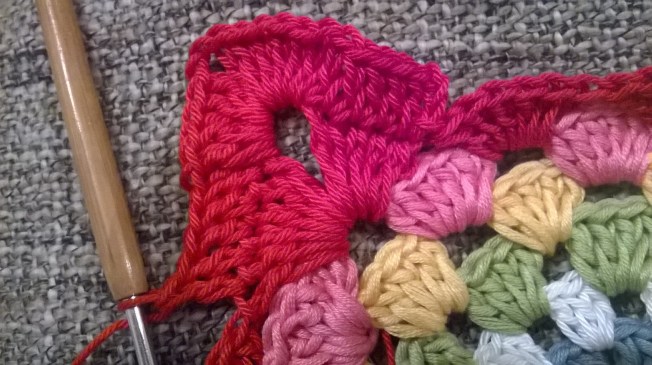
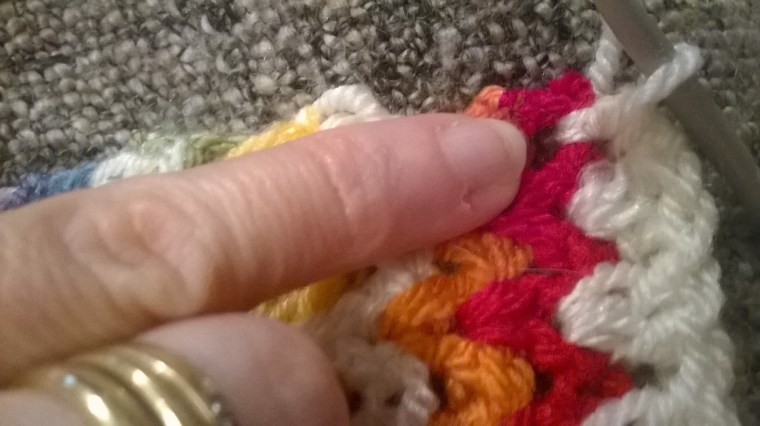
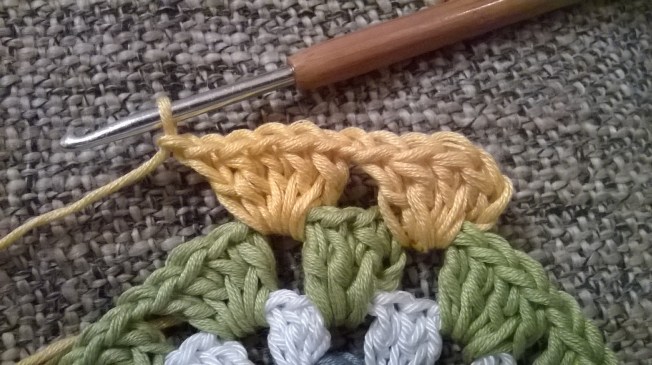
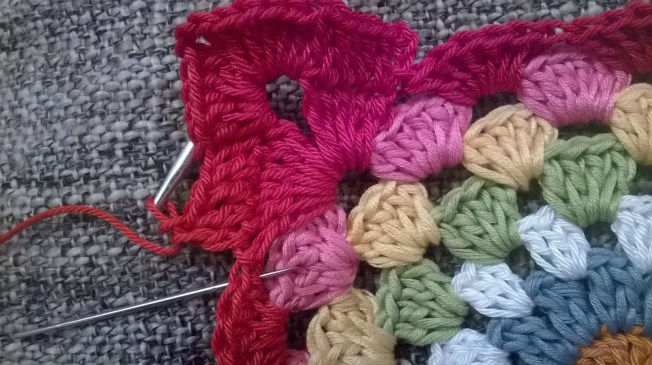
dc in next space (indicated by needle)
1tr in next 5sts,
dc in next space, 1tr in next 5sts,
dc in next space, 1tr in next 5sts*,
repeat * * x2times
6tr in ch3 space, ch2, 6tr in same space (corner made)
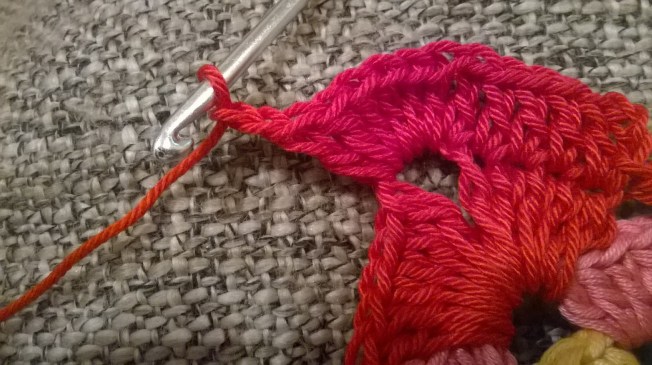
1tr in next 5sts, dc in next space,
1tr in next 5 sts, dc in next space,
1tr in next 5 sts,
slst to beginning 3rd ch to finish.
Weave in ends.
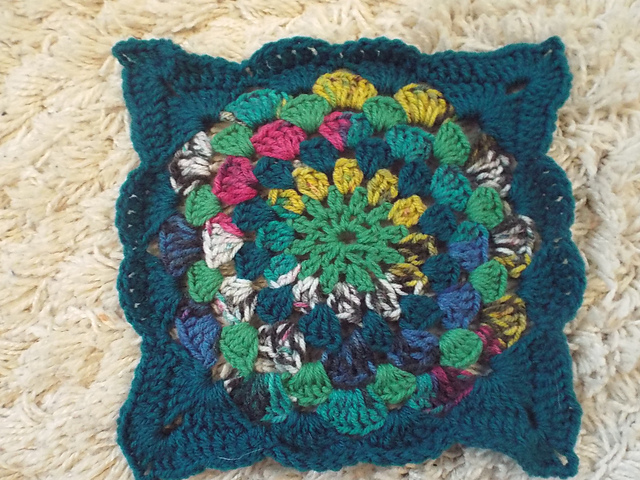
Pin out to block… this is really worth the extra effort. I just pinned this square to a clean towel,
then spritz with water and leave to dry.

blocking really makes the the world of difference…
A very versatile yarny square.
Happy hooking
xxxxx
‘Robins nest square’ designed by Nicola Florence @ ayarnyrobin.wordpress.com…….March 2016
Share this:

Little Leaf pattern

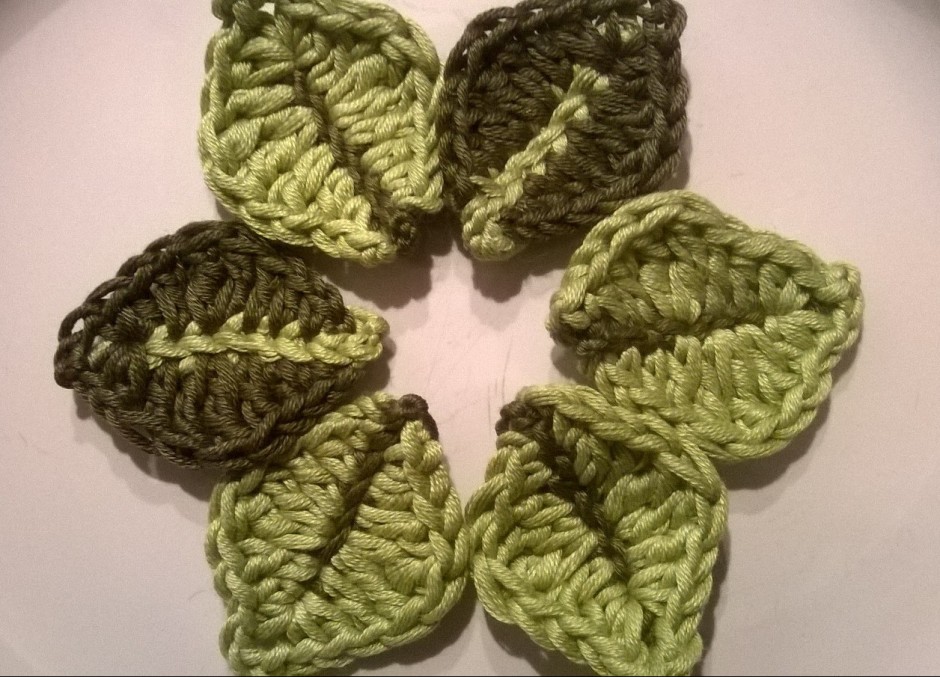
On a very wet afternoon, just the other day, I began to hook up some little leaves. Simple I thought, no pattern required.

After a couple of tweaks here and there, this is what my trusty hook had produced. I think they are rather sweet, so I thought I would share this little leaf pattern with you.
Little Leaf Pattern.
I used drops cotton dk and a 3.5mm hook. All instructions are using English terminology.
Slst – slip stitch
st – stitch
ch – chain
dc – double crochet
htr – half treble
tr – treble
dtr – double treble
blo – back loop only
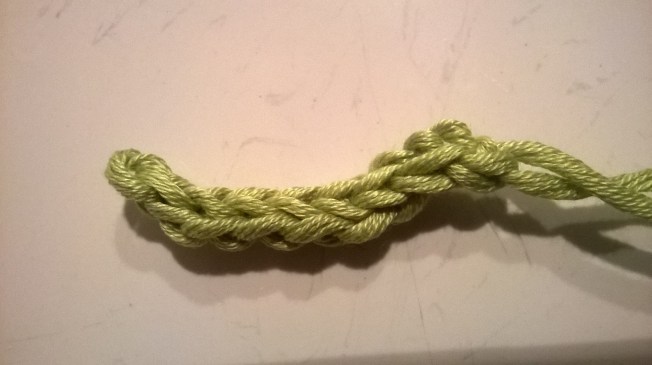
Central Vein
Ch8, slst into 2nd ch from hook, then slst into each remaining 6ch and fasten off.
Leaf Body
Join chosen colour thread to 1st st at bottom of leaf vein. Ch1, dc in next st, htr in next st, tr in next st, 2dtr in next st, tr in next st, htr in next st, dc in same st, ch3(you should now be at the top of the vein).

You now need to reverse the pattern down the other side of the leaf. This time working in the back loops only.

So, dc in next st, htr in same st.
tr in next st, 2dtr in next st, tr in next st, htr in next st, dc in next st, slst in next st. Fasten off to finish and weave in ends.

Happy little leaf hooking
xxxxx
‘A yarny little leaf’ designed by Nicola Florence @ ayarnyrobin.wordpress.com….February 2016.
Share this:

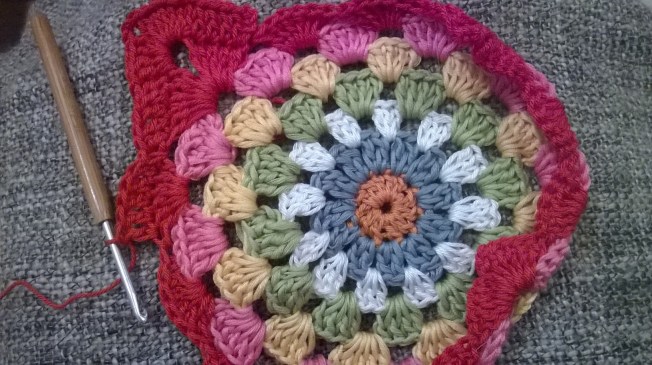
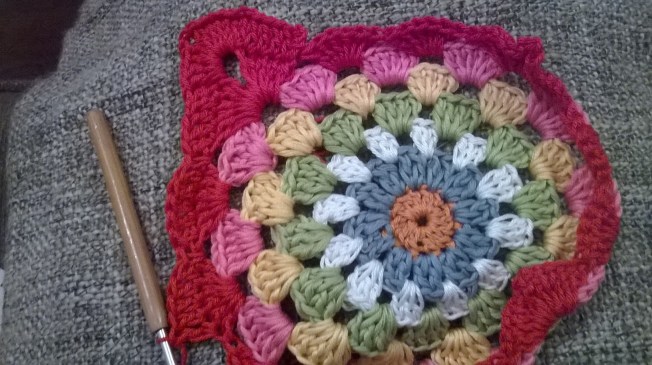
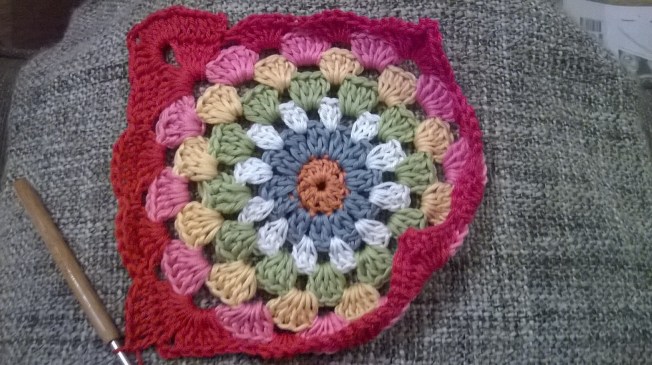
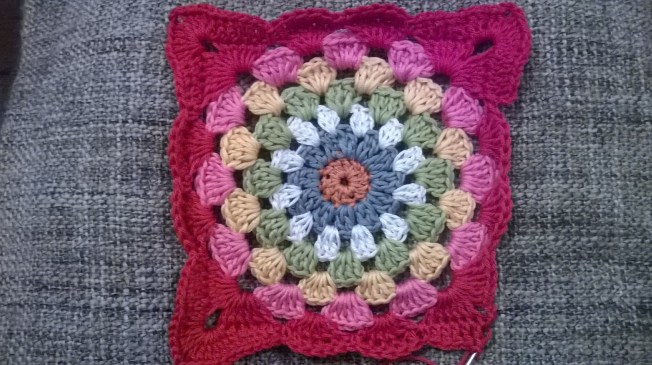
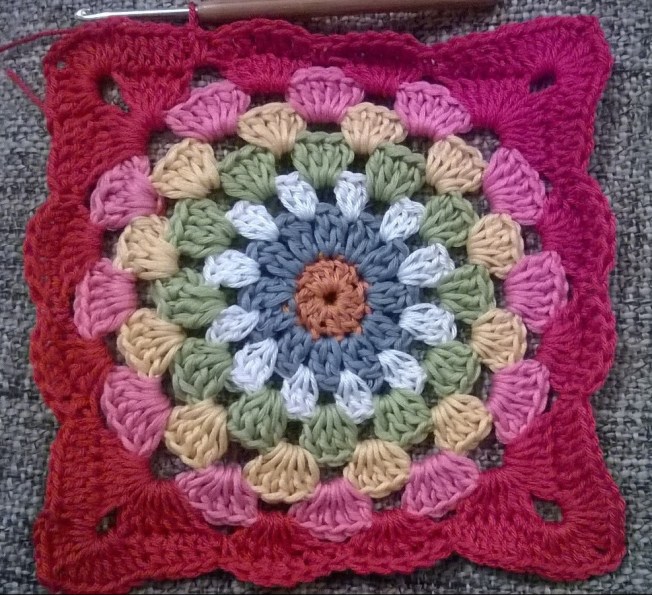
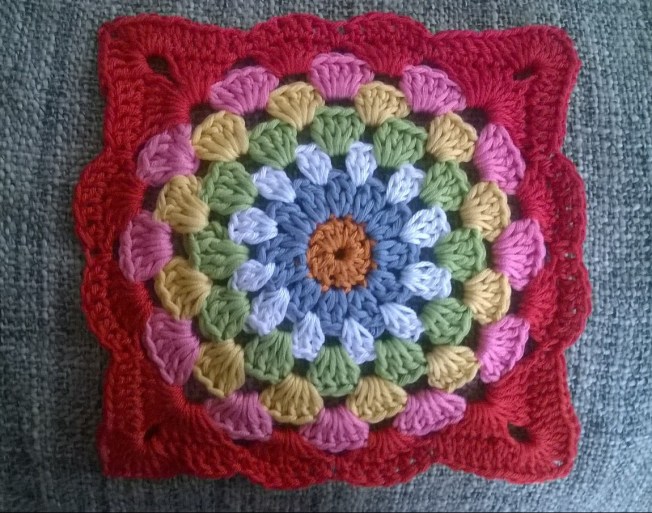
Sweet mandalas
Hooking these sweet mandalas has been so lovely…I actually hooked them last week so can include them in January’s makes.
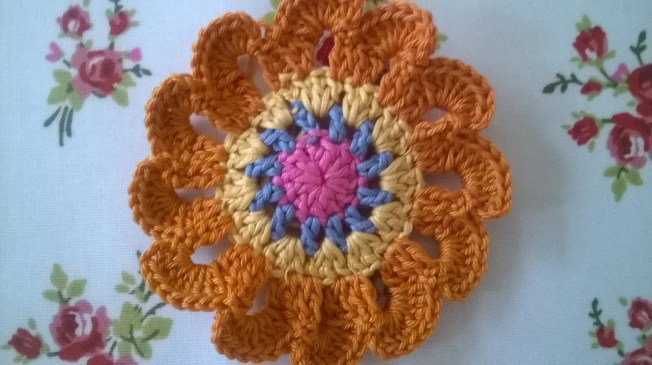
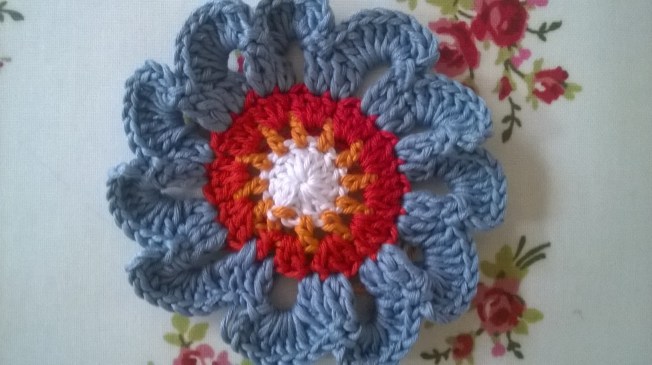

The pattern is by the very talented Robin Sanchez over at onceuponapinkmoon
Just had to share these with you.
xxxxx
Share this:

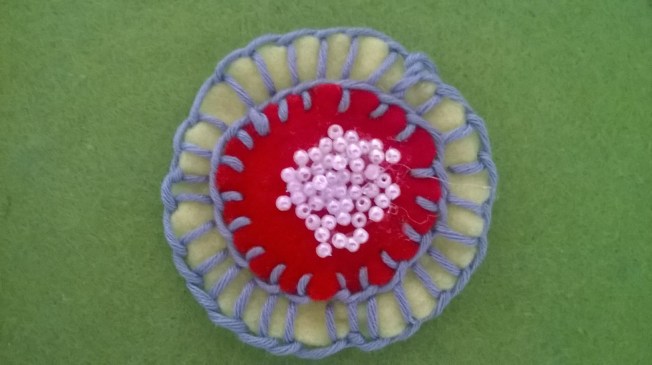
Felt Flowers
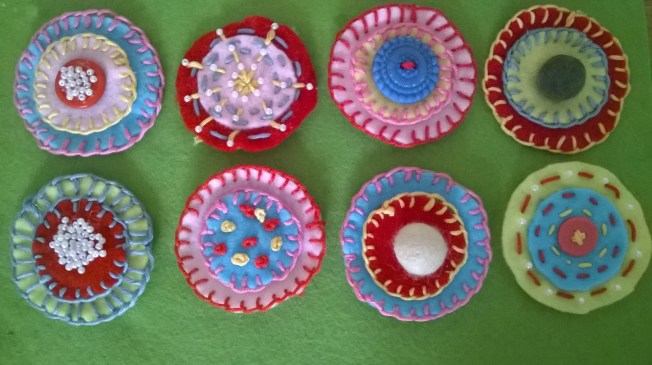
Happy Sunday to you all.
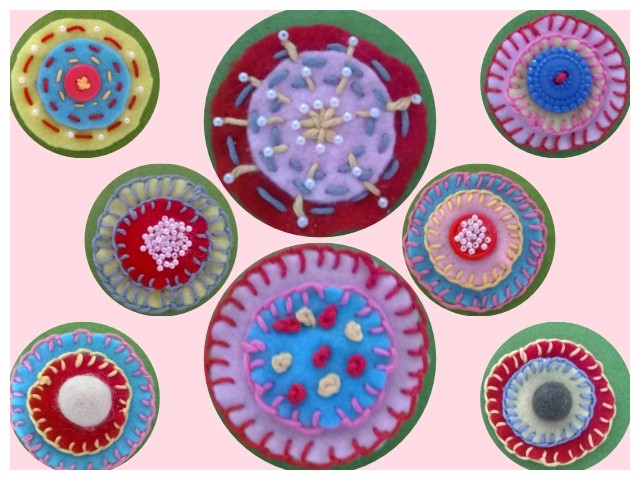
This is what I have been up to this weekend… felt flowers.
They are so sweet and tactile, I wish that photo’s were able to convey the sumptuous (ness) of these little discs of happiness.
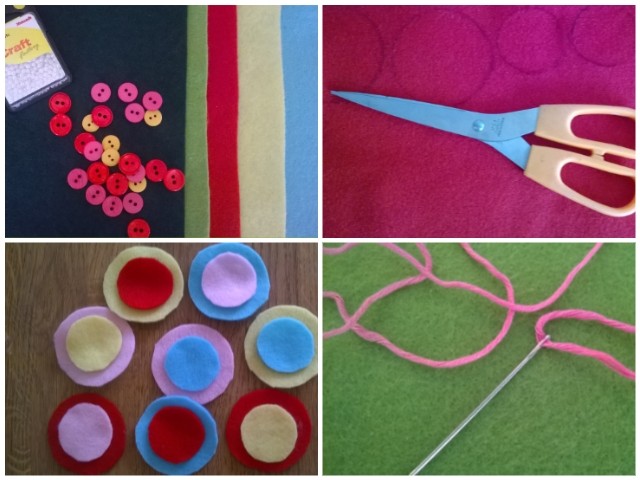
They are super quick to make too, the above is all that is required along with a hot glue gun or some super glue… and your own creativity of course.
Cut out your felt into circles, I chose two different sizes, achieved by drawing around a beaker and an egg cup.
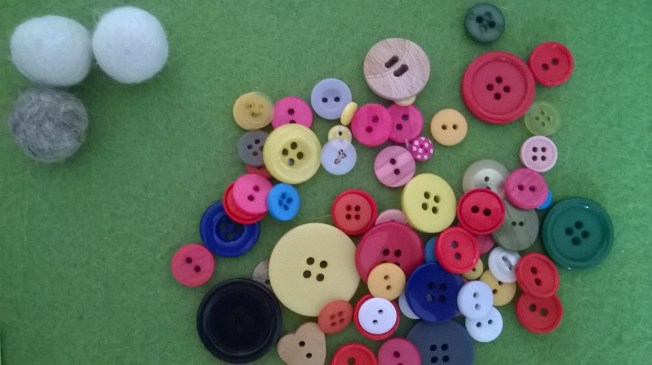
then decorate… I used cotton yarn (dk), buttons, beads and felt balls
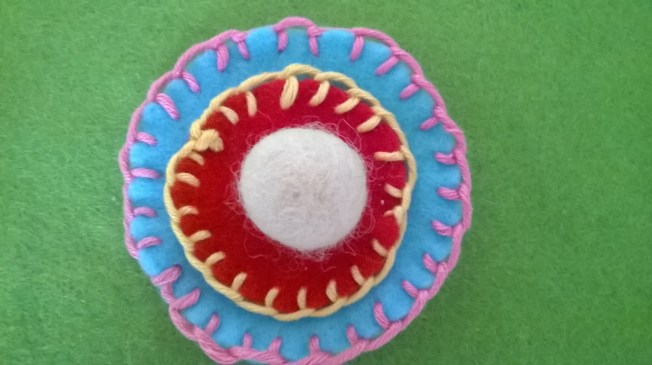
There are good tutorials on you tube for blanket stitch and french knots

Be as creative as you like

Just have fun
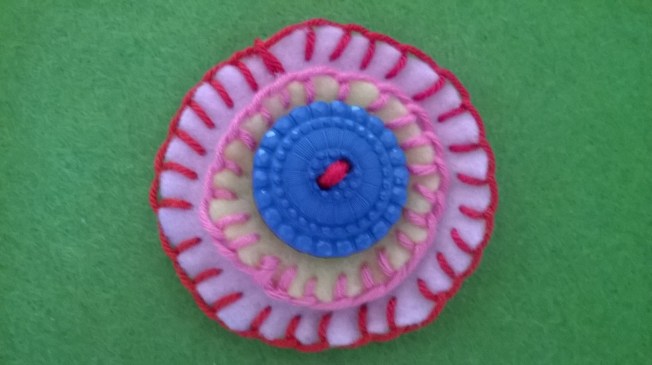
This one has a very special button, from my Gran’s collection… she would have been 99 years old this year.
So, that’s my weekends make… hope you have had a good weekend too.
xxxxx
Share this:

A lost yarny Angel
Do you remember these…I think I must have given all mine away last Christmas, because I’ve searched everywhere for my host of angels and can’t find them…I think it will be off to the shops tomorrow for some pipe cleaners and some sparkly yarn.
This divine angel is made by hooking 2 small granny squares and assembling with a few bits and pieces. I made mine in a white yarn with a silver sparkle…the pattern is by the very talented Priscilla Hewitt (search Granny square angel on her site) and is super simple to follow and in no time at all you could have your own host….


")

")
Share this:

A hooky bake off…
With my new kitchen install almost there and the ‘Robins nest’ returning to some resemblance of comforting family rhythm… I couldn’t resist hooking these sprinkle donuts…
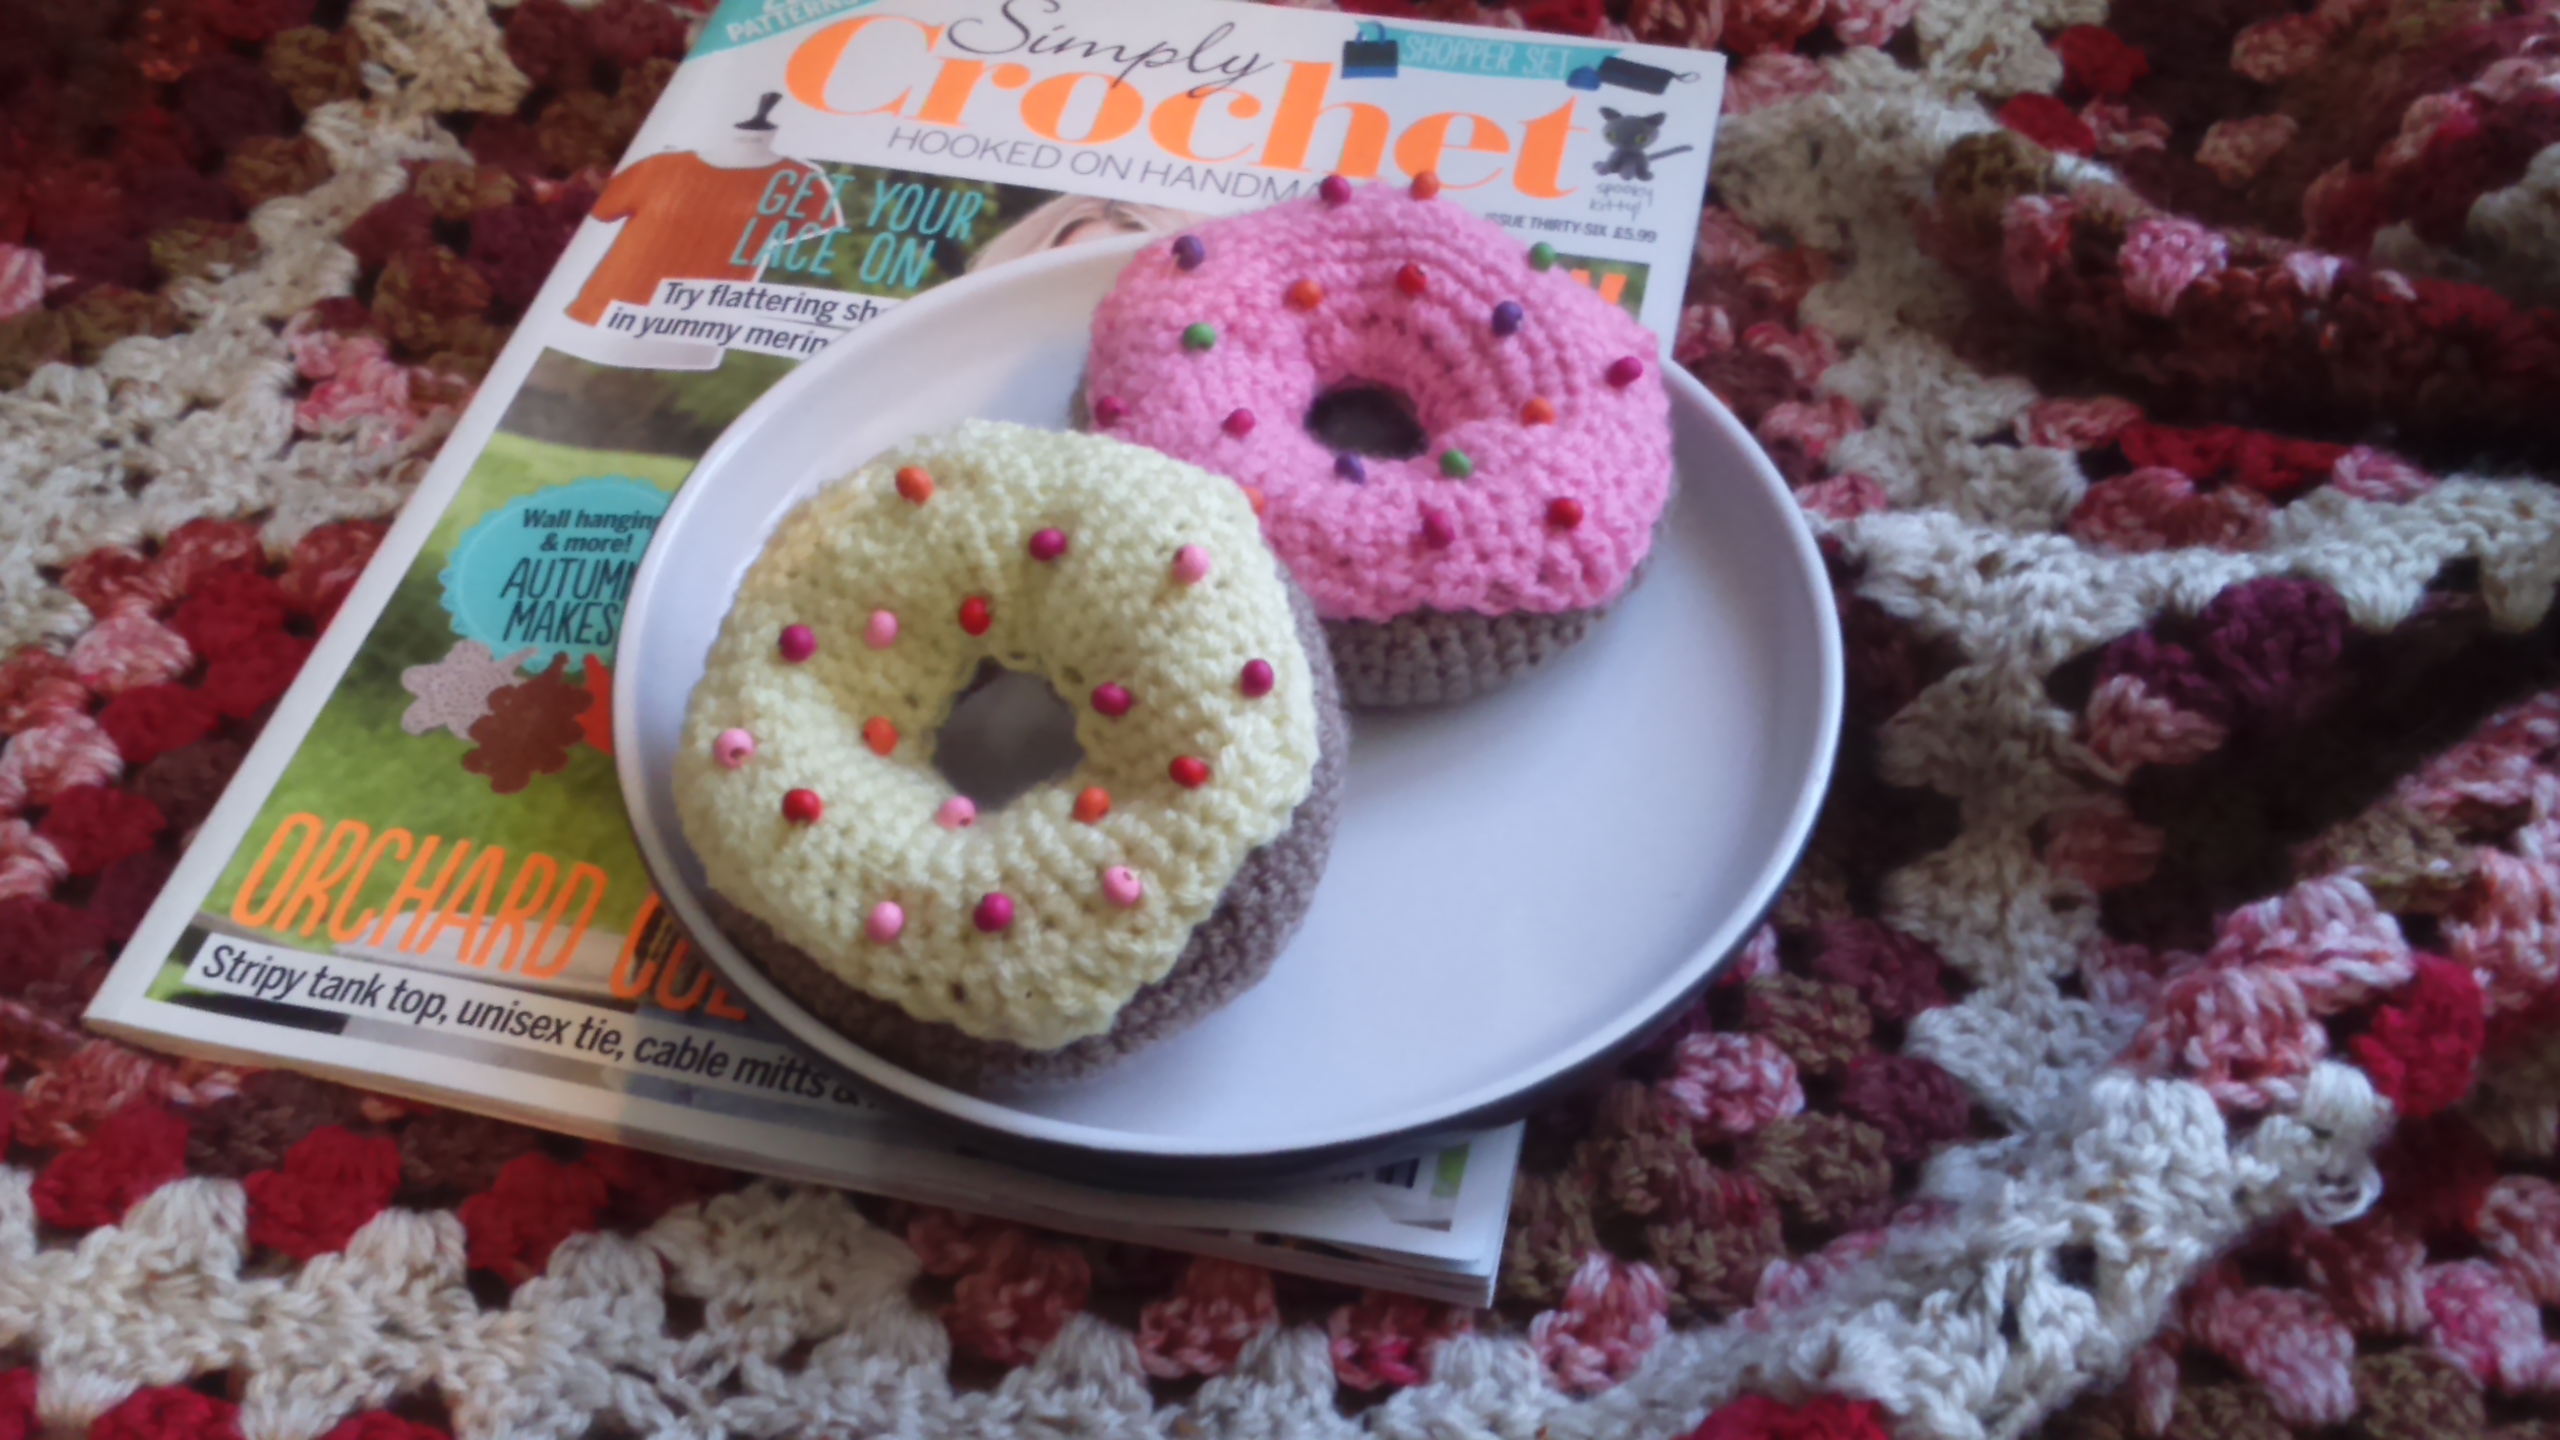
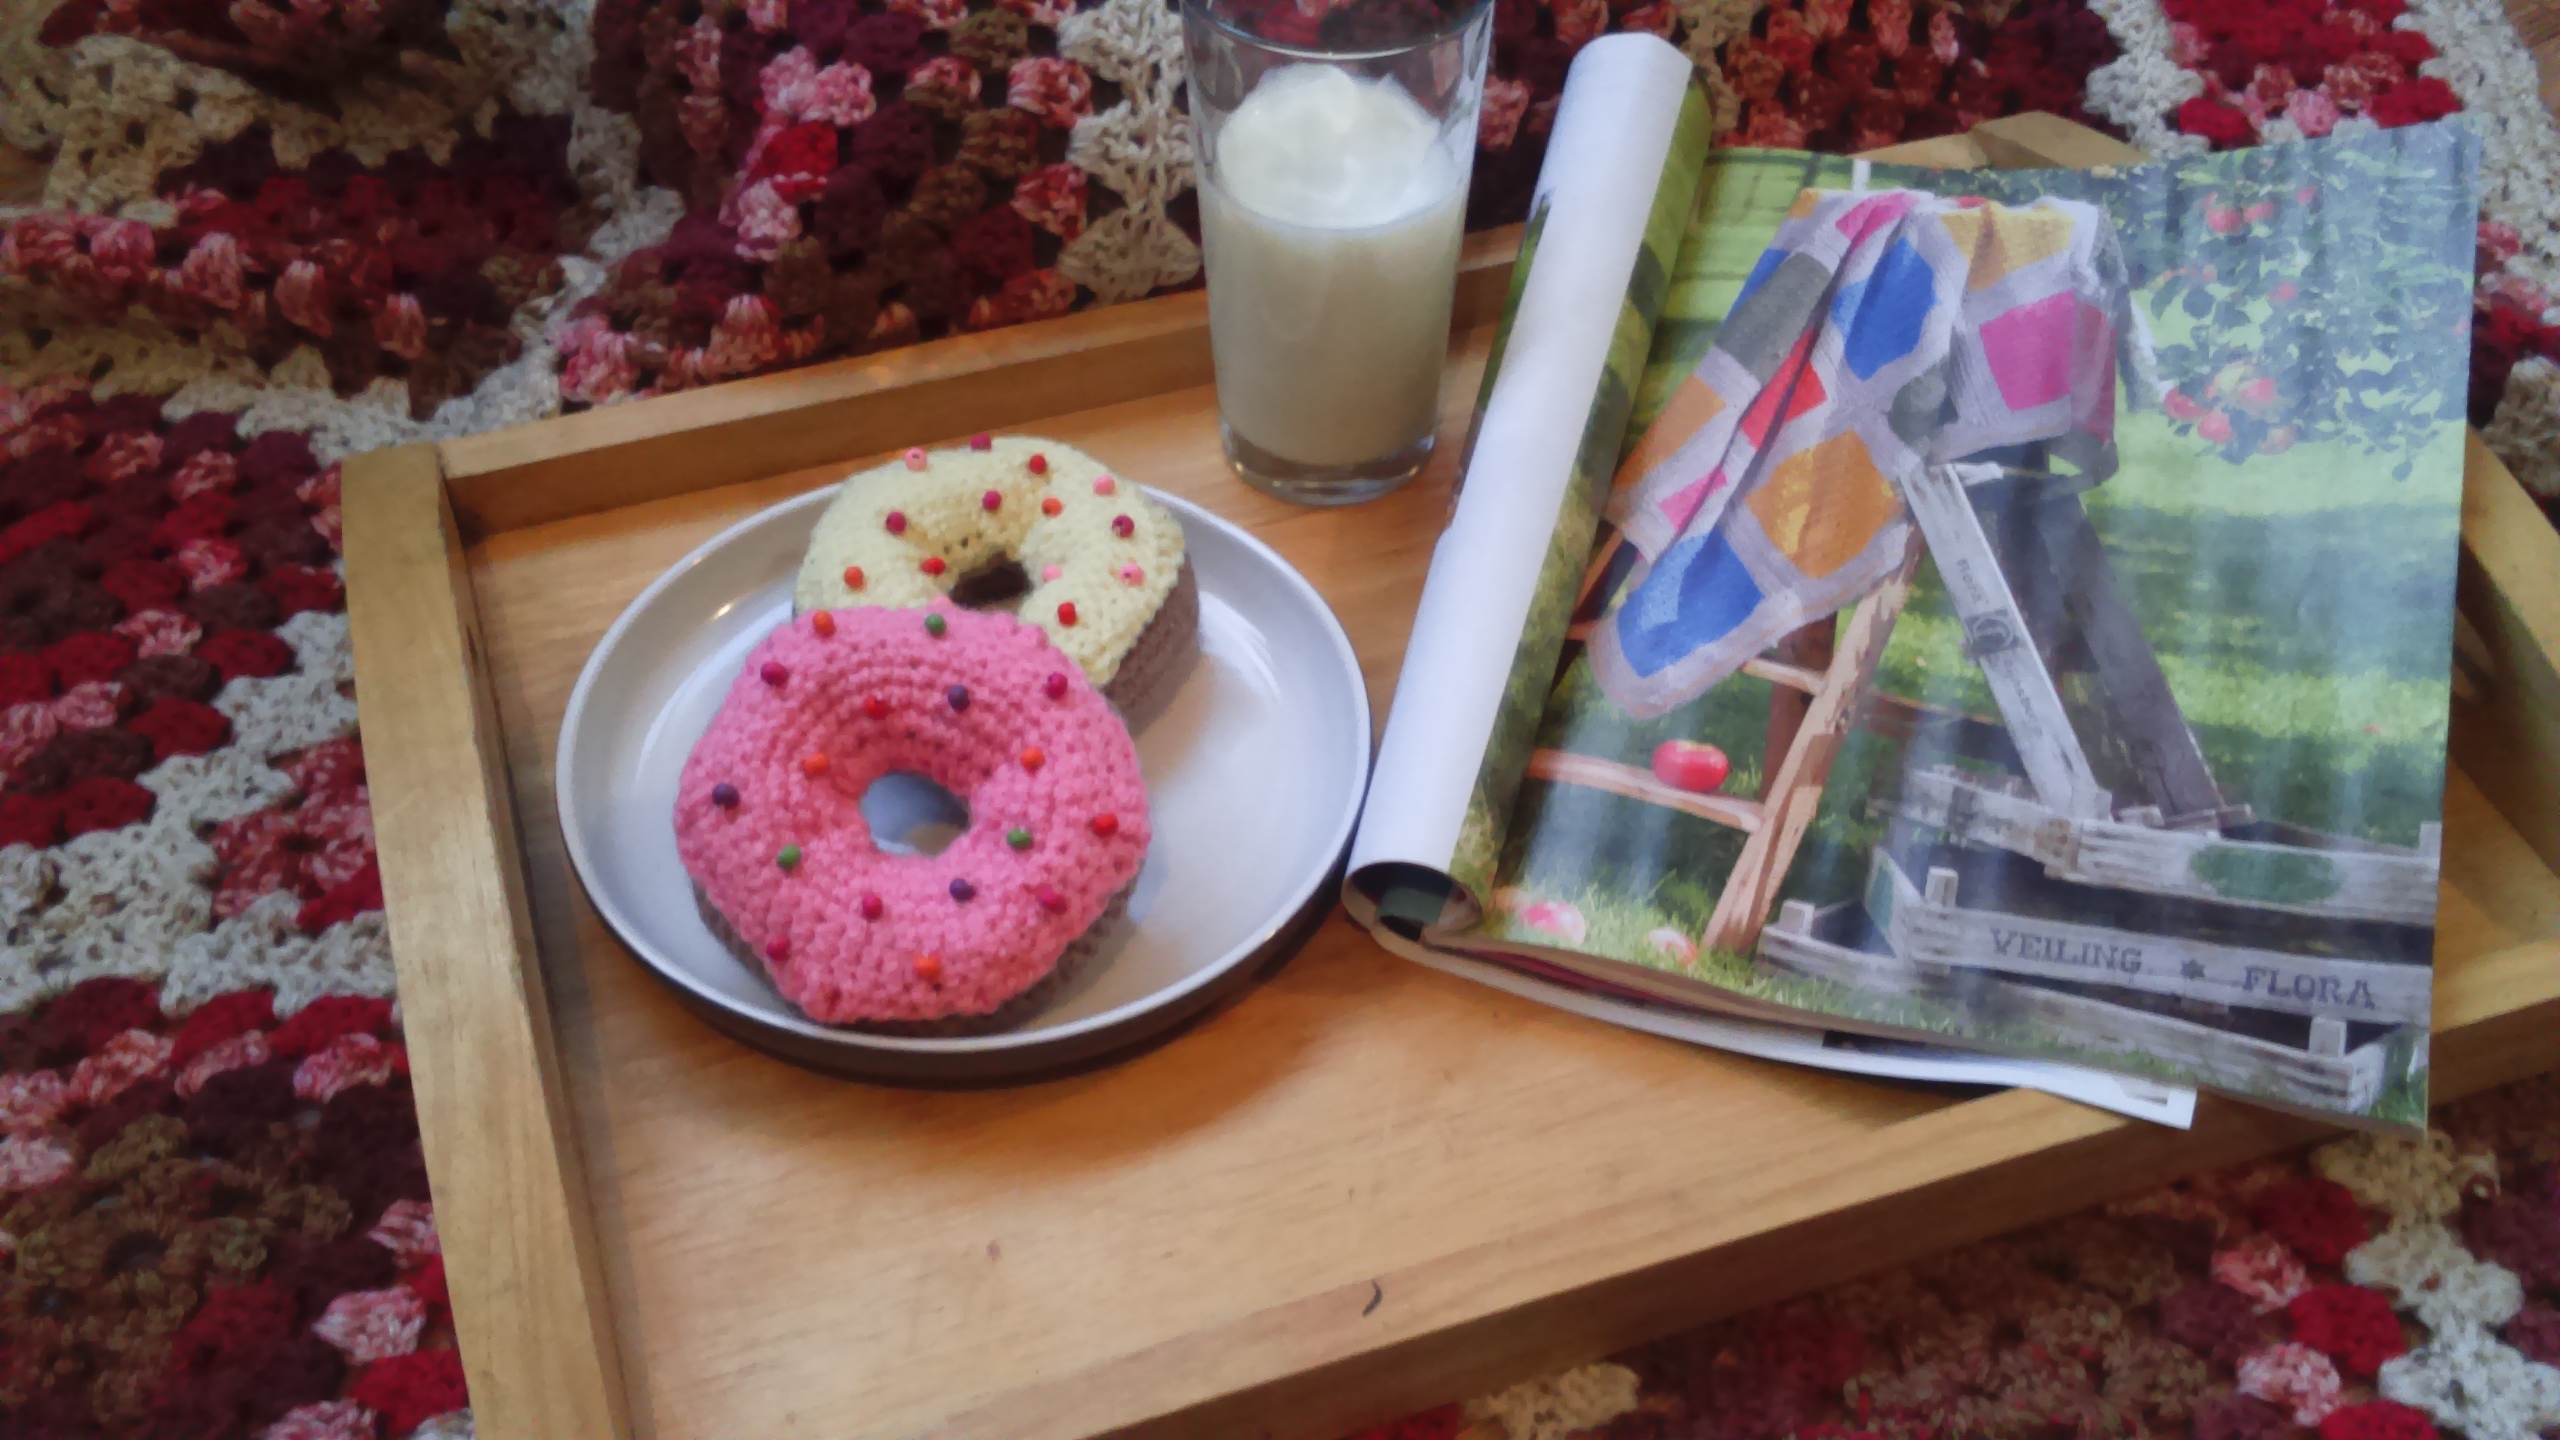
Here is the pattern link ‘sprinkly donuts’ from The Adventures of a Gingerbread Lady
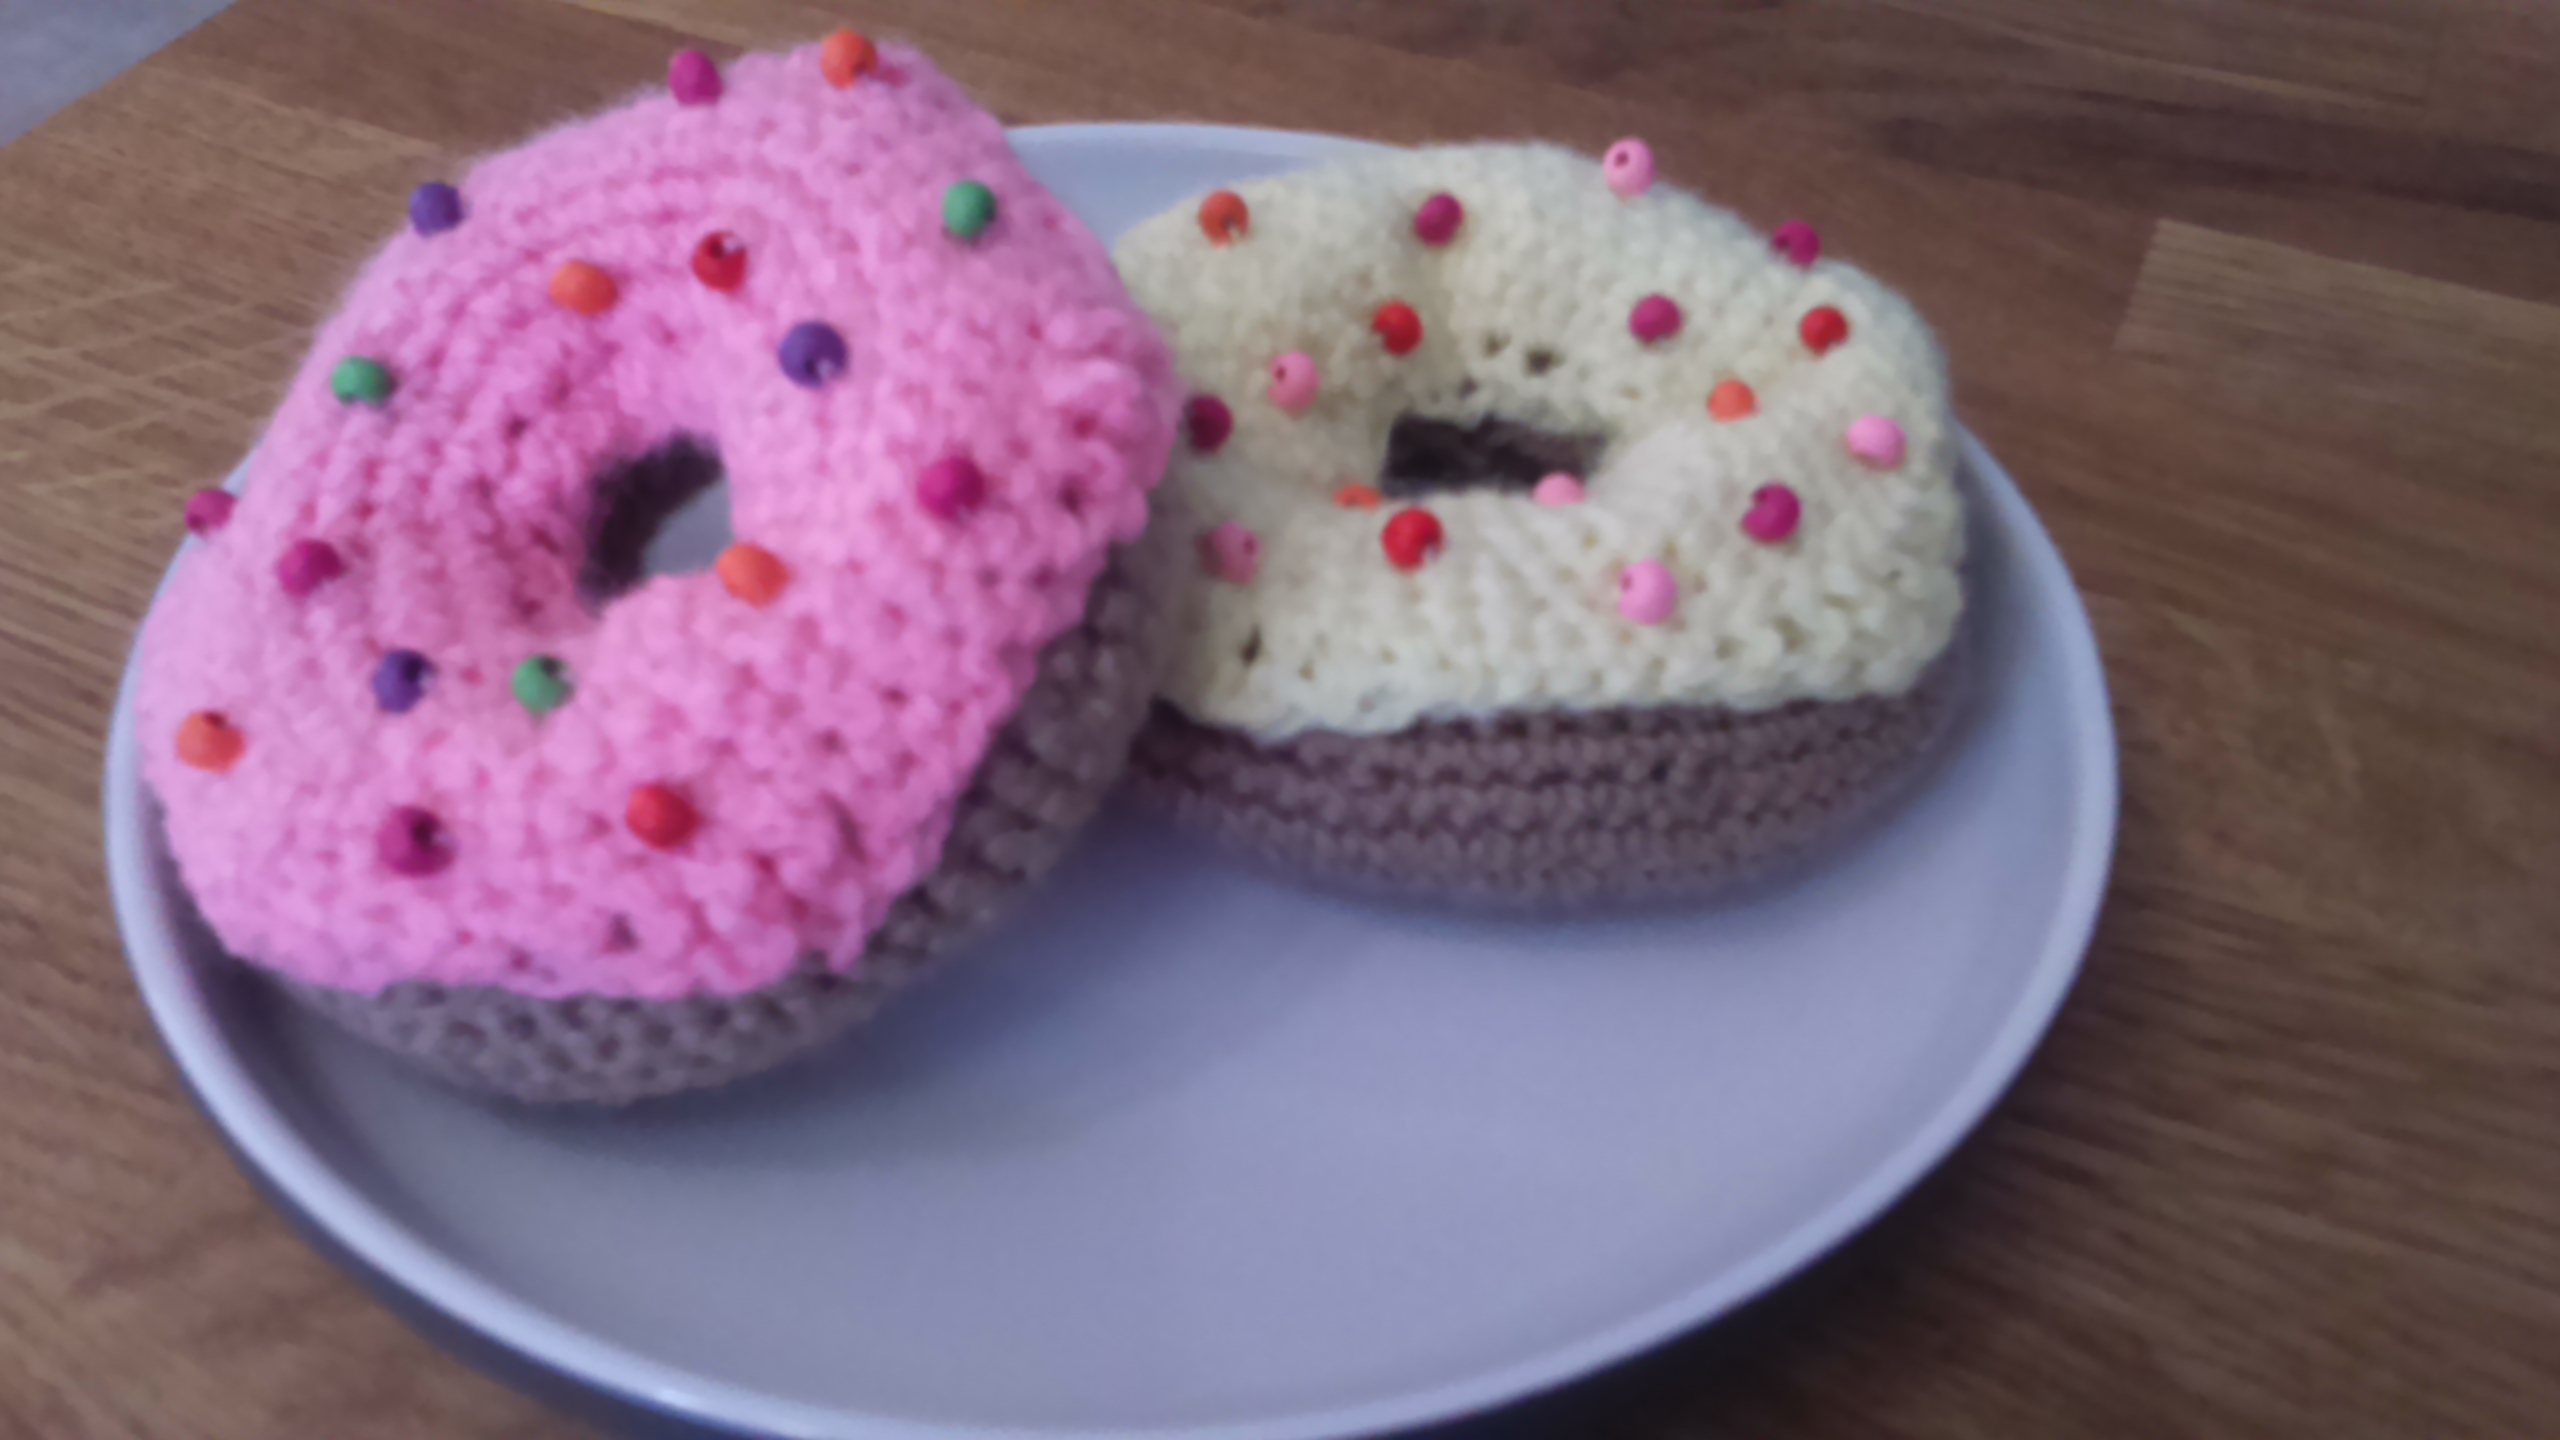
What do you think Mary Berry would say??
xxxxx

