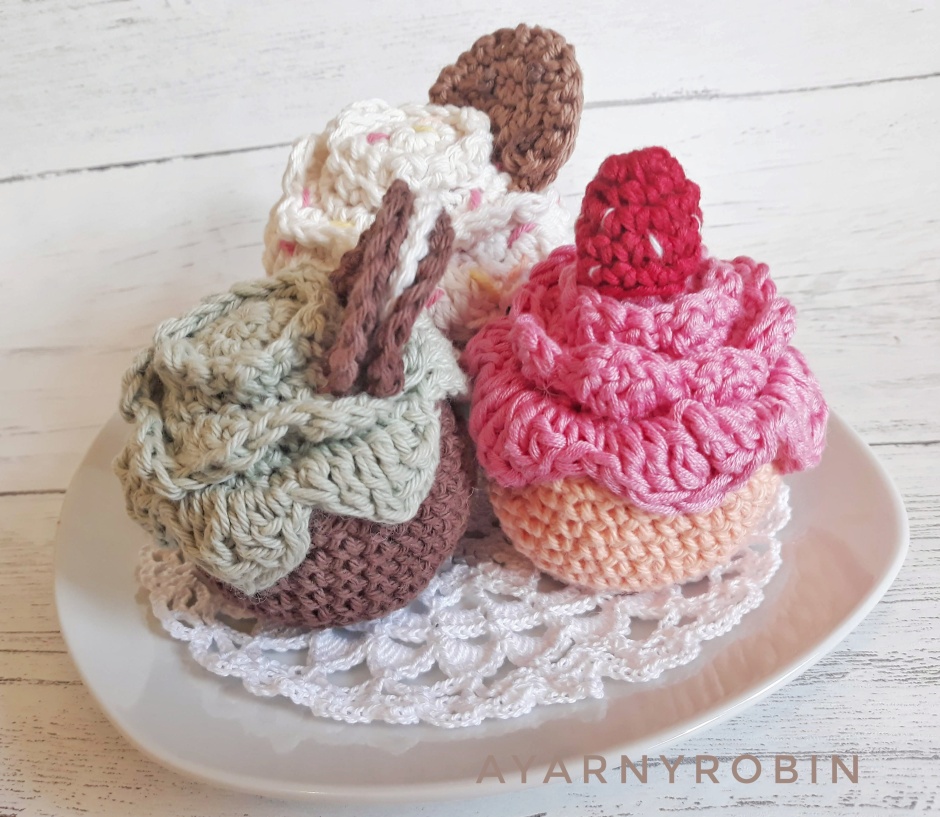
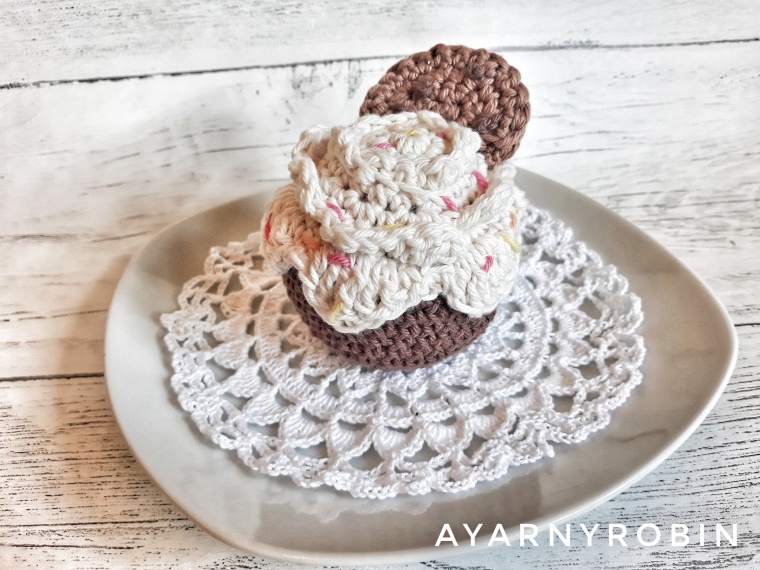
I wanted to crochet some cupcakes a while ago, but I couldn’t find a pattern that was just what I was looking for, so I set about hooking my own and writing my own pattern.
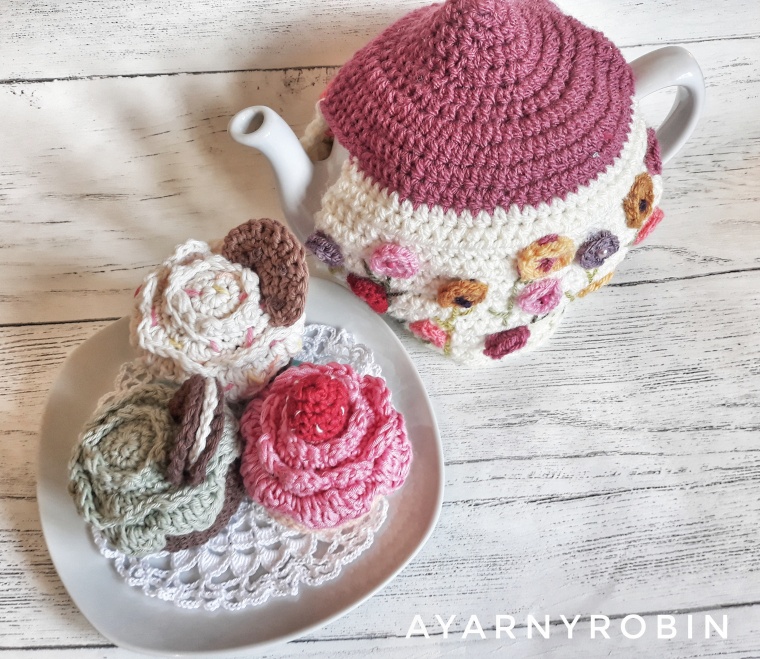
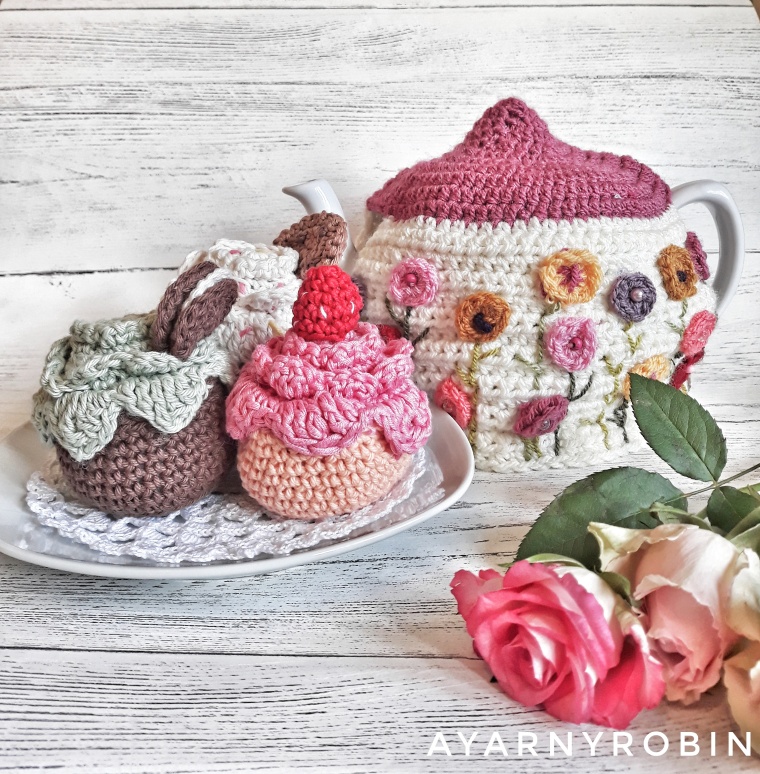
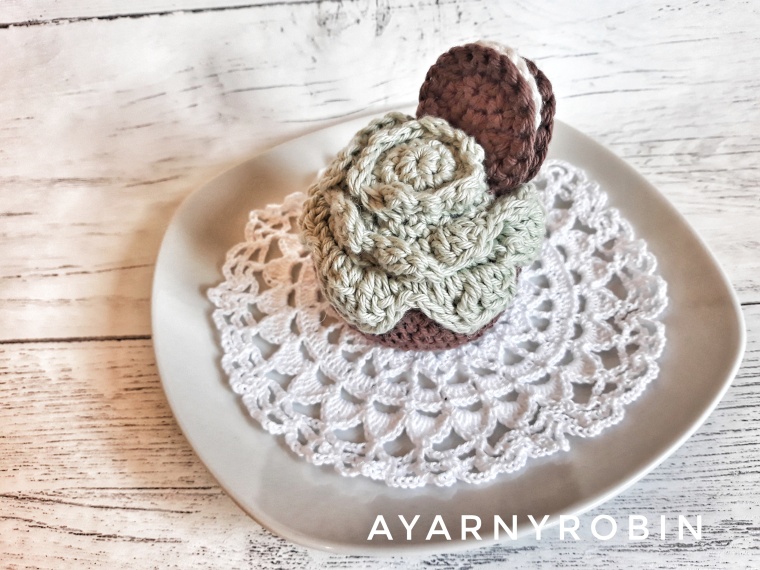
These cupcakes would look just divine as a table display for a special occasion and would also make a very special play set for a children’s kitchen. The pattern is for all 3 cupcakes:
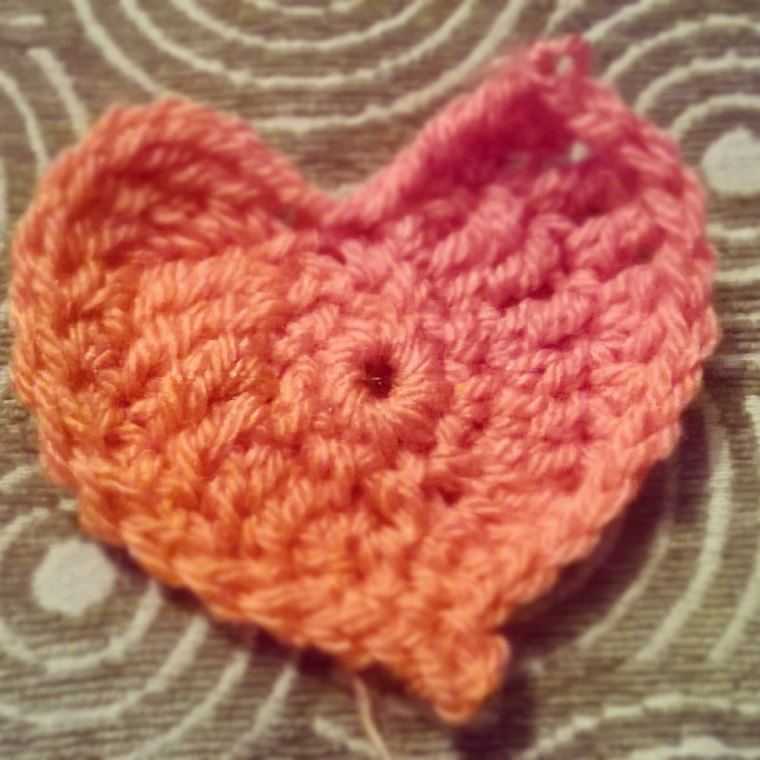
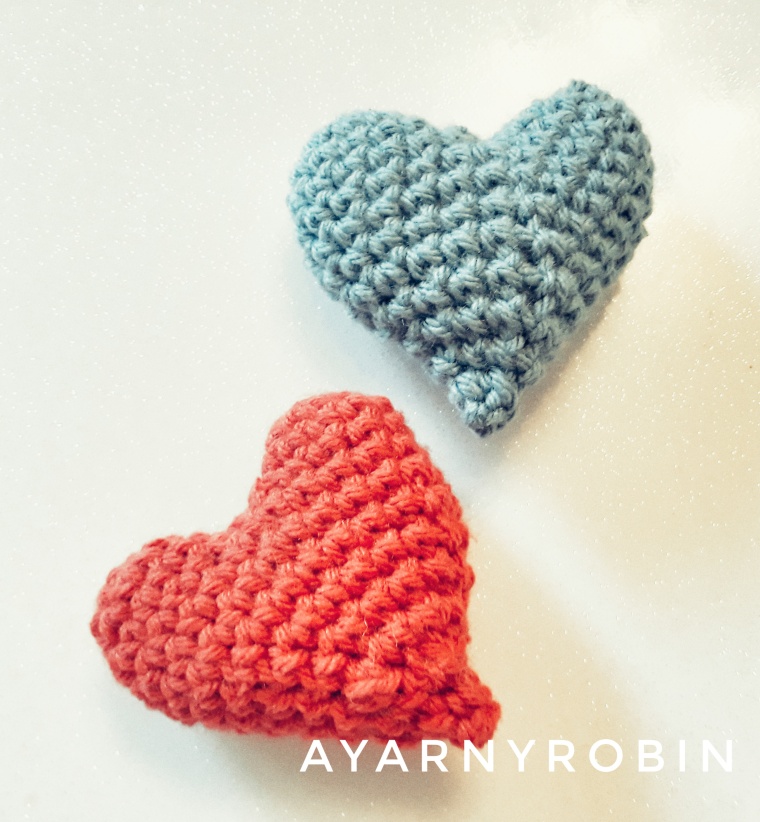
I spent a lazy New Years afternoon looking at lots of different heart patterns over on pinterest, but this pattern was written well and was my favourite by far.
I really like the neat little invisible decrease stitch which is recommended in the pattern too. I had read ‘invisible decrease’ in a few patterns, and had no idea how to make my decrease invisible, but this pattern clearly explains how to execute said stitch…and it is super nifty and is indeed invisible.
These hearts are made from Stylecraft Special Chunky and measure approx. 10cms x 9cms.
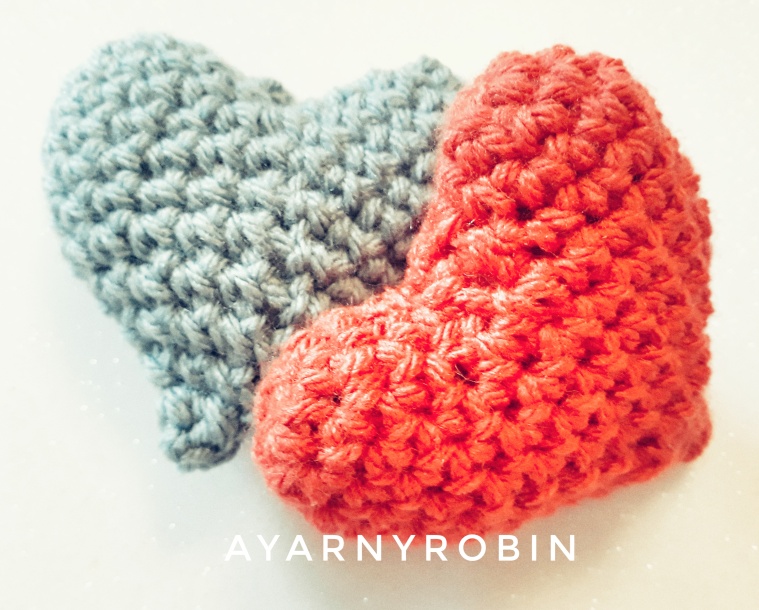
I ended up hooking several and found it a very pleasant way to spend an afternoon thawing out after an extremely cold and particular lengthy walk with the dogs.
I think these hearts would be adorable as little newborn photo props or for gender reveals or perhaps even for Valentine’s which is just around the corner!
As 2018 draws to a close and 2019 peeps over the horizon, it is that time of year when bloggers from all around the world post their obligatory review of the year.
Yes, this is that type of post…however, I have kept it simple and I have decided to choose just one photo from each month…yarn related of course.
Suffice just to say, 2018 has had it’s ups and downs, as I am sure it has for you; but crochet has, as always been my constant therapy! 2018 was all about busting my stash, finishing Projects Half Done (PHD’s) and learning to knit…I have also released the following FREE patterns this year which I hope you have enjoyed.
Being part of an amazing crafty community means so much to me and I just want to say a MASSIVE thank you to you, whether you are a first time reader or if you are a regular here at the nest. Your support and encouragement is treasured.
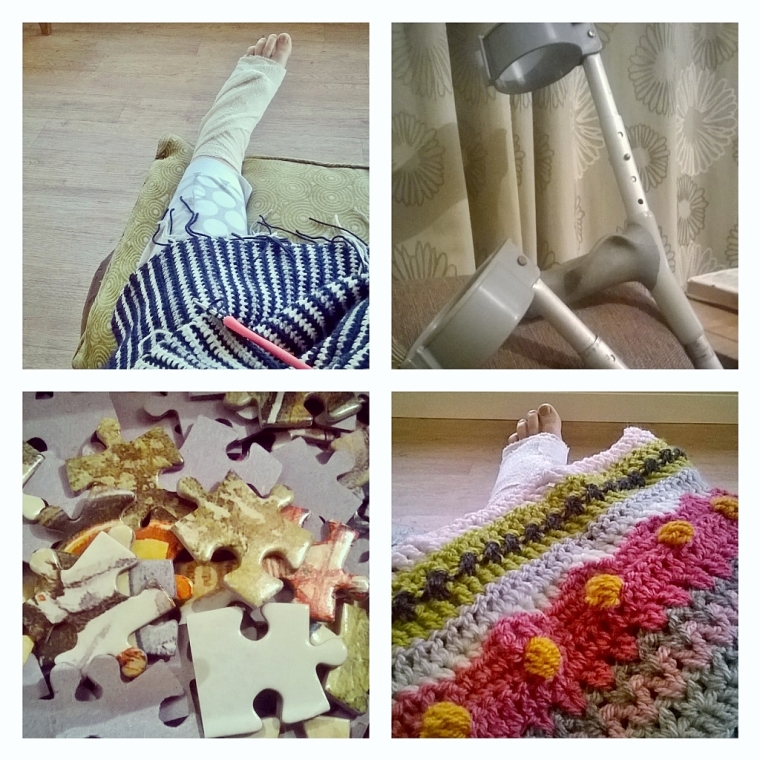
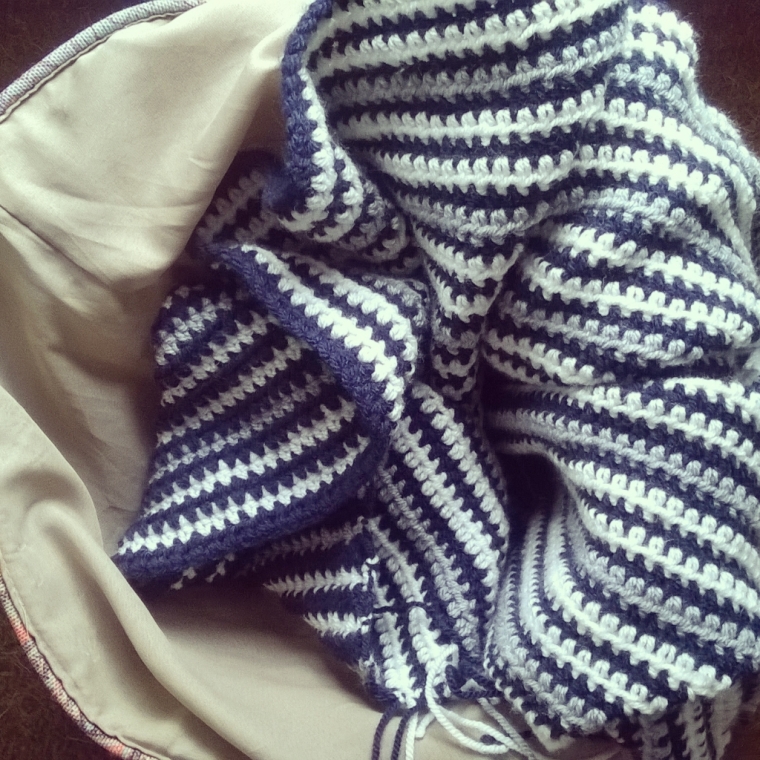
February, revolved around guilt free crochet as I ended up on crutches and had to take a month out of work. Luckily, for me I found the beautiful Seaside Stashbusting Blanket CAL hosted by the very talented Coastal Crochet It was the perfect project to bust some of my stash…every cloud eh!
March 2018
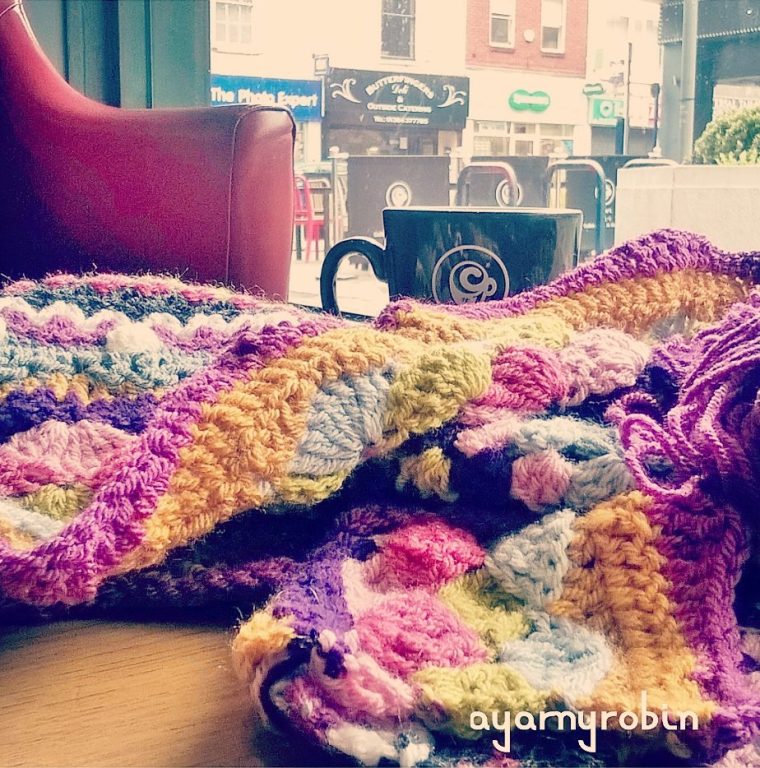
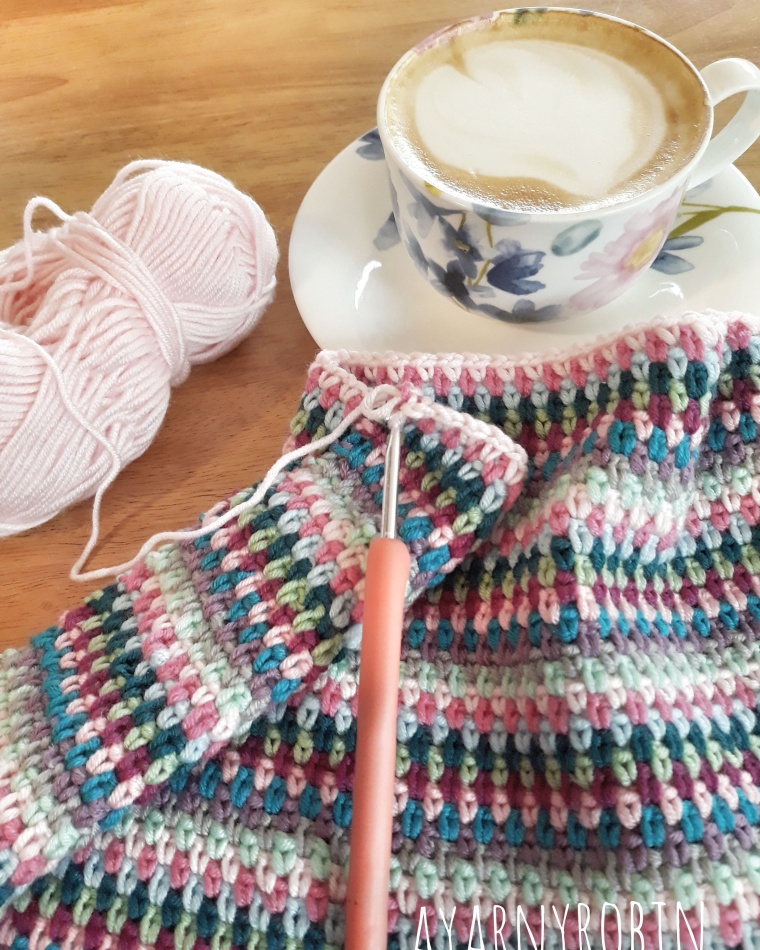
crochet and coffee
This is my favourite photo from March. My Seaside Stash Busting Blanket was starting to look more blanket like and by now I was enjoying the random colour selection from my stash.
April 2018
On a personal level April was profoundly traumatic and sad here at the nest, but on a yarny level I released the pattern for this beauty. I just love this blanket so, so much and it proved to be a welcome shower of cheer which burst forth amongst the grief. This also fulfilled the remit of completing a PHD!
2018 saw the beginning of my learning to knit adventure…this is as far as I got. I started really well and perhaps got a little ambitious…which became my downfall. Here are my posts to prove it here,just here and here
I haven’t returned to this project yet as I can’t work out where I am in the pattern! I do really want to finish this off…a New Year Challenge perhaps?
June 2018
We had an unusually hot summer here in the UK, so hooking al fresco was great now that my Seaside Stash Busting Blanket had grown in size. We had a beautiful sunny weekend glamping and those soft pink and grey shells will forever remind me of that recharging break away with Mr R and the Robins. You can read about those glamping adventures just here.
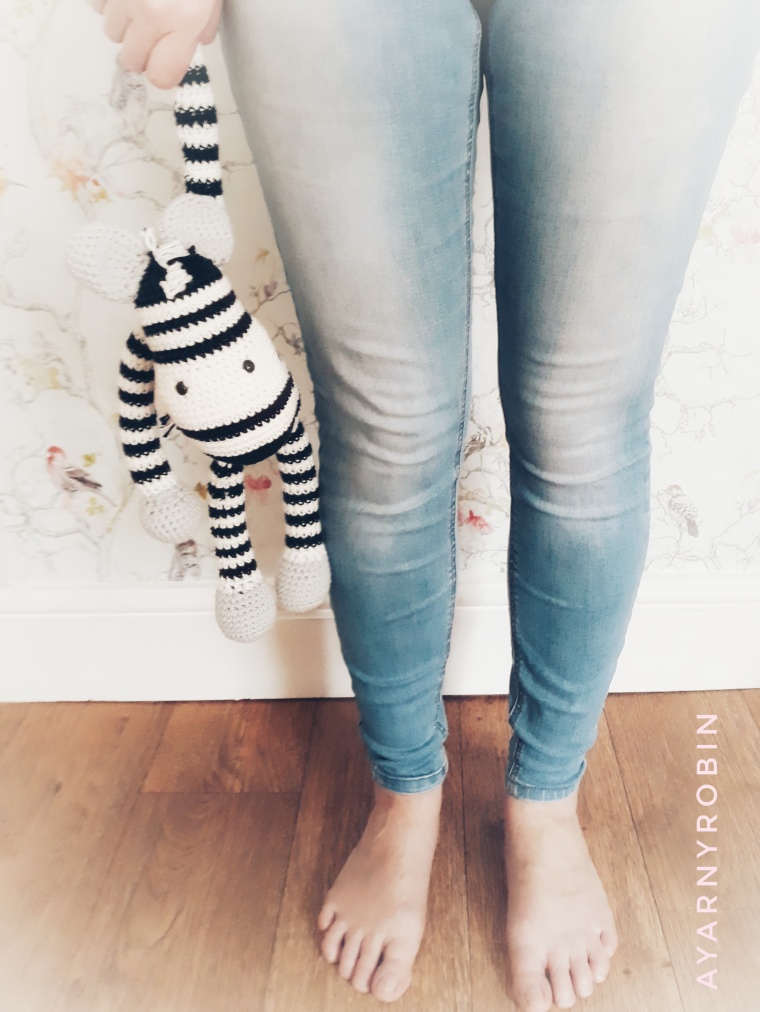
July 2018
The stash busting continued throughout July and inspired me to hook this cheeky dude. I had some black, white and grey Paintbox cottons just sitting in my stash and the most apparent thing to make was a zebra of course.
Having never made amigurumi before I am now completely smitten with all things amigurumi, which came as a total surprise to me! I made so many mistakes with this pattern, but learnt lots about the process of amigurumi along the way…if you want the full details of the mistakes I made take a look here.
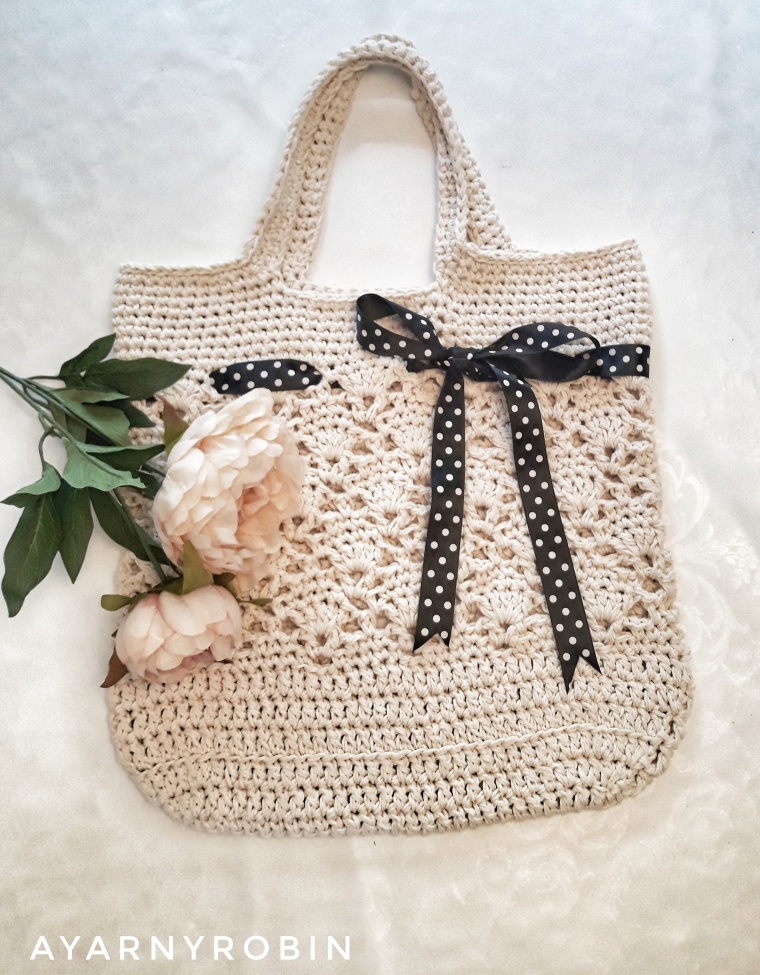
August 2018
This was a joy to hook and also busted some more stash. I made this Vintage Market Tote for my Mama…and she loved it
September 2018
The end was in sight for the now glorious Seaside Stash Busting Blanket…and just in time for the change of seasons as Autumn crept in.
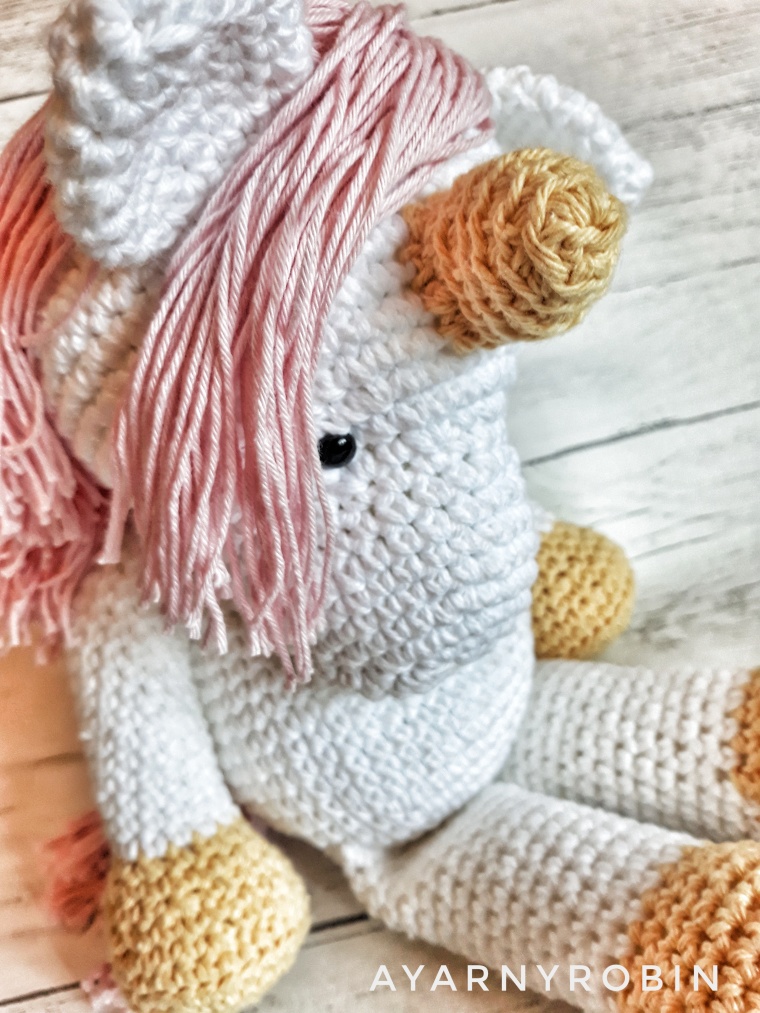
October 2018
A real …tadaaa… moment. This beautiful unicorn was made with a lot of love in my heart and no mistakes…well none that I know of! A real gem of a pattern that was easy to follow and so well written. It was an absolute joy to send her to her forever home and I am looking forward to hearing what she has been named. The pattern details are just here.
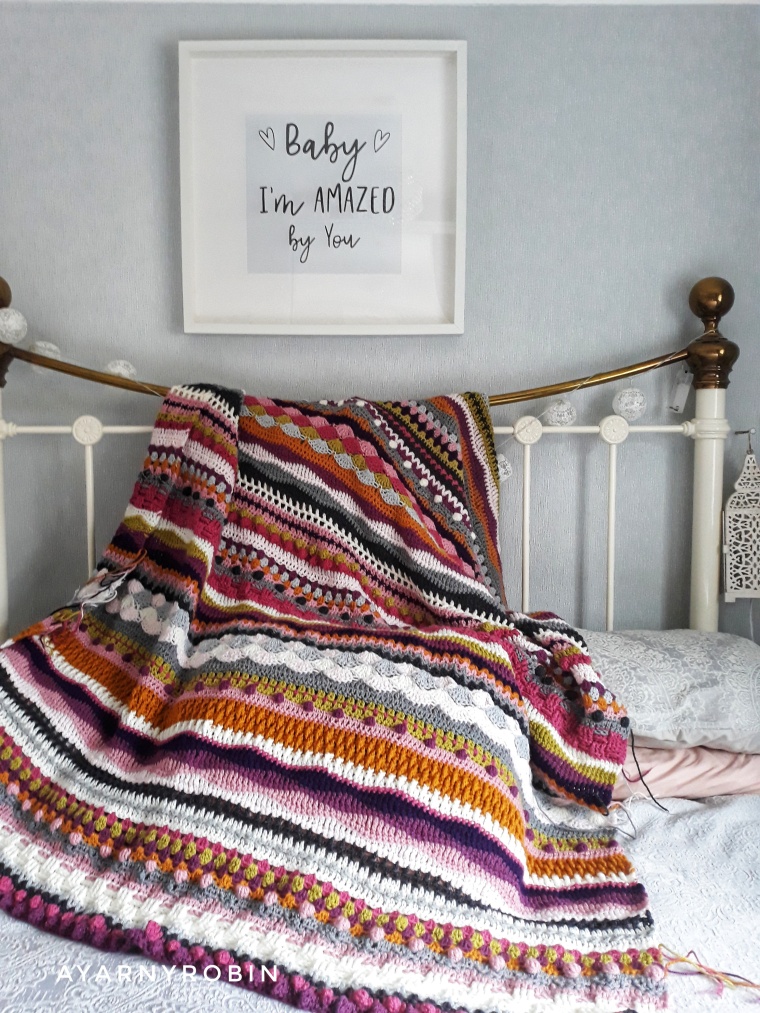
November 2018
My two favourite things to do when I’m on my own are to crochet and drink coffee and if I can do both whilst watching the world go by then that is near perfect for me.
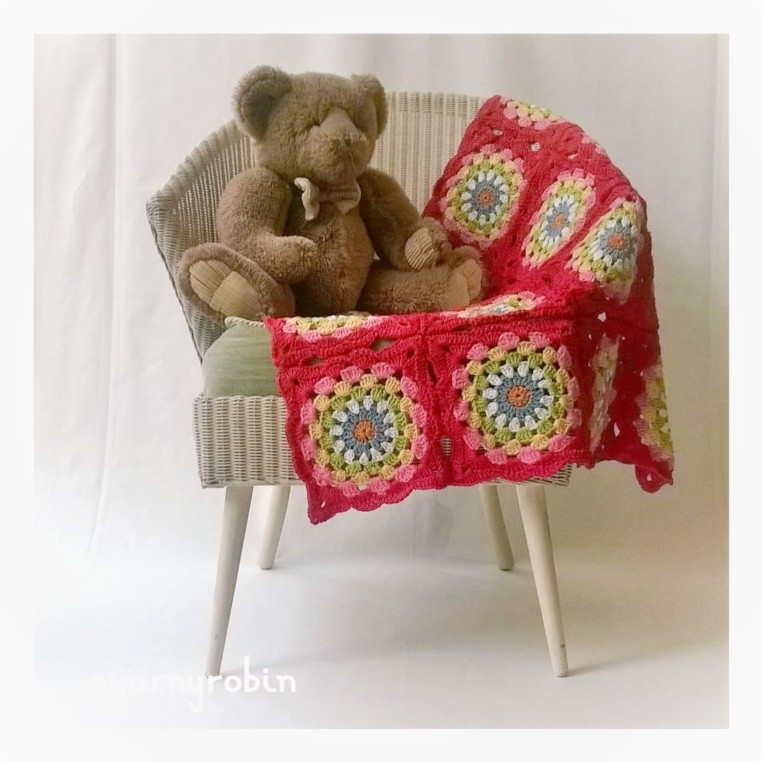
This is another stash busting win for me also…a super soft and pretty baby blanket using up left over yarn from my Sunday Shawl.
This photo is from January…a PHD fail. I have added some more rows over the course of the year…honest I have. I don’t know why I haven’t finished it. The pattern is simple and it is very handsome… and it is not really that far from being finished; but the pretty things call me more loudly.
All in all 2018 has been quite yarny, maybe not as yarny as some, but yarny nonetheless. I have met some amazing crafty friends along the way, busted through a lot of my stash and finished a PHD or two.
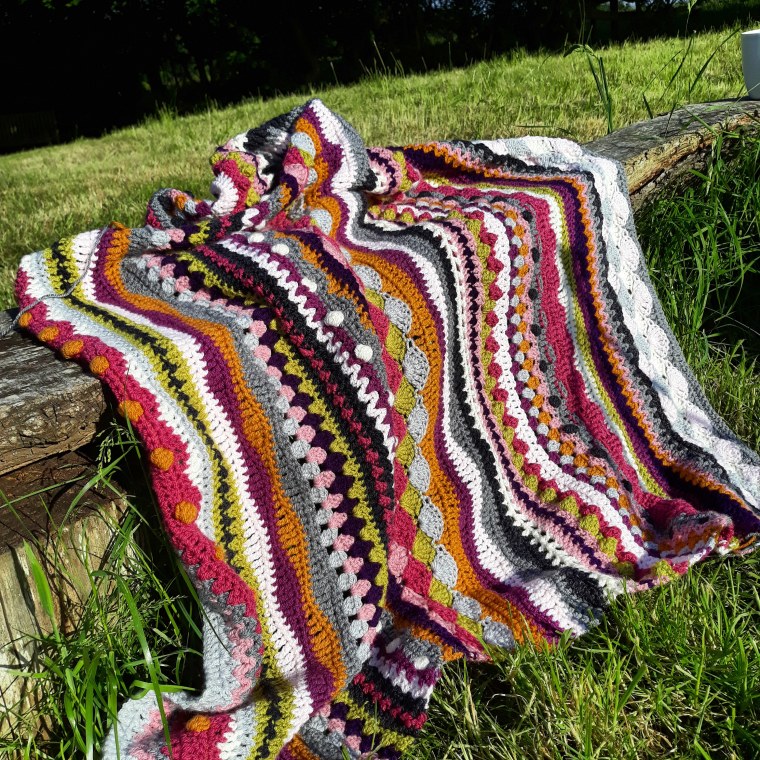
It’s done! I have made the last stitch and woven in the last end of my beautiful #seassidestashbusting blanket.
It’s huge and I simply love it!
Oh! what a journey this blanket has been…a beautiful, stitchy, vibrant and meandering journey of colour, crochet and community…not to mention stash busting too!
Thank you so much to Eleanora over at Coastal Crochet for hosting such a marvellous and well organised CAL (crochet-a-long) and to all the lovely people I have met a long the way; who have encouraged and inspired me with kind words or blankets of their own. I have really enjoyed scrolling through the IG feed #seasidestashbustingblanket and seeing so many wonderfully unique contributions.
I am keeping this blanket for myself because honestly, I just can’t bear to be parted from it. I have hooked in so many memories of my year…like the sunny glamping rows, the foot surgery rows, the world cup rows, the too hot to crochet rows and the snowy day bobbles and I can relate each memory to the specific rows. I will leave you with my photographic journey…
Love, love, love this blanket.
I’m not sure what I’m going to do without the weekly rows…
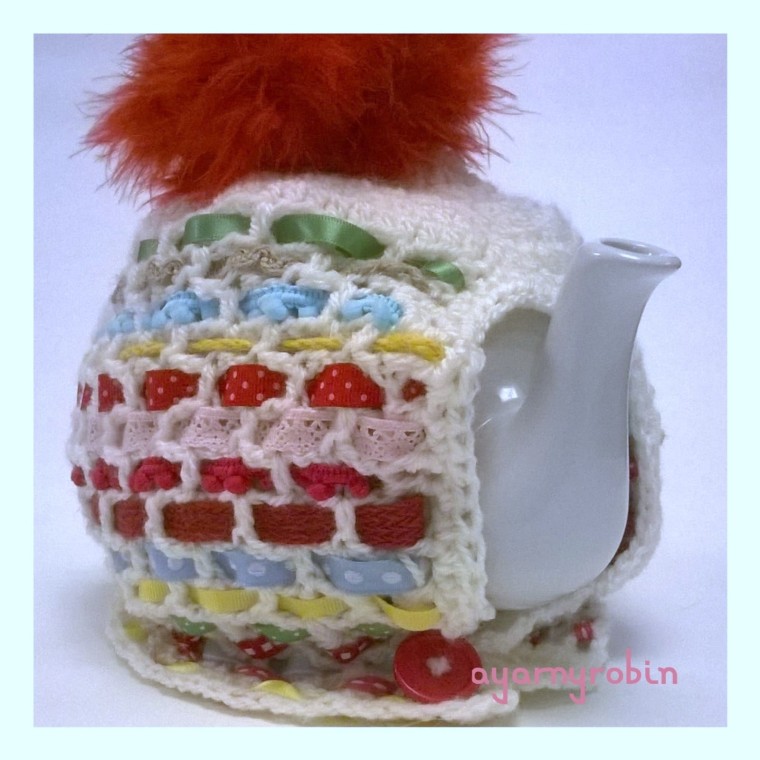
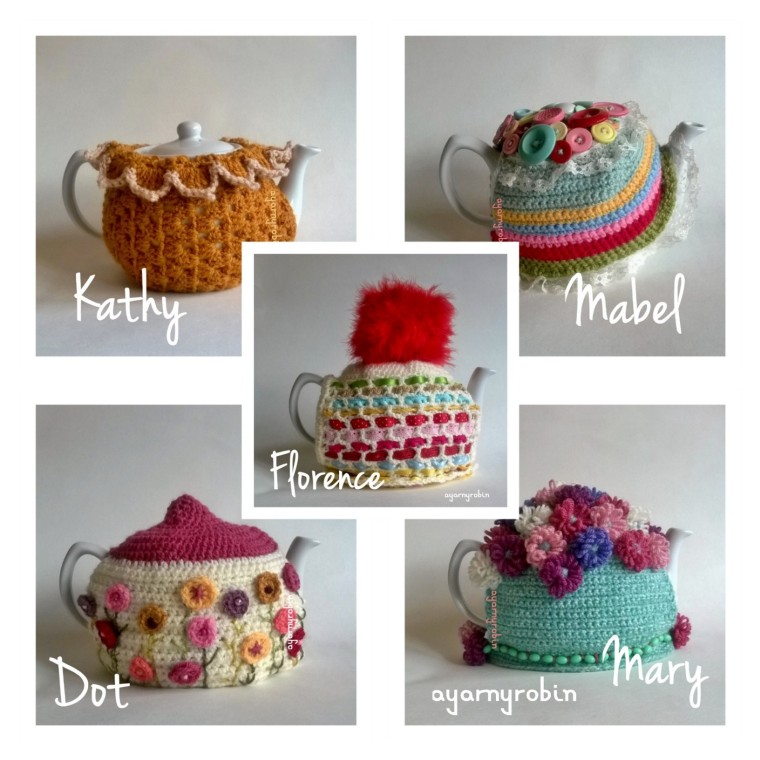
The ‘Florence cosy’ will add a large dose of fun to your teapot with a fluffy oversized pompom and woven ribbons.
and the ‘Kathy cosy’ offers understated off the shoulder glamour in traditional granny stitch style.
Each patterns is free and comes with a photo tutorial. They are easy to hook and make great weekend projects; which makes them the perfect gift for tea lovers.
Which one is your favourite?
I hope you will have fun hooking these great tea cosies.
I am so thrilled to be able to introduce the Sunshine Jelly Baby blanket to you.
This delightful crochet blanket is vibrant and fun to hook and the pattern is available, complete with a photo tutorial just below. Made from Drops Muskat cotton, it measures 74cms x 74cms or 29″ x 29″…the perfect pram blanket size, of course you can make the blanket bigger by adding more squares if you wish. You can also check out my latest free baby blanket pattern…The Angelece Baby Blanket by clicking this link. This delicious blanket is made using the Robins Nest square which I designed a few years ago and if you are a regular here you will know that I have recently updated this pattern. When I firstdesigned this square I always intended to make a baby blanket…I guess somethings just take a while to come to pass.
As always I’m using English crochet terminology. Ch – chain Slst – slip stitch dc – double crochet tr – treble crochet
ch3 – counts as a treble unless otherwise stated. I’m using drops muskat cotton.
and I’m using the colours and quantities listed below red – 100g old pink – 80g white – 50g vanilla yellow – 65g dark orange -20g
sky blue – 35g
apple green – 50g
and a 4mm crochet hook and a 3.5mm crochet hook
Each lovely yarny square measures 7″ x 7″ or 18cm x 18cm once blocked.
You will need to make 16 squares to make this blanket arranged
4 x 4…
of course you can make more squares if you wish to make a larger version.
So here goes…
with a 4mmhook ch2, join with ss to form a tiny ring (you could make a magic circle instead if you prefer)
Row 1: ch3,
11tr into ring,
join blue yarn and slst into 3rd ch
(12tr in total).
Row 2: ch3,
1tr in same space, ch1
2tr in next st, ch1
*2tr in next st, ch1*, repeat * * x10 times,
join white yarn and slst into 3rd ch
(12 clusters of 2tr and 12 ch spaces).
Row 3: ch3,
*3tr in next ch space*,
repeat * * x10 times, 2 tr in next ch space,
join with slst in top of ch3 and fasten off.
(12 clusters of 3tr).
Row 4: join green yarn in between any cluster of 3tr of previous round and ch3,
3tr in same sp, ch1
*4tr in between next cluster of 3tr, ch1*,
repeat * * x10 times, join with slst in ch3 and fasten off. (12 clusters of 4tr and 12 ch spaces)
Row 5: join yellow yarn in any ch space and ch3, 4tr in same sp, ch1
*5tr in next ch space, ch1*, repeat * * x10 times, join with slst in ch3 and fasten off. (12 clusters of 5tr and 12 ch spaces)
Row 6: join pink yarn to any ch space and ch3, 5tr in same sp, ch1, *6tr in next ch space, ch1*, repeat * * x10 times, join with ss in ch3 and fasten off. (12 clusters of 6tr and 12 ch spaces)
Row 7: join red yarn in any ch space, ch3, 5tr in same space,
ch3,
6tr in same space (corner made),
*6tr in next ch space, 6tr in next ch space,
6tr in next space, ch3, 6tr in same space* (2nd corner made) repeat * * x2 times
6tr in next space, 6tr in next space, join with slst in beginning ch3. Do not fasten off.
Row 8: ch3,
1tr in next 5sts,
*6tr in ch3 sp, ch2, 6tr in same space (corner made),
*1tr in next 5sts,
dc UNDER next stitch (indicated by the hook)
1tr in next 5sts, dc under next stitch, 1tr in next 5sts, dc under next stitch
1tr in next 6sts, 6tr in ch sp, ch 2, 6tr in same space*
repeat * * x2times
1tr in next 5sts, dc under next stitch, 1tr in next 5 sts, dc under next stitch, 1tr in next 5 sts, dc under next stitch, slst to beginning 3rd ch to finish. Weave in ends.
Blocking:
A word on blocking: Before blocking…
Your square will be wibbly. After blocking…
Your square will lie flat and will look much better. Blocking is really worth the extra effort and isn’t difficult or expensive to do. I just pinned this square to my ironing board so that it measured 7″ by 7″ and hovered my iron just above the square and blasted it with steam. Allow to cool before unpinning and store carefully. Alternatively, you could pin the square to the required measurements to a towel or a pin board, spritz with water and allow to dry.
Joining:
I have used a simple and easy slip stitch to join these squares. I have chosen this join for two reasons. The first reason is that it is secure and does not add anything to the squares, allowing them to showcase themselves.
The second reason is it uses the least amount of yarn and also creates less ends to weave in.
So to join the squares start by placing 2 squares with the right side to the right side…ie/ the wrong side of each square will be facing outwards.
Note that this join requires you to place slip stitches in the top of the stitches along the edge of the square and you should go under both loops of each stitch.
Some stitches will require you to slip stitch in both stitches of each square, these stitches should be the corresponding stitches for each square. Some stitches will require you to slip stitch in the top square only. This is because the squares are only joined to each other at each corner and in the middle of each scallop.
Join yarn in 2nd ch of any corner space and with a 3.5mm hook slst,
in both squares slst in the next 6sts,
in top square only slst in next 6 sts (tr), slst in next st (dc), slst in next st (1st tr of scallop),
*in both squares slst in next 3 sts (2nd, 3rd &4th st of scallop),
in top square only slst in next 3sts (tr,dc,tr)*
repeat * – *
in top square only slst in next 5sts,
in both squares slst in next 6 sts, miss chst, slst into 2nd ch of corner space.
Repeat this process for each side of the square which requires joining. You will not need to cut your yarn at the end of each side joined as you can continue round by adding another square. I started joining in the middle of the blanket. You will have to join in a new corner space for some of the joins, but the process remains the same.
I would love to see your makes and you can share on social media by using the following hashtags
#ayarnyrobin #yarnyrobin @yarnyrobin
This pattern to include the photos are the property of Nicola Florence @ayarnyrobin. You can’t modify, resell or share this pattern. You can sell finished items made from it, but please mention that the item is made using AYARNYROBIN pattern.
This is the fifth tea cosy in the Grandma collection, and is quite simply delightful. The use of traditional granny stitches means that this pattern can be hooked within an evening. Ideal for that last minute handmade present. This cosy is sweetly uncomplicated and will cloak any tea pot with elegance.
Dedicated to the inspiration that is ‘Nanna Kathy’
The pattern makes a tea cosy that fits a standard 6 cup teapot.
You will also need a darning needle, pin or stitch marker and a pair of scissors.
Stitches used in this pattern refer to English terminology, however a conversion to US terminology is provided in brackets below.
Ch – chain stitch
slst – slip stitch
dc – double crochet (single crochet)
htr– half treble crochet (half double crochet)
tr – treble crochet (double crochet)
dtr – double treble crochet (treble crochet)
You will also need:
a 5mm crochet hook for main body of teapot and a
4mm hook to complete picot edging trim.
Ok, here we go…
Using the gold yarn and 5mm hook, Ch 20
To adjust cosy size, the starting chain should be equivalent to the height from the base of teapot to the top of the body of the teapot or to put it another way, to the start of lid. If adjusting the starting chain it must be a multiple of 3+2.
*********************
Row 1: dc in 2nd ch from hook, dc in each st along, ch3, turn (ch3 counts as tr) (19dc in total).
Row 2: 2tr in same space as ch3, *miss 2 sts, 3tr in next st (granny cluster)*
repeat * – * til end of row, ch3 (counts as tr) turn.
(x7 granny clusters / x6 spaces).
Row 3: miss 1st granny cluster, 3tr in space before next granny cluster, *miss granny cluster, 3tr in space before next granny cluster* Repeat * – * to last space, miss 2 sts, 1tr in last st of row, Ch3 (counts as tr), turn.
(20sts = x6 granny clusters / 7 spaces / 1tr on each end of row).
Rows 4: 2tr in same space as ch 3, *miss granny cluster, 3tr in space before next granny cluster* Repeat * – * to end. Ch3 (counts as tr), turn. ( 21sts = x7 granny clusters / x6 spaces).
Row 5: – 17: Repeat rows 3 and 4, but omit turning ch on row 17.
Row 18: turn, ch1 (does not count as st)dc in same space, dc in each st across, ch3 (counts as tr), turn.
(20sts).
Now to make the spout hole!
Row 19: 2tr in same space as ch 3, miss 2sts, 3tr in next st, ch 10, miss next x5 granny clusters / x4 spaces, 3tr in last st.
(20sts).
Row 20: ch1 (does not count as dc), dc into same space, dc in next 2sts, dc in next 10 chain sts, dc in next 6sts, ch3 (counts as tr), turn. (19dc).
Row 21: Repeat Row 2.
Row 22 – 32: Repeat rows 3 and 4 but omit turning ch on row 32.
If adjusting cosy size make sure to finish this section on a row that is the same as row 3 in the pattern ie/ starts and finishes with 1tr.
*********************
Row 33: ch1 (does not count as dc), dc in same space, dc in each st along and fasten off and weave in ends
(20dc).
nb/ top and bottom – x1 granny cluster underneath spout
Noting top and bottom correctly, attach gold yarn to top right side.
Now to complete the petals.
Row 34:ch1 (does not count as dc), dc in same space, dc in each st across – ( the term sts here is used loosely as they are actually the side posts of the trebles and double crochet sts of the previous rounds. It may look a bit ambiguous, but we are aiming to get 36dc across this top edge), turn.
try to space these sts as evenly as you can… its just a case of getting them in!
Row 35: ch1, *miss 2 sts, in next st place dc, htr, tr, 2dtr, in next st place 2dtr, tr, htr, dc*
Repeat * – * to end of row
slst to beginning ch1 to join cosy in a circle.
Side Seam: Place cosy on teapot and mark with a pin across top of handle, slst from top of cosy down to this point (approx. 1.5cms).
Return cosy to the teapot and repeat process, this time marking below the handle. Remove cosy leaving marker in place, continue to slst along one edge (not both) until you reach marker for the bottom of the handle. Now slst both edges together to bottom of cosy, fasten off and weave in all loose ends.
Picot trim: Finally, attach apricot yarn in any beginning dc of petal (ie. dc to the right hand side of petal).
With a 4mm hook, ch1 (counts as dc), dc in next 3sts, dc in next st, ch3, slst into 1st ch (picot made),
dc into same space as previous dc, dc in next 4sts…1st petal edged.
For next petal and for all petals around, dc in next 4sts, dc in next st, ch3, slst into 1st ch, dc in same space as previous dc, dc in next 4sts.
NB/ do not crochet in this space by mistake
Do not crochet in this space by mistake else your picot will not be central!
To finish slst to beginning ch of trim, fasten off and weave in ends.
Now I think it’s time for a brew…don’t you?
xxxxx
I REALLY HOPE YOU HAVE ENJOYED MAKING THIS PATTERN AS MUCH AS I HAVE ENJOYED CREATING IT FOR YOU. IF YOU ARE NOT SURE ABOUT SOMETHING OR NOTICE ANY ERRORS PLEASE SHOUT UP. EQUALLY PLEASE FEEL FREE TO SHARE YOUR Grandma Kathy Tea cosy CREATIONS IN THE COMMENTS BELOW or with the #THEGRANDMACOLLECTION #AYARNYROBIN ON SOCIAL MEDIA…I WOULD LOVE TO SEE THEM!
There is a brand new tea cosy on the kitchen counter. Another brand new addition to the tea cosy series that is called the Grandma Collection and this one’s called ‘Kathy’.
The free pattern and tutorial will be available here on Friday.
Would you like a sneak peek?…
This photo was snapped last week, but it shows you some glorious gold granny stitches.
I can’t wait to share it with you all this Friday.
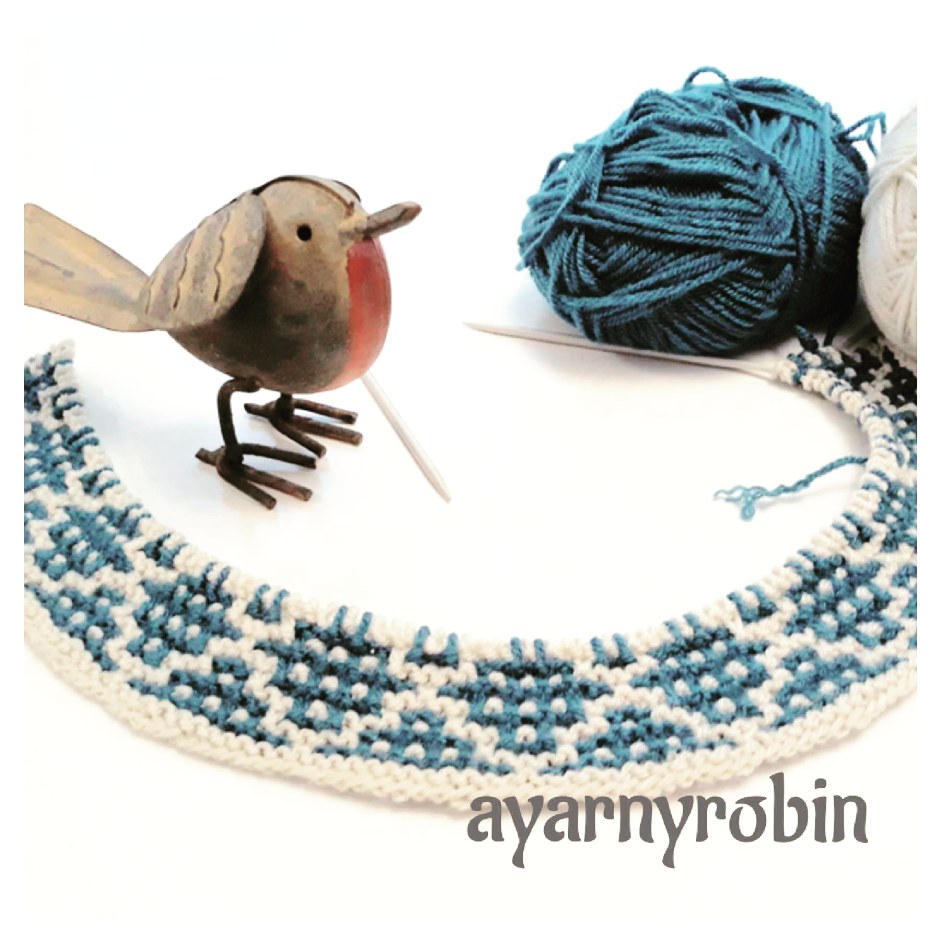
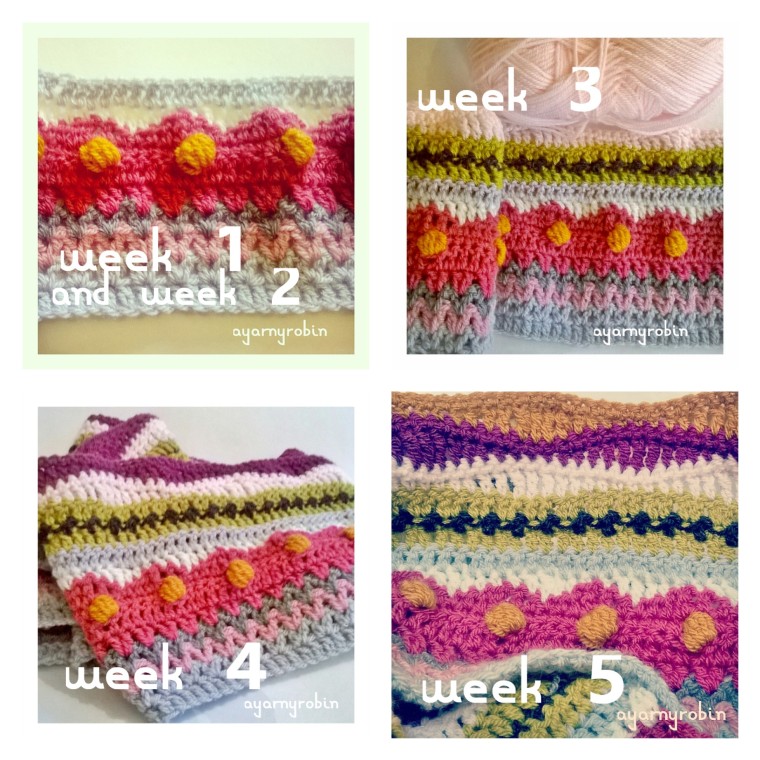
As if having one large blanket on the go isn’t enough! I have accidentally, well…ok…I spent 2 hours rummaging through my yarn stash, so not accidentally at all…but I couldn’t help but chain the starting chain for this mystery CAL, which is being hosted by the talented Eleonora over at Coastal Crochet.
In my defence I am using only stash and there are only 4 sweet rows of the pattern being released each week…so that’s doable isn’t it?
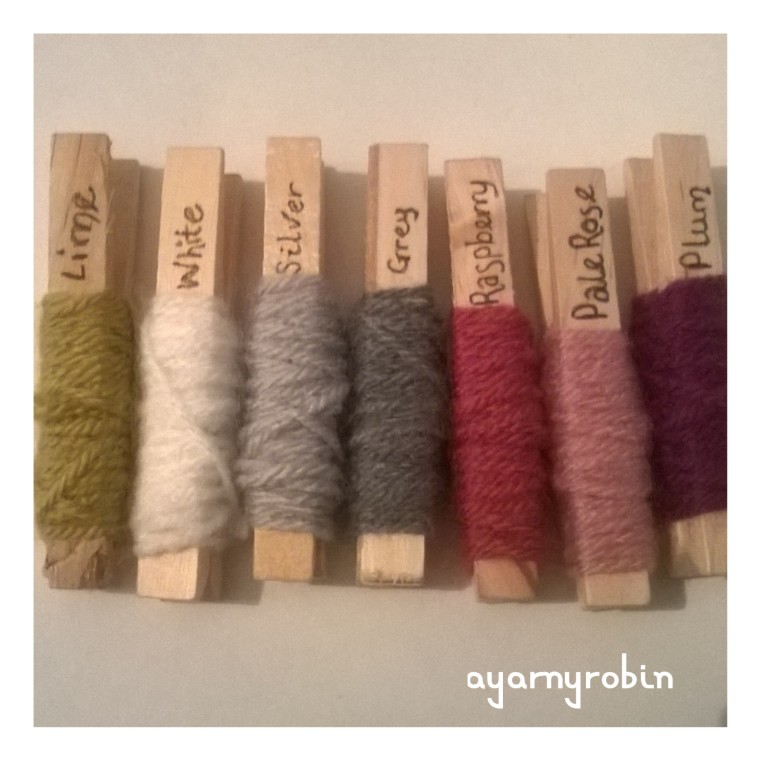
I was a little late to the hook up, starting in week 2, but I am fully caught up and I can’t wait for week 3. The bobbles were fun to hook and I am pleased with the mustard (gold) against the raspberry. The yarn is stylecraft special dk and I’m planning on using these colours.
In addition to these colours I will also be using Graphite (charcoal grey) and Gold and possibly candyfloss pink…I am still undecided about the candyfloss…mmm…we’ll see…What do you think?
I am slightly disgruntled that I have not been able to find my yarn pegs for these missing colours in the picture, but I am unable to look properly because of this…
It really hurt! and I am a big baby!
Yes, It’s all done and it wasn’t very pleasant and I still feel queasy, and I am not a good patient (it must be the nurse in me!) but I am grateful to be this side of it.
I have always wanted to complete a CAL like this but have always been a bit cautious about being able to follow the pattern instructions, but Eleonora’s instructions are written very clearly and she has also made a video tutorial to help out if needed, so I think it will all be gucci.
The blanket is going to be a fair old size when it’s finished in the Autumn. You can checkout other blanketeers in this CAL by using the #seasidestashbustingblanket or #coastalcrochetcal.

 Or do you fancy a C2C heart inspired square then look no further than this great pattern by MA Santos
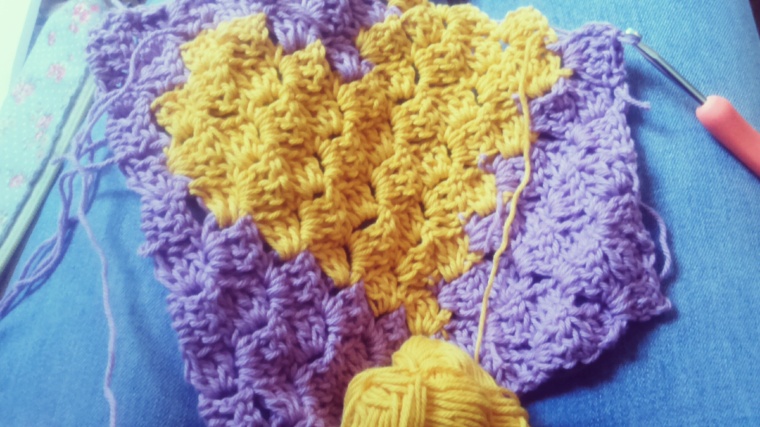


 join blue yarn and slst into 3rd ch
 Row 2: ch3,
 1tr in same space, ch1
 2tr in next st, ch1
 *2tr in next st, ch1*, repeat * * x10 times,
 Row 3: ch3,
 *3tr in next ch space*,
 repeat * * x10 times, 2 tr in next ch space,
 join with slst in top of ch3 and fasten off.


 This is the fifth tea cosy in the


 In addition to these colours I will also be using Graphite (charcoal grey) and Gold and possibly candyfloss pink…I am still undecided about the candyfloss…mmm…we’ll see…What do you think?

