I have not knitted every day this week; I have done a wee bit though. Most of my yarn time has been given over to a beautiful crochet baby blanket and to getting the pattern and tutorial ready to go out in a couple of days, which actually has been quite time consuming…
It’s a good job I love to do nothing better!
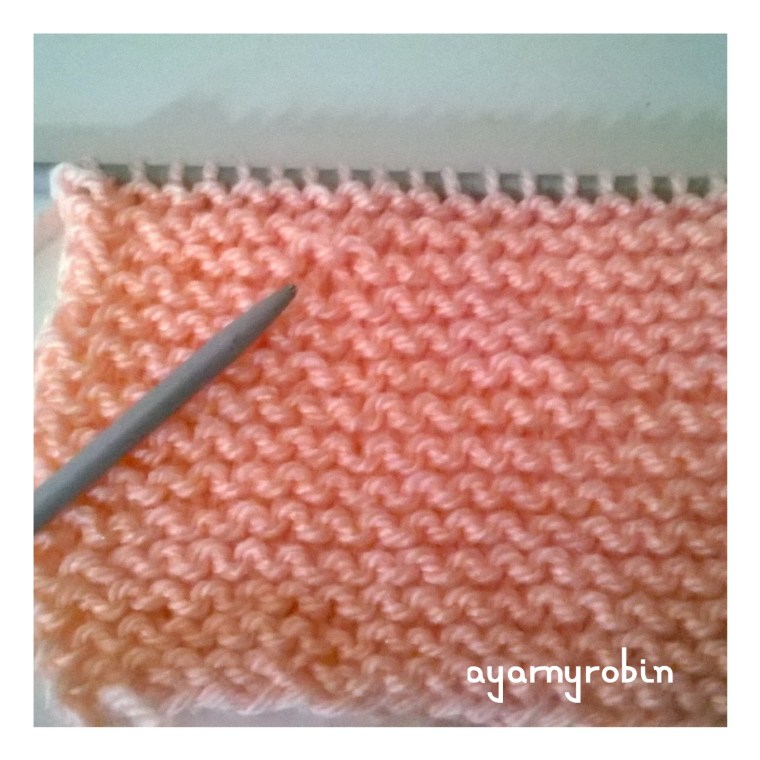
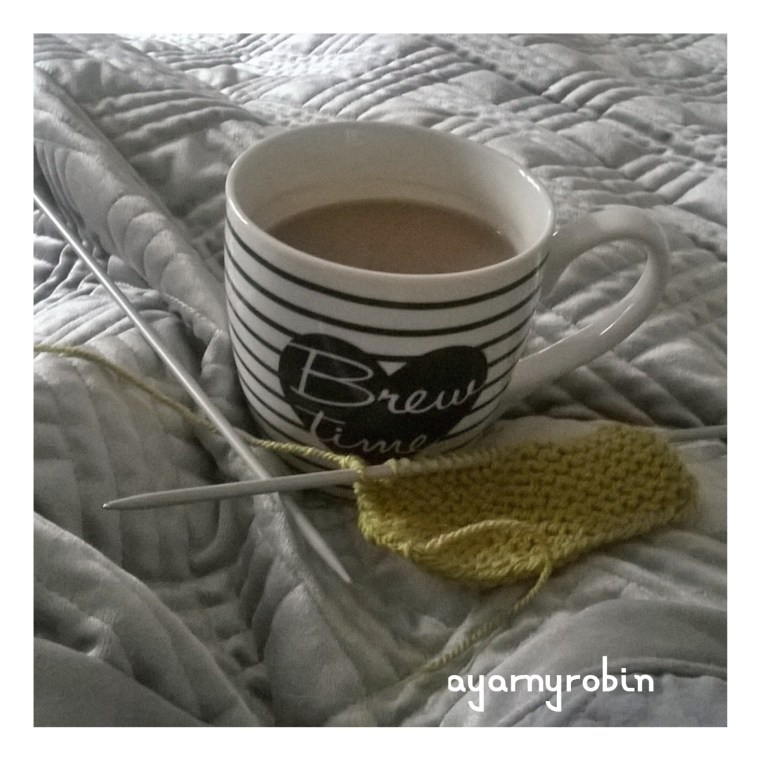
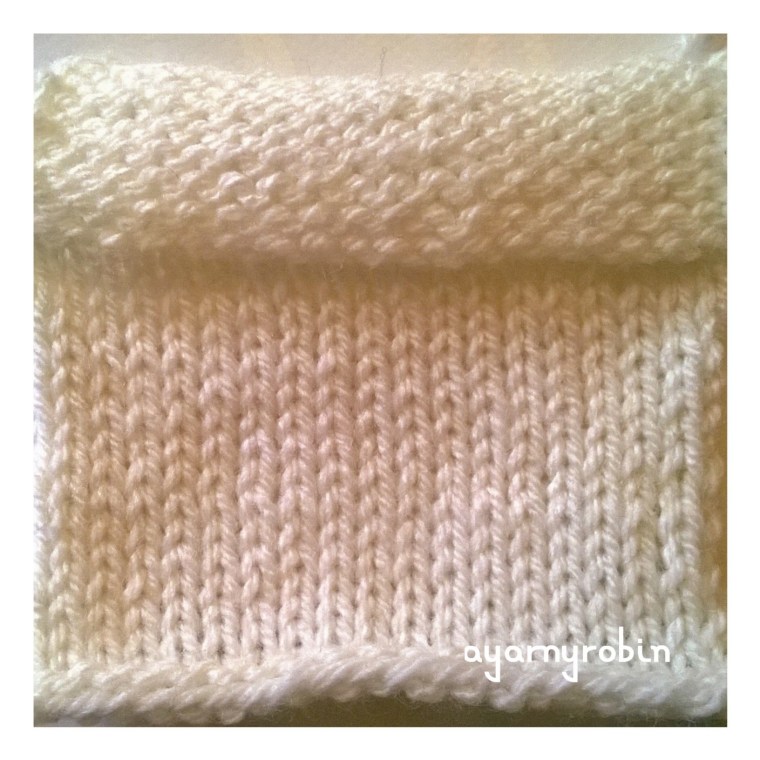
But back to knitting…this is what I have completed.
I have completed 35 rows of stocking stitch.
Told you it wasn’t much…but this is what I have learned. Purl stitch is spelt P.U.R.L… not as I had spelt it in my last post!
I think I can count the rows better if I look at the purl side. I also have been keeping track of which row I am leaving my stitches at by emailing myself…you may laugh but it works for me!
I have also had another little lesson with Mom, no wine involved this time; in which we discussed and she demonstrated increasing and decreasing and I got a little frustrated…!
Mom also gave me an old pattern just to look through and get familiar with the terms and just actually reading a knitting pattern…which got me thinking that making these squares is a bit dull.
Before I knew where I was, it was way past midnight and I had picked out a few easy knit mitts and beanies over on ravelry…this is my favourite just here
Now do you think I should really start something just yet?
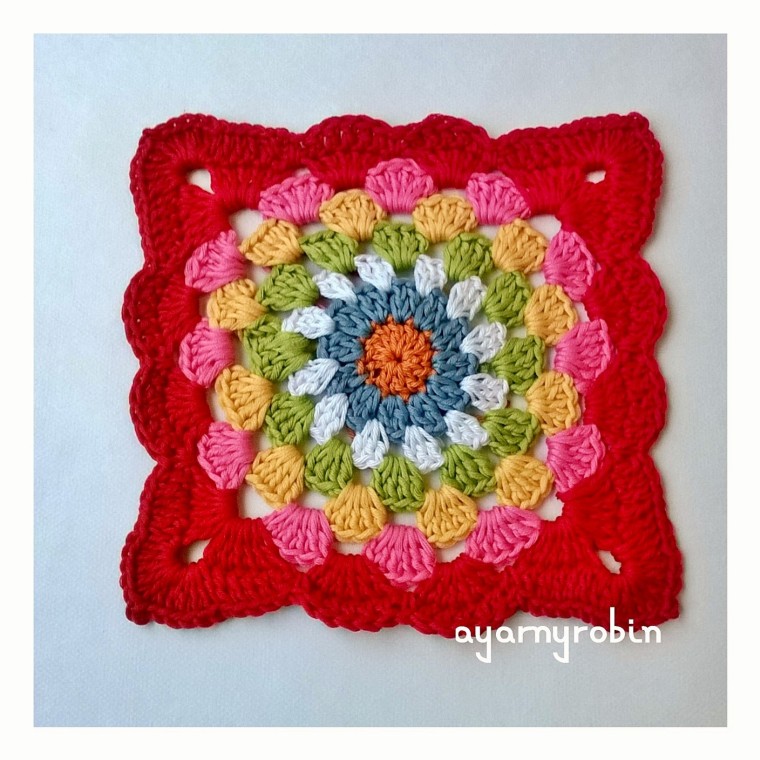
I have updated this lovely pattern and have re shot the tutorial photos, so they are clearer. I have also updated this pattern on ravelry too so you can save for later if you want to.
Hope you enjoy!
As always I’m using English crochet terminology. Ch – chain Slst – slip stitch dc – double crochet tr – treble crochet
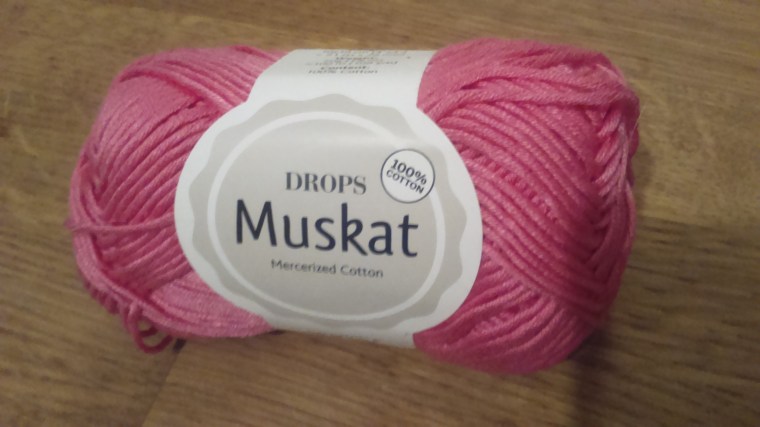
ch3 – counts as a treble unless otherwise stated. I’m using drops muskat cotton
and I’m using the colours listed below, you will see you only need a very small quantity of yarn. red – 16g old pink – 5g white – 3g vanilla yellow – 4g dark orange -1g
sky blue – 2g apple green – 3g and a 4mm crochet hook.
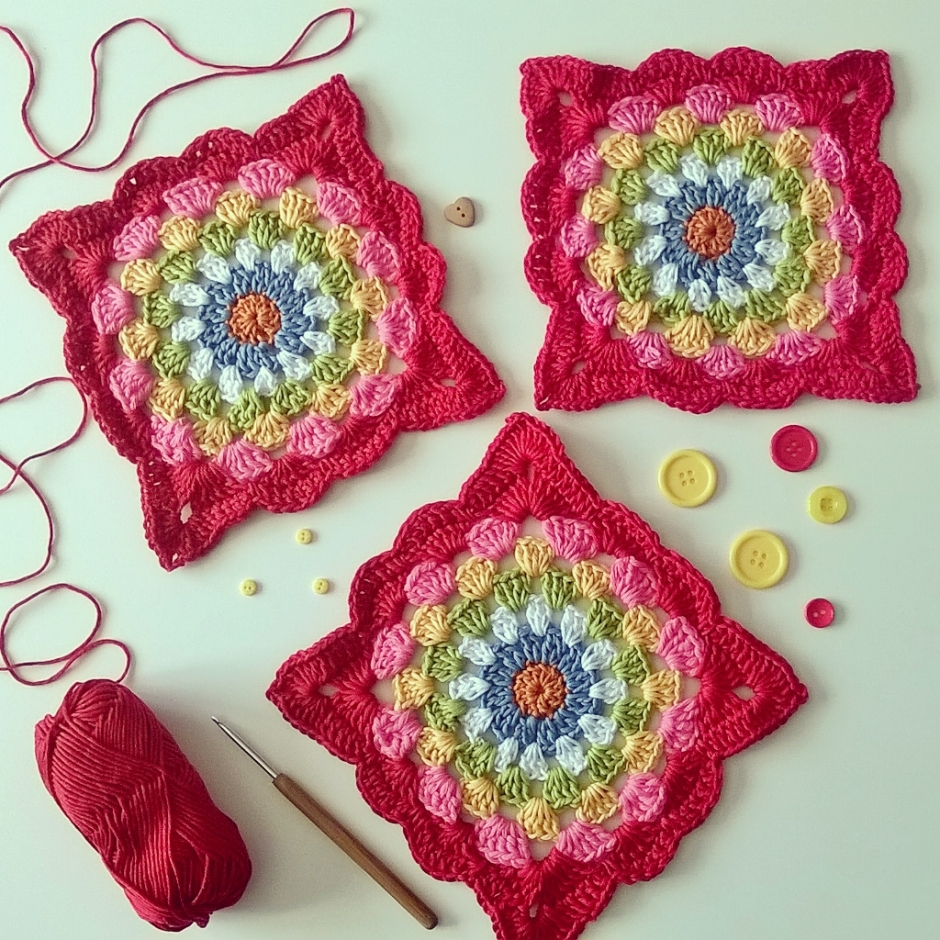
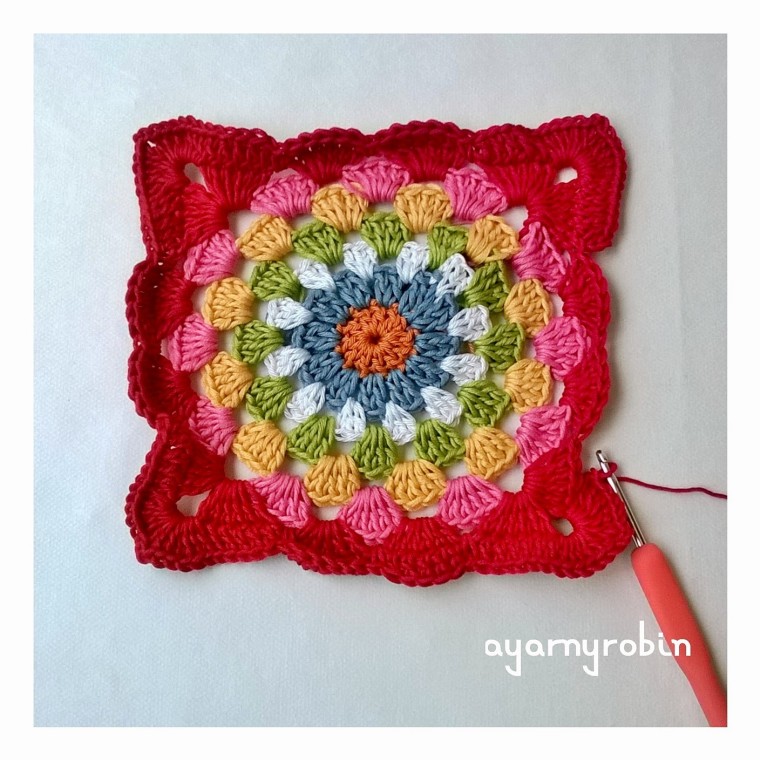
This lovely yarny square measures 7″ x 7″ or 18cm x 18cm once blocked.
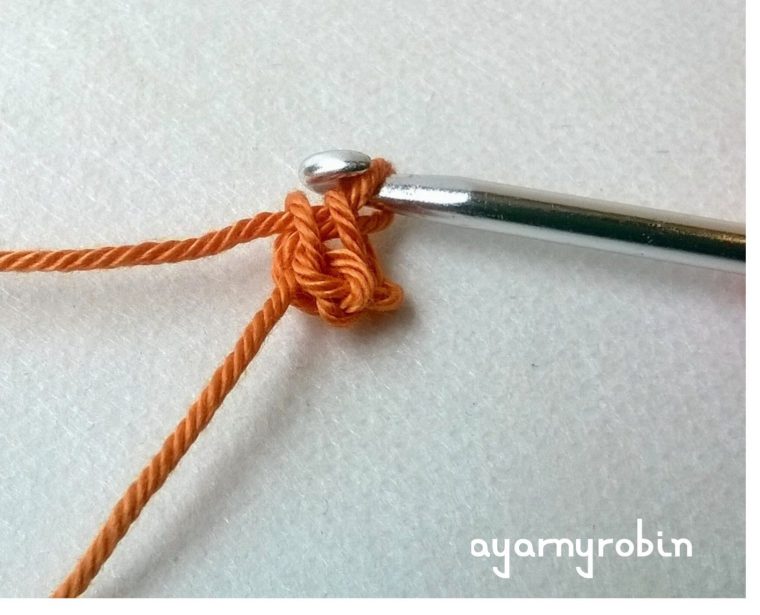
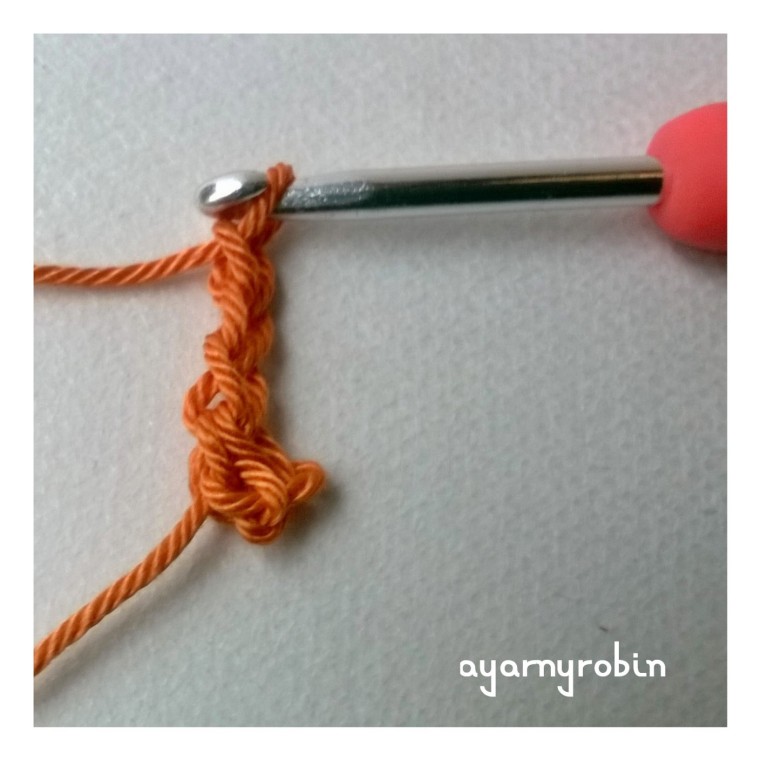
So here goes… ch2, join with ss to form a tiny ring (you could make a magic circle instead if you prefer)
Row 1: ch3,
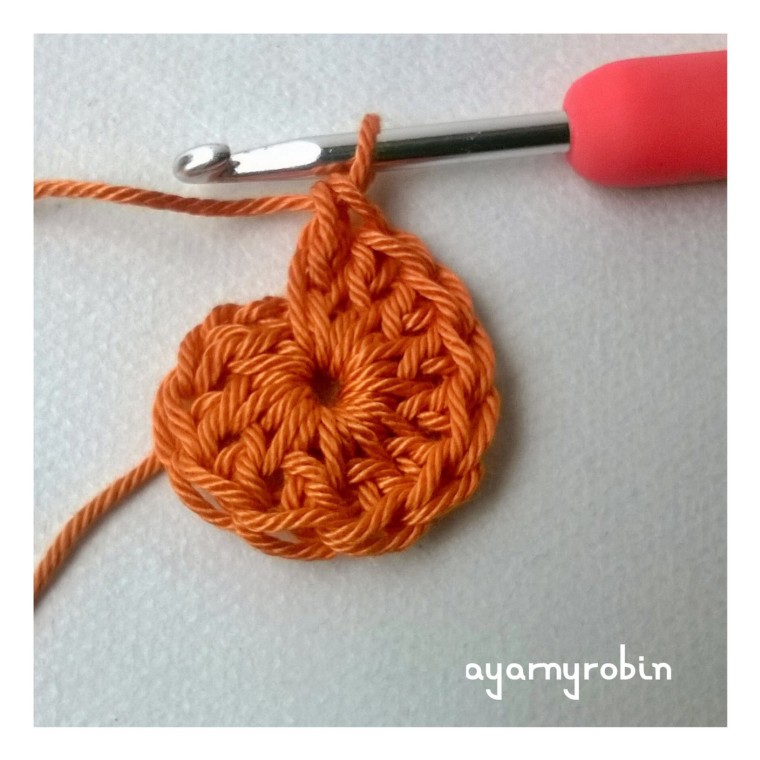
11tr into ring,
join blue yarn and slst into 3rd ch (12tr in total).
Row 2: ch3,
1tr in same space, ch1
2tr in next st, ch1
*2tr in next st, ch1*, repeat * * x10 times, join white yarn and slst into 3rd ch (12 clusters of 2tr and 12 ch spaces).
Row 3: ch3,
*3tr in next ch space*,
repeat * * x10 times, 2 tr in next ch space,
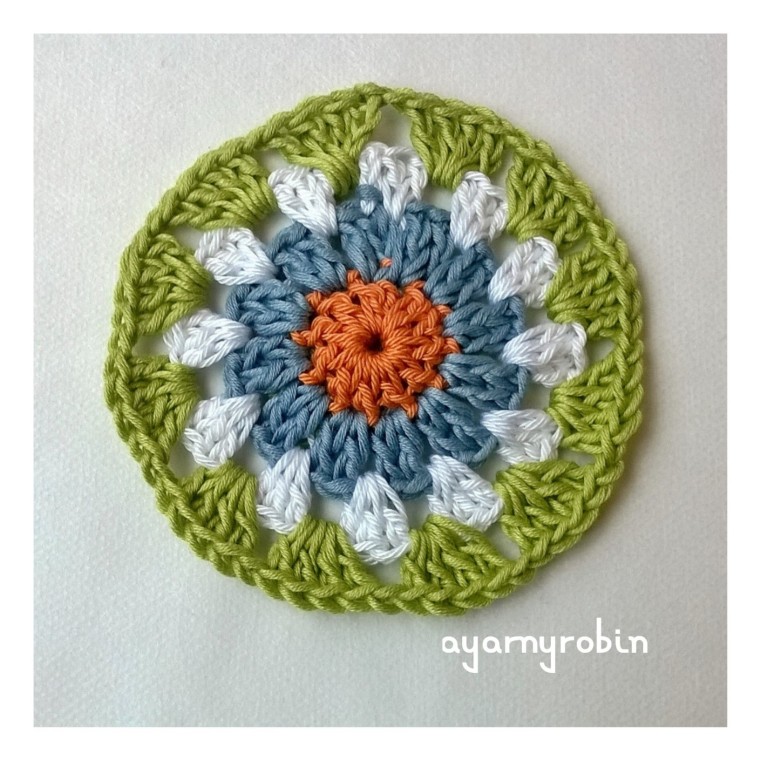
join with slst in top of ch3 and fasten off. (12 clusters of 3tr). Row 4: join green yarn in between any cluster of 3tr of previous round and ch3, 3tr in same sp, ch1
*4tr in between next cluster of 3tr, ch1*,
repeat * * x10 times, join with slst in ch3 and fasten off. (12 clusters of 4tr and 12 ch spaces)
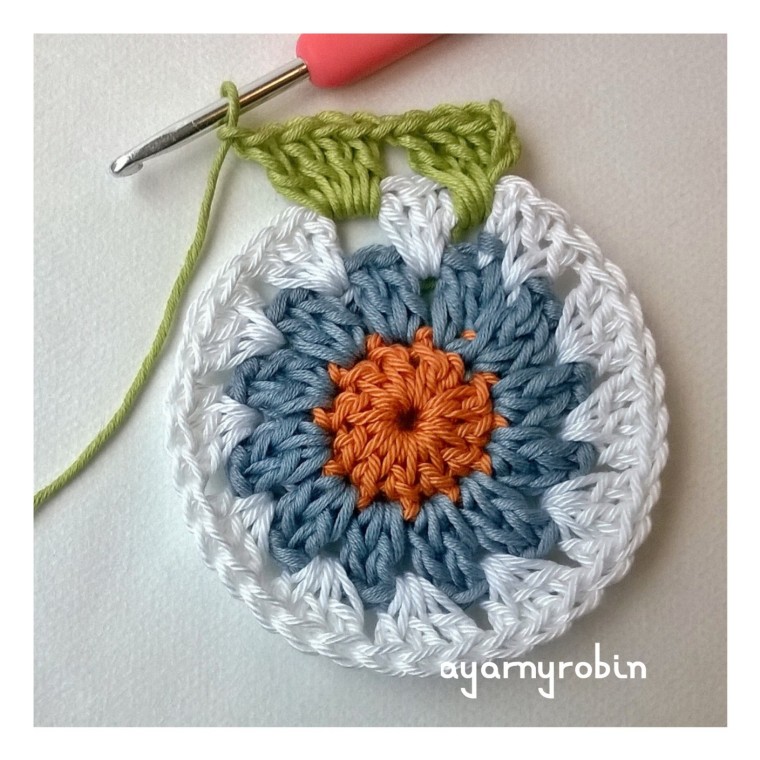
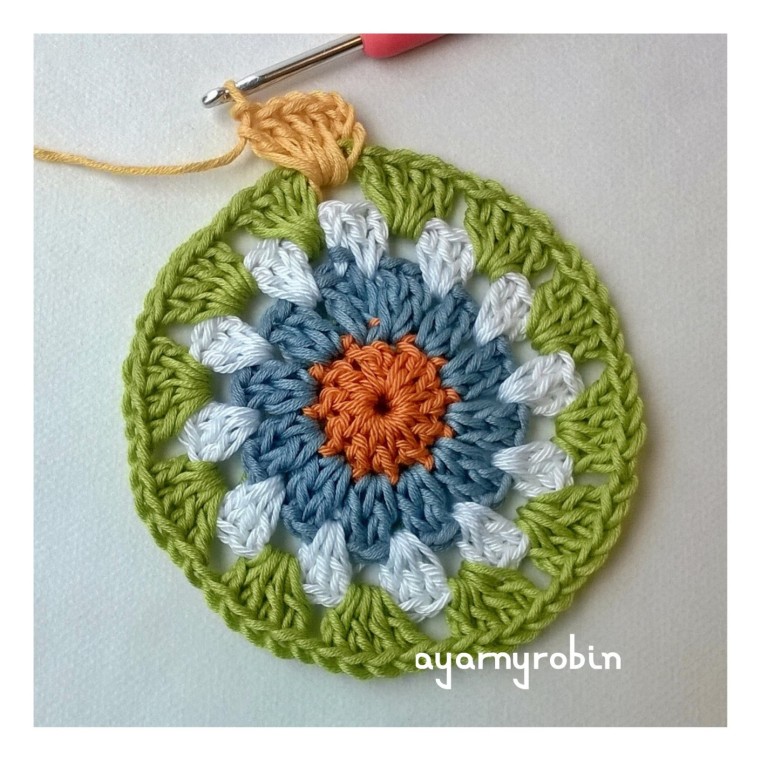
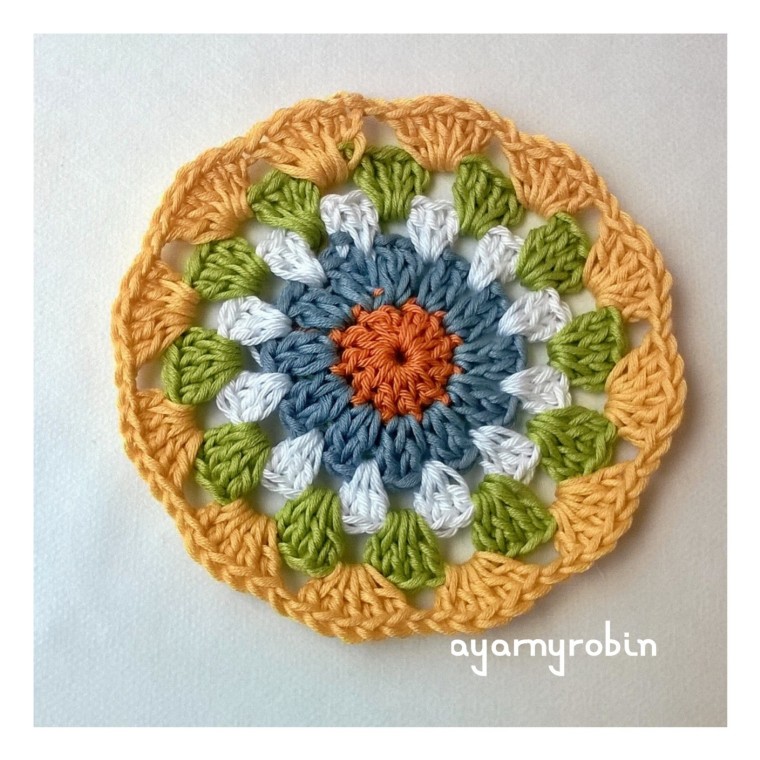
Row 5: join yellow yarn in any ch space and ch3, 4tr in same sp, ch1
*5tr in next ch space, ch1*, repeat * * x10 times, join with slst in ch3 and fasten off. (12 clusters of 5tr and 12 ch spaces)
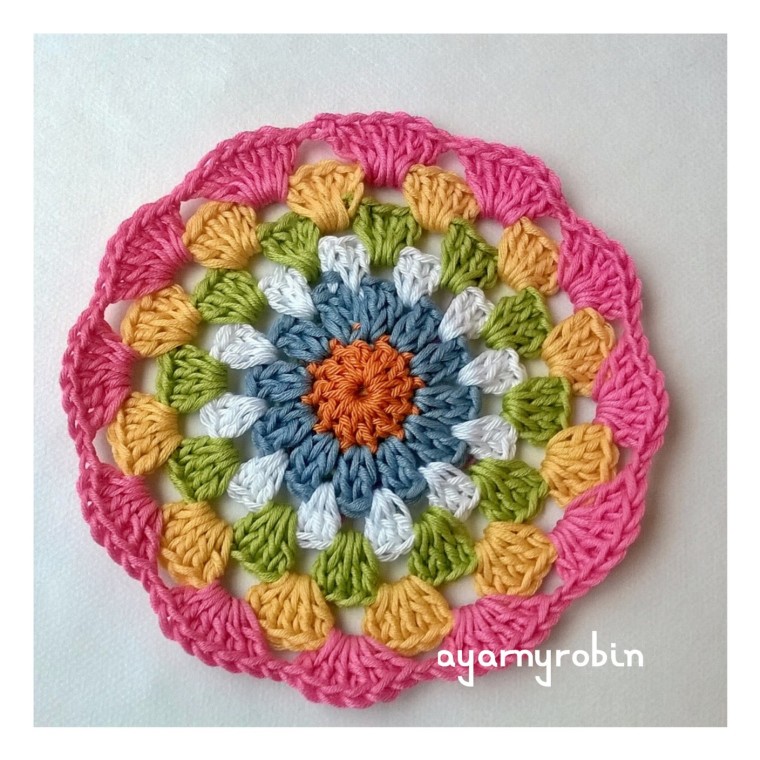
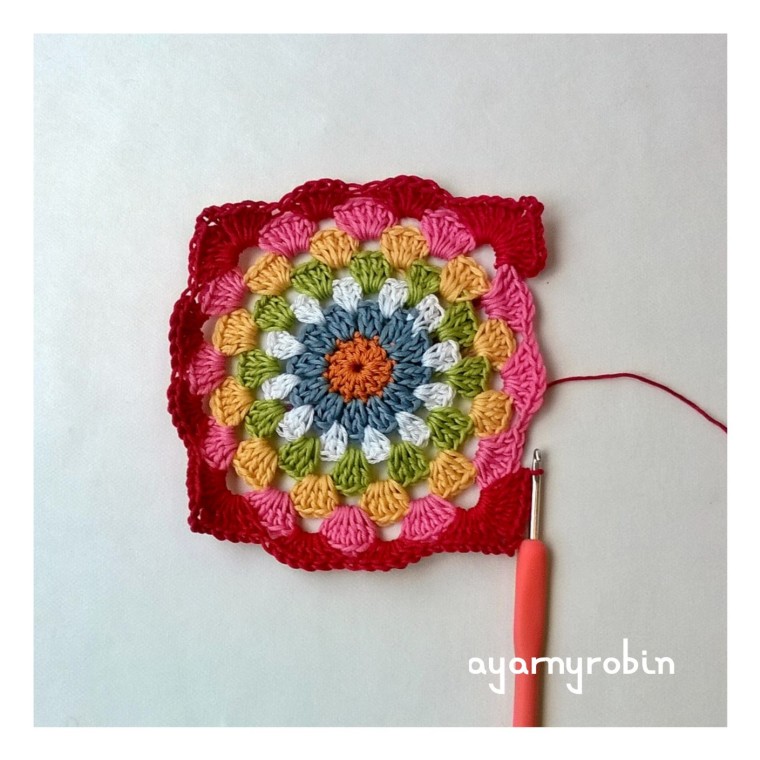
Row 6: join pink yarn to any ch space and ch3, 5tr in same sp, ch1, *6tr in next ch space, ch1*, repeat * * x10 times, join with ss in ch3 and fasten off. (12 clusters of 6tr and 12 ch spaces)
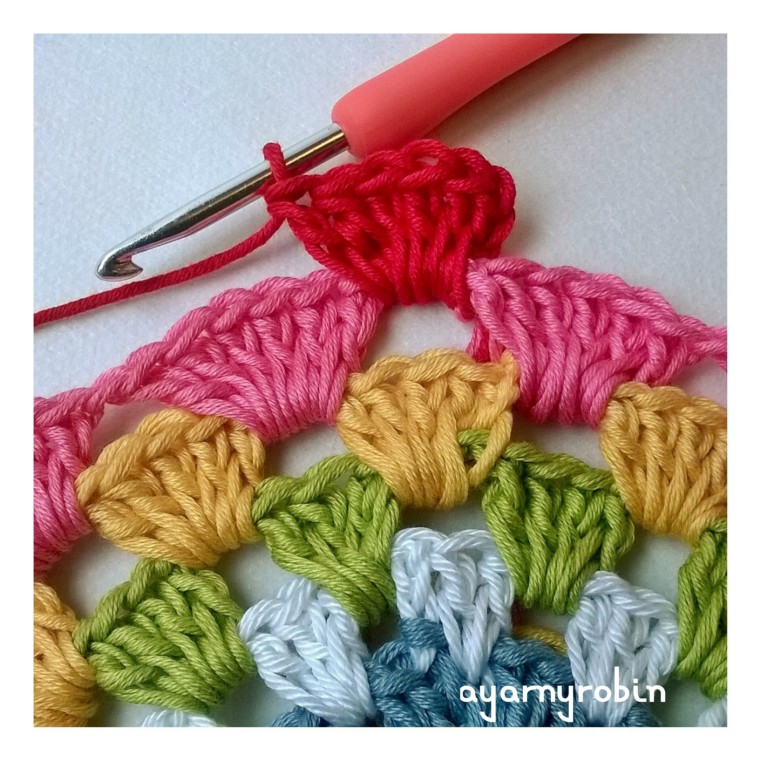
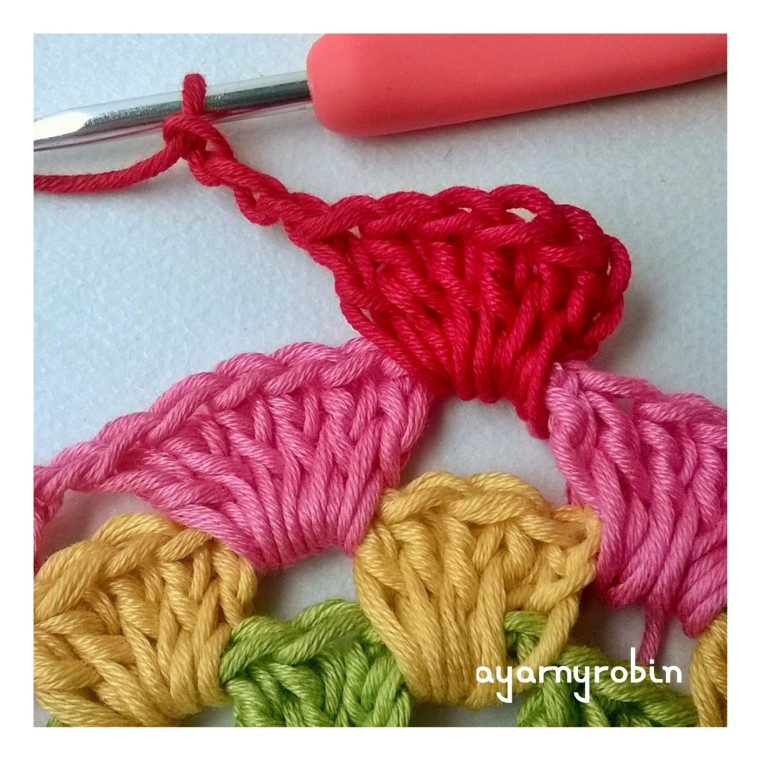
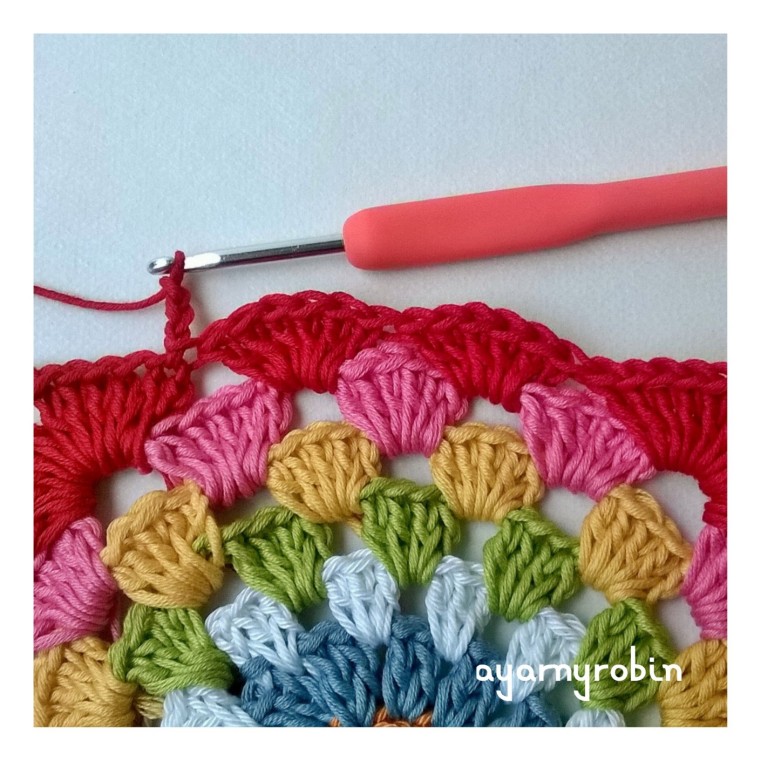
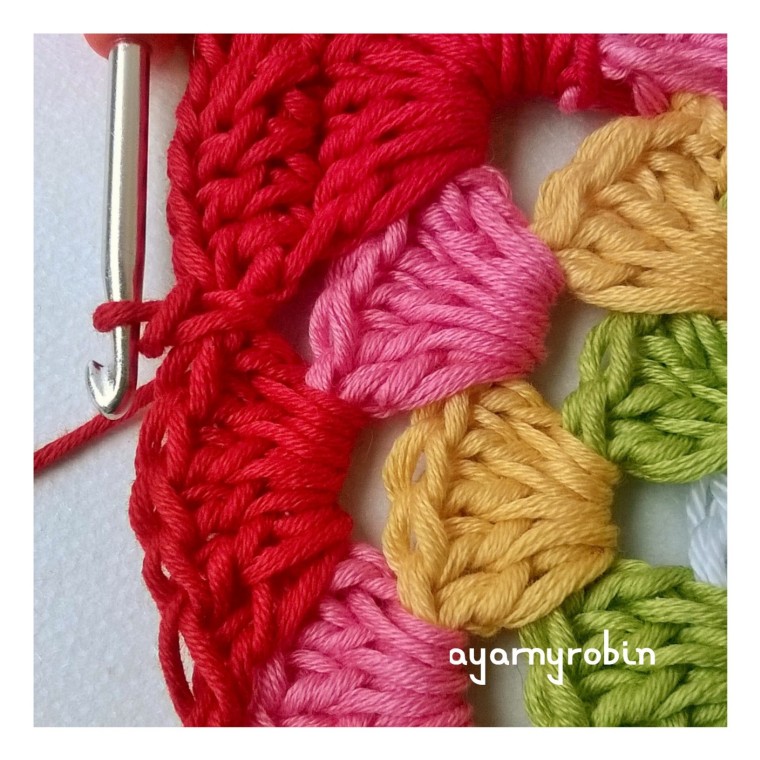
Row 7: join red yarn in any ch space, ch3, 5tr in same space,
ch3,
6tr in same space (corner made),
*6tr in next ch space, 6tr in next ch space,
6tr in next space, ch3, 6tr in same space* (2nd corner made) repeat * * x2 times
6tr in next space, 6tr in next space, join with slst in beginning ch3. Do not fasten off.
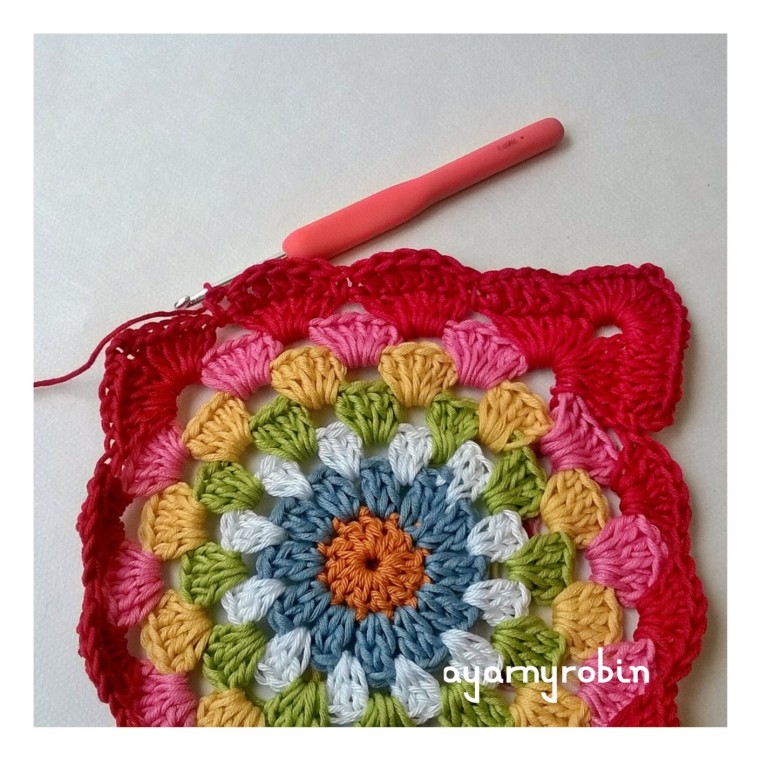
Row 8: ch3,
1tr in next 5sts,
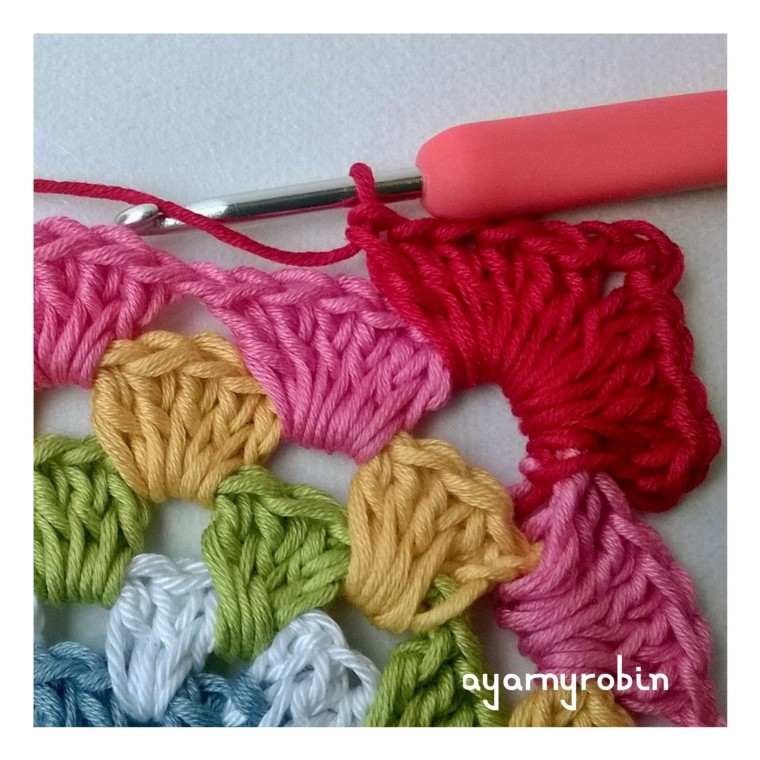
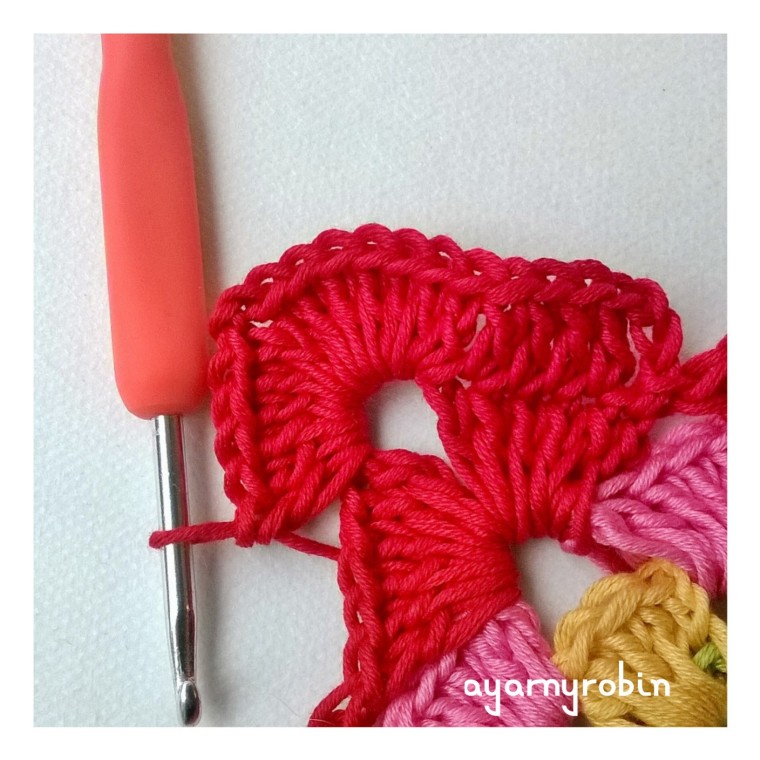
*6tr in ch3 sp, ch2, 6tr in same space (corner made),
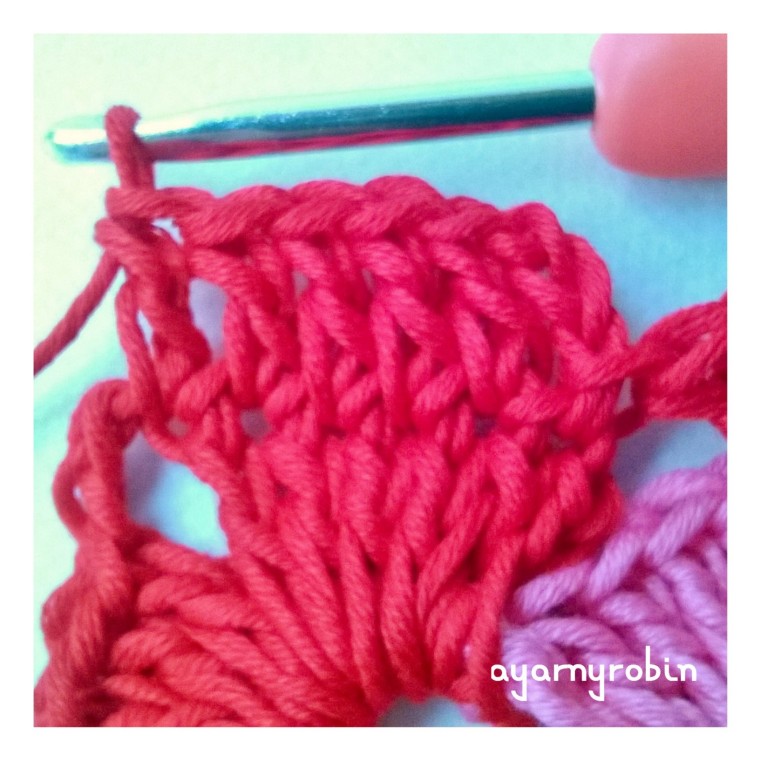
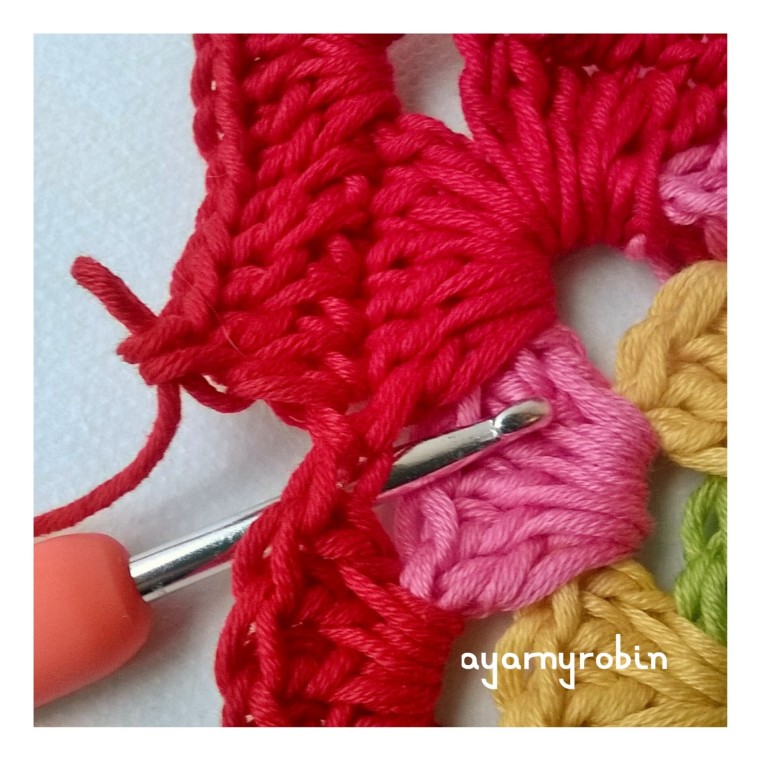
*1tr in next 5sts,
dc UNDER next stitch (indicated by the hook)
1tr in next 5sts, dc under next stitch, 1tr in next 5sts, dc under next stitch
1tr in next 6sts, 6tr in ch sp, ch 2, 6tr in same space*
repeat * * x2times
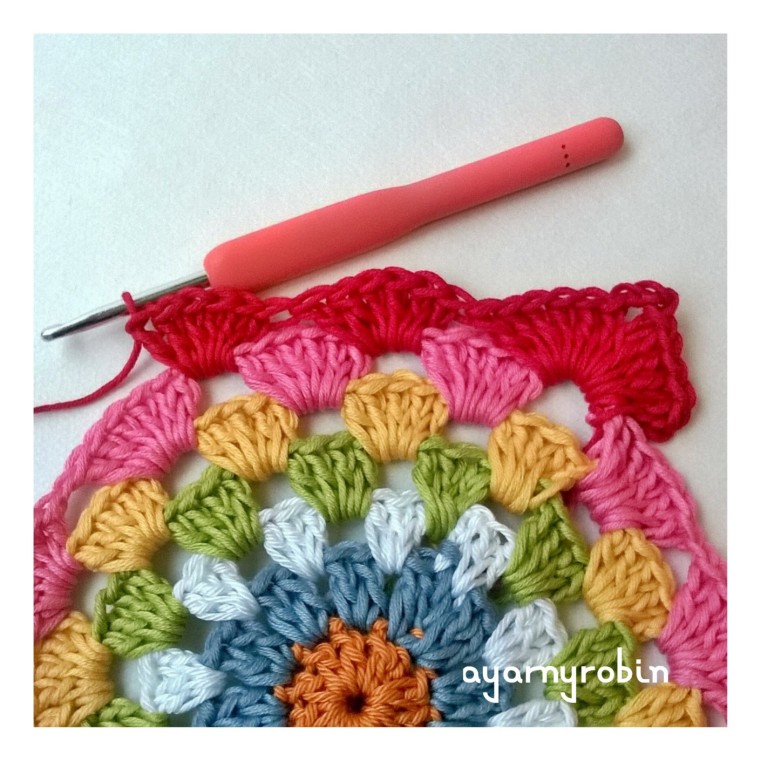
1tr in next 5sts, dc under next stitch, 1tr in next 5 sts, dc under next stitch, 1tr in next 5 sts, dc under next stitch, slst to beginning 3rd ch to finish. Weave in ends.
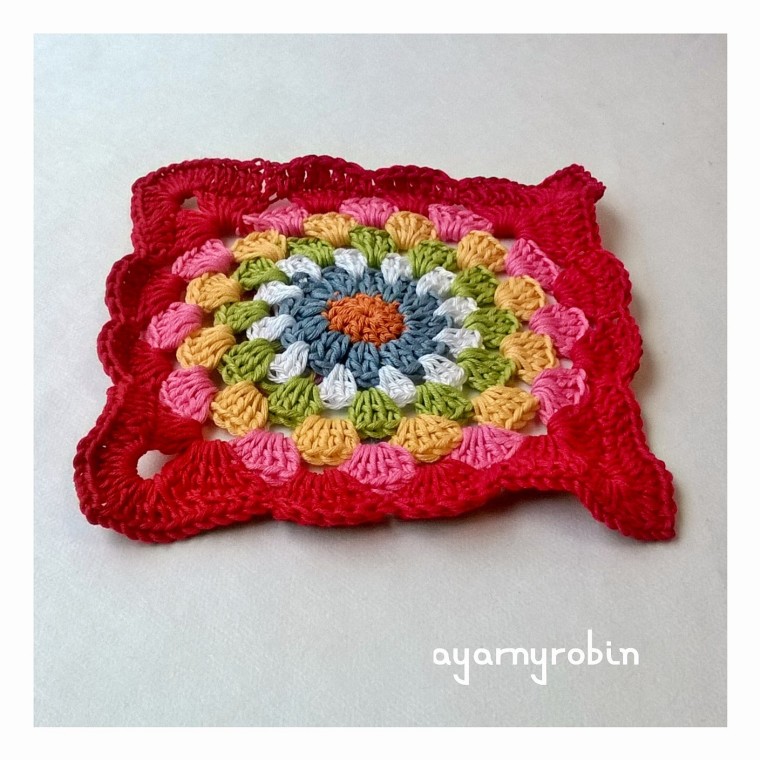
A word on blocking: Before blocking…
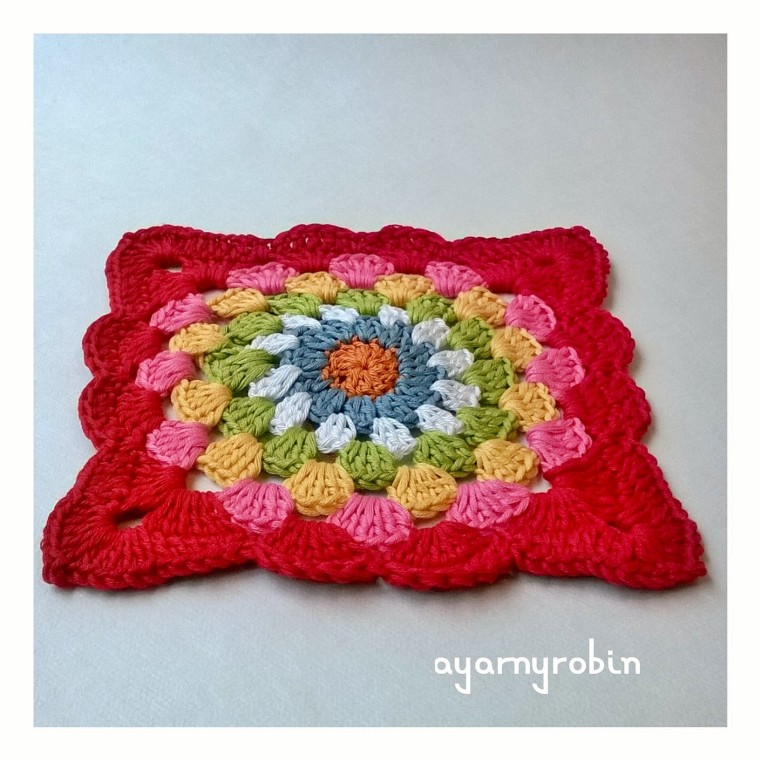
Your square will be wibbly. After blocking…
Your square will lie flat and will look much better. Blocking is really worth the extra effort and isn’t difficult or expensive to do. I just pinned this square to my ironing board so that it measured 7″ by 7″ and hovered my iron just above the square and blasted it with steam. Allow to cool before unpinning and store carefully. Alternatively, you could pin square to the required measurements, to a towel or a pin board, spritz with water and allow to dry. A very versatile yarny square.
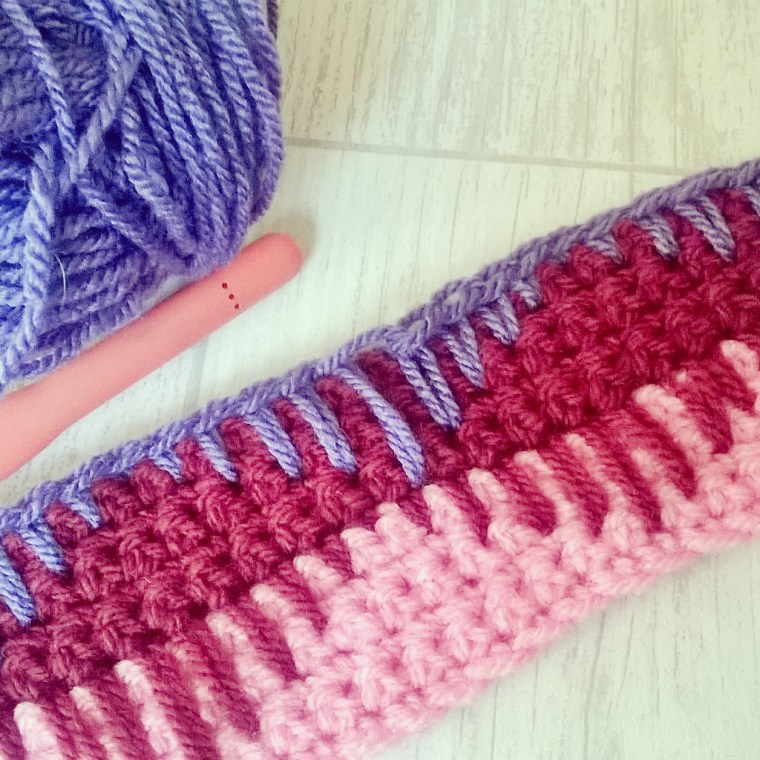
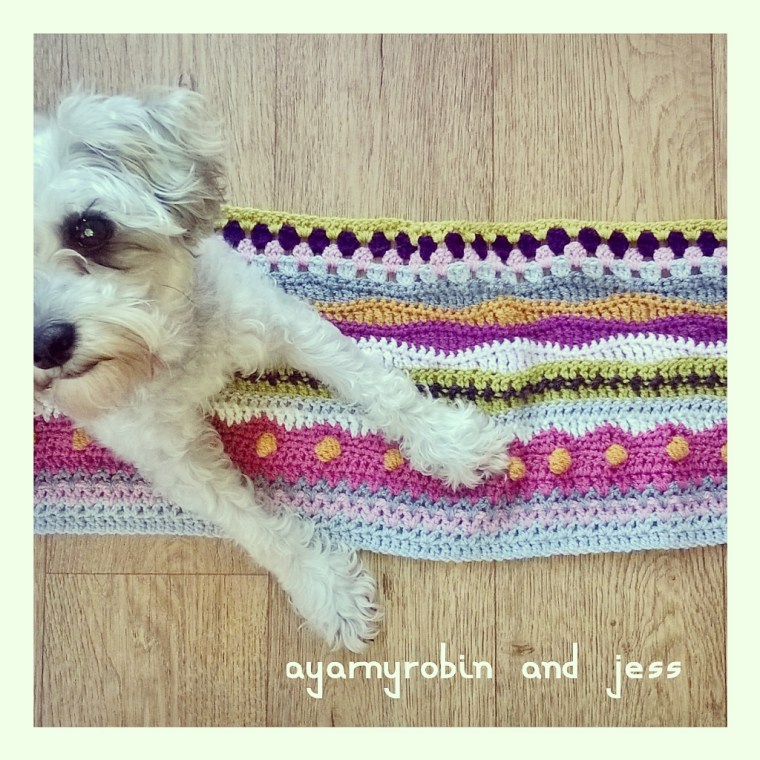
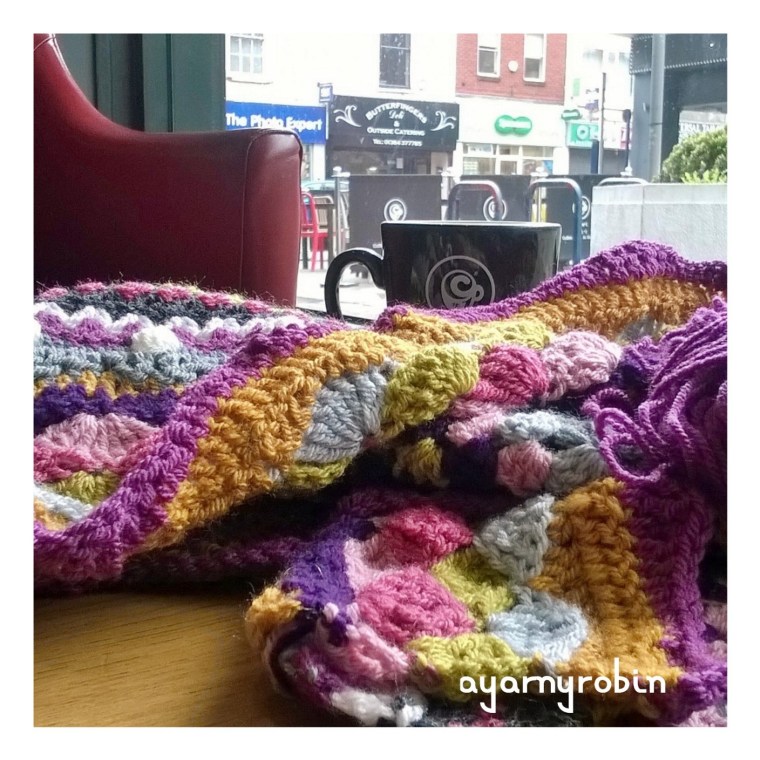
I thought you might like another little update on the slow CAL (crochet a long) I’m participating in which is being hosted by the lovely Eleanora over at coastal crochet. You can also find lots of other amazing blankets and makers participating in this CAL across social media by searching #seasidestashbustingblanket.
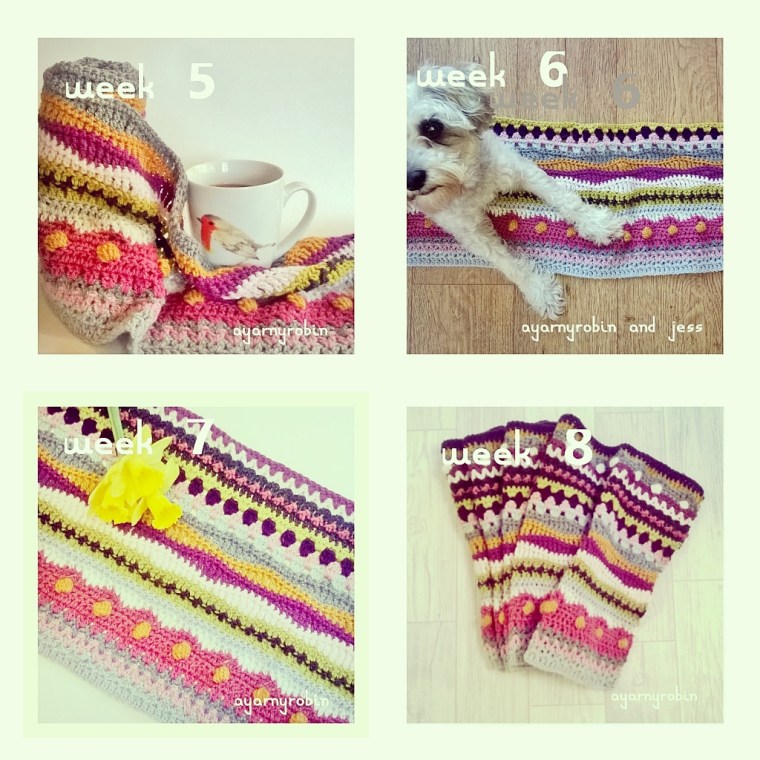
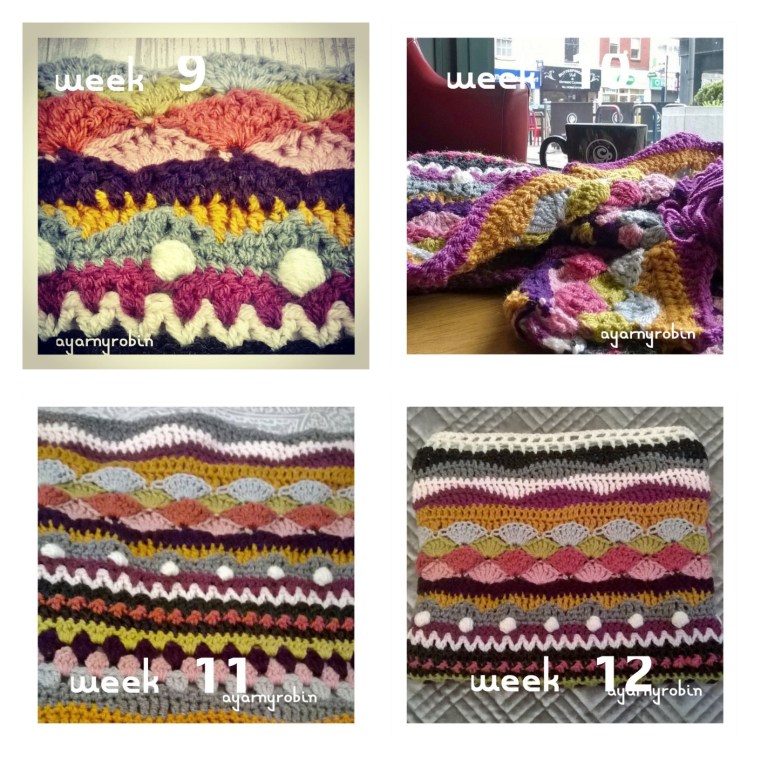
But let me show you weeks 9 – 12. I have enjoyed these weeks so much, hooking out and about in town
The blanket is certainly growing larger and no longer resembles a scarf…in fact it is way past scarf stage now and is handy for keeping my lap warm whilst I hook away.
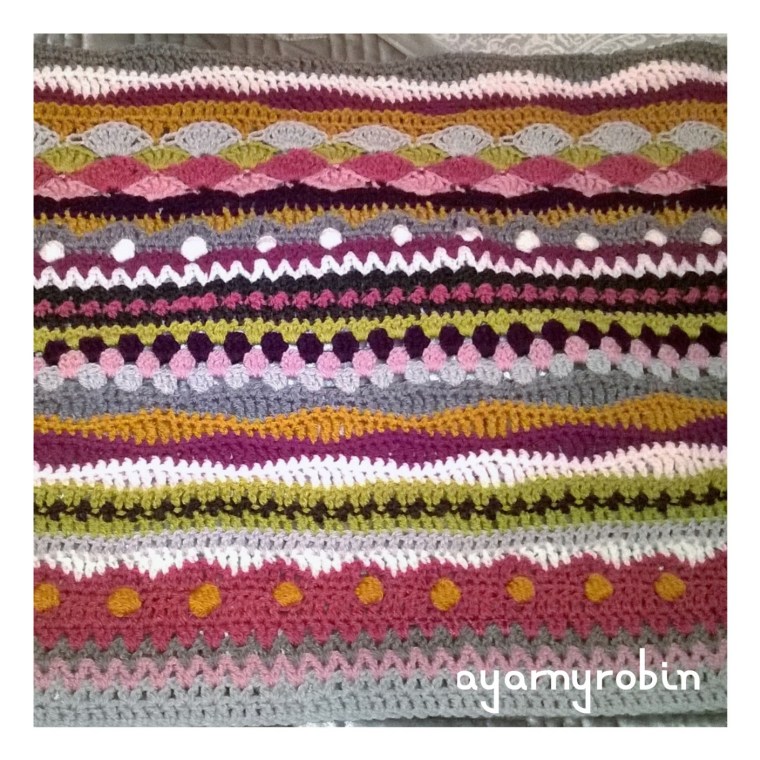
I think this will be the last close up picture where the whole of the blanket will fit into frame.
I’m still ploughing through my stash too, so this makes me doubly thrilled with this blanket. I find I am really looking forward to every Monday and Friday when the next rows are released. I love the surprise of not knowing what the next set of rows will be.
I have knitted religiously every day this week; just a little bit here and there. I read about the brain having ‘muscle memory’ and the importance of repetition when learning something new. If only knitting practice or crochet for that matter toned the physical muscles…I would be a goddess by now!
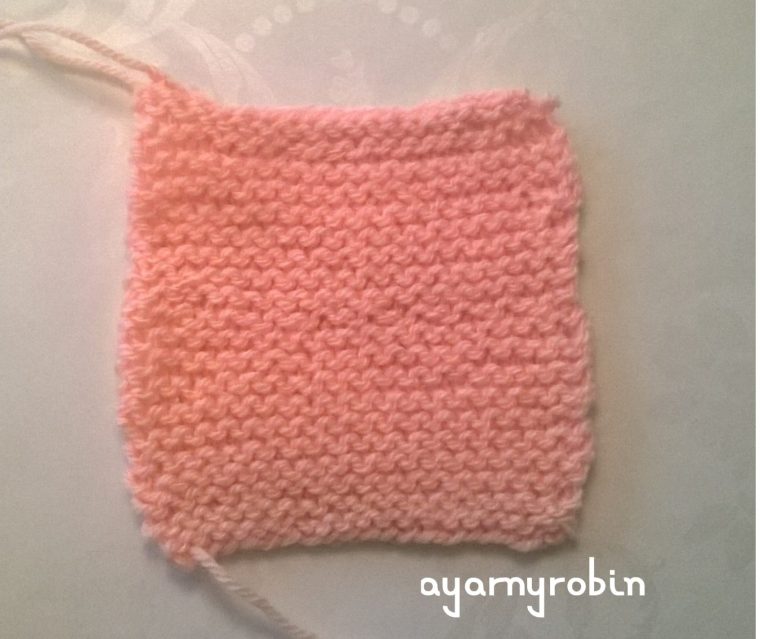
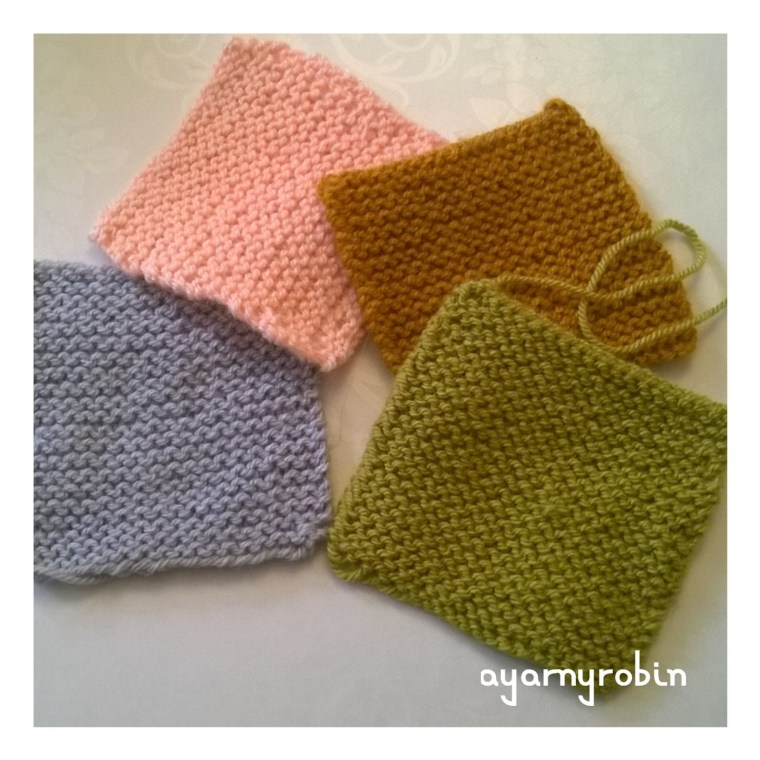
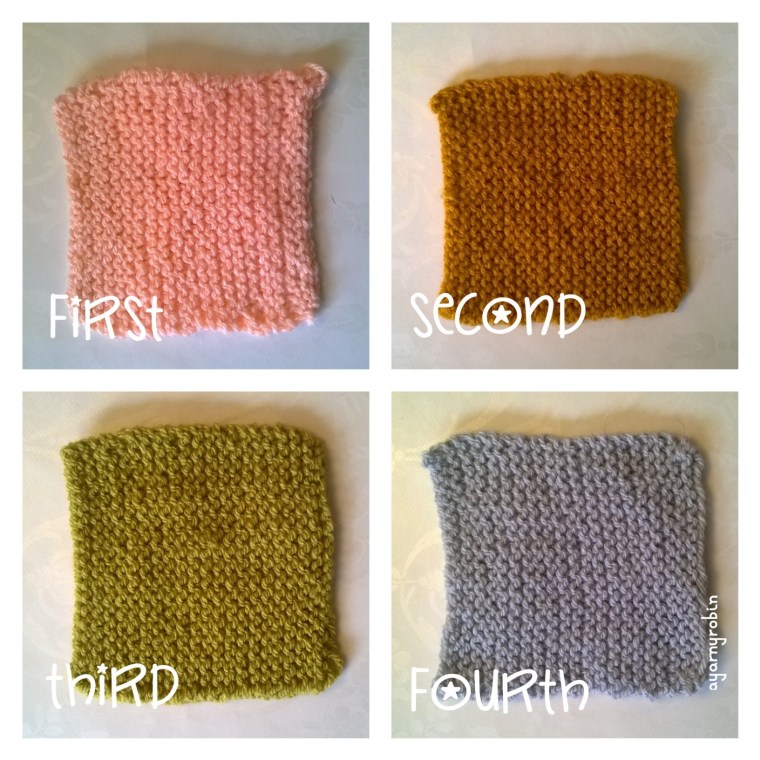
So I have knitted more squares using the ‘knit’ stitch and I have sorted out the wibbly edge. I am pleased with my tension and I am not getting a random extra stitch anymore. I can cast on and off all by myself too. I have learnt that this knit stitch is also called garter stitch and that when the fabric is separated you have an umbrella and a v underneath…but to count the stitches is tricky. I am doing 40 rows not 20 like I thought!
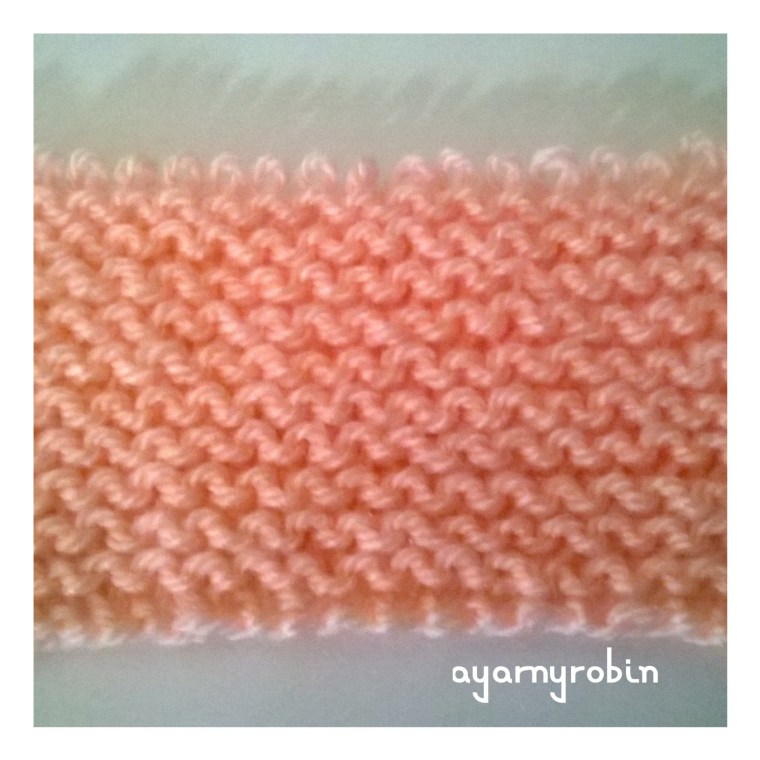
This is my weeks work…
On Friday evening my Mom came round with some more wine…(there is a theme here isn’t there?) and taught me how to pearl.
Now as far as I can tell this is just backward knit stitch, but I love it. It gives a flatter fabric which makes my heart flutter a little bit. I thought I would be able to make squares just from pearl stitches but Mom explained that I could not do this and would need to make squares to practice that were made up of a row of knit stitch followed by a row of pearl stitch; repeated…also known as ‘stocking stitch’.
I love that in knitting there is a term like stocking stitch or garter stitch which refers to a pattern repeat…I don’t think crochet does this so well.
Anyway, this is my first attempt at stocking stitch…can you notice the BIG whoops? Yes, I lost track of my rows and must have pearled or knitted two rows together and my flatter pearl rows jumped over to the bumpier knit side! Oh well! It may have been the wine.
I still can’t count the rows…it is so difficult to count the rows.
I have tried before, but it has not ended well. For a while now I have thought about knitting, but then I would recall my previous attempts and squash any thought I had.
But, just the other week I spied the most gorgeous pair of fair isle mitts I ever did see and I thought I must learn to knit. Then I thought of my previous attempts at knitting and instead of squashing that thought…I thought… I SHOULD really learn to knit. Of course, me being me I have set my heart on fair isle. I know it is most complicated and tricky, but it is also absolutely beautiful. And so, here I am documenting part 1 of my yarny knitting adventure.
If you have read my previous post you will know that there is still much crochet going on here at the nest too and that will continue as always.
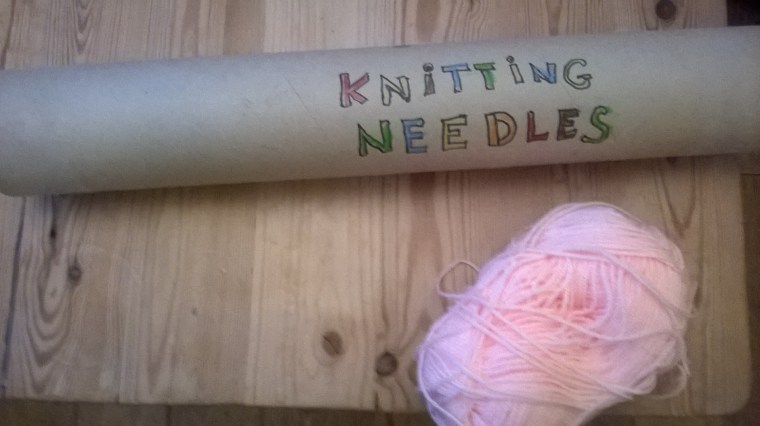
So, yesterday afternoon after Easter Sunday dinner at my parents house, my Mom fetched her hoard of knitting needles and sorted me a pair of 4mm needles…an odd pair, but a pair non the less.
Mom, then showed me how to cast on and do a knit stitch. 20 stitches per row and set me the task of knitting 20 rows.
I found the knit stitch reassuringly satisfying as the needles made a gentle clicking sound and of course the familiar feel of the yarn in my hands was heart warming. The 21st stitch that appeared from no where was baffling as was the loopy first stitch in every row.
I must also stress the responsibility of holding 20 (sometimes 21) stitches on the needle all at the same time instead of the 1 stitch in crochet required much concentration…which after 3 large glasses of wine was a challenge I must confess. After a good nights sleep I continued with my task until I noticed something didn’t look quite right, see…
Now, I still am not quite sure what had happened here, but I also couldn’t just leave it. So I ripped the rows back
recaptured the 20 little stitches and continued until I could count 19 rows and 20 stitches on the needle. Now I thought do I knit another row to make 20 rows or do the stitches on the needle count as row 20 already??? Cue Mom and another cup of tea and a cast off lesson to!
I am so pleased, but I still have to get this knit stitch nailed.
I still need to be able to cast on and knit on my own, visually recognise the stitch so that I can recognise when the stitch is not right. I need to fix the wibbly edge and cast off on my own too. So I plan on knitting some more knit stitch squares before progressing to pearling.
So, I can no longer say I can’t knit, instead I can now say I am learning to knit.
I have so many projects half done or PHD’s as I like to call them and I am enjoying hooking them all. The problem has been deciding which one to pick up and which one to put down!
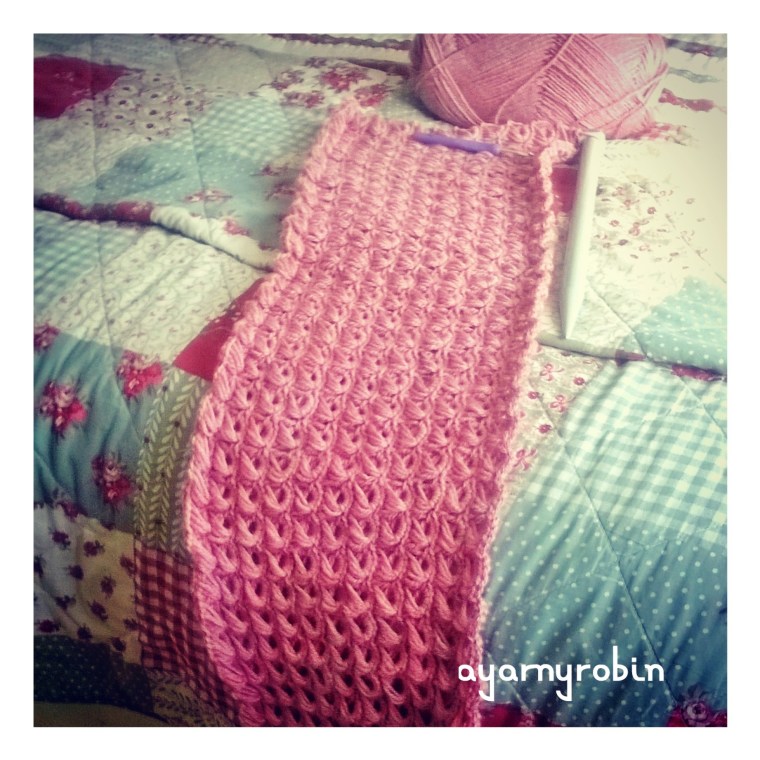
I have my Lazy Days broomstick lace blanket which is just divine to hook, but I have to keep count, so this is best hooked when I’m on my own. It has grown considerably since it was snapped here and looks more like this now…
It is so pretty.
I have decorated my bedroom now, so I really must make this a priority to finish.
The next PHD is this beauty…
crochet and coffee
Technically, this is a PHD, but it is also up to date as it is being hooked as a CAL (crochet a long) blanket, so this super #seasidestashbusting blanket has x4rows added to it each week and is growing fast. You can read about it just here.
making stash pretty…
Then, there is this lovely spiked stitch baby blanket, which I don’t think I have introduced you to yet. I will write a post about it soon complete with pattern details I promise. The important detail for now is I’m using up stash…yes, I’m on a mission!
I am still plodding on with my Charming Harbour blanket, although progress is slow as the lure of the brighter colour blankets call louder to me. However, this quiet and unassuming blanket thrills me once it is on my lap, it’s simplicity and beauty seduces me and I feel I should apologise to it for leaving it alone for so long.
Charming Harbour blanket in progress…
So, that’s four blankets on the go. I also have a flower fiesta commission that I should be getting along with. I have made a start…but I also have lots more to get done. Then there is a little baby romper that I need to start and several baby hats too!
You may have noticed some funny business going on here over the last week too…apologies if you have been affected. I have had a little reorganisation of this space and now have some of my patterns featuring at the top of the main page. I have also finally got my own logo which I am super pleased with.
I am also about to launch a new series called
‘My Yarny Knitting Adventure’
I can’t resist any longer and I have set myself the challenge of learning to knit. I am collecting my knitting needles from my Mom tomorrow and I’m going to see what happens, so look out for a lot of dropped stitches and some yarny tangles!
I also have a pattern release due out mid April. It is a free pattern for a beautiful crochet baby blanket, I just need to put the component pieces together…..
Wow, that seems like rather a lot now that I have written it down all in one place…I had better pull my hook out!
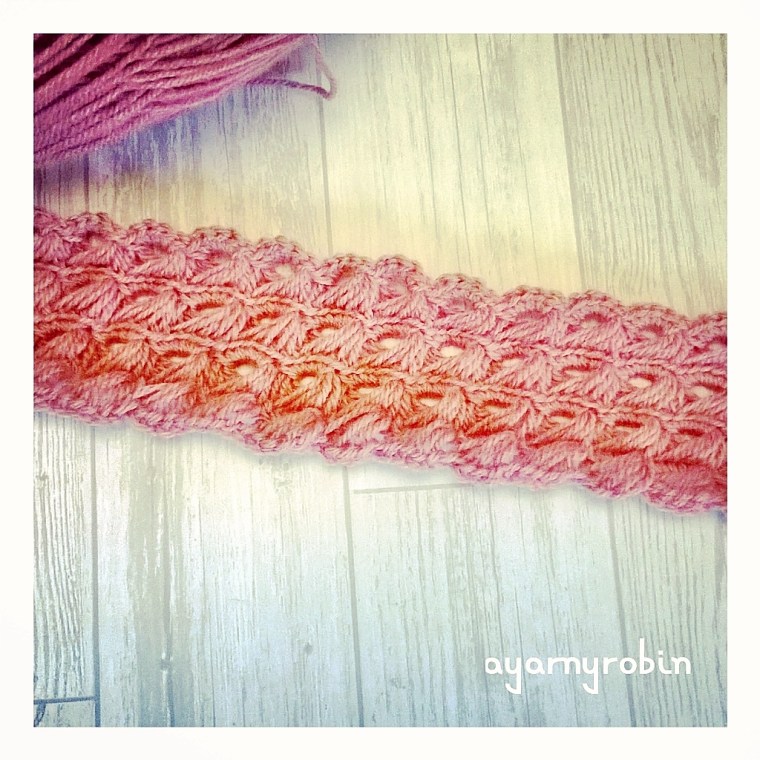
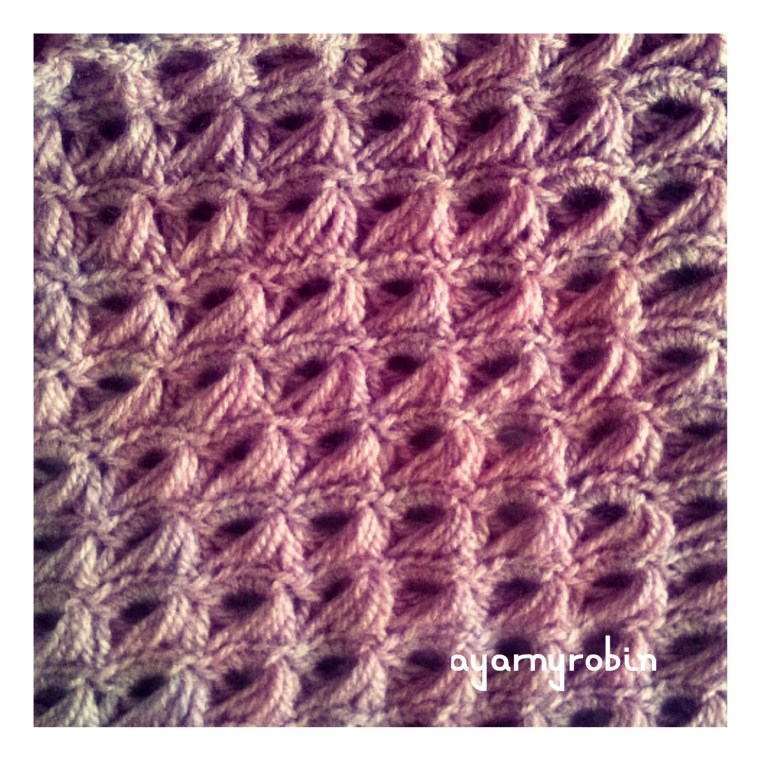
I have a small confession for which I hold my temporary insomnia completely responsible. I have started yet another crochet blanket. But, in my defence it is a gorgeous broomstick crochet, and in a beautiful wild rose blush and it’s for my new bedroom.
So, that’s ok.
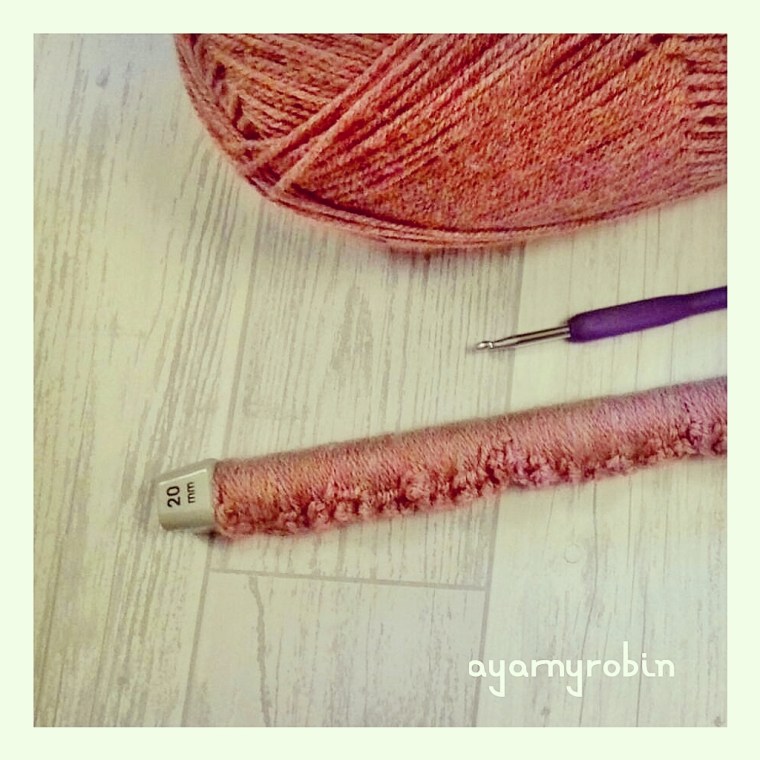
It is!…just look at it on a chunky size 22 needle.
It has been my weekend love and has been a welcome distraction from the snow and freezing temperatures; and it grows quickly too.
This blanket is so pretty and feminine and uses a very old stitch. Traditionally, hooked over a broomstick handle, hence the name. It is a little undignified, sat with a huge needle between your legs whilst you anchor the stitches over that size 22!!
Not really one to take to the coffee shop if you catch my drift!
So that is three blankets on the hook now…my seaside stashbusting blanket is all up to date, you can check it out just here and my Charming Harbour blanket is making steady progress too.
I have also been really enjoying the ‘yarn – a – long’ series which has been running each Sunday through March. There is still time to join in with the chatter, last Sundays is just here.
Enjoy the rest of your week whatever you have planned.
I thought you might like a little update on the slow CAL (crochet a long) I am participating in which is being hosted by coastal crochet…details of weeks 1 – 4 are just here. You may have seen it across social media with the #seasidestashbustingblanket.
mixed stitches…
There are several things I am enjoying about this CAL. The first of which is the pace. Eleonara, is releasing just four rows a week; two on a Monday and two on a Friday and so it feels very relaxed.
as approved by little Jess
The second little gem is that I am busting my stash! The CAL’s focus is using up what you already have and so this blanket is being made entirely from stash. I have a lot of stash, not as much as some, but too much to be just lying idle. I feel like I am achieving something very positive using up my hoard and turning my treasure into usable wealth.
The third pleasure is the online community element of this CAL. I have met and chatted with so many talented ladies and gentleman and have been inspired and encouraged. It never ceases to amaze me how folk can hook the same pattern and yet the different colour choices make it look so different.
Creativity…I just love it!
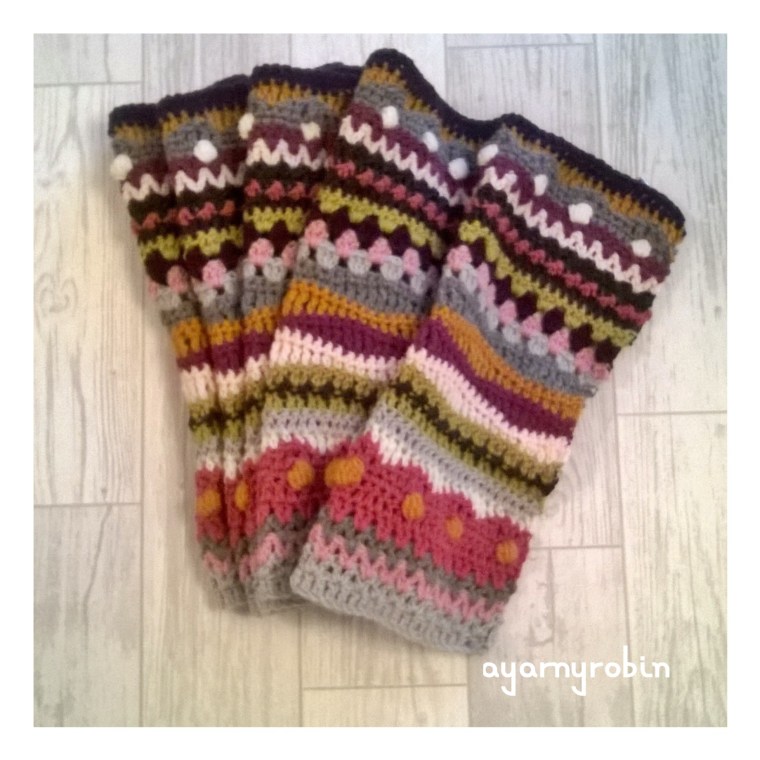
week 8
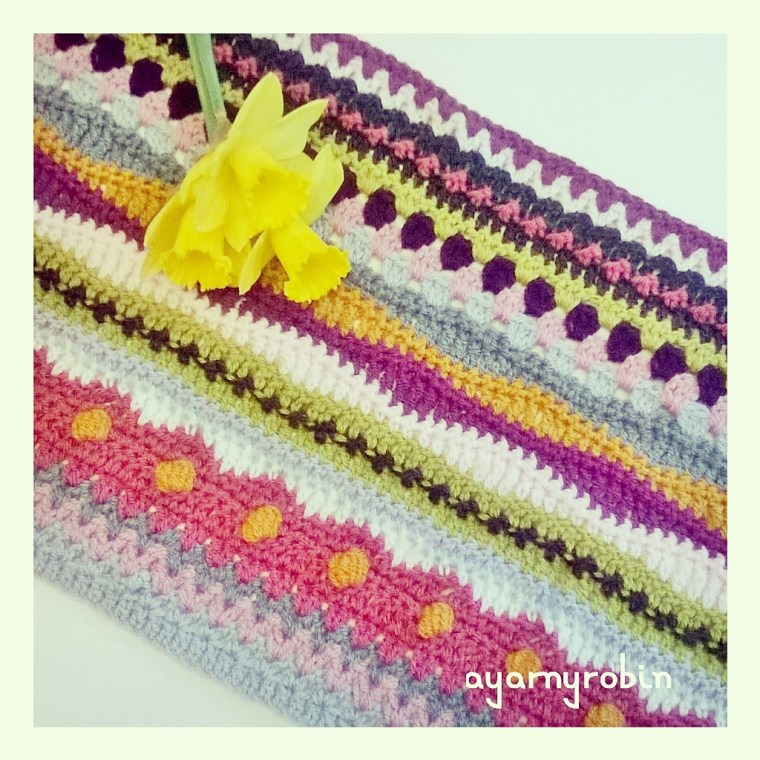
Eleonora, has called it her seaside blanket because she lives by the sea and takes her inspiration from her surroundings and therefore that is reflected in her colour choices. It made me smile when she introduced pink into her blanket… stating she new she would have to as it was in her stash. Eleonora, likened it to strawberry icecream on the beach, which I liked a lot.
It got me thinking about the colours in my blanket and what they reminded me of and after some thought I think they remind me of a stormy sunset.
So I am going to call this my Stormy Sunset blanket…what do you think?
#yarnlovechallenge... if you’re not following this on Instagram…here are my final four days of prompts.
Day 25: International…This is my ‘Around the World in 64 Squares’ friendship blanket. A blanket made from crochet and knit squares sent to me from all around the world. In return I sent the same amount of squares all around the world as part of a fabulous group on ravelry call The Global Square Exchange. It was super fun to be a part of and I have a truly unique and international blanket.
Day 26: Embellish…This is my ‘yarny Little Leaf ‘ and one of my favourite embellishments to use. They are quick and simple to hook and look stunning in Autumn colours too. Just click on the link for the free pattern and tutorial.
Day 27: Fit …This gorgeous boy got a surprise new winter hat when it became evident that it was not going to fit on my gorgeous husbands gorgeous head! A ‘fit’ fail!
Day 28: Confession…What more an I say
And that is it February #yarnlovechallenge complete…it has been fun…hope you have enjoyed it too.


 join blue yarn and slst into 3rd ch
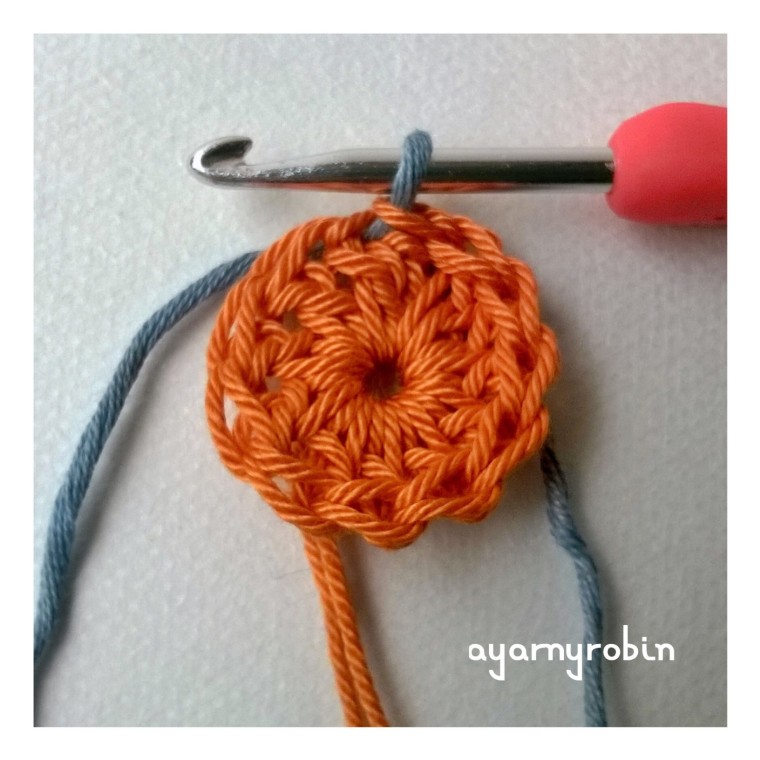 Row 2: ch3,
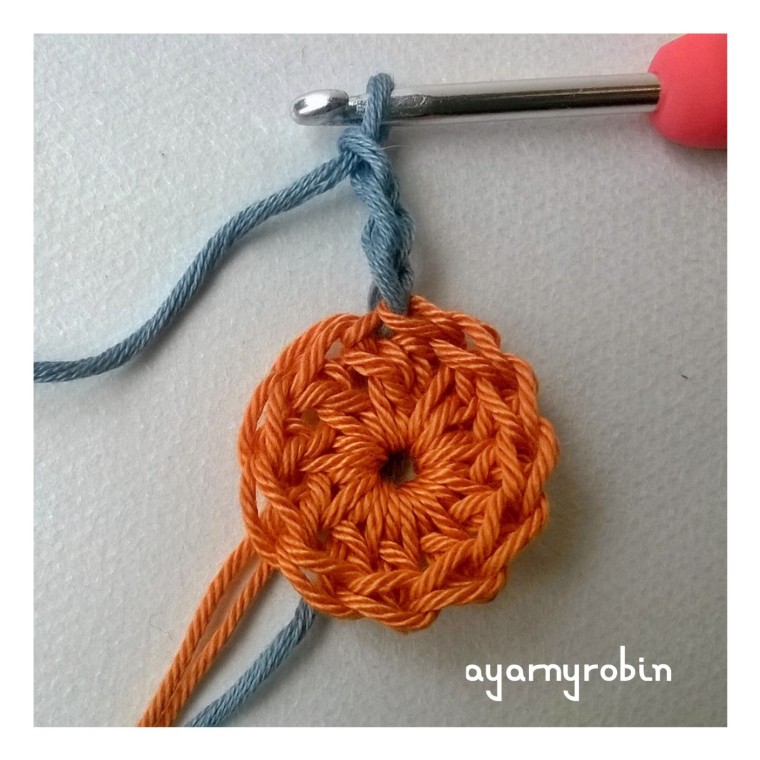 1tr in same space, ch1
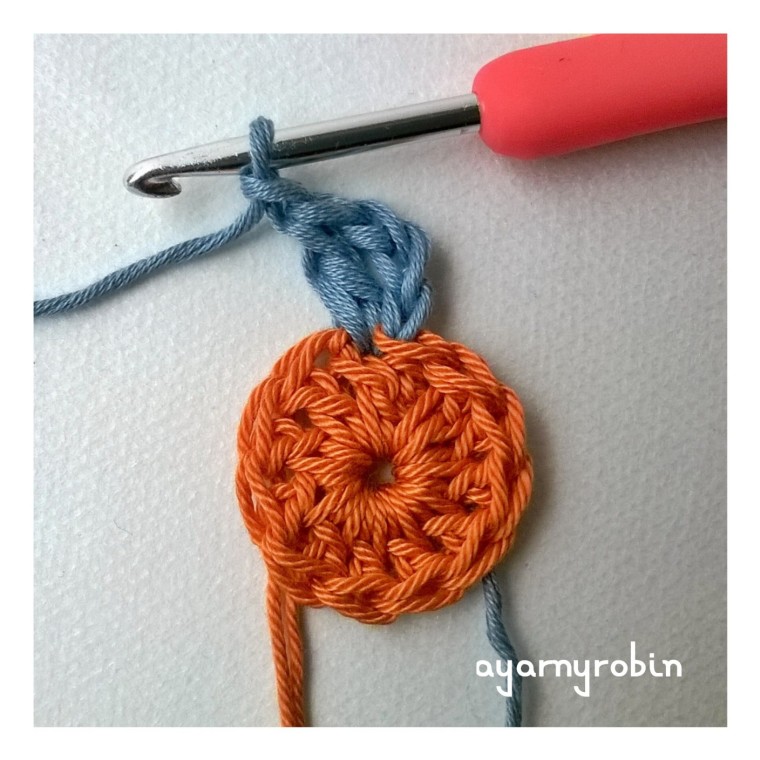 2tr in next st, ch1
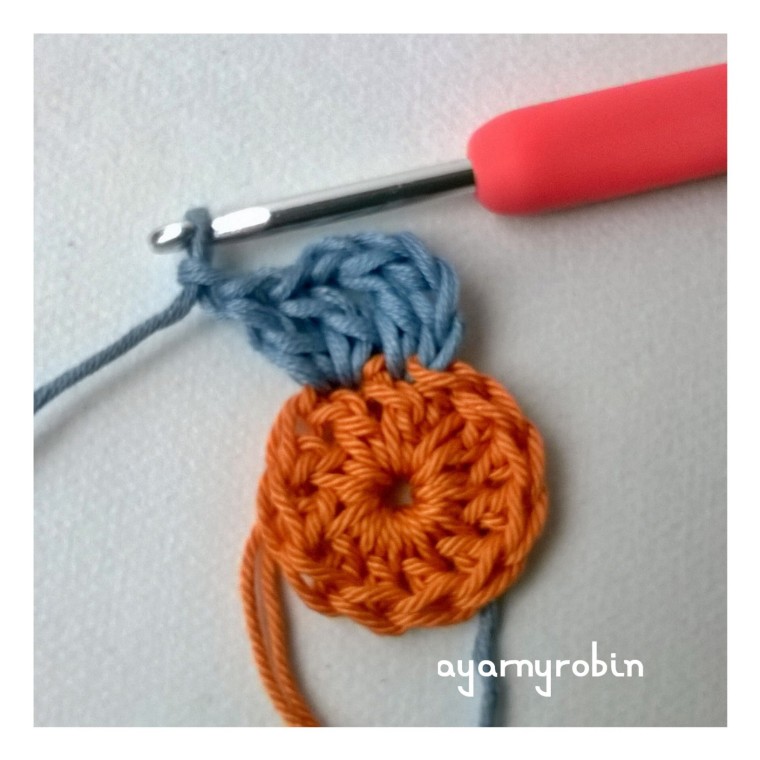 *2tr in next st, ch1*, repeat * * x10 times,
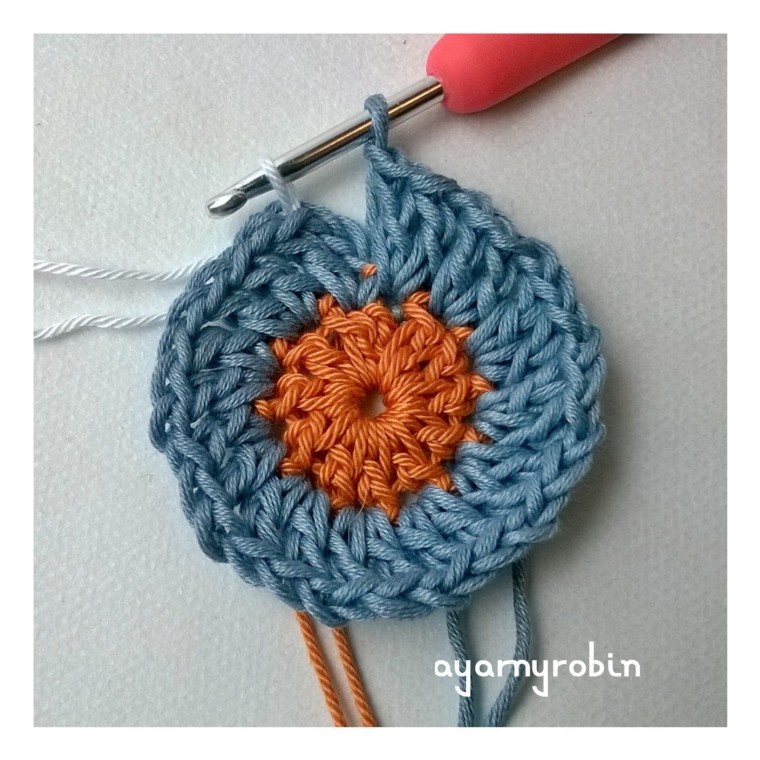 Row 3: ch3,
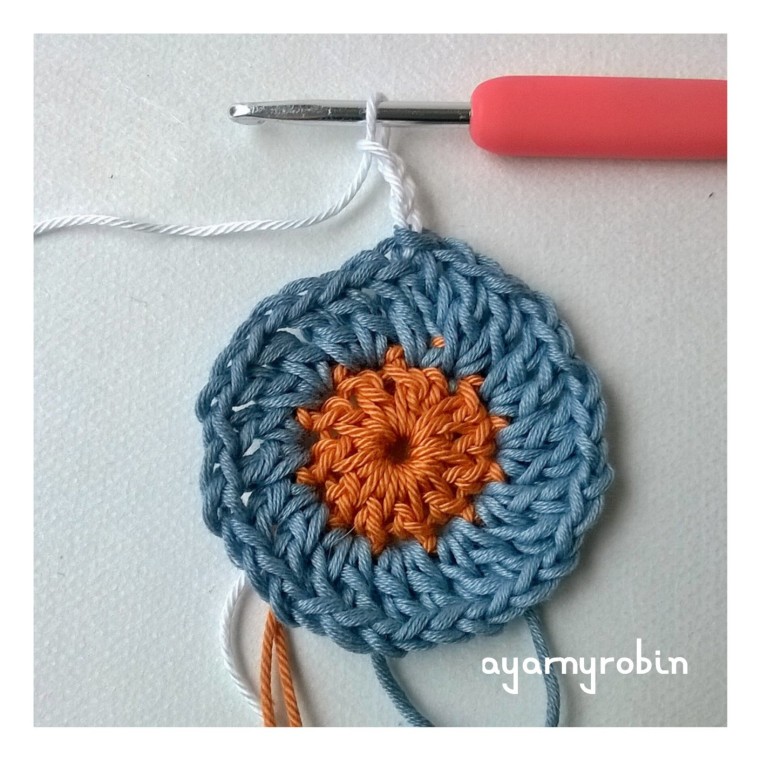 *3tr in next ch space*,
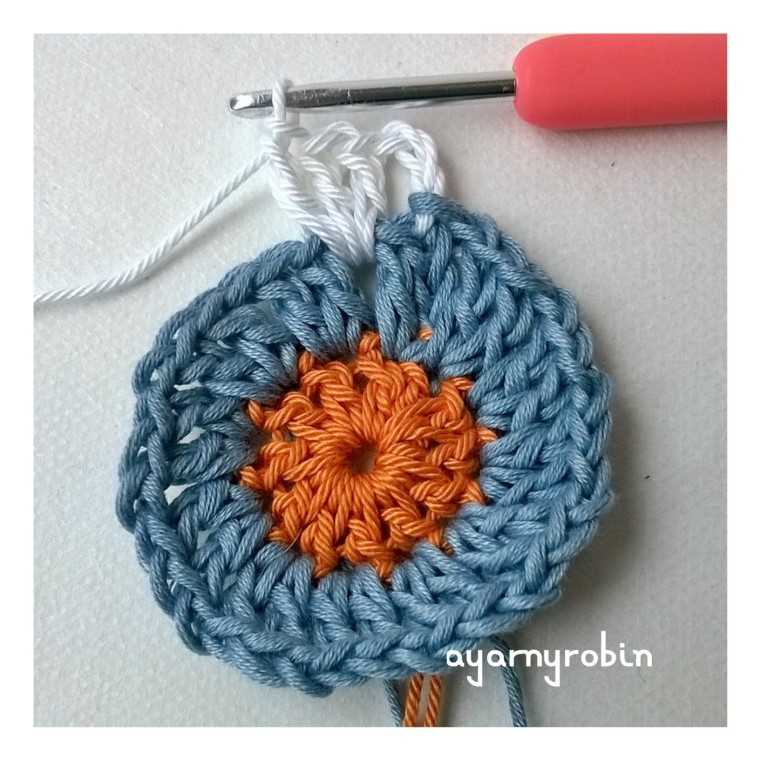 repeat * * x10 times, 2 tr in next ch space,
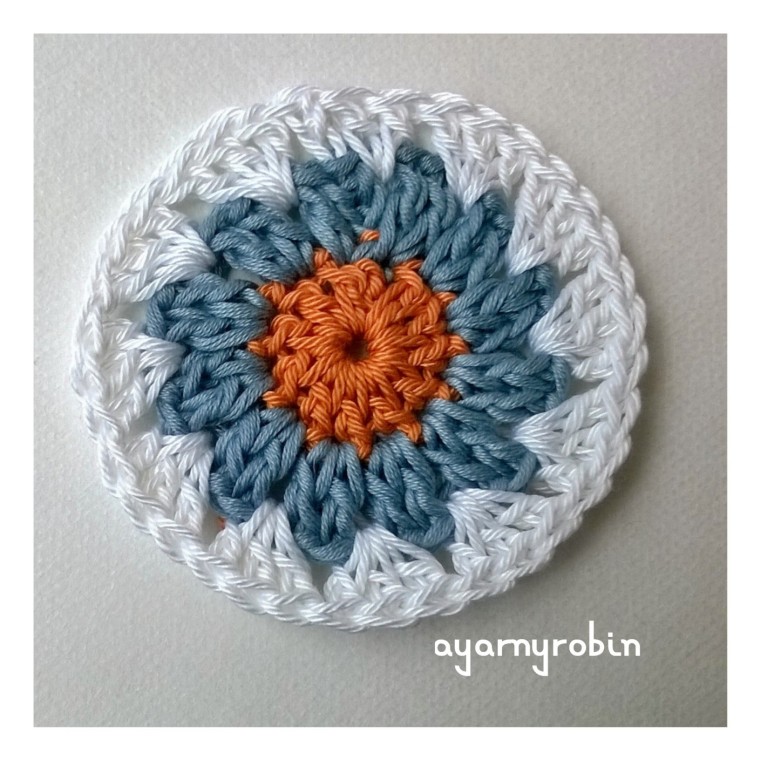 join with slst in top of ch3 and fasten off.
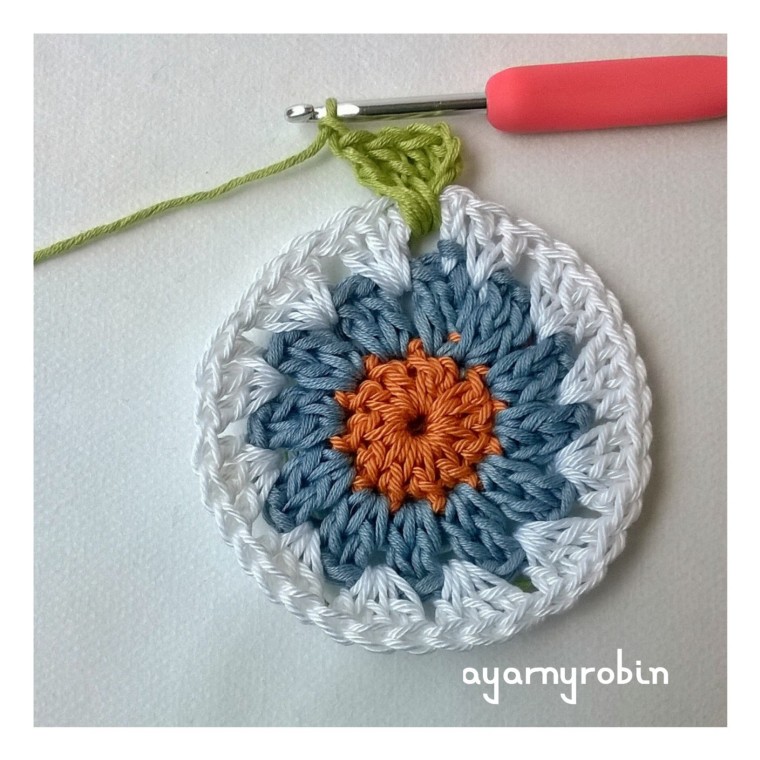


 I found the knit stitch reassuringly satisfying as the needles made a gentle clicking sound and of course the familiar feel of the yarn in my hands was heart warming. The 21st stitch that appeared from no where was baffling as was the loopy first stitch in every row.