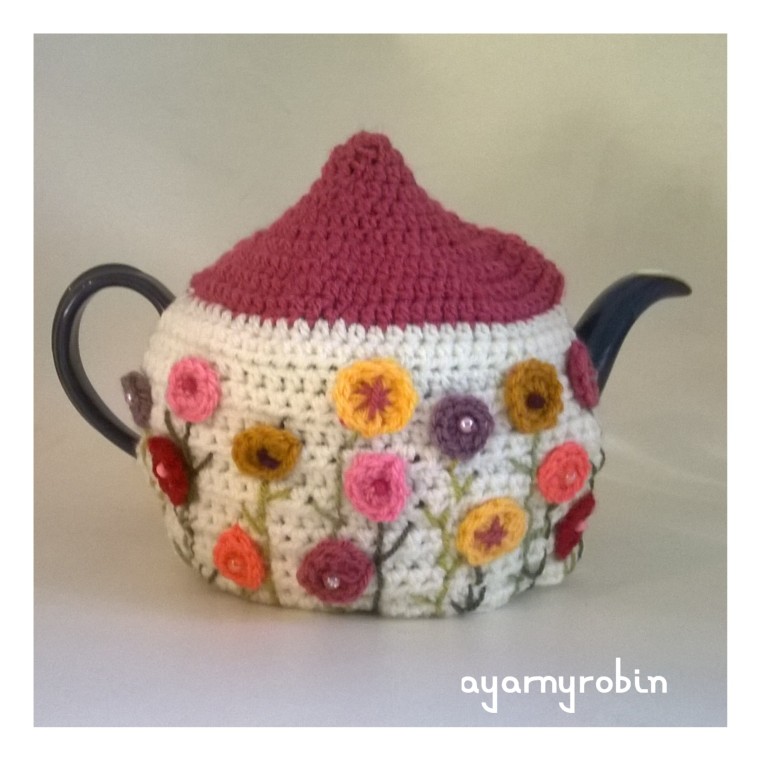
Introducing the ‘Grandma Dot’ tea cosy…the third in the Grandma Collection
Dedicated to my husband’s Nanna Dot who was a truly formidable woman.
Nanna Dot was a tiny woman in stature but a mighty woman non the less.
Strong, brave and wise with the most beautiful smile. No matter what was going on or how much hell was breaking loose round about; Nanna Dot would make a cuppa tea or something a wee bit stronger and in a way that I still do not really understand, she would put things into perspective with a gentle reassurance.
I wish I had known Nanna Dot for longer. I especially loved her love of family and Christmas. Family were so important to her. When my first son was born, we counted from Nanna Dot and Grandad Ernie that our son was number 50….a BIG family indeed!
So this cosy is covered in ‘dotty little flowers’
A meadow of ‘dotty little flowers’ to represent the growth and legacy of her family, which at last count is upwards of 60!
So that is the Grandma Dot tea cosy in all of its glory, here is the pattern linky thing which is free and has a photo tutorial also.
A beautiful Tuesday too, a happy day off for me catching up with family, drinking lots of coffee and I must confess a little nap before the school run instead of crochet.
a blustery Sunday walk in the countryside
So, I thought I would post the pictures of our lovely blustery Sunday countryside walk this weekend.
a British adder snake
We were all thrilled to find this adder snake slithering across the path. I have never seen an adder before, they are a rare sight. They are also our only poisonous snake in Britain, so we got the dogs back on their leads quickly and let Mr adder go on his way.
We continued our walk, chatting and planning and breathing in the crisp air and generally being amazed by the beautiful British countryside.
Once home I curled up with my hook and began a new pattern which has been long overdue.
A new tea cosy for the Grandma Collection. I am almost done with it, so I will release it here very soon I promise.
xxxxx
all photographs in this post are provided by Mr Little Brother…
With Autumn sneaking in…well here in the UK anyway, I thought I would take a little look back at some of my favourite blankets that I have hooked over the years.
I rather think there is nothing as good to hook as a blanket, the process is satisfying and restful and of course it always involves that lovely stage of playing with colour and almost always buying new yarn!
Here is my yarny autumn blanket round – up…pattern details can be found in the links below or on my Ravelry page just here.
already a firm favourite!
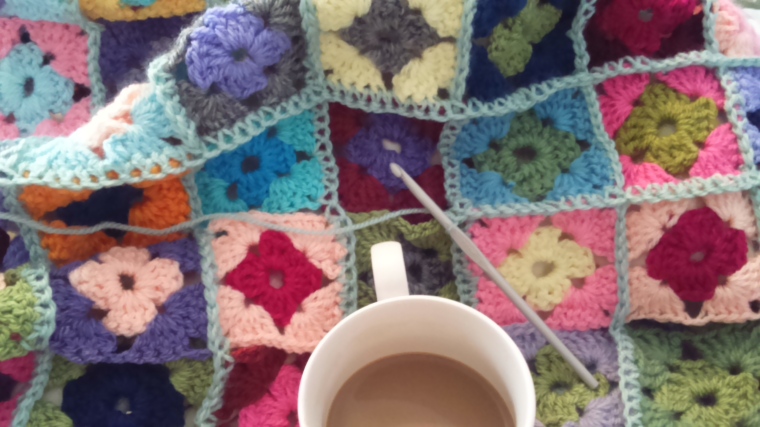
This is my favourite camping granny square blanket. Strictly speaking I did not hook this one as the squares were made for me from all around the world. In return I sent squares all across the world too. You can read more about this blanket here .
design by Katherine Eng
This beautiful apartment lapghan in this stunning alpine colourway, was a fabulous hook. It challenged me at the time with the starting chain in the middle of the blanket ! I finished hooking this in the sunshine and I was thrilled with the end result…a perfect gift.
Using up scraps!
I loved the alpine colourway so much that I used the scraps from the lapghan to make this simple granny square blanket. I love to hook a traditional granny square and always return to this pattern every now and then! I couldn’t resist a fringed edge for this one and it didn’t disappoint.
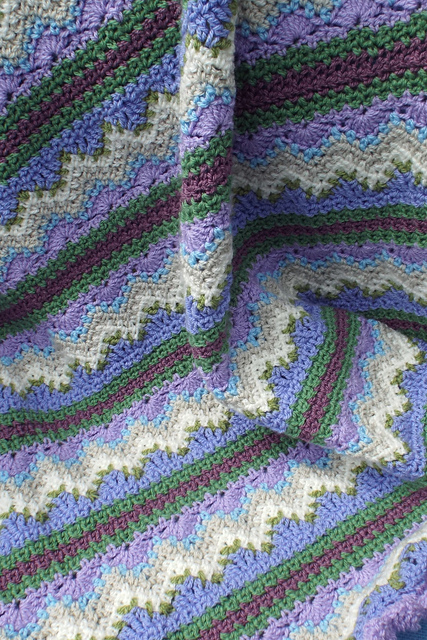
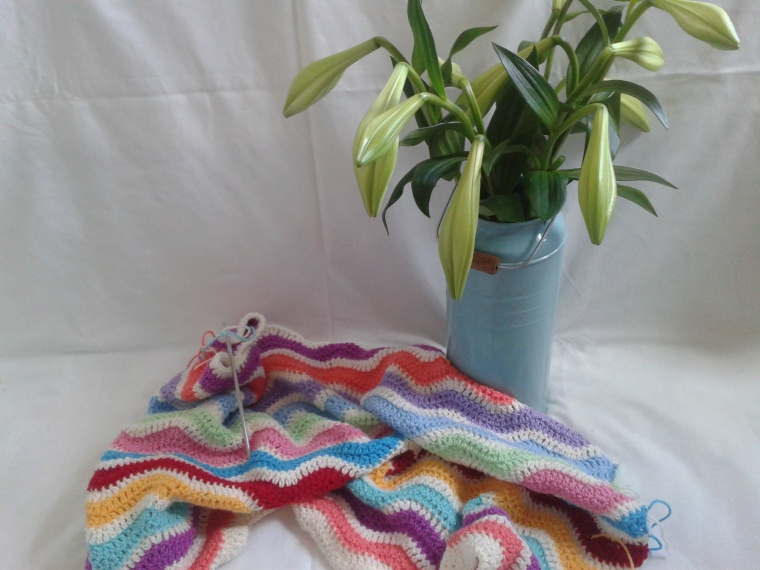
ripple so far…Attic 24 pattern
This happy ripple was another perfect gift…and just had to have a happy bobble edging to crown it. This was a very, very happy hook…and I wished I could have kept it for myself!!!
basket weave baby blanket
Gorgeously cushy and in chilli pepper red. This basket weave baby blanket nearly tipped me over the edge, to read why click here. I’m glad I have done basket weave, but it is my least favourite stitch and I think you get very similar results and much more joy from a C2C (corner to corner) technique. I did not follow a pattern as such, I followed a you tube clip on basket weave stitch (I cant remember which one!) but my ravelry page for this blanket is just here, it might give an idea of amount of yarn used etc
Cosy Cottage Blanket by Attic 24
Another Lucy blanket and a dash to the finish line. A simple hook but a mammoth project. I love this blanket and still get to snuggle under it even though it was a gift…as I gave it to my Mom!
Once I had the pattern repeat in my head, I was able to hook this beautifully understated baby blanket on auto pilot. I adore the popcorn stitches, and the alternating texture of this blanket. This blanket draped well, felt soft and squishy and I remember thinking any baby would feel cherished snuggled in this blanket. For pattern details click here.
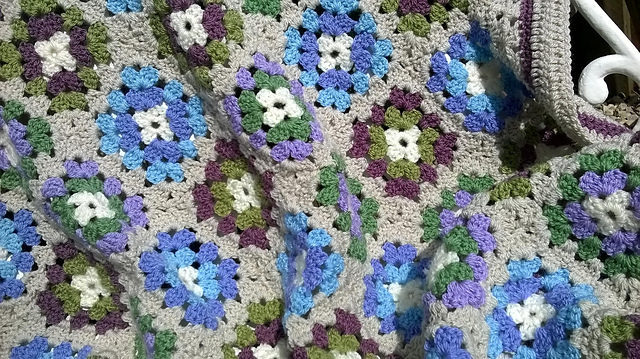
Another great stash buster and great for crocheting whilst watching a box set…A giant granny square blanket. Going back to my roots with this blanket as it was one of the first patterns I taught myself to hook…so the pattern is in my head…but youtube traditional granny square and you will be certain to find a tutorial for sure.
100 patch granny
I kept this 100 patch mini granny square blanket after learning sometimes smaller is better! I couldn’t resist another bobble edge again, but this time in duck egg. I joined the squares using a double crochet technique which frames each square beautifully. Pattern details are here.
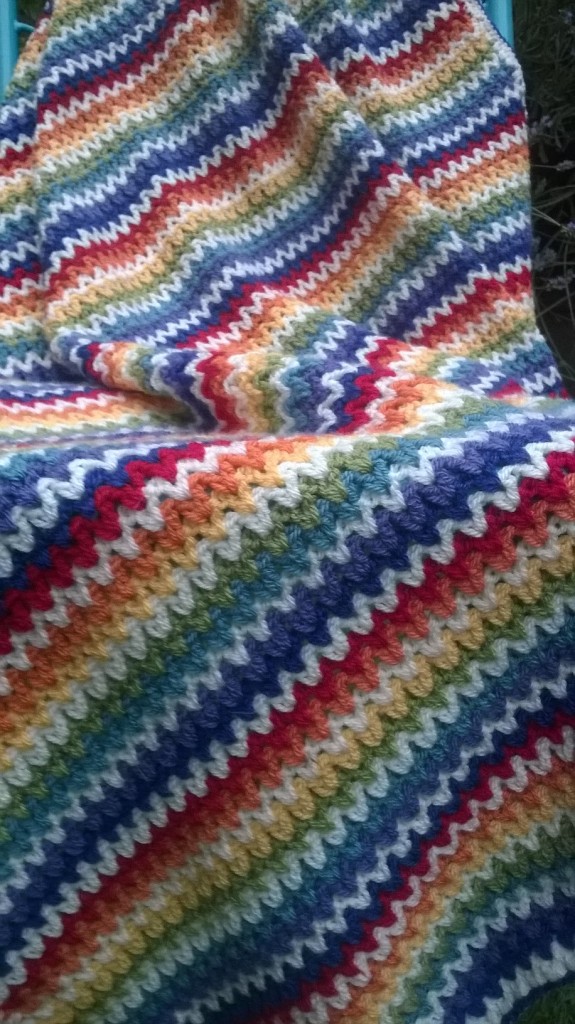
Very V blanket
A rainbow lovely.
This simple v stitch blanket proved to be nothing but joyous from the moment the yarn arrived in its lovely balls all bagged up together. Hooking this merry delight was rhythmically therapeutic and soothed me whenever I picked it up…needless to say I couldn’t put it down!
An interlocking stitch on this Baby Wilmer blanket, gave a dense squishy feel and a reversible fabric, ideal for putting in the pram. Using just 3 colours also meant I could work the yarn threads up the sides of the blanket without getting in a tangle; meaning colour changes were a doddle and the number of ends to be woven in at the end were reduced by a gazillion!
C2C Totally Smitten blanket
And finally, the blanket on my hook at the moment, a real stunner and a keeper…this C2C heart blanket which I am smitten with. Pattern details just here and yes… it is still awaiting a border.
So, there you have it; my yarny autumn roundup of blankets I have made over the years. I will never tire of hooking such beauties and I still have so many on my to do list.
I hope if you have the blanket bug this may help in your happy, hooky deliberating.
If you have got this far and read all of this and you don’t have the blanket bug, just know that you may well have caught it by now…look out for symptoms over the coming week!
15000 riders came past the bottom of our street yesterday, on a 100 mile ride on closed roads. I made a coffee and took the very short walk in the early morning sunshine with the boys.
I sat with my neighbours as we watched all sorts of people from all walks of life zoom past.
They rode so fast it made me a little dizzy, but they were so inspiring. I guess all of them having different motives to complete the challenge.
A lot of folk had been moaning about the extensive road closures…but I was excited, a few hours of something completely different and a rare chance for our community to come together and drink coffee on the pavement together and chat.
I can’t tell you what 15000 riders looked like, I just know that for hours they poured down our hill, determined and pumped and probably a little exhausted, but exhilarated and achieving.
I returned home, empty mug in hand
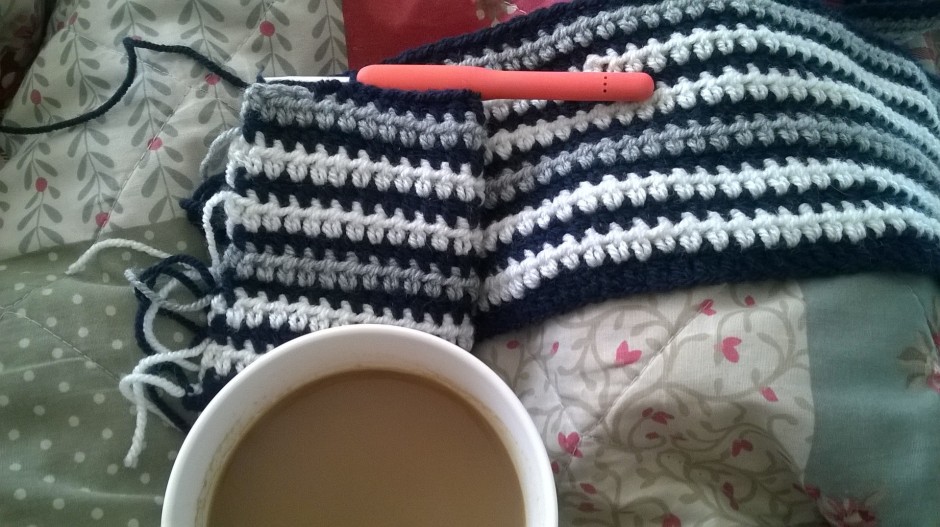
I made a fresh coffee and settled down with new yarn and began to hook my newest project
a new blanket…
a masculine and handsome edition to the blankets I have hooked in the past. I’m 13 rows in and loving it!
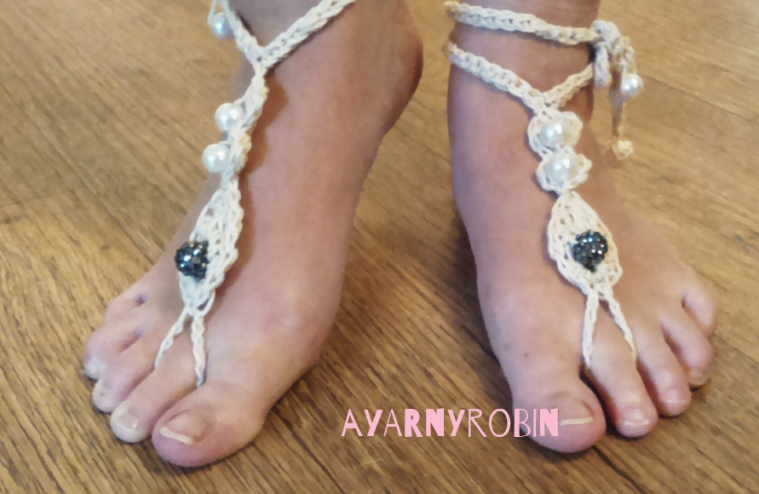
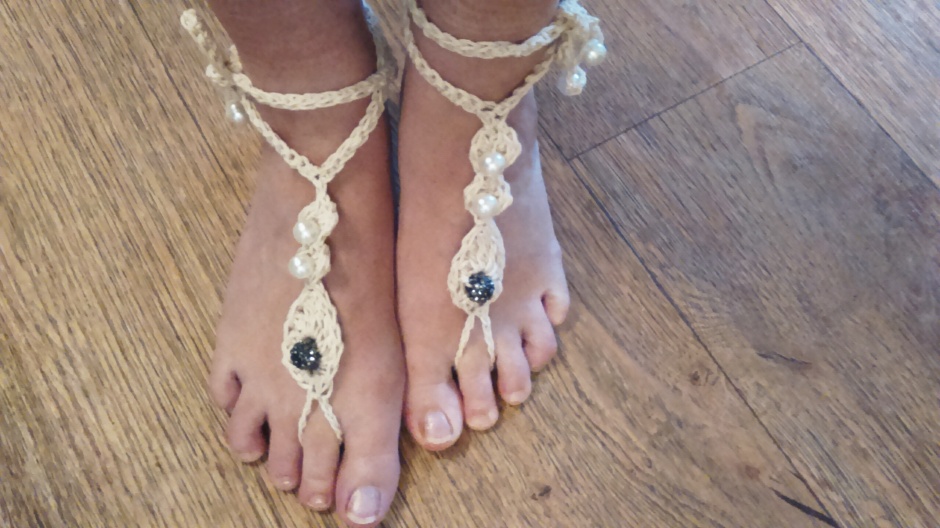
As promised Ginny, here is my pattern for these cute Corfu barefoot sandals.
You will need approx. 7m of yarn for each sandal, I used Paintbox dk cotton in cream and a 4mm hook.
You will also need x5 beads for each sandal, I used beads from a cheap bracelet. Just make sure the threading hole in the bead is large enough for your yarn.
Other useful items you will need are a pair of scissors and a darning needle to weave in the ends.
This pattern uses English terminology and the following abbreviations:
Ch – chain stitch
st- stitch
slst – slip stitch
dc – double crochet
htr- half treble
tr – treble crochet
dtr – double treble crochet
By adjusting the number of chains in the ties, you can make them longer or shorter to suit. Additionally adjusting the number of chains in the toe loop for comfort may be required.
To skip photo tutorial, head to the end of the post for written pattern without photo’s.
So, assuming you have gathered your supplies cut at least 7m of yarn from the ball, knot one end and thread X5 beads on. The X2 beads nearest the knot will be located at the end of the ties of the sandal, the following X2 beads will be located, just before the tie chain starts, and the last bead you thread will be the bead nearest the toes (I used a different bead which was larger and sparkly for this)…the darker bead in the photo.
move the beads to the end of the yarn for later…
Now, starting at the other end of the yarn to the beads, leave a long length, approx. 50cms. You will use this at the end to make the toe loop. Make a loop
Chain 6 and bring first bead down
Join with a slip stitch into 1st chain – catching / incorporating the bead in the centre
Ch4 (counts as a dtr) As you make the next stitches around the bead be careful not to weave in the long tail that you are saving for your toe loop.
2dtr into loop (this can be a bit fiddly getting the hook in next to the bead)
Continue working in the loop around the bead as follows
2tr, 2htr, 2dc, 2htr, 2tr, 2dtr
and join with slst in top of beginning ch4 (feather made).
Now ch6,
in 2nd ch from hook *dc, 2tr,dc* (1st cluster)
miss a st and repeat *—* (2nd cluster), slst into top of feather.
Turn work so feather is on the your right hand side
The next set of stitches will be made in the base of the 1st cluster st, (see photo). But first, bring the second bead down and rest it on top of cluster, now slst in base of cluster st to secure.
*Dc,2tr,dc* in same space.
Bring down third bead and repeat *—* in second cluster.
To finish cluster slst in 1st ch at the start of 1st cluster (see photo above).
*Ch55, bring down 4th bead, slst into 4th ch from hook and pull tight to secure bead.
Dc in each ch back to cluster, slst into top of cluster* (tie made) repeat *—* to make second tie. Fasten off and weave in ends.
Returning to length of yarn left at start, weave end to bottom of feather
insert hook into top st of central dtr and pull up a loop
Ch12 and slst into top of central dtr which you started ch from. Tie off and weave in ends.
Now to make another!
I really hope you have enjoyed making these barefoot sandals, I would love to see some pictures if you have.
xxxxx
Written pattern without photo’s.
Corfu Barefoot sandal by ayarnyrobin.wordpress.com
cut at least 7m of yarn from the ball, knot one end and thread X5 beads on. The X2 beads nearest the knot will be located at the end of the ties of the sandal, the following X2 beads will be located, just before the tie chain starts, and the last bead you thread will be the bead nearest the toes
Now, starting at the other end of the yarn to the beads, leave a long length, approx. 50cms. You will use this at the end to make the toe loop.
Make a loop, Ch6 and bring first bead down, join with a slip stitch into 1st chain – catching / incorporating the bead in the centre.
Ch4 (counts as a dtr) As you make the next stitches around the bead be careful not to weave in the long tail that you are saving for your toe loop. 2dtr into loop (this can be a bit fiddly getting the hook in next to the bead).
Continue working in the loop around the bead as follows 2tr, 2htr, 2dc, 2htr, 2tr, 2dtr and join with slst in top of beginning ch4 (feather made).
Ch6, in 2ch from hook *dc, 2tr,dc* (1st cluster) miss a st and repeat *—* (2nd cluster), slst into top of feather.
Turn work so feather is on the your right hand side.
The next set of stitches will be made in the base of the 1st cluster st. But first, bring the second bead down and rest it on top of cluster, now slst in base of cluster st to secure. *Dc,2tr,dc* in same space.
Bring down third bead and repeat *—* in second cluster.
To finish cluster slst in 1st ch at the start of 1st cluster. *Ch55, bring down 4th bead, slst into 4th ch from hook and pull tight to secure bead.
Dc in each ch back to cluster, slst into top of cluster* (tie made), repeat *—* to make second tie. Fasten off and weave in ends.
Returning to length of yarn left at start, weave end to bottom of feather, insert hook into top st of central dtr and pull up a loop, Ch12 and slst into top of central dtr which you started ch from. Tie off and weave in ends.
The profit of a non working day is, I have a little crochet to show you.
I can’t tell you of the glorious simplicity that being at home has afforded; even if it is just for one day in the working week.
I just know that Tuesday is going to be my favourite day of the week from now on.
I took Little Robin to school…Oh how I have missed doing that! Then, I headed straight for my crochet hook and finished off my barefoot sandals.
Which I am super thrilled with.
Shame it was too cold to wear them!!!
Instead, Mr R and I headed out on a little bike ride
Which took us around our local paths where Autumn is beginning to creep; kissing the leaves with it’s colour.
The leaves are just beginning to turn Autumn yellow in places
Our ride took us over the golf course,
and by the old church.
To the café at the park, where we stopped for a bit of fruity refreshment.
Before being chased home by a very large rain storm.
We made it home without getting wet, stopping briefly by little Robin’s school to hear the children playing in the yard (and to get my breath back!). Happy sounds of children’s chatter and laughter which made me smile inside very much. We also stopped at a badger carcass in the woodland, well it was the smell which stopped us…hundreds upon hundreds of maggots feasting upon dead badger!
I did not take a photo of either the school yard for fear of being arrested; or the dead badger as I could not stomach the stench long enough… and besides I couldn’t decide on the badgers best angle!
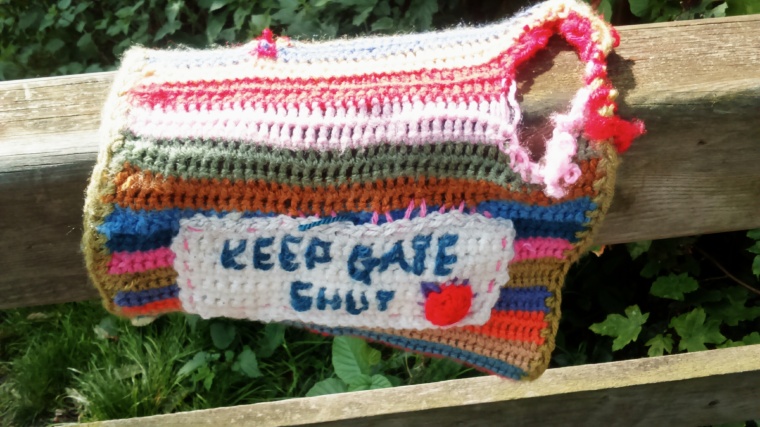
I did get a snap of this though on the last stretch home!
It is still there after all this time, well worn and stretched by the rain now; with holes where the birds have pecked at it. But, still there…well loved it would appear…which made me smile inside all the more.
Thank you for time with my brood, for rest and relaxation and time just to breathe a new rhythm for a while
Thank you for tequilla sunrise and Corfu beer
Thank you that I was able to create x1 barefoot sandal
well, I was just too busy doing not a lot! See…
Thank you for time spent in your Old Town, where the streets came alive after dusk with the chatter of the swifts overhead and where the street sellers appeared from nowhere with their wares.
For your cobbled alley ways crammed with unique gems and treasures.
Thank you for fun, lots of fun…
Thank you Corfu for helping our healing and for new memories. Thank you, Thank you, Thank you.
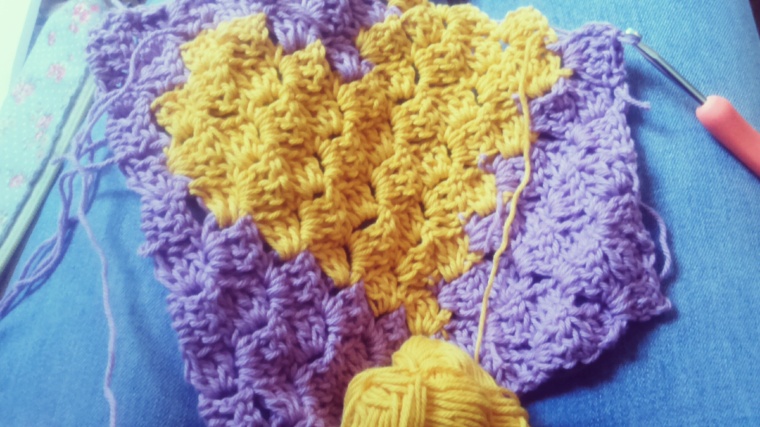
It seems quite a while back now that I dipped my toe into the world of C2C (corner to corner) crochet. It is safe to report that I am totally hooked, if you pardon the pun!
It was actually only in July that this C2C journey of mine began, inspired by the very talented lemonadesucrette who had posted a series of updates on Instagram of a beautiful heart baby blanket. In my soul I had decided I too must create my own, but also had a yearning to learn C2C… you can read more about my inspiration for this project just here.
I am using paintbox cotton yarns
I feel like my progress has been slow and steady. I don’t have a lot of crochet time lately, but I am hoping that will change as the Autumn approaches as I have taken the decision to reduce my hours at work to restore some balance.
I can’t tell you how ridiculously excited I am to be able to take a non working day in the week. It means I get to take and fetch my smallest Robin from school once a week; something which my heart has ached to do for far too long now.
I am hoping it will give me some more time with my hook also!
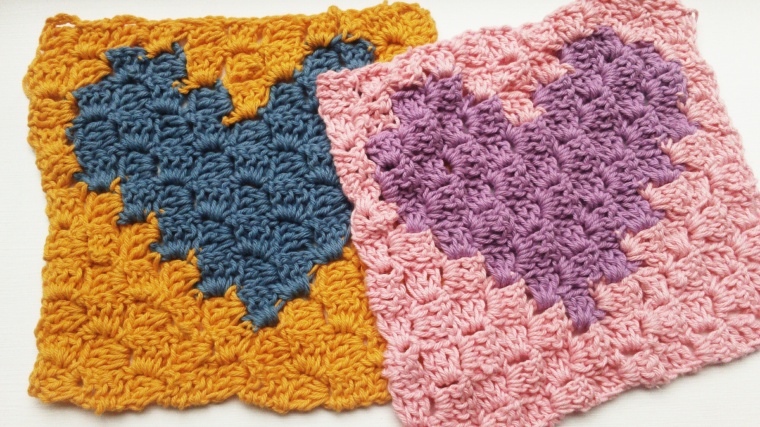
I have finally got to the stage in my C2C sojourn, where I am sewing the squares together. I am so in love with this blanket that I am not going to part with it. I am going to treasure it and use it here at the nest.
I just have the decision to make about the border. I will decide on a colour and keep it simple I think, but it looks like this will have to wait until September now….
and a non working, taking to school, type of happy hooky day!xxxxx


 Introducing the ‘Grandma Dot’ tea cosy…the third in the Grandma Collection