Quick Amigurumi Bee Tutorial for Beginners

Small Crochet bee with rosy cheeks made from cotton
Crochet bag charm patterns

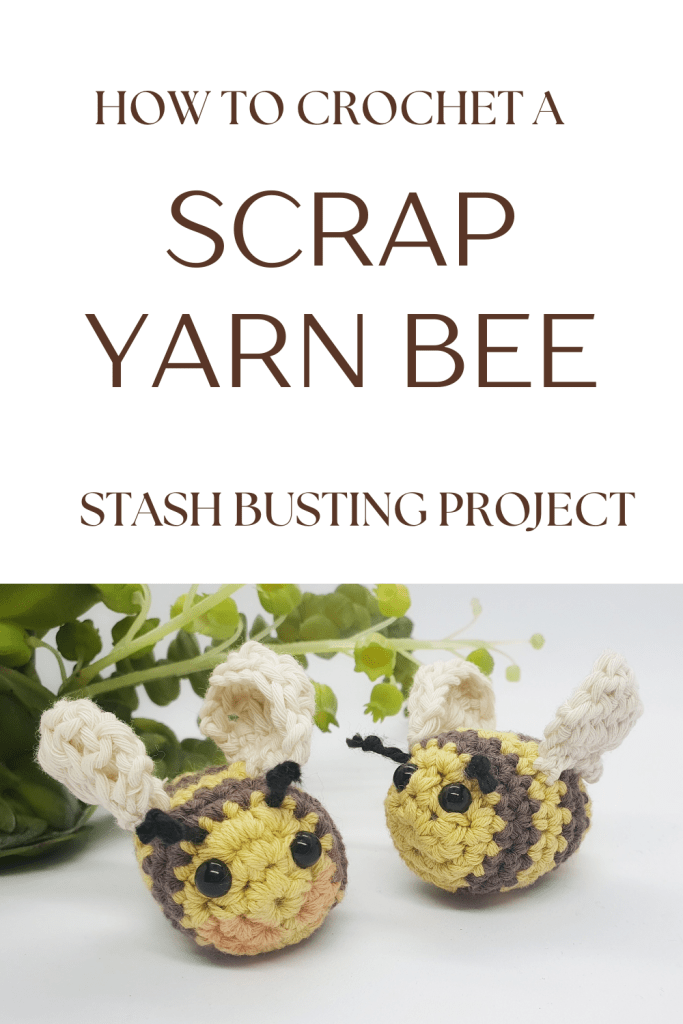
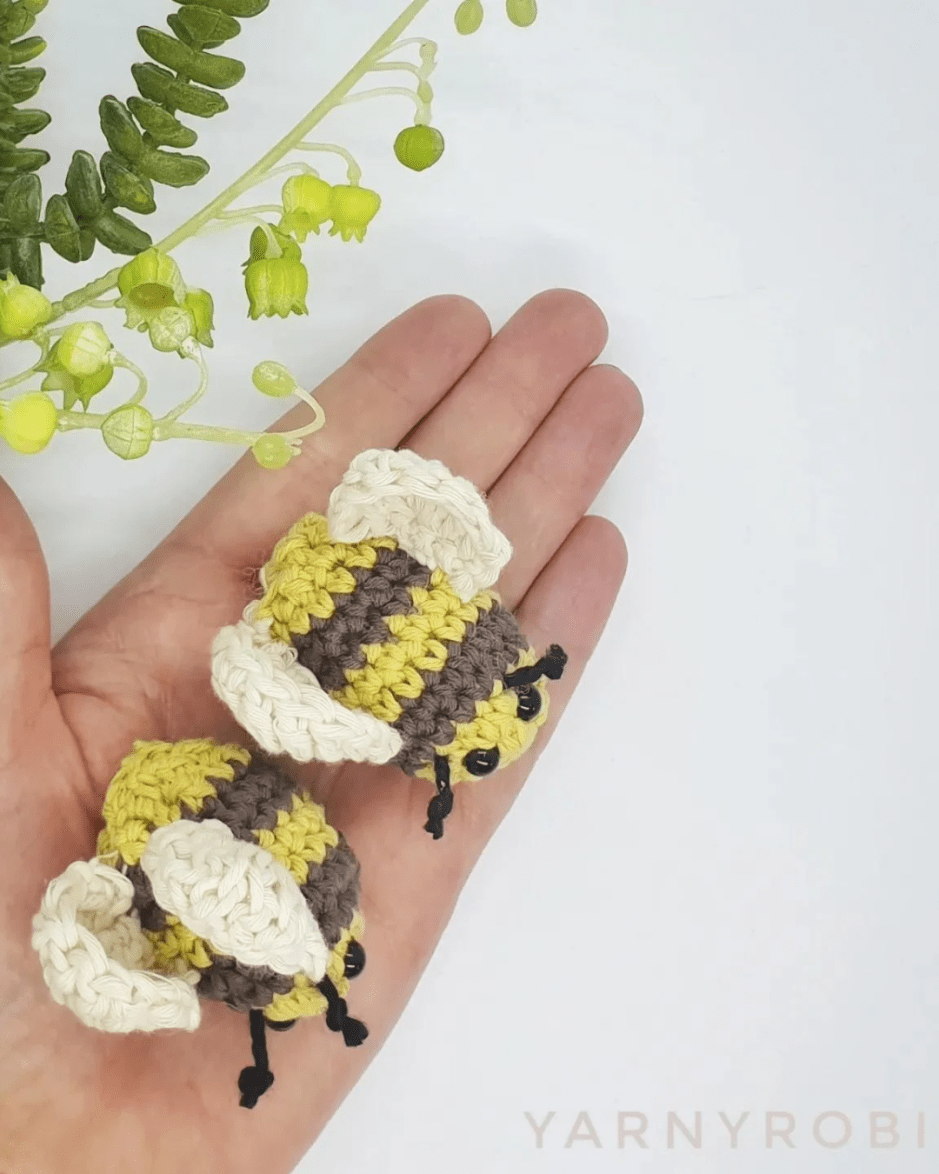
This free Yarny Bee crochet pattern is a simple amigurumi bee design that’s quick to make, great for using leftover yarn, and perfect for handmade gifts or craft fairs. They make sweet bag charms. They can be added to summer wreaths. They are perfect for all kinds of handmade décor. They are also quick and simple to crochet. They’re ideal for market sellers looking for fast makes. And make thoughtful gifts for friends and teachers. They’re also a lovely way to use up leftover yarn from your stash, especially if you’re trying to keep things tidy and actually use up those small odds and ends.

Here’s the free crochet bee pattern, just for you — I hope you enjoy making them as much as I do. They’re a lovely quick crochet project when you want a satisfying finish, and I’m currently making a few more to turn into a fun little tic-tac-toe game (they’re surprisingly addictive!).

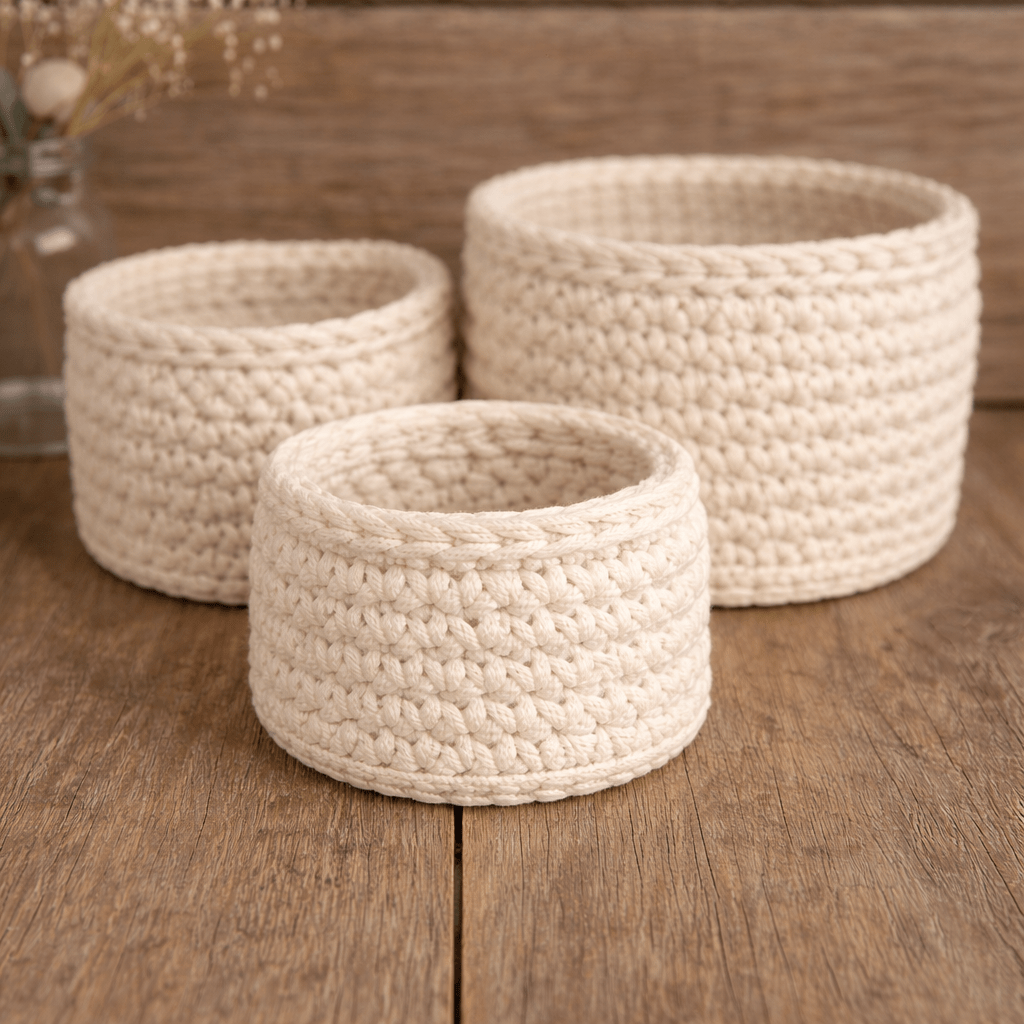
Want a tidy, ad-free version to use offline?
You can download the premium UK or US PDF pattern and keep it saved in your pattern library for easy access whenever you’re crocheting.

This post contains affiliate links. If you make a purchase through these links, I may earn a small commission at no extra cost to you. Thank you for supporting this blog — every little bit helps keep the free patterns coming.

Yarn and bee size

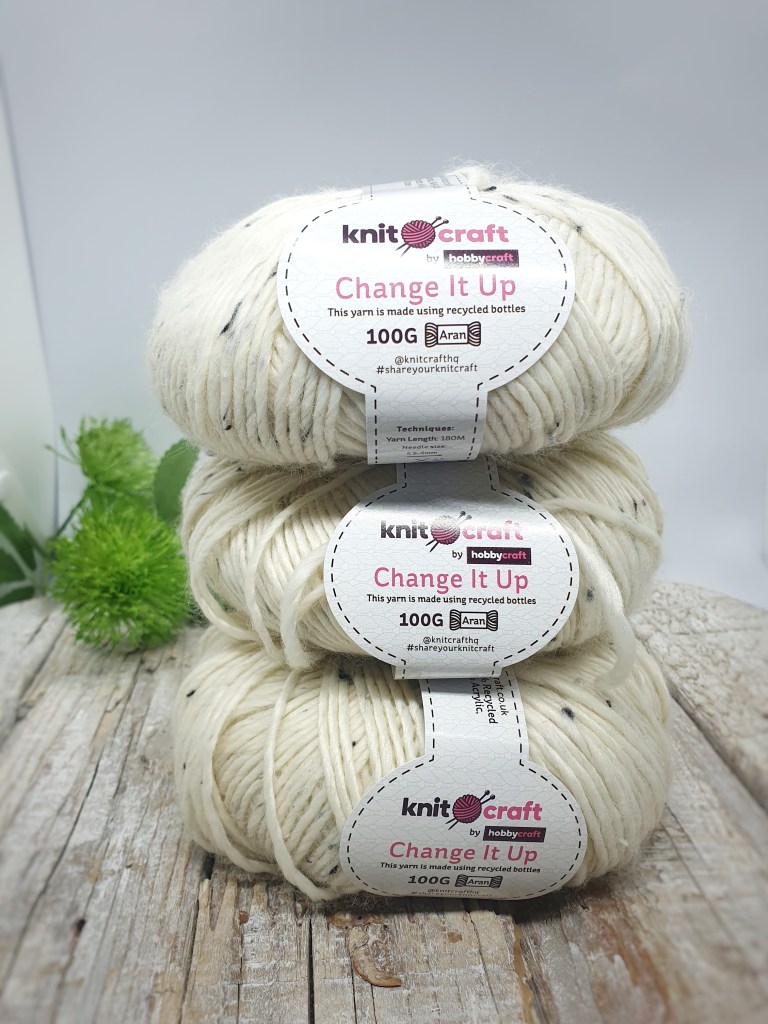
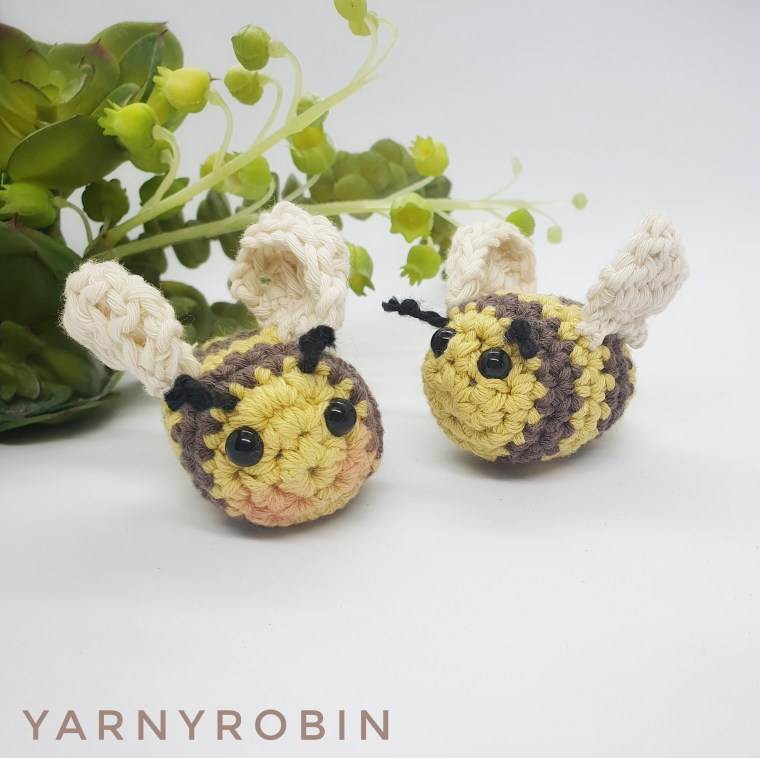
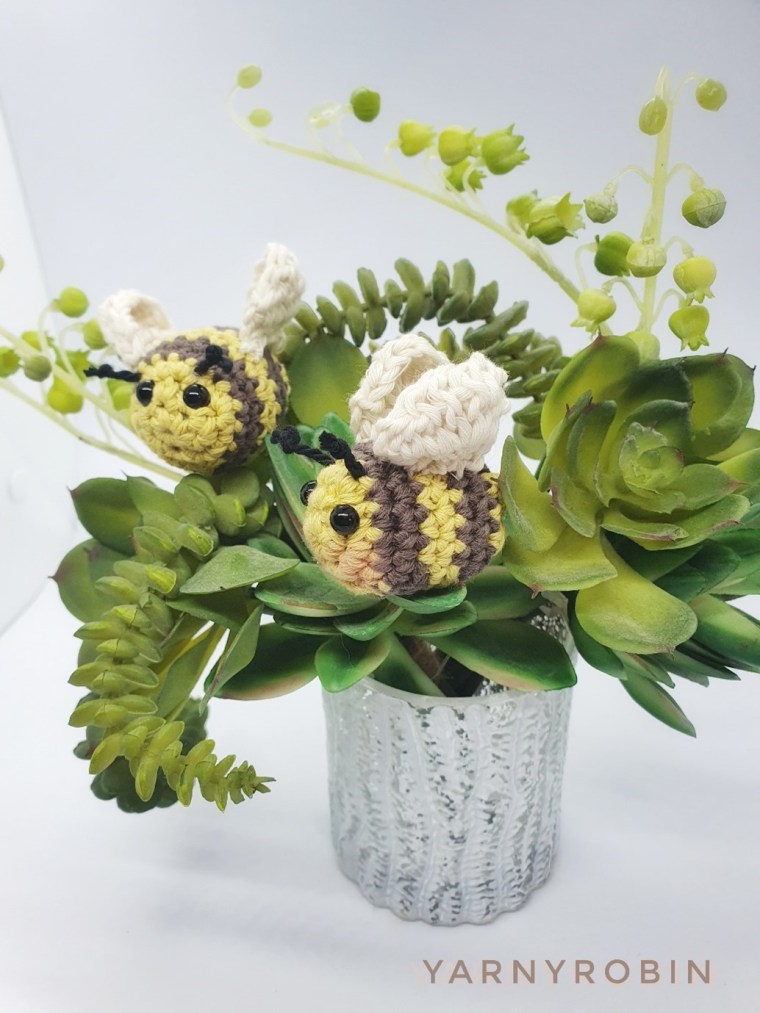
You can use any yarn to make this project, but I think they look best made from cotton. The chunkier the yarn the bigger the bee.

I used Sirdar Happy Cotton

20g in Sundae (Yellow), Sandcastle (Brown) for main body. You should get 2 bees from this

20g Dolly (white/cream) will be enough for multiple bees (x4)

20g Liquorice (black) will be enough for a swarm of bees

My finished bee measured 6cms long x 3cms wide x 5cms tall.

Two small crocheted amigurumi bees with cream wings nestled in a green succulent arrangement in a silver plant pot.

You will need:

Hook – use one size down from recommended on yarn ball. I used a 3mm

Scissors

Darning needle to weave in ends

Yarn of your choice

Stitch marker (recommended)

Safety eyes (I used 5mm – if you are using thicker yarn your bee will be larger so you may want to consider using bigger eyes. Alternatively, you could embroider the eyes using the black yarn.

Polyester toy filling (fire safety standard / EN71)

Blusher or crayon for cheeks (optional)

Pattern Notes:

Abbreviations used – UK terminology

The bee is made in continuous rounds or spirals. It is a method commonly used in amigurumi and means there will be no visible seam. When you start a new round just work it into the next st. I highly recommend marking the first st of each round with a st marker. 

Repeats are marked by *

How to do a jogless join colour change

For clean, smooth stripes, I recommend using a Jogless join when changing colour. If you would like a more in-depth step by step explanation take a look at my previous post: How to do a Jogless Join

Side-by-side crochet swatches showing the difference between a jogged stripe and a jogless stripe, worked in cream yarn with contrasting yellow and purple stripes.

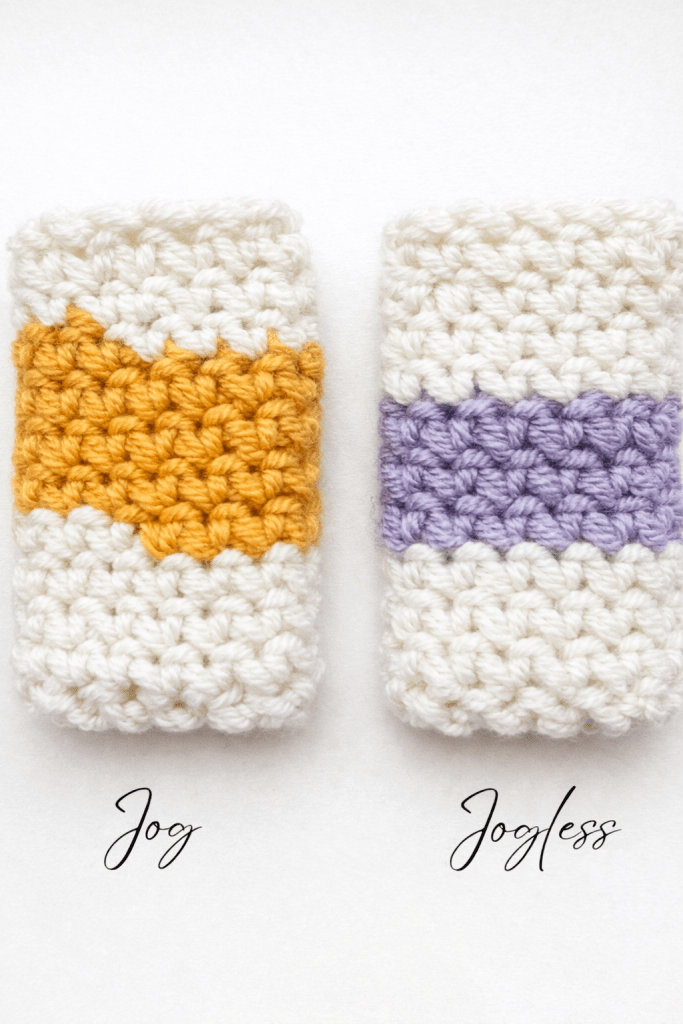
When changing colour, you need to work the previous stitch to the colour change differently.  Work the stitch as normal until there are 2 loops on the hook, then pull the new colour through all 2 loops to complete the dc stitch; this is a standard colour change.

Slst in the front loop of next st, this counts as the 1st st of the new row. I suggest marking the slst with a st marker until you are familiar with this method.

Do not cut yarn, simply drop non-working yarn on wrong side and pick up working yarn.

Stitches

st – stitch                                           slst – slip stitch

ch – chain                                          dc – double crochet

Inv-Dec – invisible decrease              htr – half treble

Tr – treble                                         dtr – double treble

BLO – back loop only                        FLO – front loop only

Dc: Insert hook into chain or under both loops of stitch, yarn over and pull through so there are 2 loops on hook, yarn over again and pull through both loops on hook.

Inv-Dec – invisible decrease st worked over 2 stitches: insert hook under FLO of stitch, insert hook under FLO of next st (3 loops on hook) yarn over and pull through 2 loops on hook, yarn over and pull through remaining 2 loops.

Htr: Yarn over before inserting hook into chain or under both loops of stitch, insert hook, yarn over and pull through so there are 3 loops on the hook, yarn over and pull through all 3 loops on hook.

Tr: Yarn over hook, insert hook into chain or under both loops of stitch, yarn over and pull through so there are 3 loops on hook, yarn over again and pull through 2 loops, yarn over and pull through last 2 loops on hook.

Dtr: Yarn over hook twice, insert hook into chain or under both loops of stitch, yarn over and pull through so there are 4 loops on hook, yarn over again and pull through 2 loops, yarn over and pull through 2 loops on hook, yarn over and pull through last 2 loops on hook.

BLO: Work stitch as stated, but in back loop of stitch only.

FLO: Work stitch as stated, but in front loop of stitch only

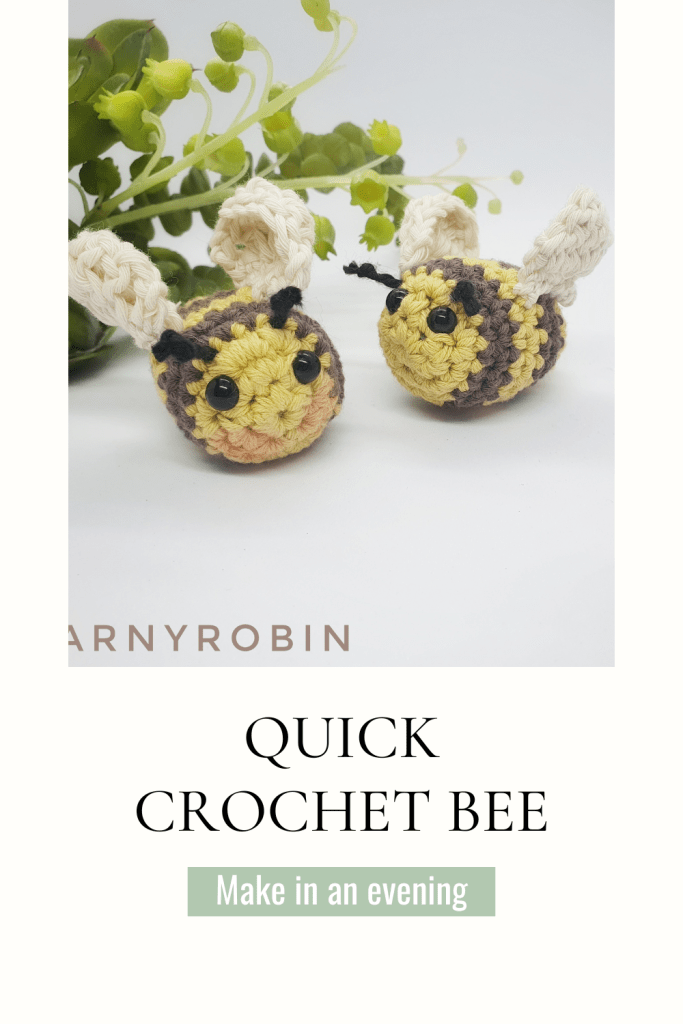
📌 pin this post for later

pattern

In yellow, make a magic ring

Rnd 1: 6dc into magic ring (6dc)

Rnd 2: 2dc in each st around (12dc)

Rnd 3: *2dc in next st, dc in next st* repeat around (18dc) change colour (brown / black)

Rnd 4: slst in FLO of 1st st,dc in each st around(1 slst, 17dc)

Rnd 5: dc in each st around, (18dc) change colour (yellow). Place st marker whilst you insert eyes.

Insert safety eyes in desired position.

Rnd 6: slst in FLO of 1st st,dc in each st around(1 slst, 17dc)

Rnd 7: dc in each st around,(18dc)change colour (black / brown)

Rnd 8: slst in FLO of 1st st,dc in each st around(1 slst, 17dc)

Rnd 9: dc in each st around,(18dc) fasten off brown yarn.Change colour (yellow)

Rnd 10: slst in FLO of 1st st, inv-dec*dc, inv-dec* repeat around (12dc)

Rnd 11: inv-dec all around (6dc). Stuff With toy filling.

Fasten off leaving a long tail. With darning needle close with running st, pull tight and weave in any loose ends.

To create the antennae, cut a length of black yarn approx. 12cms long. 

  • Insert hook where you would like the 1st antennae to be positioned (I placed mine between rounds 3 and 4).  
  • Exit hook where you would like the 2nd antennae to be positioned (I left approx. a finger space between the antennae).
  • Pull yarn right through, so that you have two long antennae.
  • Tie a knot in each antennae at equal distance from the body of the bee and trim tails close to knot.

Make 2 wings in cream.

Row 1: Leaving a long tail Ch6, dc in 2nd ch from hook and each st along, turn (5dc)

Row 2: ch1, htr, tr, 4dtr, tr, htr. Fasten off and weave in end.                               

With darning needle sew wings into position.    

Add blusher / crayon to cheeks if desired.

Prefer to crochet offline or keep all your patterns in one place?
Premium UK and US PDF versions of this pattern are available to download, save, and access anytime in your personal pattern library.

If you make this pattern, I’d absolutely love to hear how you got on – let me know in the comments or tag me on Instagram @ayarnyrobin so I can see your makes

You can also help support what I do by

• Pin the image below for later on your Pinterest board

• leave me a like or a comment below

• tag me in your makes using @yarnyrobin

• Join me here and hit follow so you don’t miss new free patterns and all the crochet goodness I share along the way.

DIY Christmas Crochet Basket Tutorial

This free crochet basket pattern is a practical, step-by-step tutorial you can enjoy all year round, whether you’re making festive baskets for Christmas gifts and décor or creating useful storage for yarn, home organisation, and everyday handmade gifts. These handy crochet baskets are super versatile and perfect for keeping small items tidy or adding a simple handmade touch to your home.

These baskets are easy to make. You can swap the colours to suit your own style and add whatever decorations you choose, here I have chosen to add a sweet wooden snowflake, but labels, ribbons, bows and bells would look just as good. The best bit about these baskets is the wooden base.

The wooden base makes this a super quick make and means the basket has a great shape and is sturdy…all good elements for a useful basket to have. You will find bases in all sorts of shapes and sizes on lots of different shopping sites. I got mine from Etsy, as I like to support small business owners when I can. Take a look here to get started

I would just like to talk about your choice of yarn or cord. I purchased several versions before I settled on one I was happy with. Some were too splitty, or dull, or just didn’t crochet well. I highly recommend using this 5mm braided recycled cotton cord because it is economical, comes in a great colour range and is easy to work with.

Prefer a premium ad-free version of this pattern. Available in both UK or US download, so no need for converting stitches. Perfect if you prefer to work offline or keep in your pattern library.

Pattern notes

The pattern that follows can be adapted to any size or shape base. The pattern uses English crochet terminology, but you can find US crochet terminology in brackets just below.

I strongly advise that you mark the 1st chain 1 of each round with a stitch marker. Repeats are marked by *

What you will need

5mm braided cotton cord in colour of your choice

wooden base(s)

scissors

hooks – see below

stitch marker

decorations of your choice – bows / bells / small tree ornaments

Stitches used

DC – double crochet ( SC – single crochet)

slst – slip stitch

Ch – chain stitch

Dc: Insert hook into chain or under both loops of stitch, yarn over and pull through so there are 2 loops on hook, yarn over again and pull through both loops on hook.

Hooks used

5mm and 8mm

📌 Pin this post for later

To start

Start by holding cord underneath the base. Using smaller hook pull up a loop through the first hole in the base.

Yarn over and pull through loop on your hook.

*Pull up next loop from the underside of base through next hole and complete DC* Repeat around base to last hole. Slst in 1st st.

Now turn work so outside of the basket is facing you.

Round 2: Using larger hook. Ch1 (counts as a st) place marker. DC in next stitch and in each st around.

Round 3: ch 1, continue to place DC in each st for desired height of basket, placing marker in ch1 of each round. Change colours as desired.

eg/ large basket pictured had a base with 37 holes / 17cm diameter. I completed rounds 1 – 8 in candy red and rounds 9 – 11 in natural. Final round in natural also. My basket measures 14cms tall.

Final round: Do not ch1, slst in each st around. Fasten off.

With smaller hook weave in loose ends. Weave starting tail at base so that it fills in the gap.

Now decorate your basket as desired.

More cosy crochet ideas for your home

If you enjoy adding handmade touches around your home, you might also love my crochet bunting pattern — a simple project that’s perfect for seasonal décor, celebrations, or using up leftover yarn.

Next steps

If you have enjoyed this pattern you can help support what I do by

• Pin the image below for later on your Pinterest board

• leave me a like or a comment below

• tag me in your makes using @yarnyrobin

Prefer a premium ad-free version of this pattern. Available in both UK or US download, so no need for converting stitches. Perfect if you prefer to work offline or keep in your pattern library.

• Join me here and hit follow so you don’t miss new free patterns and all the crochet goodness I share along the way.

Crochet Hexagons Made Easy…

Master the Craft: Crochet Hexagon Made Easy is your ultimate guide to creating beautiful, vintage crochet motifs. Whether you’re a seasoned pro or just starting out, this comprehensive video tutorial is your step by step guide to help you crochet the perfect hexagon.

So, what are you waiting for? Start your crochet hexagon journey right here!

Crochet hexagon Tutorial – click here

Processing…
Success! You're on the list.

Free Pumpkin crochet pattern

If you’re looking for a free crochet pumpkin pattern that’s quick to make and perfect for cosy autumn decorating, this simple design is a lovely one-evening project. These crocheted pumpkins have a soft, textured finish and work beautifully styled on shelves, tables, or tucked into seasonal displays around the home.

I love creating autumn decor that feels handmade but effortless, and these pumpkins are ideal for using up scrap yarn while still looking intentional and timeless. They’re beginner-friendly, easy to customise in different sizes or colours, and make a relaxing crochet project as the evenings start to draw in.

Below you’ll find the free crochet pumpkin pattern, written in UK terms. If you’d prefer an ad-free printable PDF, or need the pattern in US crochet terms, both versions are also available and linked within the post for easy reference.

📌 Pin this post for later

These crochet pumpkins are designed with stash-busting in mind and are quick and inexpensive to make, making them ideal for gifting or selling. They can be made using any yarn weight, worked in a range of sizes, and the pattern is easy to adapt by adjusting the stitch or size to suit your project.

If you enjoy stash-busting projects like this, you might also like my post on 7 things you can make with yarn you already own, full of simple, practical crochet ideas.

You will need to gather some supplies before you start. I recommend having a hunt through your stash to see what you’ve forgotten about and start there. You will also need a hook suitable for the yarn you have selected.

You will also need a pair of scissors, a darning needle, some polyester toy filling (fire safety satndard / EN71), some cinnamon sticks, a hot glue gun and some twiddly bits!

Twiddly bits are anything that you wish to decorate your pumpkin with. I used artificial leaves and berries, but you could use twine, ribbon or what ever else you fancy. Be creative and use what you already have. The cinnamon sticks make whimsical pumpkin stalks and they smell delicious too! Alternative stalks can be made from twigs from the garden to create a more rustic vibe.

This pattern is written using UK crochet terminology and the stitch abbreviations can be found below

Gauge is not important for this project.  You will find instructions for a small, medium and large pumpkin.

This pattern can easily be adapted to make smaller or larger pumpkins by adding or decreasing the number of chains in the starting chain. You can even change the stitch for a different textured pumpkin

Stitch Abbreviations:

Ch- chain                          

St – stitch

Slst – slip stitch

Dc – double crochet

Htr – half treble

BLO – back loop only

Dc: Insert hook into chain or under both loops of stitch, yarn over and pull through so there are 2 loops on hook, yarn over again and pull through both loops on hook.

Htr: Yarn over before inserting hook into chain or under both loops of stitch, insert hook, yarn over and pull through so there are 3 loops on the hook, yarn over and pull through all 3 loops on hook.

BLO: Work stitch as stated, but in back loop of stitch only.

working in blo tutorial

click the link above for a short video of working in the back loop

Small Pumpkin

Leave long tail, Ch17

Row 1: dc into 2nd ch from hook and each st along, turn (16dc)

Row 2 -19: in BLO, ch1, htr in next st and in each st along, turn (16htr)

Row 20: Ch1, dc in next st, and each st along (16dc) Fasten off leaving a long tail

Medium Pumpkin

Leave long tail, Ch22

Row 1: dc into 2nd ch from hook and each st along, turn (21dc)

Row 2 -24: in BLO, ch1, htr in next st and in each st along, turn (21htr)

Row 25: Ch1,dc in next st, and each st along (21dc) Fasten off leaving a long tail

Large Pumpkin

Leave long tail, Ch27

Row 1: dc into 2nd ch from hook and each st along, turn (26dc)

Row 2 -29: in BLO, ch1, htr in next st and in each st along, turn (26htr)

Row 30: Ch1,dc in next st, and each st along (26dc) Fasten off leaving a long tail

To assemble.

With ribs running vertically fold edges of pumpkin together and sew edges together using a simple running stitch or whip stitch to create a tube.

With darning needle, weave long tail in and out, around bottom of pumpkin (it does not matter which end this is)

 Once completed pull long tail tightly to gather pumpkin and sew across middle in a zig zag to close neatly.

Fill pumpkin generously with toy stuffing.

Now with second long tail weave in and out along top edge and pull tight to gather top of pumpkin. Insert cinnamon stick towards the end of this process and pull the tail tightly. Wrap yarn a couple of times around base of cinnamon stick, take needle through the pumpkin and exit centrally at the bottom of pumpkin. Fasten off and weave in any loose ends.

To create the indentations in the side of the pumpkin you will take yarn through the middle of the pumpkin from top to bottom or vice versa.  Always insert needle centrally at the top or the bottom of the pumpkin as indicated.

With new yarn, inset needle into bottom of pumpkin, leaving a tail at the bottom of the pumpkin and pull up through the middle of the pumpkin, so that your needle exits the top of the pumpkin, centrally.  Take the yarn on the outside of the pumpkin and insert needle into the bottom of the pumpkin, back through the centre of the pumpkin and exit again at the top of the pumpkin and pull tight to create indentation in the side of the pumpkin.

Repeat this process taking the yarn on the opposite side of the 1st indentation to create a second indentation.  Repeat around the pumpkin to create equal indentations all around. As a guide, segment the pumpkin into quarters and then in between each quarter.

Weave in any loose ends

Twiddly Bits

Now with a glue gun add your twiddly bits. If you do not have a glue gun consider tying or sewing twiddly bits into position.

When you make this project don’t forget to tag me in your social media as I would love to see your pumpkin creations Tag me using @yarnyrobin using #twiddlypumpkins

  • Leave a comment below to let me know what you think of this pattern
  • Come say Hi over on Instagram…I would love to see what’s on your hook
  • Pin for later on your Pinterest board using image below

A Yarny Little Bee…Free Pattern

This beautiful little bumble bee is currently FREE in July’s newsletter which you can sign up to just here…

Processing…
Success! You're on the list.

These cute little bees have so many uses. I’m currently making lots to send into Forest School for the children to count with, play hide and seek with and to spark conversations about just how important our bees are!

They would also be really great if you sell at markets as they are quick and easy to make. They would be great as magnets, pin badges, class mate gifts, decorations for wreaths and a whole host of other decorations! Let your mind run free!!

Just June’s FREE crochet pattern…

Fancy getting this crochet macaron pattern for FREE…here’s how!
Sign up to my email list ready for June’s newsletter and get this perfect macaron pattern for FREE!!
I’m thinking Teddy bears picnics and tea parties by the paddling pool

Macarons and cupcakes

Pattern is a written pattern and suitable for beginners with some knowledge of basic stitches. The pattern includes 20 step by step pictures to assist you.

Stitches used are UK – double crochet and slip st (US – Single crochet and slip stitch)

Materials you will need: 4 ply cotton yarn (the pattern recommends Drops Safran but this can be substituted)(3.0mm) crochet hook or other size to obtain gauge although gauge is not imperative. Tapestry needle scissors and small amount of polyester toy filling (fire safety standard / EN71) stitch marker (optional)

Join my monthly email list and get this macaron pattern FREE aswell as 30% off this crochet cupcake pattern- offer valid up to the end of June 2023

Processing…
Success…welcome to The Nest…please allow 24 hours for your email to update

Happy Hooking!

Another Angelece Blanket…

I recently made another version of my popular Angelece Baby Blanket crochet pattern, and I’m excited to share how beautifully this simple design works up in different yarns and colours. This easy, beginner-friendly crochet baby blanket uses a delicate filet stitch that creates a timeless handmade gift, perfect for baby showers, nursery decor, or relaxing crochet projects.

You can find the full free crochet pattern for the Angelece Baby Blanket here.

About the Angelece Baby Blanket Crochet Pattern

The Angelece Baby Blanket is a free crochet pattern designed to be simple, relaxing, and beginner-friendly. Featuring a delicate filet stitch design, it works up quickly and creates a beautiful handmade baby gift that looks elegant in any colour.

I used this aran / worsted weight yarn which I found in Hobbycraft. It is beautifully soft and it is made from mostly recycled bottles…I still don;t understand how it feels so soft and squishy!!!

So here are the pattern details, for this blanket I added an additional round of double crochet – UK (single crochet – US) to make a wider border and I made my tassels super chunky by wrapping them more. I actually cant remember how many balls of yarn I used…I think it was 6…which works out at 300g and I have some left over too!

Ad-Free Printable PDF Pattern

If you’d prefer to crochet without ads, you can download an ad-free printable PDF version of the Angelece Baby Blanket pattern from my Etsy shop. It’s perfect for printing or saving to your tablet for easy, distraction-free crocheting.

I absolutely love seeing your finished projects and reading your feedback — it truly makes my day. Here’s what other crocheters have said about this pattern:

⭐⭐⭐⭐⭐ “Very easy. Great for beginners!”

⭐⭐⭐⭐⭐ “Very well written pattern, easy to follow and simple instructions for adjusting the size! Definitely recommend!”

⭐⭐⭐⭐⭐ “Great pattern, easy to follow and link was fast.”

If you enjoyed this pattern, here are a few ways to support and stay connected:

• 💛 Like this post if you found it helpful

• 💬 Leave a comment — I love hearing from you

• ✨ Join me by following the blog for more crochet inspiration

• 📌 Pin this post to save for later

Mini Heart Beanie…Free Pattern

This is a super cute and quick make, so perfect to hook if you have an upcoming craft fair or if you wanted to make in time for Valentines Day as a treat for yourself or as a Galentine’s gift for your Bestie! The pattern is only available in adult size at the moment, hopefully I can carve out some more time to grade it for other sizes.

I get lots of questions about where I get my labels for my hats…the answer is Etsy! My labels are cork labels made from 100% sustainable material that is vegan. There are lots of custom sellers, so if you are looking for some labels or tags go and check them out.

The pattern is suitable for beginners and just uses a double crochet stitch (single crochet stitch), and some decrease stitches. It is important not to have your tension very tight or the teeny, tiny hearts become pinched. I used Stylecraft Softie which is a chunky yarn blend 20% wool 80%acrylic. I did try with some other chunky yarn, but I got the best results with the Softie, it just gives a subtle amount of drape which feels lovely to wear.

You can also purchase a printable PDF of this pattern which is available in both UK and US crochet terms over in my Etsy shop for less than a cup of coffee which you can access just here

You will need:                          

6.5mm hook

Stitch Markers (optional)

Scissors

Darning needle

Tape measure

Faux fur pom or you could make your own.

Yarn – chunky / bulky see further below for recommended yarns.

20% superwash wool 80% acrylic blend

Adult –  approx. 95g

Main colour – approx..80g

Accent colour approx. 15g

Size Guide.

Adult – to fit head circ. 22” / 55.8cms

Measurements are approximate and I advise you measure the intended head wherever possible.  This beanie allows for a 2” / 5cm negative ease (the amount of stretch)

Stitch Abbreviations.

Ch – chain

Slst – slip stitch

Dc – double crochet

Hs – Heart stitch

Dec – decrease

BLO – work st into the back loop only (see photo at back of pattern)

Dc: Insert hook into chain or under both loops of stitch, yarn over and pull through so there are 2 loops on hook, yarn over again and pull through both loops on hook.

Hs: Insert hook under both loops of stitch, in accent colour – yarn over and pull through so there are 2 loops on hook (1st loop in main colour, 2nd loop in accent colour), in main colour – yarn over again and pull through both loops on hook to complete st.  See top tip below! See Pic 1 – 4

Dec: decrease st worked over 2 stitches: insert hook under both loops of stitch, yarn over and pull through so there are 2 loops on your hook, insert hook into next st, yarn over and pull through so there are 3 loops on your hook, yarn over and pull through all 3 loops.

Top Tip:

When working the heart stitch and you yarn over and pull through in accent colour, pull loop up a little higher than you would for a regular dc stitch as this helps to keep the heart lying flat instead of pulled too tight.

Pattern Notes.

This pattern is written using UK crochet terminology and the stitch abbreviations can be found below. 

Ch1 does not count as a stitch throughout the pattern unless otherwise stated. Repeats are marked by asterisks *.  

The hat is worked by making the ribbed brim and joining one end to the other to form a circle. The main body of the hat is then worked in rounds.

When working Rounds 3 and 5 and subsequent repeats carry non-working yarn along the round (see pic 5)

When working rounds 4 and 6 and subsequent repeats drop accent colour yarn and pick up again on next round

Top Tip:

When working a dc in round above heart st, insert hook into side of heart as shown in Pic 6 as this will make it easier.

Yarn Suggestions.

Stylecraft Softie chunky is the recommended yarn for the pattern, but here are some similar substitutes…

King Cole Timeless Chunky

King Cole Big Value Baby Soft Chunky

King Cole Shadow Chunky

Red Heart Gemstone

Bernat Wavelength

Gauge

It is very important to check your gauge to ensure your beanie will fit.

To do this make a gauge swatch in the yarn you will be using for the body of the hat.  If this matches the gauge, you’re good to go!   If your swatch is too big, try using a smaller hook to obtain correct gauge.  If your swatch is too small, try using a larger hook to obtain correct gauge.

Using chunky / bulky yarn swatch 11dc x 14 rows = 4” x4” (10cm x 10cm)

Pattern Protocol

This pattern including all photos are the property of Nicola Florence at ayarnyrobin.wordpress.com.

Please do not modify, resell, publish in part or in full, or share this pattern or photo’s as your own.

You may sell finished items made from this pattern, I hope it becomes a hot item for you; but please credit, with a link, that the item is made using @yarnyrobin pattern.

Please also tag your makes on your social using #miniheartbeanie @yarnyrobin because I love to see what you make!

In main colour

Row 1: Ch8, dc in 2nd ch from hook and in each ch along, turn do not ch1 (7dc)

Row 2 – 62: IN BLO dc in each st across, turn do not ch1 (7dc)

Slst row 62 to beginning row to form a circle. Turn brim inside out so the seam is on the inside. We will now be working in rounds around the brim of the hat.

Working with right side facing you in main colour

Round 1: ch1, 64dc evenly around top of brim – 2dc in first and last st then aim to place a dc at the top of each rib, join with a slst to 1st dc (64dc)  

Round 2: ch1, dc in each st around, join with a slst to 1st dc (64dc)

Round 3: ch1, dc in same st, hs * dc, hs * repeat around, last st is a hs, slst to top 1st dc (32dc / 32hs)

Round 4: repeat round 2

Round 5: ch1, hs in same st, dc * hs, dc * repeat around, last st is a dc, slst to top of 1st hs (32hs / 32 dc)

Round 6: repeat round 2

Repeat Rounds 3 – 6: 2 more times(total of 8 rounds)

Round 15: repeat round 3

Round 16: repeat round 2

Round 17: repeat round 5

Round 18: ch1,dc in same st,decrease * dc,decrease * in each st around, skip last st, slst into 1st dc (21dc / 21dec)

Round 19: ch1,dc in same st,decrease * dc,decrease * in each st around, st, slst into 1st dc (14dc / 14dec)

Round 20: ch1,decrease in each st around, skip last st (13dec)

Hat measures 8.5” from brim to crown

Fasten off cutting yarn leaving a long tail approx. 20cms from hat.  Thread darning needle and weave in and out of the top loops of last round. Pull the end tight to gather and secure with a few stitches. Weave in any loose ends. Now add your pom (see end of pattern for details)

Add pom

Add a faux fur pom to complete the look. Or alternatively make your own pom. I added a Trimits pompom as they tie into the hat easily, which makes them really easy to remove for when you want to launder your beanie.

If you are making your own pom you have a couple of options. You could use a pom pom maker however, I favour making my pompoms using the method my Grandma taught me; using 2 pieces of cardboard.  I like my pompoms to be really full and lush and so I wrap each pompom with a minimum of 3 layers of yarn.  My card circles have an outer diameter of  approx. 4.5” / 11cms.

Here is a useful link for making pompoms with 2 discs of card https://www.youtube.com/watch?v=SXFCO3LBJss

TOP TIP:  If making your own poms leave long tails when you tie your pompoms off as it will make attaching them to your hat much easier.  If your pompoms are in a different colour to your hat, tie your pompoms off with the main colour of the hat as it makes weaving in the ends much neater.

REMEMBER: IF MAKING YOUR OWN POM YOU WILL NEED MORE YARN THAN STATED IN THIS PATTERN.

You can also purchase a printable PDF of this pattern which is available in both UK and US crochet terms over in my Etsy shop for less than a cup of coffee which you can access just here

Happy Hooking!

Niki xxxxx

Happy New Year…

crochet deer lovey, crochet pattern

Happy New Year to you and welcome 2023.

What did you do to celebrate?

Don’t judge me…but I went as far as the living room. We watched TV, I crocheted of course, drank a few glasses of bubbles, ate good food and fell asleep…only to be woken 5 minutes before midnight to watch the fireworks on the TV from London. Not so exciting, but Mr R had the lurgy, so it suited us this year, especially as the grown up Robins were out celebrating with their tribes.

Have you set your plans? Your resolutions? Let me know what they are if you are happy to share…you may inspire me! I have set some plans here at the Nest, you may be pleased to know. I have lots of pattern ideas as well as lots of plans to share free patterns and tutorials with you.

I am also starting an email list and will periodically send exclusive coupon sale codes and free patterns. If you fancy some crochet goodness in your inbox, then I would love to have you onboard. You can subscribe just here and I promise not to spam you!

Processing…
Success! You're on the list.

I am currently writing a new pattern for a bottom up beanie, which is a completely new way to make beanies for me. I’m just doing the grading, so it can be made for all the family. Here’s a sneak peek…

I have treated myself to some new yarn too, so I will show you that as soon as I take some photos. But for now, I will leave you with some crochet highlights from last year.

Nicola

xxxxx

Free Snowflake Coffee Cup Cosy…

It’s been a while since I gave you a free pattern and I really wanted to share something with you in time for Christmas…I’m not sure I’ve entirely reached my goal as it is already Christmas Eve! Anyway better late than never and the really good news is this takes under an hour to make, so if your stuck for that last minute gift, this is perfect

This striking, seasonal cup cosy features textured popcorn stitches and embroidered snowflake finished with a little bit of sparkle.

You will need:

a small amount of chunky yarn. I used Stylecraft Softies stone washed in Denim and cream.

5mm hook,

darning needle to weave in the ends. 

Beads x 17

Glue gun to attach beads or you could sew them into position.

Pattern Notes:

Abbreviations used UK terminology (American terminology in brackets)

At the end of each round join with a slst and ch1. Ch 1 does not count as a st throughout pattern

Repeats are marked by *

To prevent your starting chain from twisting ch 5, remove hook from active loop and insert through 1st ch made

Stitches:

st – stitch

slst – slip stitch

ch – chain

dc – double crochet (sc -single crochet)

Dc2tog – decrease / Sc2tog – decrease (US)

Dc: Insert hook into chain or under both loops of stitch, yarn over and pull through so there are 2 loops on hook, yarn over again and pull through both loops on hook.

PC: Popcorn st –5dc in same st, pull up active loop on your hook and remove hook, insert hook in 1st dc (just count back 5dc), catch the active loop of the 5th dc, draw the active loop through 1st dc 

Dc2tog – decrease st worked over 2 stitches: insert hook under both loops of stitch, yarn over and pull through so there are 2 loops on your hook, insert hook into next st, yarn over and pull through so there are 3 loops on your hook, yarn over and pull through all 3 loops.

snowflake cup cozy free crochet pattern

Let’s go!

Ch30 (or adjust chain to fit your cup, just keep ch a multiple of 2)

Join with a slst to form a ring

Round 1: dc in 1st st and in each st around (30dc)

Round 2: dc in 1st st and in each st around (30dc)

Round 3: repeat round 2

Round 4: dc in the next 10sts, *PC, dc* to end of row

Round 5: dc in 1st st and in each st around (30dc)

Round 6, 8 & 10: repeat Round 4

Round 7, 9 & 11: repeat Round 5

Round 12: repeat Round 5

Round 13: dc2tog, dc in each st around (29dc)

Round 14: dc2tog, dc in each st around (28dc)

Round 15: dc in 1st st and in each st around (28dc)

Weave in any loose ends.

In accent colour yarn, hand embroider a simple snowflake. Embroider a simple cross and then add a diagonal cross. Now add a ‘v’ to the end of each point. Weave in any loose ends. Add a bead to each point around the snowflake and one in the centre. Beads can be hand sewn for security or glued into position with a hot glue gun!

Happy Christmas!

XXXXX