If you crochet regularly, chances are you have more than one project on the go. A half-finished blanket tucked into a basket, an amigurumi waiting for stuffing, a cardigan that only needs one sleeve… sound familiar?
Crochet is creative, calming, and deeply satisfying — but without a little organisation, it can also become overwhelming. That’s where a crochet project planner can make a real difference.
The hidden problem with unfinished projects
Most crocheters don’t abandon projects because they lose interest. They stop because:
Yarn details get forgotten
Hook sizes aren’t written down
Pattern notes are scattered across notebooks or phones
Life gets busy and projects lose momentum
A planner isn’t about being rigid or overly structured. It’s about gently supporting your creativity so you can actually enjoy the making process — and finish what you start.
What a crochet project planner helps you do
A good crochet planner brings everything together in one calm, intentional place. Instead of searching through notes or trying to remember what you did last time, you can sit down and pick up right where you left off.
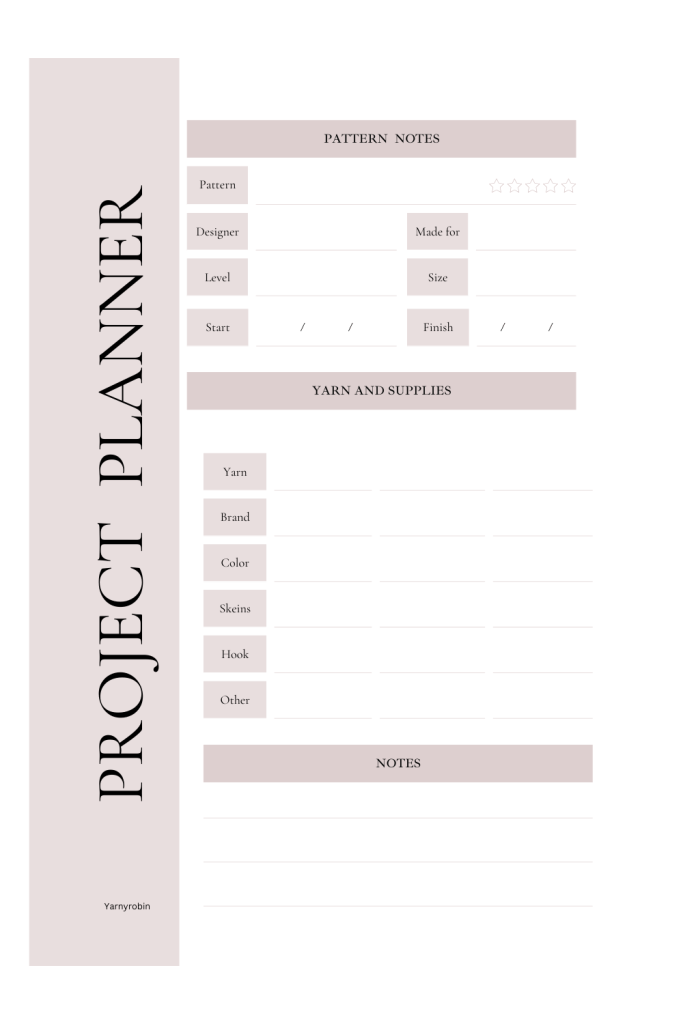
With dedicated project planning pages, you can:
Record pattern names, designers, and difficulty levels
Note yarn brands, colours, and quantities
Track hook sizes and gauge
Jot down adjustments, ideas, and reminders
This small habit saves time, reduces frustration, and keeps crochet relaxing rather than stressful.
Keeping track of WIPs without guilt
Work-in-progress projects (WIPs) are a natural part of crocheting. A planner doesn’t judge how many you have — it simply helps you keep track of them.
When each project has its own page, WIPs feel intentional instead of chaotic. You can see what’s active, what’s paused, and what’s ready to be finished when the mood strikes.
The value of built-in crochet reference pages
One of the most useful parts of a crochet planner is having reference information close at hand. Instead of opening multiple tabs or searching online mid-project, you can quickly check:
UK and US stitch conversions
Yarn weight and hook size guides
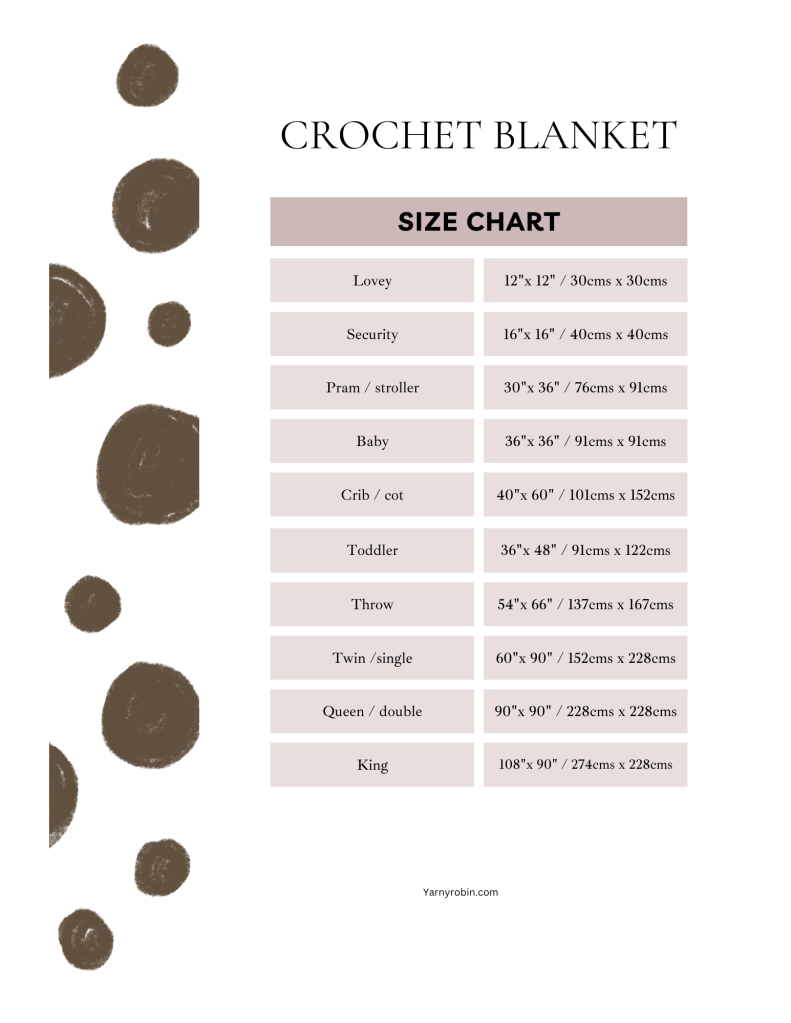
Standard blanket and hat sizes
Common crochet abbreviations and slang
Having these pages printed and nearby keeps your creative flow uninterrupted.
Why printables work so well for crocheters
Printable planners are flexible and practical. You can:
Print only the pages you need
Reprint favourites as often as you like
Use them in a binder, folder, or clipboard
Adjust your setup as your projects change
Whether you prefer a minimal system or a cosy, creative workspace, a printable planner adapts to you.
Crochet should feel calm, not chaotic
At its heart, crochet is about slowing down and making something with your hands. A project planner doesn’t take away from that — it supports it.
By keeping your projects organised, your ideas clear, and your notes in one place, you give yourself permission to enjoy crochet fully, without the mental clutter.
If you’ve ever felt overwhelmed by unfinished projects or forgotten details, a crochet project planner might be the gentle tool you didn’t know you needed.
Happy hooking
Ready to Get Organised?
If you’re looking for a calm, practical way to keep your crochet projects organised, my Printable Crochet Project Planner is designed to gently support your making. It will do so without pressure or overwhelm.
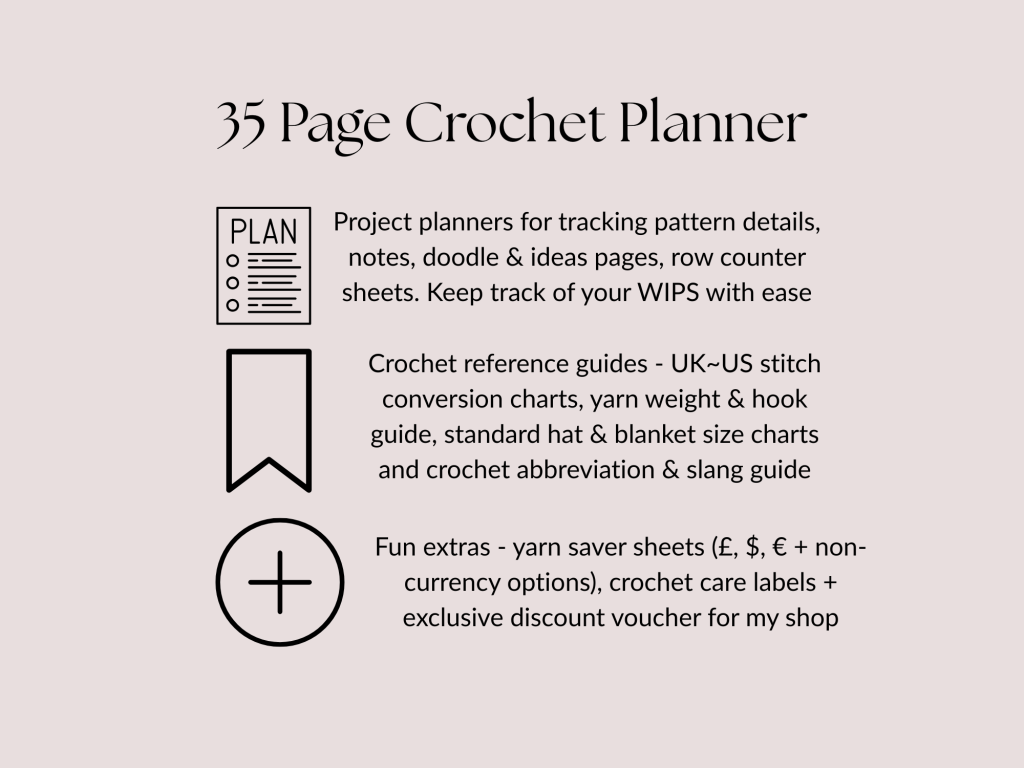
It includes project planning pages, notes and ideas sheets, crochet reference charts, all in a soft, cosy aesthetic. I have included some bonus printable crochet care labels to help you level up your gifting. There are also some fun savings sheets to help you buy more yarn! You can print only the pages you need and reuse them as often as you like.
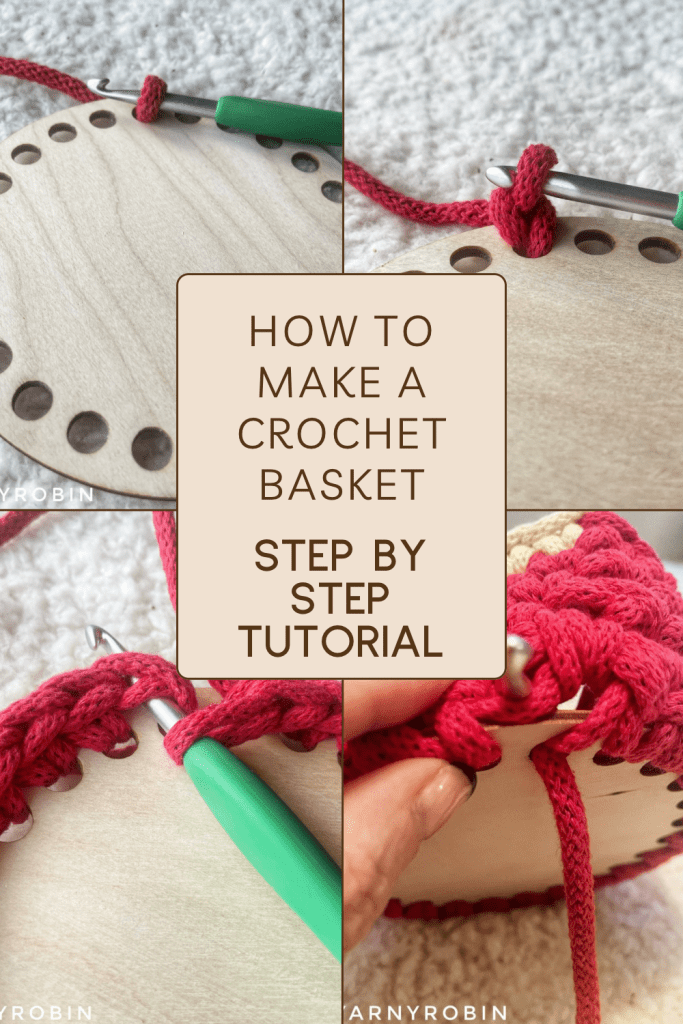
With Christmas fast approaching I wanted to share with you a fabulous and practical step by step tutorial, perfect for this festive season (or for any other time of the year!). These handy baskets can be used to gift or store festive chocolates or just add a little seasonal decor around the home.
These baskets are super versatile. You can swap the colours to suit your own style and add whatever decorations you choose, here I have chosen to add a sweet wooden snowflake, but ribbons, bows and bells would look just as good. The best bit about these baskets is the wooden base.
The wooden base makes this a super quick make and means the basket has a great shape and is sturdy…all good elements for a useful basket to have. You will find bases in all sorts of shapes and sizes on lots of different shopping sites. I got mine from Etsy, as I like to support small business owners when I can. Take a look here to get started
I would just like to talk about your choice of yarn or cord for a moment also. I purchased several versions before I settled on one I was happy with. Some were too splitty, or dull, or just didn’t crochet well. I highly recommend using this 5mm braided recycled cotton cord because it is economical, comes in a great colour range and is easy to work with.
Pattern notes
The pattern that follows can be adapted to any size or shape base. The pattern uses English crochet terminology, but you can find US crochet terminology in brackets just below.
I strongly advise that you mark the 1st chain 1 of each round with a stitch marker. Repeats are marked by *
What you will need
5mm braided cotton cord in colour of your choice
wooden base(s)
scissors
hooks – see below
stitch marker
decorations of your choice – bows / bells / small tree ornaments
Stitches used
DC – double crochet ( SC – single crochet)
slst – slip stitch
Ch – chain stitch
Dc: Insert hook into chain or under both loops of stitch, yarn over and pull through so there are 2 loops on hook, yarn over again and pull through both loops on hook.
Hooks used
5mm and 8mm
To start
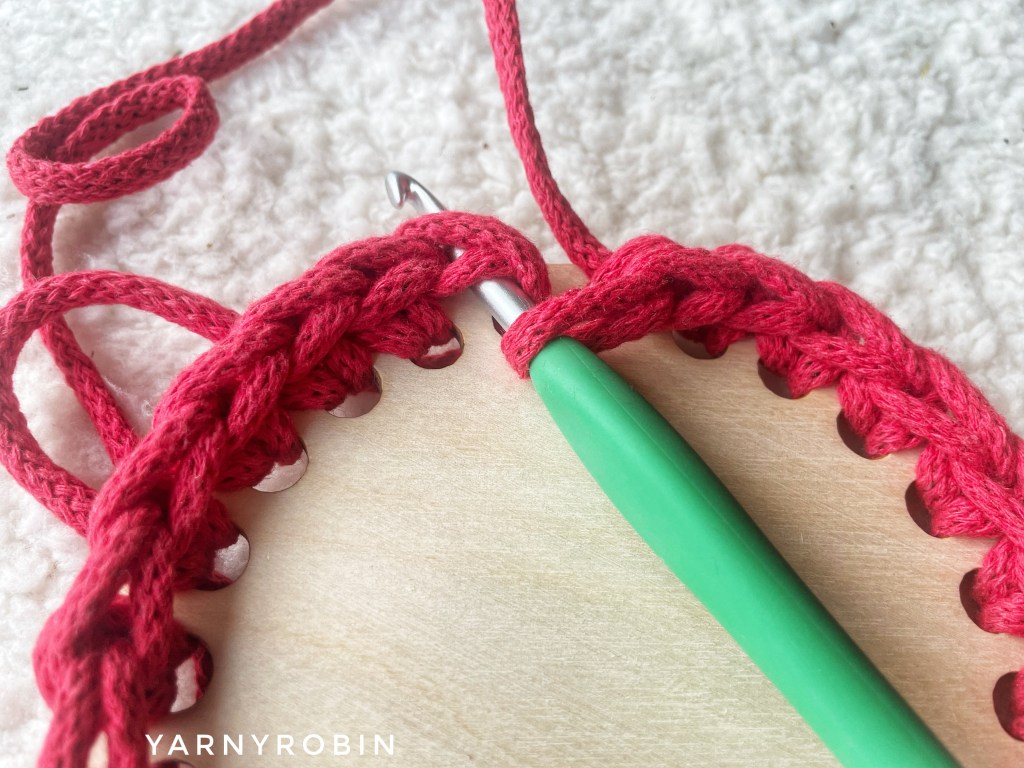
Start by holding cord underneath the base. Using smaller hook pull up a loop through the first hole in the base.
Yarn over and pull through loop on your hook.
*Pull up next loop from the underside of base through next hole and complete DC* Repeat around base to last hole. Slst in 1st st.
Now turn work so outside of the basket is facing you.
Round 2: Using larger hook. Ch1 (counts as a st) place marker. DC in next stitch and in each st around.
Round 3: ch 1, continue to place DC in each st for desired height of basket, placing marker in ch1 of each round. Change colours as desired.
eg/ large basket pictured had a base with 37 holes / 17cm diameter. I completed rounds 1 – 8 in candy red and rounds 9 – 11 in natural. Final round in natural also. My basket measures 14cms tall.
Final round: Do not ch1, slst in each st around. Fasten off.
With smaller hook weave in loose ends. Weave starting tail at base so that it fills in the gap.
Now decorate your basket as desired.
Next steps
If you have enjoyed this pattern you can help support what I do by
• Pin the image below for later on your Pinterest board
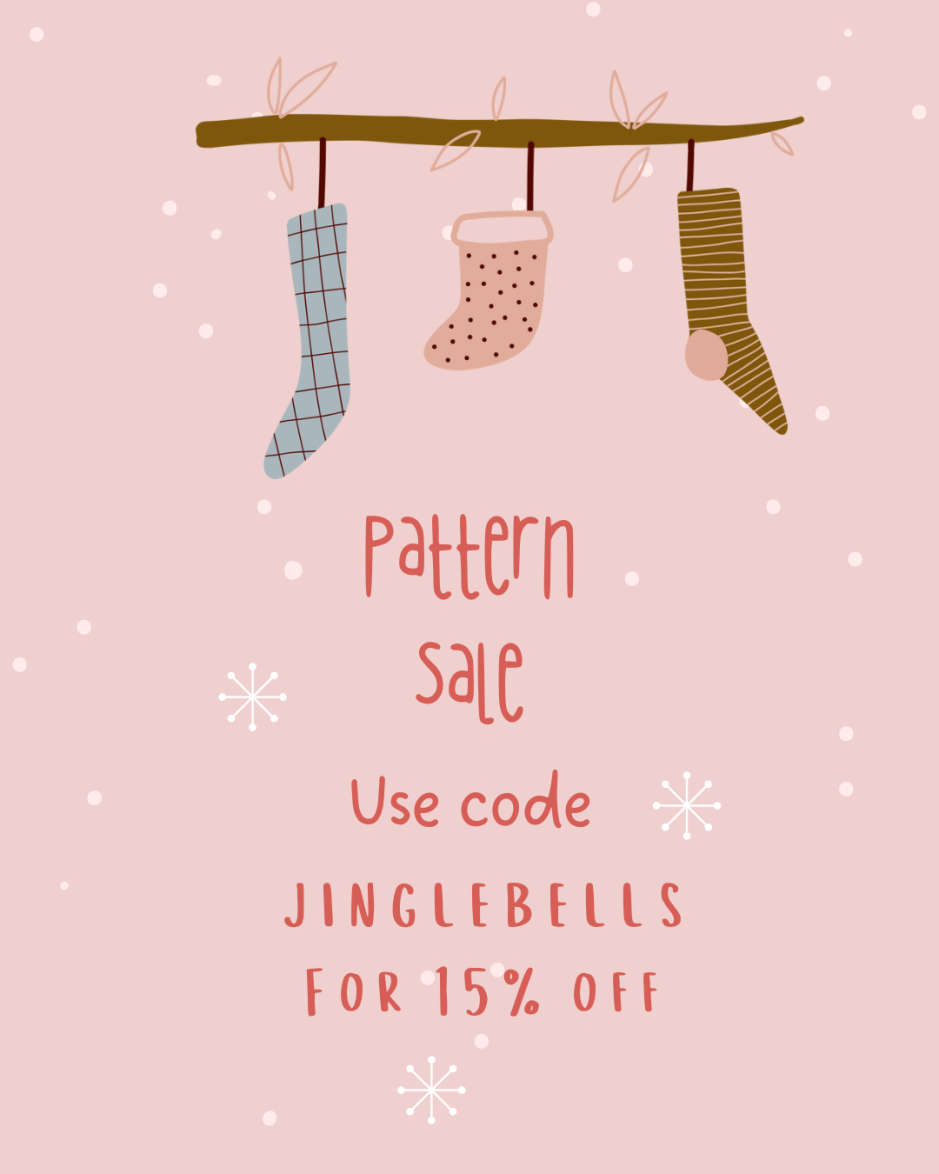
If your stuck for any last minute homemade gifts, I’ve got you! There’s 15% off all patterns in my Etsy shop until Christmas Eve and there’s lots of Christmassy patterns that can be made in an evening, so don’t sweat it! Just use code JINGLEBELLS at the checkout!
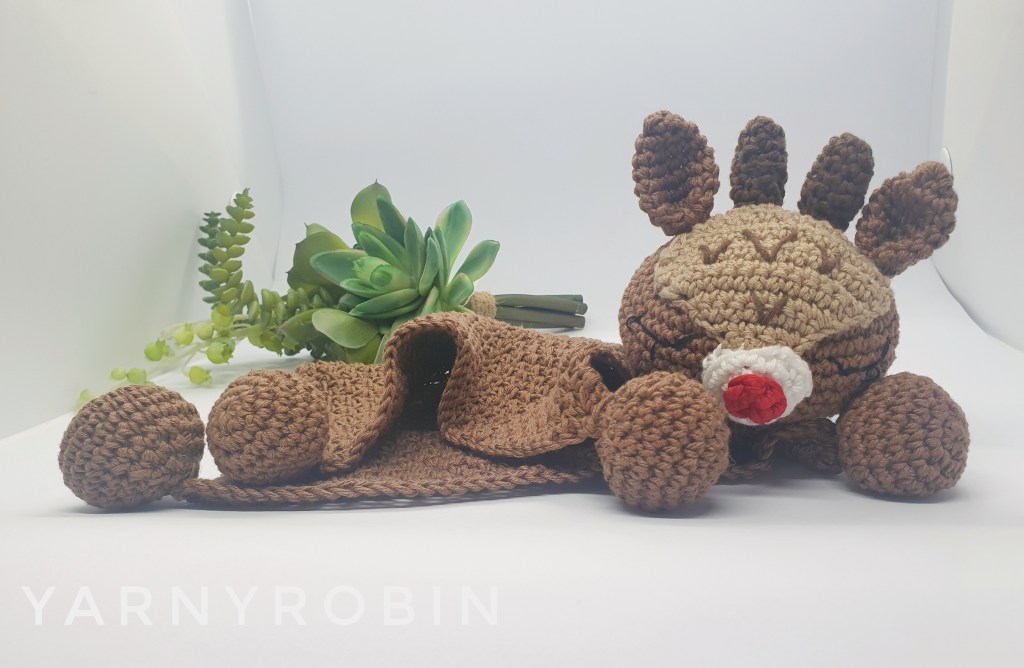
This beautiful little bumble bee is currently FREE in July’s newsletter which you can sign up to just here…
Processing…
Success! You're on the list.
Whoops! There was an error and we couldn't process your subscription. Please reload the page and try again.
These cute little bees have so many uses. I’m currently making lots to send into Forest School for the children to count with, play hide and seek with and to spark conversations about just how important our bees are!
They would also be really great if you sell at markets as they are quick and easy to make. They would be great as magnets, pin badges, class mate gifts, decorations for wreaths and a whole host of other decorations! Let your mind run free!!
I am ridiculously excited to share this Happy Snappy Camera with you which you will find in Issue 96 of Crochet Now…yes, that’s right…I got published for the very first time and I’m still up on cloud 9!!
I am super thrilled that it got onto the front cover too and am extremely grateful to Jenny and her wonderful team over at Crochet Now for giving me the chance to create for them. You will find lots of other great summer crochet patterns in this edition too designed by very talented designers indeed.
Picture courtesy of Practical Publishing
So if you fancy hooking your own Happy Snappy Camera…you know where to get the pattern. They make great toys for pre-schoolers! I am off to make another in a different colour.
Processing…
Success! You're on the list.
Whoops! There was an error and we couldn't process your subscription. Please reload the page and try again.
This is a super cute and quick make, so perfect to hook if you have an upcoming craft fair or if you wanted to make in time for Valentines Day as a treat for yourself or as a Galentine’s gift for your Bestie! The pattern is only available in adult size at the moment, hopefully I can carve out some more time to grade it for other sizes.
I get lots of questions about where I get my labels for my hats…the answer is Etsy! My labels are cork labels made from 100% sustainable material that is vegan. There are lots of custom sellers, so if you are looking for some labels or tags go and check them out.
The pattern is suitable for beginners and just uses a double crochet stitch (single crochet stitch), and some decrease stitches. It is important not to have your tension very tight or the teeny, tiny hearts become pinched. I used Stylecraft Softie which is a chunky yarn blend 20% wool 80%acrylic. I did try with some other chunky yarn, but I got the best results with the Softie, it just gives a subtle amount of drape which feels lovely to wear.
You can also purchase a printable PDF of this pattern which is available in both UK and US crochet terms over in my Etsy shop for less than a cup of coffee which you can access just here
Yarn – chunky / bulky see further below for recommended yarns.
20% superwash wool 80% acrylic blend
Adult – approx. 95g
Main colour – approx..80g
Accent colour approx. 15g
Size Guide.
Adult – to fit head circ. 22” / 55.8cms
Measurements are approximate and I advise you measure the intended head wherever possible. This beanie allows for a 2” / 5cm negative ease (the amount of stretch)
Stitch Abbreviations.
Ch – chain
Slst – slip stitch
Dc – double crochet
Hs – Heart stitch
Dec – decrease
BLO – work st into the back loop only (see photo at back of pattern)
Dc: Insert hook into chain or under both loops of stitch, yarn over and pull through so there are 2 loops on hook, yarn over again and pull through both loops on hook.
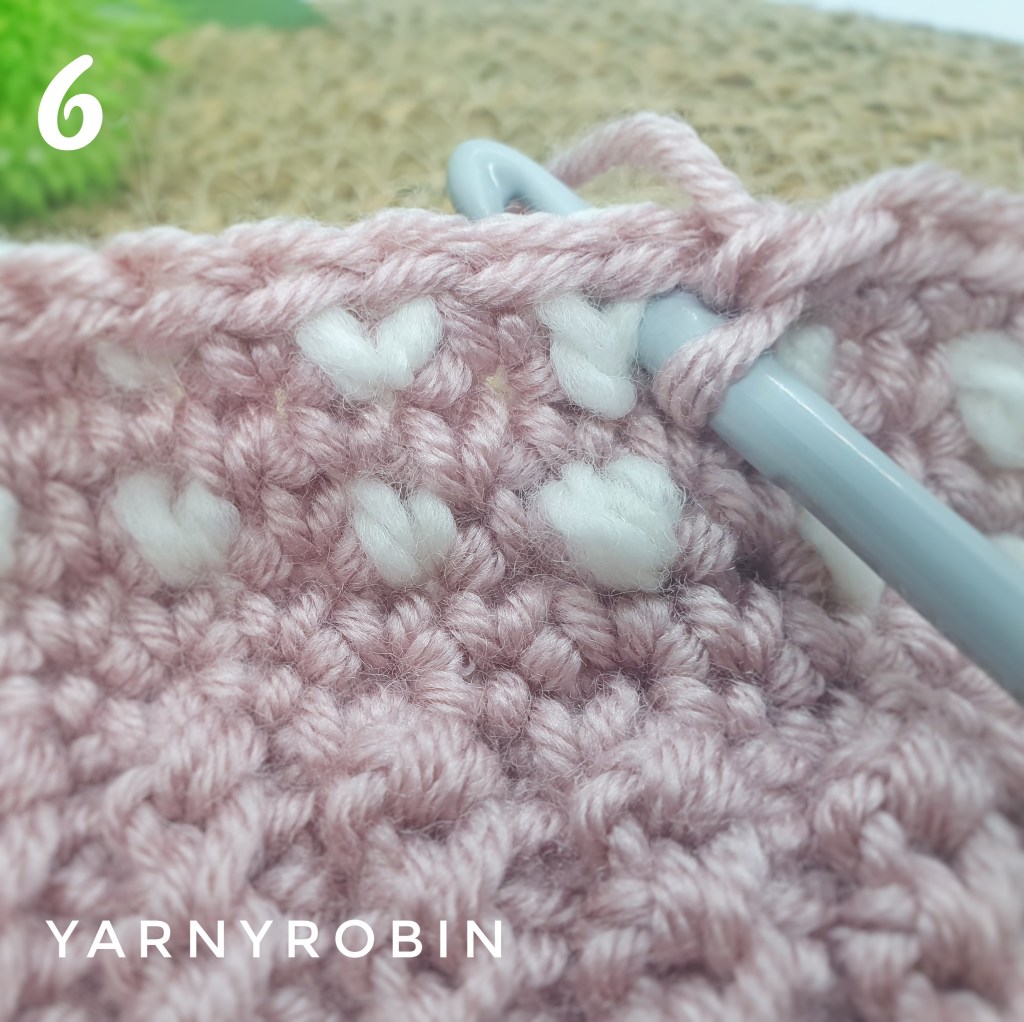
Hs: Insert hook under both loops of stitch, in accent colour – yarn over and pull through so there are 2 loops on hook (1st loop in main colour, 2nd loop in accent colour), in main colour – yarn over again and pull through both loops on hook to complete st. See top tip below! See Pic 1 – 4
Dec: decrease st worked over 2 stitches: insert hook under both loops of stitch, yarn over and pull through so there are 2 loops on your hook, insert hook into next st, yarn over and pull through so there are 3 loops on your hook, yarn over and pull through all 3 loops.
Top Tip:
When working the heart stitch and you yarn over and pull through in accent colour, pull loop up a little higher than you would for a regular dc stitch as this helps to keep the heart lying flat instead of pulled too tight.
Pattern Notes.
This pattern is written using UK crochet terminology and the stitch abbreviations can be found below.
Ch1 does not count as a stitch throughout the pattern unless otherwise stated. Repeats are marked by asterisks *.
The hat is worked by making the ribbed brim and joining one end to the other to form a circle. The main body of the hat is then worked in rounds.
When working Rounds 3 and 5 and subsequent repeats carry non-working yarn along the round (see pic 5)
When working rounds 4 and 6 and subsequent repeats drop accent colour yarn and pick up again on next round
Top Tip:
When working a dc in round above heart st, insert hook into side of heart as shown in Pic 6 as this will make it easier.
Yarn Suggestions.
Stylecraft Softie chunky is the recommended yarn for the pattern, but here are some similar substitutes…
King Cole Timeless Chunky
King Cole Big Value Baby Soft Chunky
King Cole Shadow Chunky
Red Heart Gemstone
Bernat Wavelength
Gauge
It is very important to check your gauge to ensure your beanie will fit.
To do this make a gauge swatch in the yarn you will be using for the body of the hat. If this matches the gauge, you’re good to go! If your swatch is too big, try using a smaller hook to obtain correct gauge. If your swatch is too small, try using a larger hook to obtain correct gauge.
Using chunky / bulky yarn swatch 11dc x 14 rows = 4” x4” (10cm x 10cm)
Please do not modify, resell, publish in part or in full, or share this pattern or photo’s as your own.
You may sell finished items made from this pattern, I hope it becomes a hot item for you; but please credit, with a link, that the item is made using @yarnyrobin pattern.
Please also tag your makes on your social using #miniheartbeanie @yarnyrobin because I love to see what you make!
In main colour
Row 1: Ch8, dc in 2nd ch from hook and in each ch along, turn do not ch1 (7dc)
Row 2 – 62: IN BLO dc in each st across, turn do not ch1 (7dc)
Slst row 62 to beginning row to form a circle. Turn brim inside out so the seam is on the inside. We will now be working in rounds around the brim of the hat.
Working with right side facing you in main colour
Round 1: ch1, 64dc evenly around top of brim – 2dc in first and last st then aim to place a dc at the top of each rib, join with a slst to 1st dc (64dc)
Round 2: ch1, dc in each st around, join with a slst to 1st dc (64dc)
Round 3: ch1, dc in same st, hs * dc, hs * repeat around, last st is a hs, slst to top 1st dc (32dc / 32hs)
Round 4: repeat round 2
Round 5: ch1, hs in same st, dc * hs, dc * repeat around, last st is a dc, slst to top of 1st hs (32hs / 32 dc)
Round 6: repeat round 2
Repeat Rounds 3 – 6: 2 more times(total of 8 rounds)
Round 15: repeat round 3
Round 16: repeat round 2
Round 17: repeat round 5
Round 18: ch1,dc in same st,decrease * dc,decrease * in each st around, skip last st, slst into 1st dc (21dc / 21dec)
Round 19: ch1,dc in same st,decrease * dc,decrease * in each st around, st, slst into 1st dc (14dc / 14dec)
Round 20: ch1,decrease in each st around, skip last st (13dec)
Hat measures 8.5” from brim to crown
Fasten off cutting yarn leaving a long tail approx. 20cms from hat. Thread darning needle and weave in and out of the top loops of last round. Pull the end tight to gather and secure with a few stitches. Weave in any loose ends. Now add your pom (see end of pattern for details)
Add pom
Add a faux fur pom to complete the look. Or alternatively make your own pom. I added a Trimits pompom as they tie into the hat easily, which makes them really easy to remove for when you want to launder your beanie.
If you are making your own pom you have a couple of options. You could use a pom pom maker however, I favour making my pompoms using the method my Grandma taught me; using 2 pieces of cardboard. I like my pompoms to be really full and lush and so I wrap each pompom with a minimum of 3 layers of yarn. My card circles have an outer diameter of approx. 4.5” / 11cms.
TOP TIP: If making your own poms leave long tails when you tie your pompoms off as it will make attaching them to your hat much easier. If your pompoms are in a different colour to your hat, tie your pompoms off with the main colour of the hat as it makes weaving in the ends much neater.
REMEMBER: IF MAKING YOUR OWN POM YOU WILL NEED MORE YARN THAN STATED IN THIS PATTERN.
You can also purchase a printable PDF of this pattern which is available in both UK and US crochet terms over in my Etsy shop for less than a cup of coffee which you can access just here
It’s been a while since I gave you a free pattern and I really wanted to share something with you in time for Christmas…I’m not sure I’ve entirely reached my goal as it is already Christmas Eve! Anyway better late than never and the really good news is this takes under an hour to make, so if your stuck for that last minute gift, this is perfect
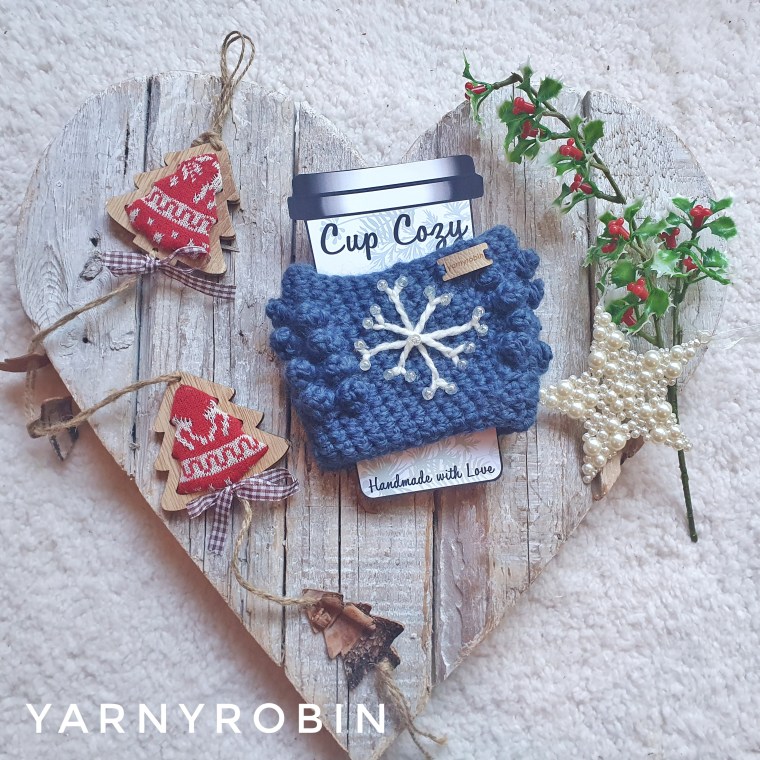
This striking, seasonal cup cosy features textured popcorn stitches and embroidered snowflake finished with a little bit of sparkle.
You will need:
a small amount of chunky yarn. I used Stylecraft Softies stone washed in Denim and cream.
5mm hook,
darning needle to weave in the ends.
Beads x 17
Glue gun to attach beads or you could sew them into position.
Pattern Notes:
Abbreviations used UK terminology (American terminology in brackets)
At the end of each round join with a slst and ch1. Ch 1 does not count as a st throughout pattern
Repeats are marked by *
To prevent your starting chain from twisting ch 5, remove hook from active loop and insert through 1st ch made
Stitches:
st – stitch
slst – slip stitch
ch – chain
dc – double crochet (sc -single crochet)
Dc2tog – decrease / Sc2tog – decrease (US)
Dc: Insert hook into chain or under both loops of stitch, yarn over and pull through so there are 2 loops on hook, yarn over again and pull through both loops on hook.
PC: Popcorn st –5dc in same st, pull up active loop on your hook and remove hook, insert hook in 1st dc (just count back 5dc), catch the active loop of the 5th dc, draw the active loop through 1st dc
Dc2tog – decrease st worked over 2 stitches: insert hook under both loops of stitch, yarn over and pull through so there are 2 loops on your hook, insert hook into next st, yarn over and pull through so there are 3 loops on your hook, yarn over and pull through all 3 loops.
Let’s go!
Ch30 (or adjust chain to fit your cup, just keep ch a multiple of 2)
Join with a slst to form a ring
Round 1: dc in 1st st and in each st around (30dc)
Round 2: dc in 1st st and in each st around (30dc)
Round 3: repeat round 2
Round 4: dc in the next 10sts, *PC, dc* to end of row
Round 5: dc in 1st st and in each st around (30dc)
Round 6, 8 & 10: repeat Round 4
Round 7, 9 & 11: repeat Round 5
Round 12: repeat Round 5
Round 13: dc2tog, dc in each st around (29dc)
Round 14: dc2tog, dc in each st around (28dc)
Round 15: dc in 1st st and in each st around (28dc)
Weave in any loose ends.
In accent colour yarn, hand embroider a simple snowflake. Embroider a simple cross and then add a diagonal cross. Now add a ‘v’ to the end of each point. Weave in any loose ends. Add a bead to each point around the snowflake and one in the centre. Beads can be hand sewn for security or glued into position with a hot glue gun!
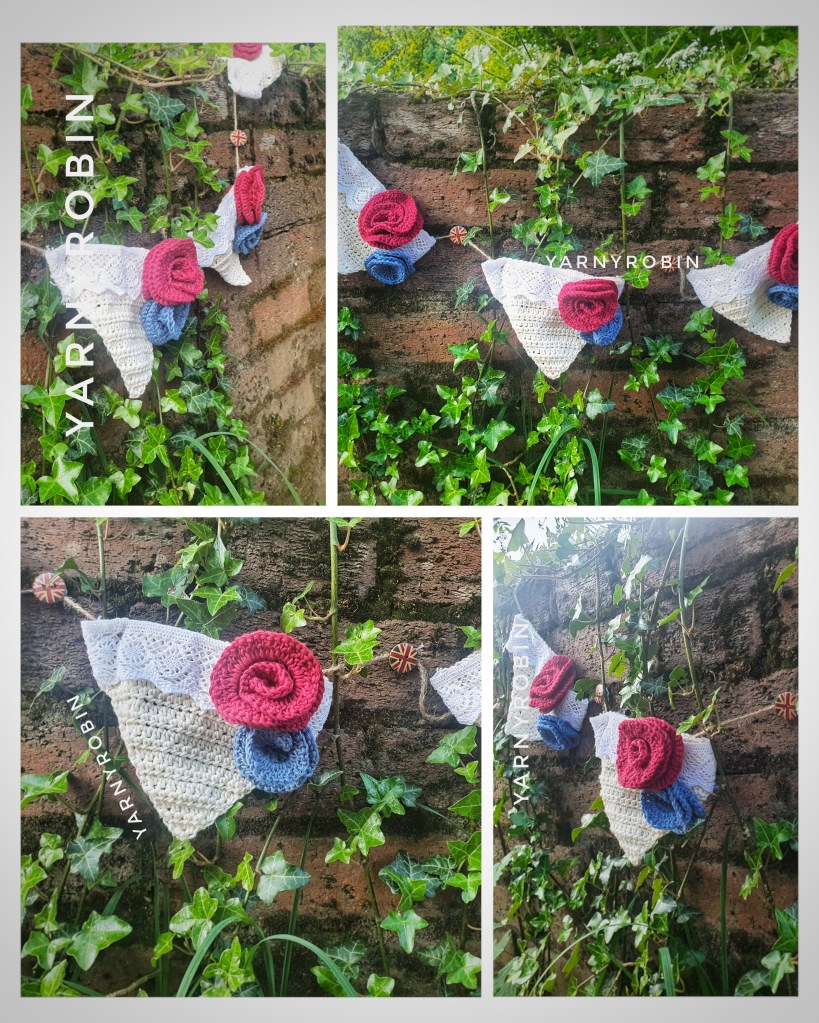
With Her Majesty’s Platinum Jubilee just around the corner I thought I’d share my progress on my Jubilee decorations and share the pattern with you. After all what good is a garden party or afternoon tea without a bit of bunting?
To make the bunting flags please see my previous post just here They are simple to make and the lace trim gives a pretty, vintage vibe. What’s more if you tie your embellishments to the flags rather than sew them on, the bunting can be recycled and dressed up again for the next occasion / holiday season in your calendar…clever eh!
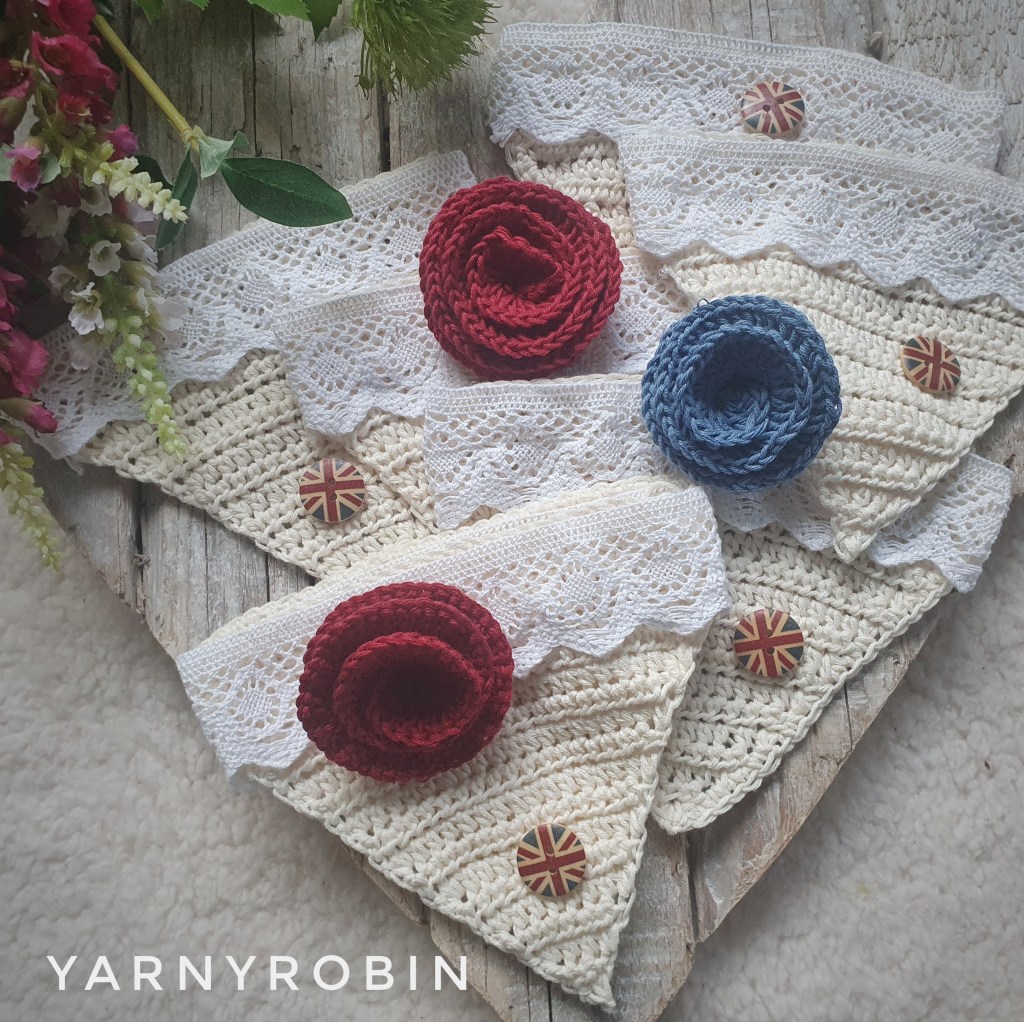
I wanted my Jubilee bunting to be traditional in colour , so of course it had to be red, white and blue, but I wanted it to look pretty and almost understated, so you won’t find any navy or lipstick red here! instead I chose a more muted red tone and coupled it with a mid blue. I also wanted to incorporate the Union Jack and found these gorgeous little buttons, which again are more subtle in tone.
This pattern is written using UK crochet terminology and the stitch abbreviations can be found below. I have included US terminology in brackets if you wish to convert.
Dc: Insert hook into chain or under both loops of stitch, yarn over and pull through so there are 2 loops on hook, yarn over again and pull through both loops on hook.
Tr: Yarn over hook, insert hook into chain or under both loops of stitch, yarn over and pull through so there are 3 loops on hook, yarn over again and pull through 2 loops, yarn over and pull through last 2 loops on hook.
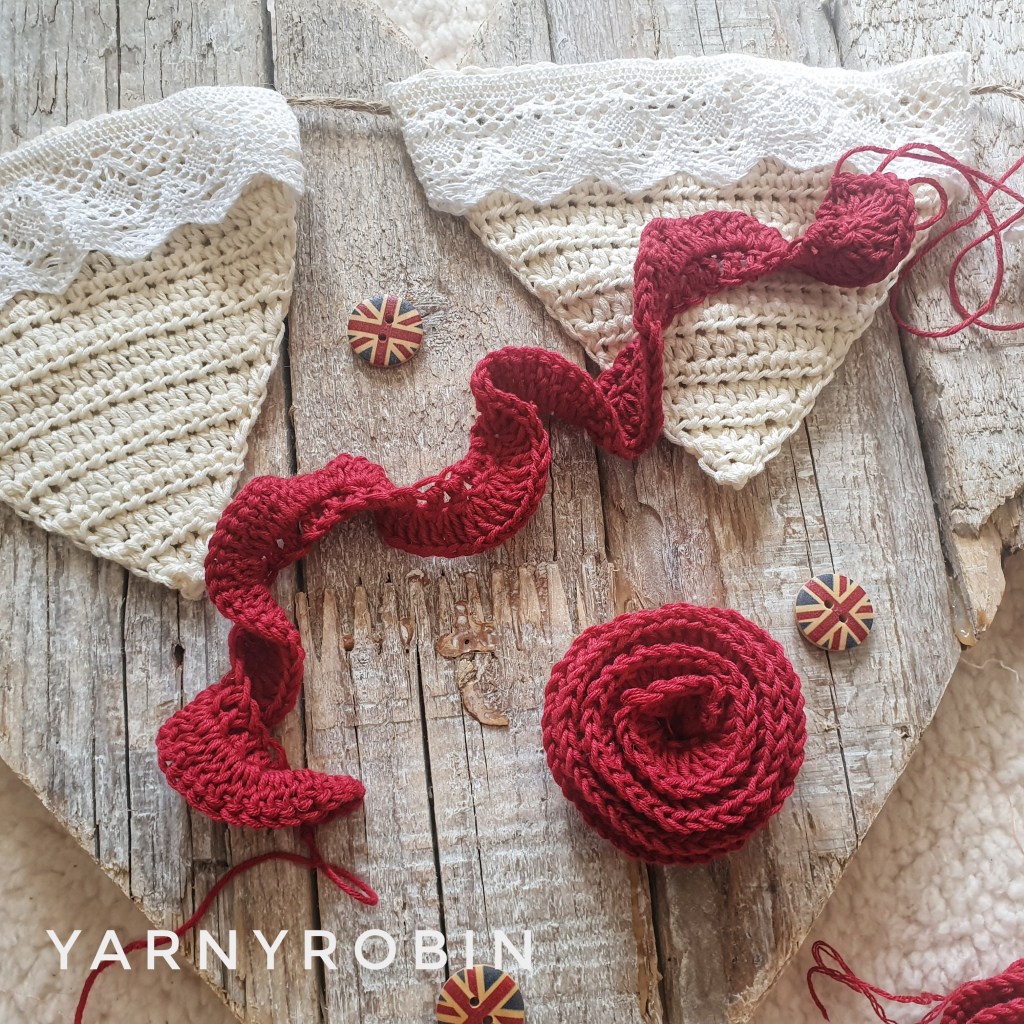
Large Jubilee Rose
In cherry
Leave a long tail, ch 50
Tr in 2nd ch from hook, tr in each ch along, dc in last ch
Ch3, turn
2tr in same space, 3tr in each st a long, dc in last st. Fasten off leaving a long tail
Small Jubilee Rose
In denim blue
Leave a long tail, ch 33
Tr in 2nd ch from hook, tr in each ch along, dc in last ch
Ch3, turn
2tr in same space, 3tr in each st a long, dc in last st. Fasten off leaving a long tail
To assemble
Spiral flower in an anti-clockwise direction with one long tail at the front of the rose and one long tail at the back of the rose. With a darning needle take the front tail through to the back of the rose to secure centre petal. Now make several passes of the needle at back of the rose making sure you catch all the layers of the rose. With other tail, thread darning needle and make several more passes at the back of the rose. Tie tails together in a knot to secure. Attach to bunting by passing both tails with a darning needle through to back of flag and tie neatly so tails tuck neatly behind flag and can be easily removed when you wish to re-dress your bunting. Add buttons to string in between flags with hot glue / glue gun.
If you like this pattern and would like me to continue to share my patterns please give me a clap and follow me on instagram
I would love to see your Jubilee Roses, so please tag me in your makes on social media and I will share your lovely makes.
So, I have a new blanket on my hooks. It has been a long time since I made anything bigger than a hat, so I am really enjoying the hooking and process of writing the pattern…even if I did have to frog an enormous amount…see here for the proof!
I am also on the hunt for a handful of pattern testers, so if you are interested here are the deets… there will be 2 sizes of blanket
baby blanket and stroller blanket
You need to provide your own yarn – dk weight (approx 400g in main colour and 100g in accent colour…I think…I’m still not done making the original!
Time – I need you to be able to complete the test within 4 weeks of receiving the pattern and i’m hoping to release in March.
Spot any typo’s, pattern mistakes or make suggestions if you have any.
Finally, be able to share with me a clear well lit shot…think insta worthy!
In return I will send you the full edited pattern and also another pattern of your choice from my designs and I will love you forever. So, if you are up for testing then dm me, leave a message or contact me via insta and let’s become hooky buddies.
this post contains affiliate links, which means if you choose to purchase through them, i earn a small commission at no extra cost to you, which helps to support this blog.
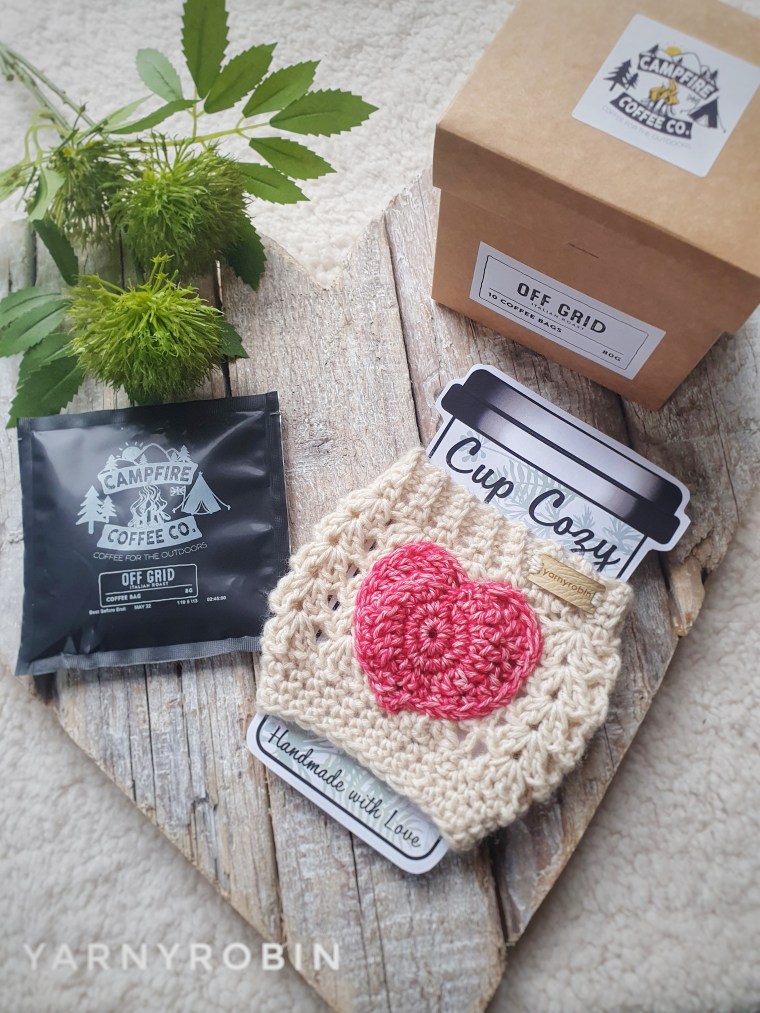
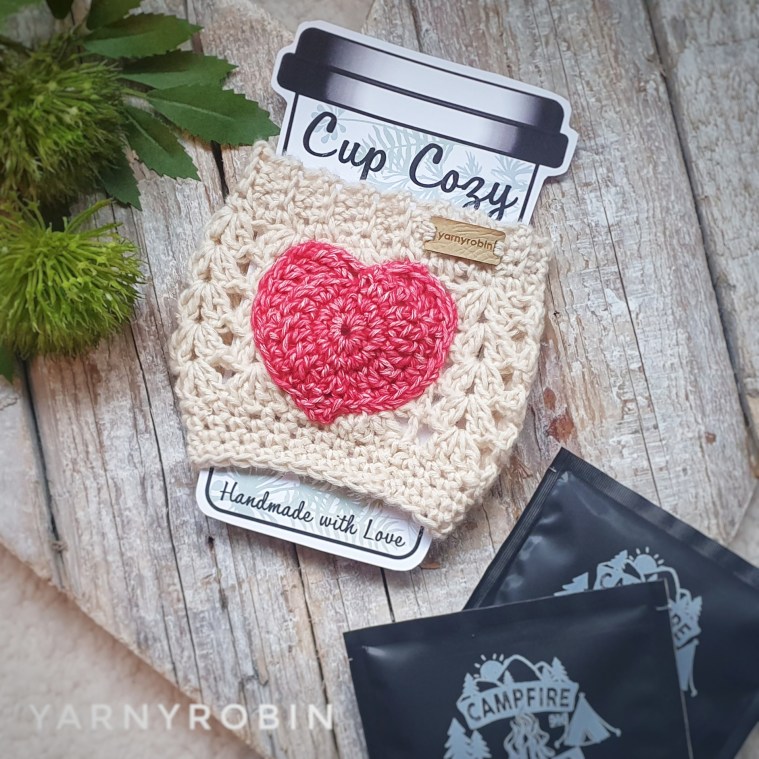
It’s been a while since I gave you a free pattern and I really wanted to share something with you to celebrate Valentines / Galentines Day, which is only a couple or so weeks away now.
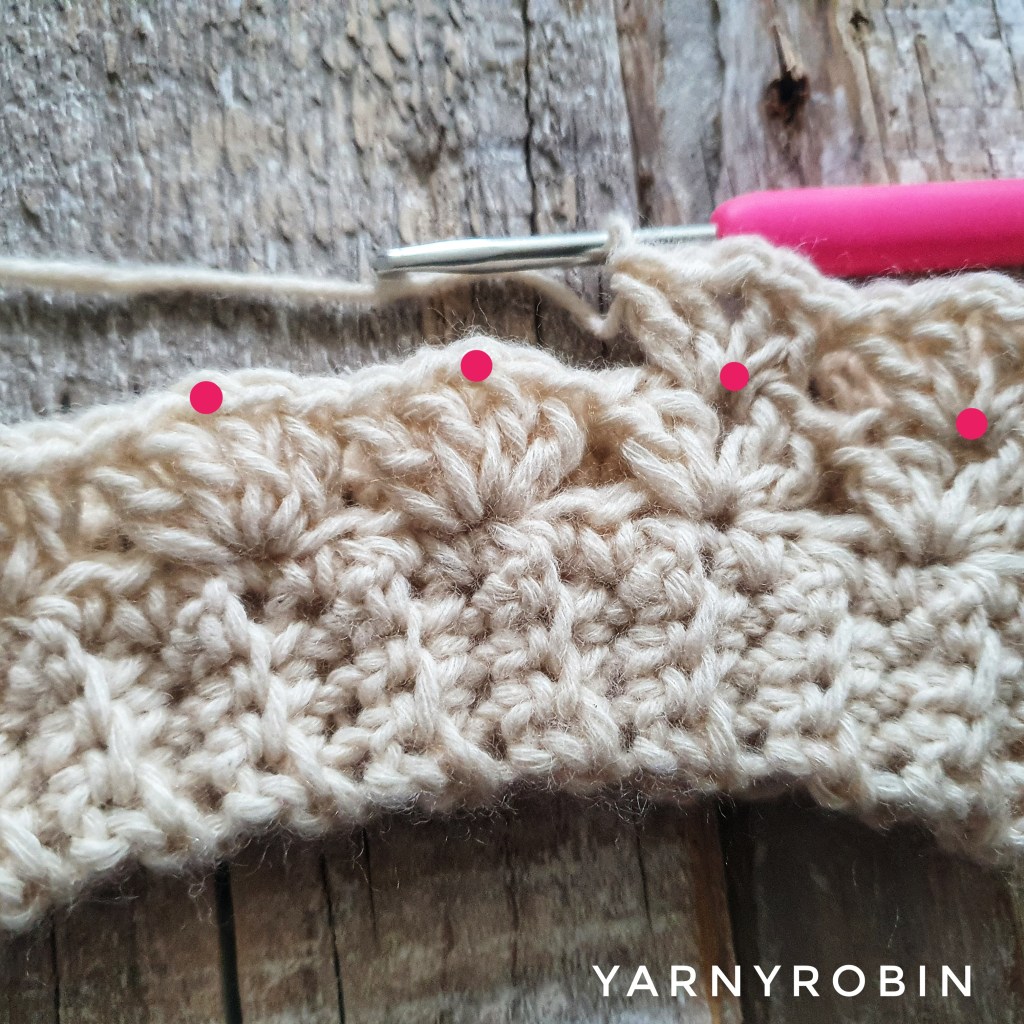
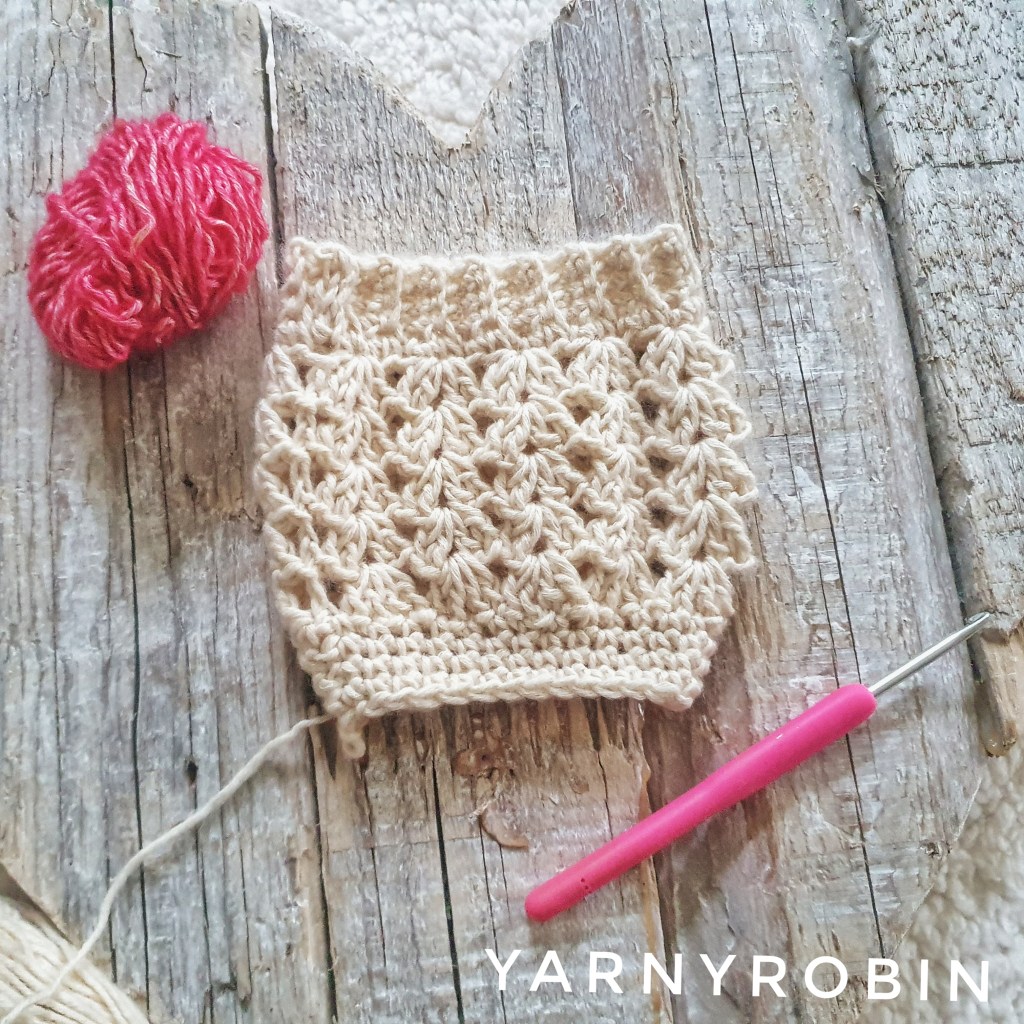
This cute coffee cup cosy has a cute ribbed top brim and a chic lacy body made from clusters of v stitches, before nipping in at the base with a band of double crochet stitches and being finished with a yarny little heart.
The pattern is simple and quick to hook up and can be made from stash… just perfect for gifting and treating your best friends with or of course yourself! They are also great sellers at markets, so if you are a finished piece seller, they make a great low-cost, high-appeal item for fairs and craft markets.,
You will need:
a small amount baby / sport weight yarn. I used Scheepjes stone washed in Moon Stone and Red Jasper. Pattern does share how to make cosy smaller or larger, so dk yarn will work also.
Turning ch does not count as a st unless otherwise stated
V cluster st – in same st, 2tr, ch1, 2tr (in same st 2dc, ch1, 2dc)
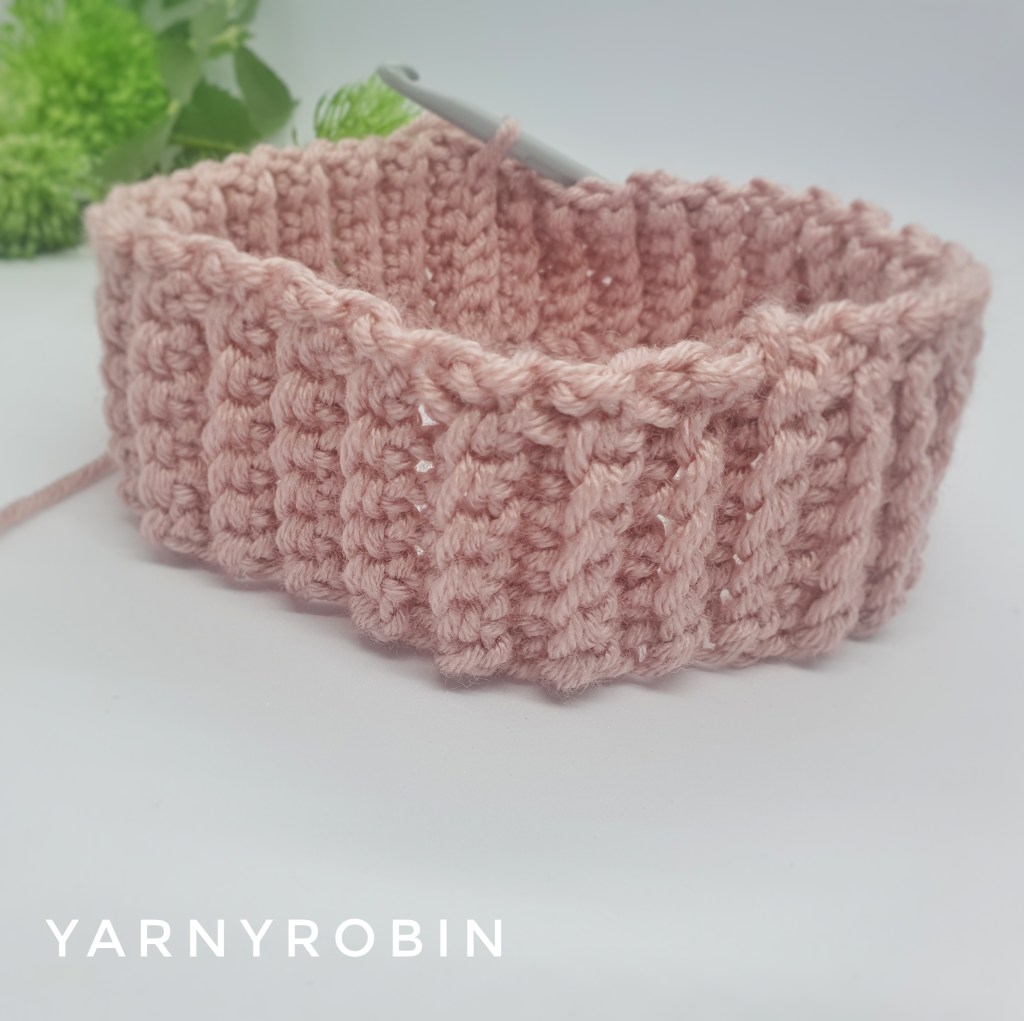
We will start by making the ribbed brim.
Ch5
Row 1: Dc in second ch from hook and in each st along (4dc), ch1 turn,
IN BACK LOOPS ONLY
Row 2: Dc in each st along, ch1 turn (4dc)
when making the rib, crochet into the back loop of each stitch only as shown.
Rows 3 – 33: repeat row 2 (increase or decrease rows in rib to fit around your cup. Rib number of rows must however be a multiple of 3, remember the cosy will stretch) join rib ends with a slst to form a circle, ch1
Round 1: work 33 dc into top of rib, ch2 (or dc the equivalent number to rows in your rib eg/ 30 rows in rib then 30dc in row 4)
Round 2: * v cluster in 1st st, miss 2sts,* repeat * – * to end of round, join with a slst in top of ch2 (11 v clusters)
Round 3: ch2, *v cluster in ch 1 of previous round* see picture below. Repeat * – * all around, slst in top of ch2
Round 4 – 6: repeat round 3
Round 7: ch1, dc in first st, *miss a st, dc in next st* repeat all around, slst in top of ch1 (29dc)
Round 8 – 10: ch1, dc in each st around, slst in top of ch1 (29dc) fasten off at end of round 10.
In accent colour make heart. If you would like more of a photo tutorial for this click here otherwise follow the instructions below.
Ch2
Round 1: 10dc into 2nd ch from hook, slst in to top of 1st dc form a circle
Round 2: Ch 1, 2dc into each st around (20dc)
Round 3: Ch4 (counts as a dtr), 1dtr in the next 3 sts, 1tr in next 4sts, 1htr in next st, dc in next st, ch3, slst into same space (this creates a picot), dc in next st, 1htr in next st, 1tr in next 4 sts, 1dtr in next 4 sts, slst in to ch1 of beginning ch4.
Round 4: ch4 (counts as a dtr), 3dtr into next 3sts, (these are actually the chains from previous round) 1tr in next 3 sts, 1htr into the next st, 1dc in next 4sts, slst in picot space, ch3, slst in to same space (picot made), 1dc in next 4 sts,1htr in next st, 1tr in next 3 sts, 1dtr in next 4sts,
slst in to the cleft of the heart to finish. Fasten off leaving a long tail and sew to cosy, weaving in any loose ends.
Now, just make as many cosy’s as you have best friends or just make one for yourself!