Spring is upon us, although I’m bracing for the Spring showers, which seem to have started early here! Whether you’re looking for a quick Easter make, for that last minute gift or Easter basket filler, I’ve got some patterns to tempt you…and most of them are FREE… Hurrah!
How about this as a sweet Easter basket filler for baby. Using Oeko Tex standard 100 approved 100% cotton in a 4ply; these lovey’s are soft to snuggle and safe to chew on…and are sure to become baby’s best friend.
This luxurious set of reusable soft textured facecloths and squishy scrubbies would make the perfect Easter gift for baby, Mom’s-to-be, or just that special girl in your life. They are quick and easy to make, so are perfect to add that handmade touch to gift baskets.
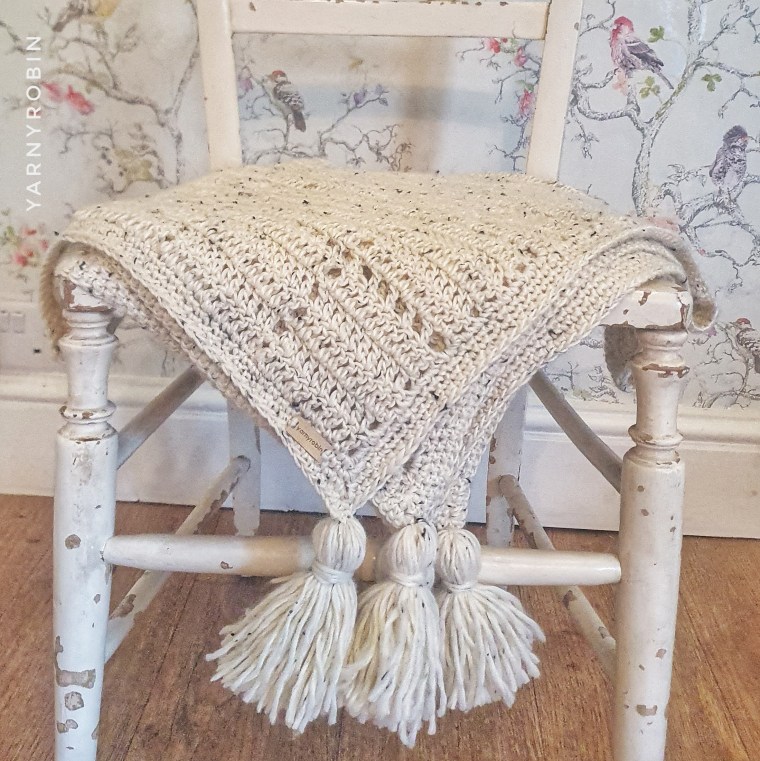
Why not hook this beautiful baby blanket, ideal for the spring / summer. A beginner’s introduction to filet crochet, the pattern is free and gives instructions on how to size up for a bigger blanket too!
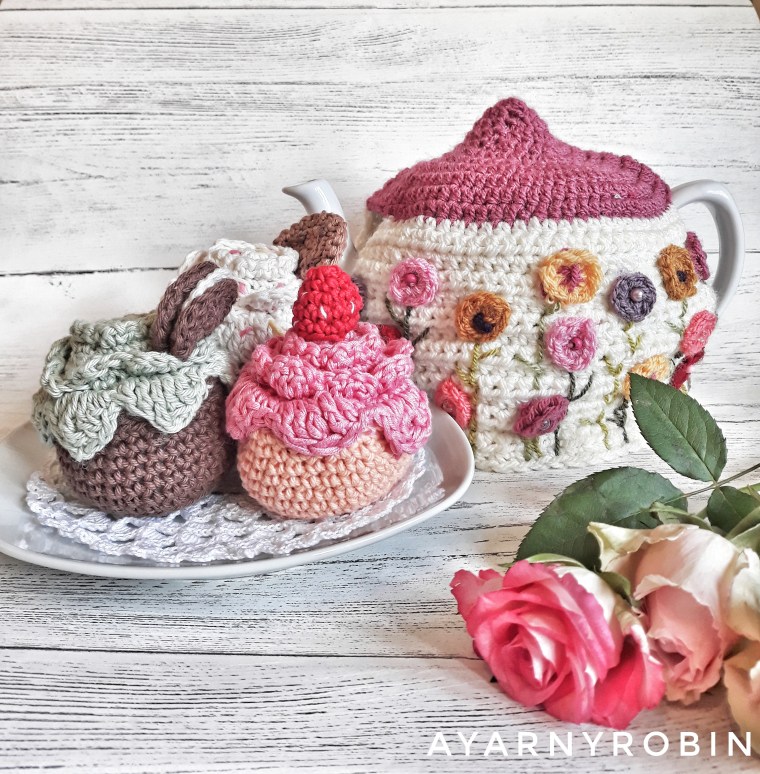
The simplicity and sweetness of this beautiful Spring tea cosy, makes it quick to make. Suitable for a beginner with a little experience of working in the round, this tea cosy is sure to keep your Easter cup of tea as warm as your freshly toasted hot cross bun!
Don’t forget to pop over to my socials to say hi…I would love to see what’s on your hook. @yarnyrobin
Happy Hooking!
Processing…
Success! You're on the list.
Whoops! There was an error and we couldn't process your subscription. Please reload the page and try again.
I am ridiculously excited to share this Happy Snappy Camera with you which you will find in Issue 96 of Crochet Now…yes, that’s right…I got published for the very first time and I’m still up on cloud 9!!
I am super thrilled that it got onto the front cover too and am extremely grateful to Jenny and her wonderful team over at Crochet Now for giving me the chance to create for them. You will find lots of other great summer crochet patterns in this edition too designed by very talented designers indeed.
Picture courtesy of Practical Publishing
So if you fancy hooking your own Happy Snappy Camera…you know where to get the pattern. They make great toys for pre-schoolers! I am off to make another in a different colour.
Processing…
Success! You're on the list.
Whoops! There was an error and we couldn't process your subscription. Please reload the page and try again.
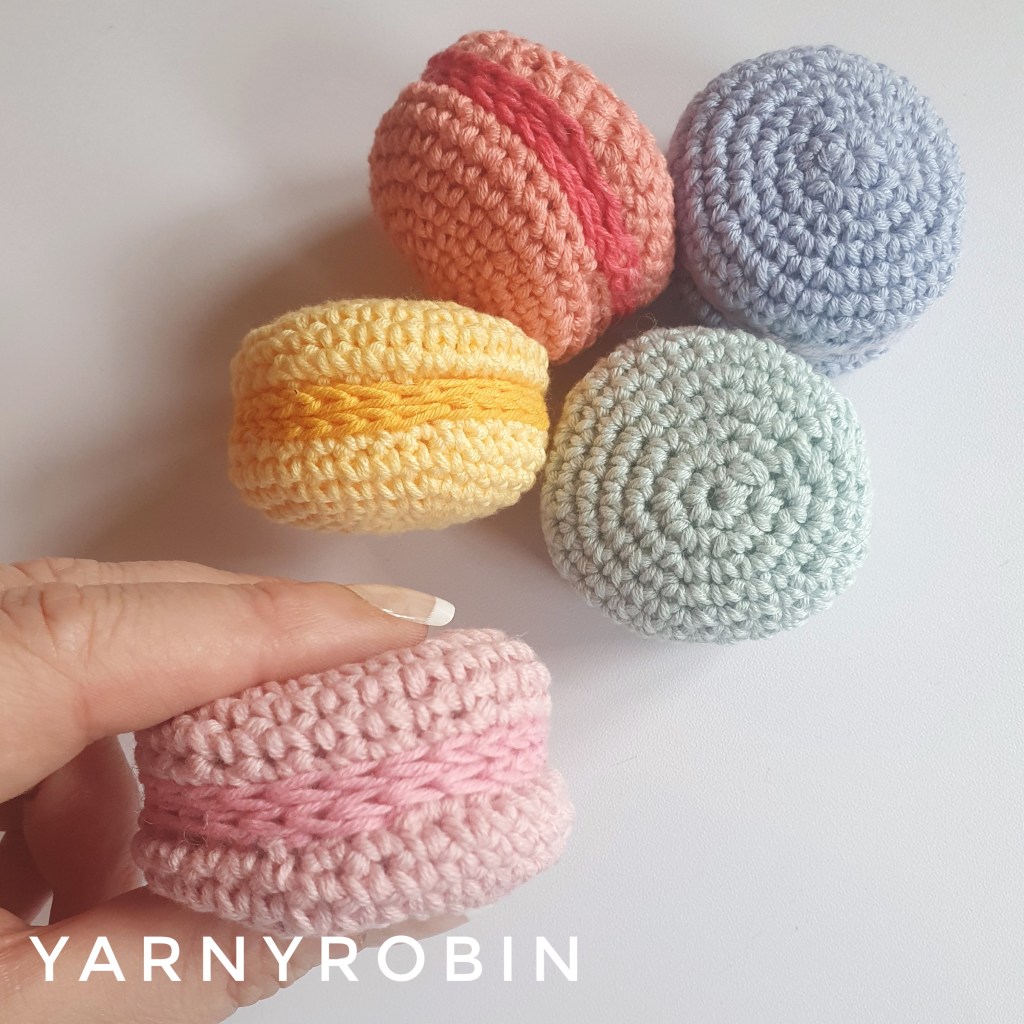
Fancy getting this crochet macaron pattern for FREE…here’s how! Sign up to my email list ready for June’s newsletter and get this perfect macaron pattern for FREE!! I’m thinking Teddy bears picnics and tea parties by the paddling pool
Macarons and cupcakes
Pattern is a written pattern and suitable for beginners with some knowledge of basic stitches. The pattern includes 20 step by step pictures to assist you.
Stitches used are UK – double crochet and slip st (US – Single crochet and slip stitch)
Materials you will need: 4 ply cotton yarn (the pattern recommends Drops Safran but this can be substituted)(3.0mm) crochet hook or other size to obtain gauge although gauge is not imperative. Tapestry needle scissors and small amount of polyester toy filling (fire safety standard / EN71) stitch marker (optional)
Join my monthly email list and get this macaron pattern FREE aswell as 30% off this crochet cupcake pattern- offer valid up to the end of June 2023
Processing…
Success…welcome to The Nest…please allow 24 hours for your email to update
Whoops! There was an error and we couldn't process your subscription. Please reload the page and try again.
Spring is upon us, although I’m bracing for the April showers, which seem to have started early here! Whether you’re looking for a quick Easter make, for that last minute gift or Easter basket filler, I’ve got some patterns to tempt you…and most of them are FREE… Hurrah!
How about this as a sweet Easter basket filler for baby. Using Oeko Tex standard 100 approved 100% cotton in a 4ply; these lovey’s are soft to snuggle and safe to chew on…and are sure to become baby’s best friend.
This luxurious set of reusable soft textured facecloths and squishy scrubbies would make the perfect Easter gift for baby, Mom’s-to-be, or just that special girl in your life. They are quick and easy to make, so are perfect to add that handmade touch to gift baskets.
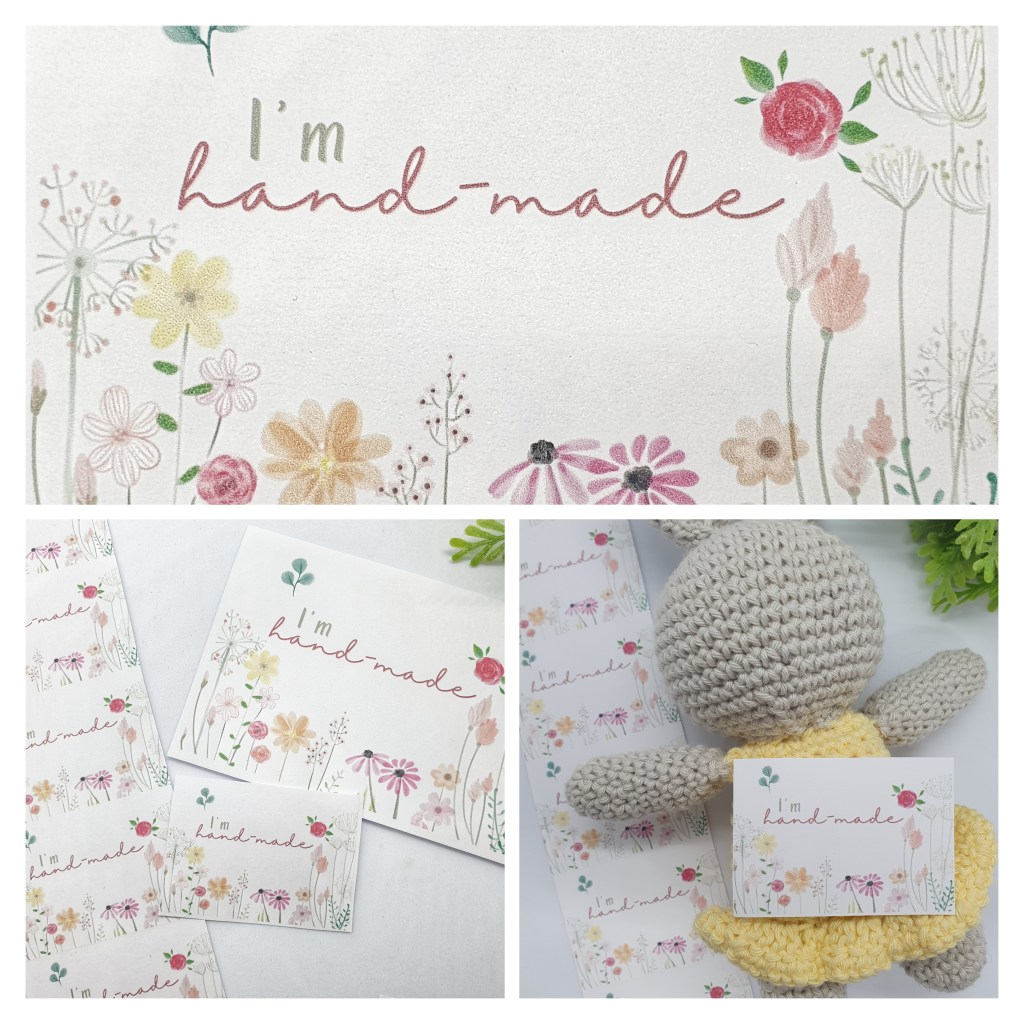
FREE crochet Spring Printable PDF
For the month of April 2023 only, if you sign up to my email list, you will receive a pdf for these beautiful spring printable mini tags and postcards, perfect for printing on your choice of card stock (I recommend business card stock) and attaching to your hand-made gifts this Spring / Easter. Please allow 24 hours for your email to update.
Processing…
Success…welcome to The Nest…please allow 24 hours for your email to update
Whoops! There was an error and we couldn't process your subscription. Please reload the page and try again.
Why not hook this beautiful baby blanket, ideal for the spring / summer. A beginner’s introduction to filet crochet, the pattern is free and gives instructions on how to size up for a bigger blanket too!
The simplicity and sweetness of this beautiful Spring tea cosy, makes it quick to make. Suitable for a beginner with a little experience of working in the round, this tea cosy is sure to keep your Easter cup of tea as warm as your freshly toasted hot cross bun!
Don’t forget to pop over to my socials to say hi…I would love to see what’s on your hook. @yarnyrobin
The hot Summer weather has me out and about and in the garden which isn’t leaving me a lot of crochet time. So I have been looking for small crochet wins to satisfy my creativity and to gain a sense of achievement with the little time I have. I have found myself creating delicious treats to add to my previous trio of cupcakes and have made these perfect macarons in beautiful pastel shades.
I love the idea of making play food sets and I would have loved these as a little girl; and now with two beautiful neice in my life I have just the right excuse to make play food sets for their play kitchens (albeit I am prepping for a couple of years ahead!).
These macarons are quick and easy to make. With play food sets in mind I treated myself to a Drops Safran cotton yarn pack and am giddy with the colours and have peace of mind that the cotton is Oeko Tex standard 100 approved; which means the cotton has been certified to be free of harmful chemicals and is safe for human use, as well as being verified as both safe and non-irritating to human skin. For more of my patterns using this yarn take a look at my
which means I am getting through my Drops Safran stash quite quickly and making beautiful items I can gift.
This pattern is written using English crochet terminology but has US terminology in brackets within the stitch abbreviation section of the pattern. The macarons are made in continuous rounds or spirals. A method commonly used in amigurumi and means there are no visible seams. The pattern is suitable for beginners with some knowledge of basic stitches and includes 20 step by step pictures to assist you.
Let me know what you think or if you can recommend any good crochet food patterns I can take a look at!
this post contains affiliate links, which help to support my blog at no extra cost to you
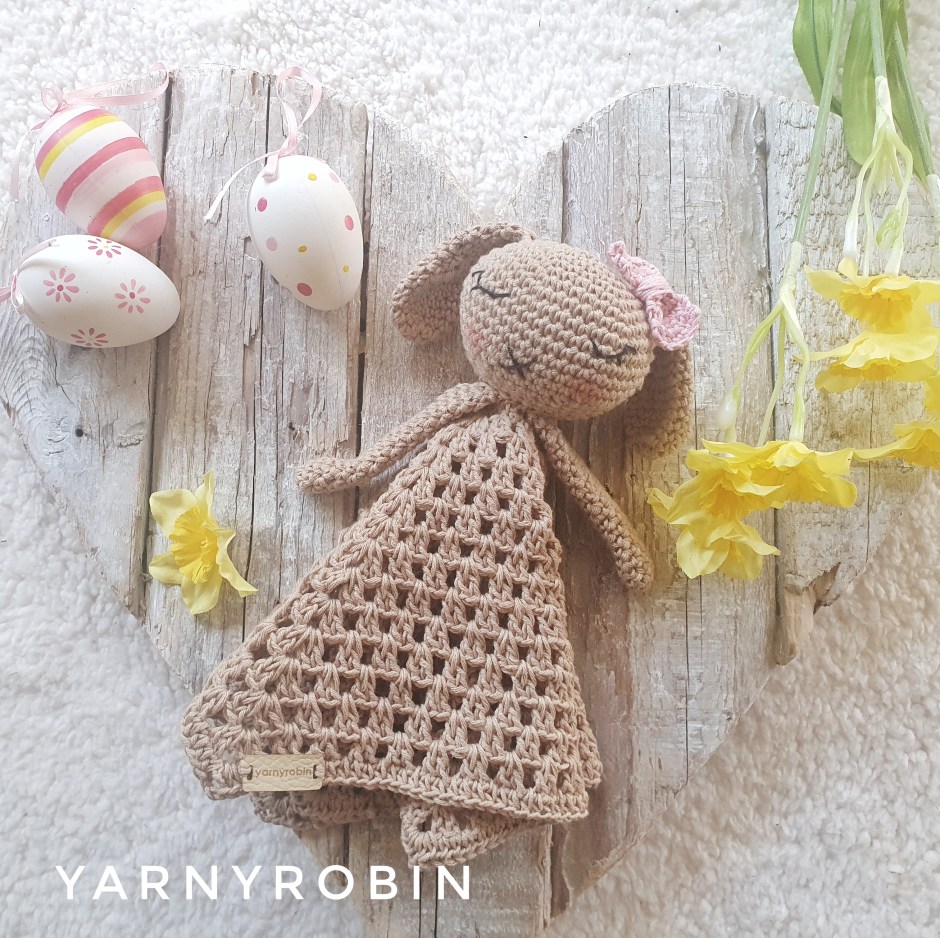
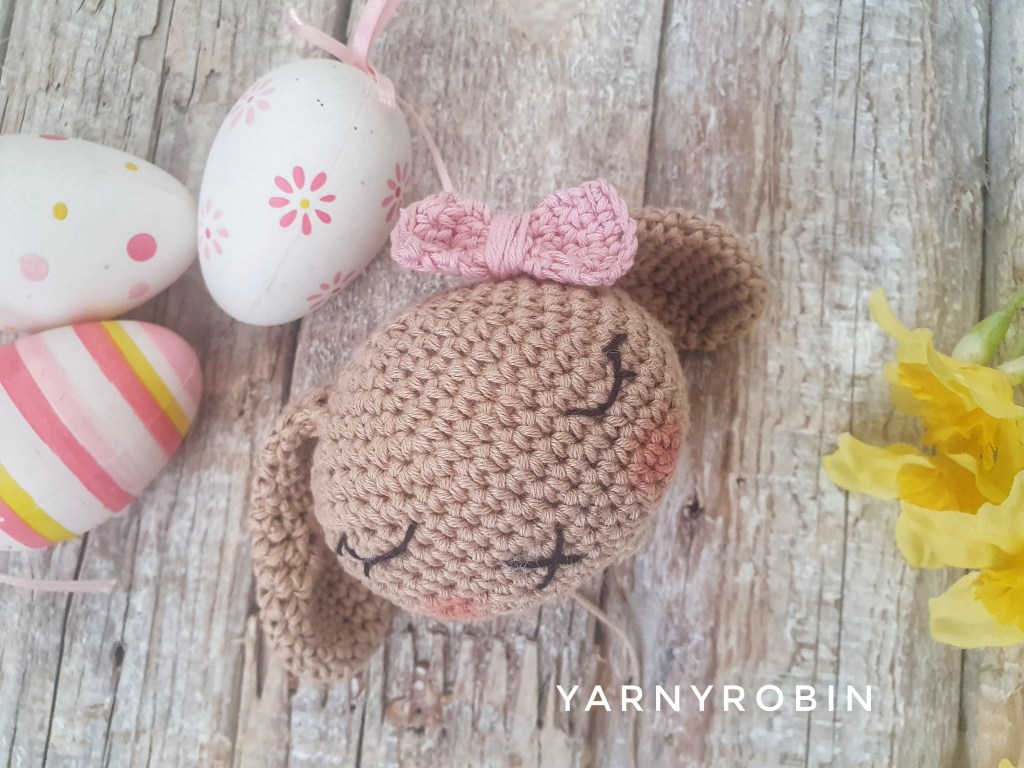
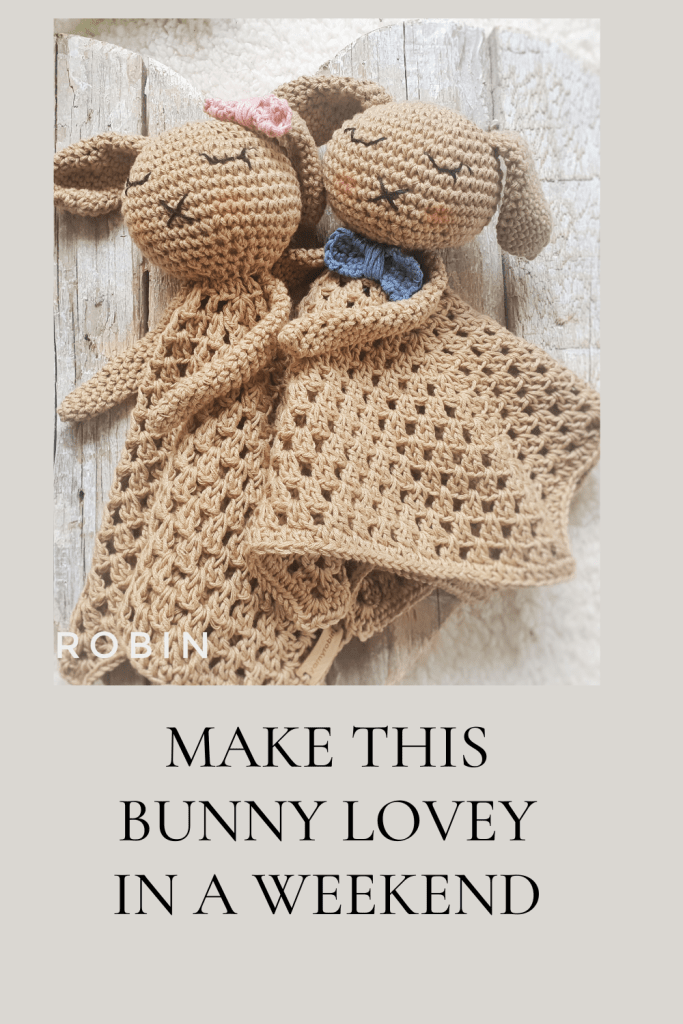
Spring Bunny Lovey
Fancy hooking up your own Spring Bunny Lovey, well you can…because I’m going to share my pattern with you and just in time for Easter. You will find the full pattern details in this post
Prefer a printable, ad-free version?I’ve created a tidy PDF version of this Bunny Lovey Pattern with BOTH UK and US crochet terms included. This way, you can follow the version you prefer with no conversions. Perfect if you like to print your patterns or follow them offline. 👉 Get the ad-free PDF here
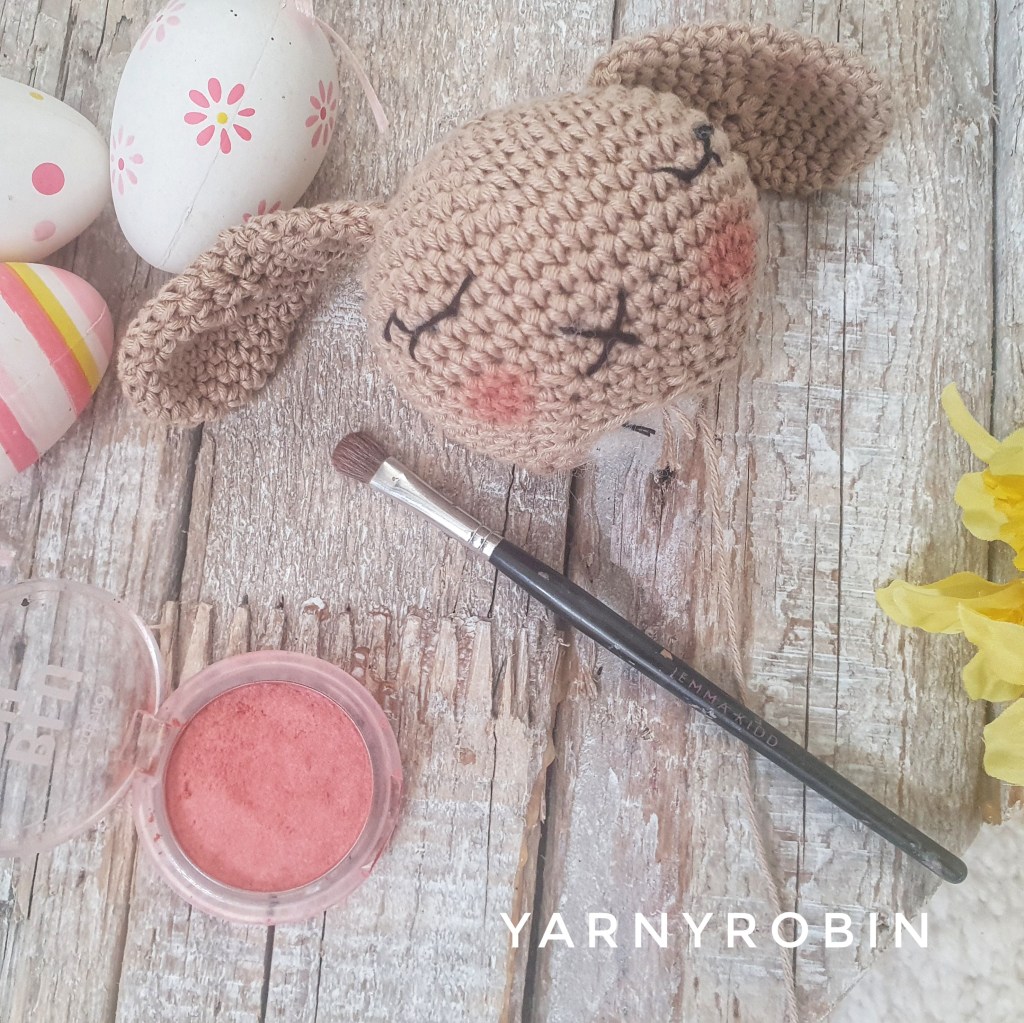
The pattern is simple and quick to hook up. It uses only 50g of cotton plus a tiny amount for the bow. This is just perfect for gifting a special little someone! I made this in an afternoon so it really is a quick make.
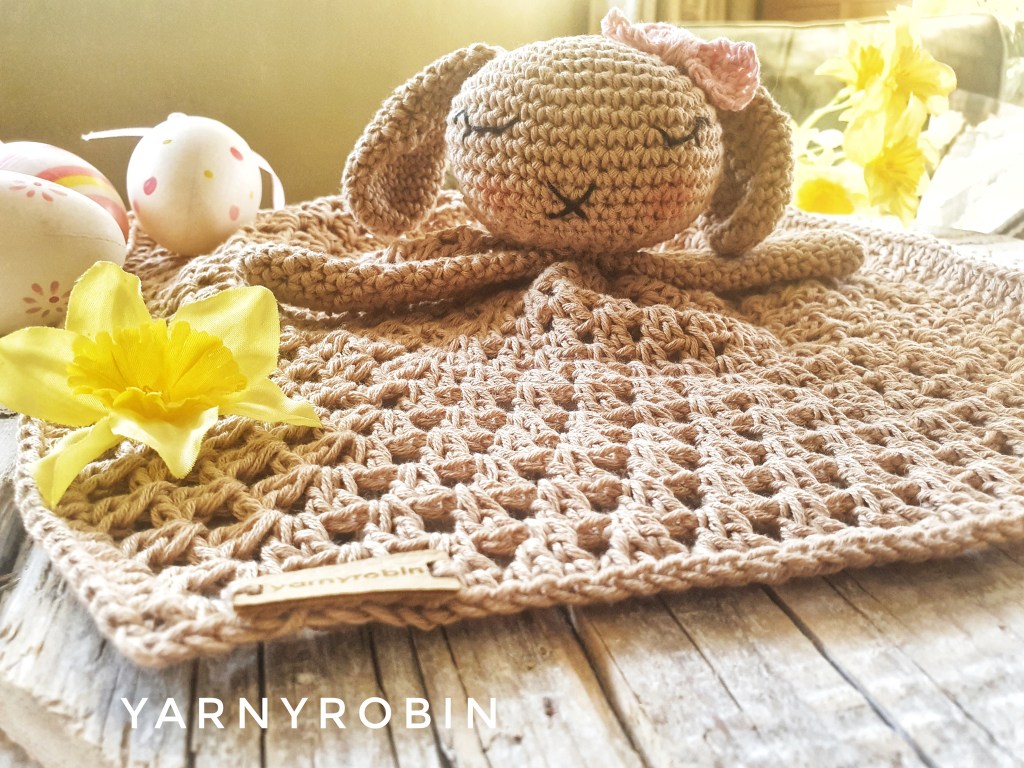
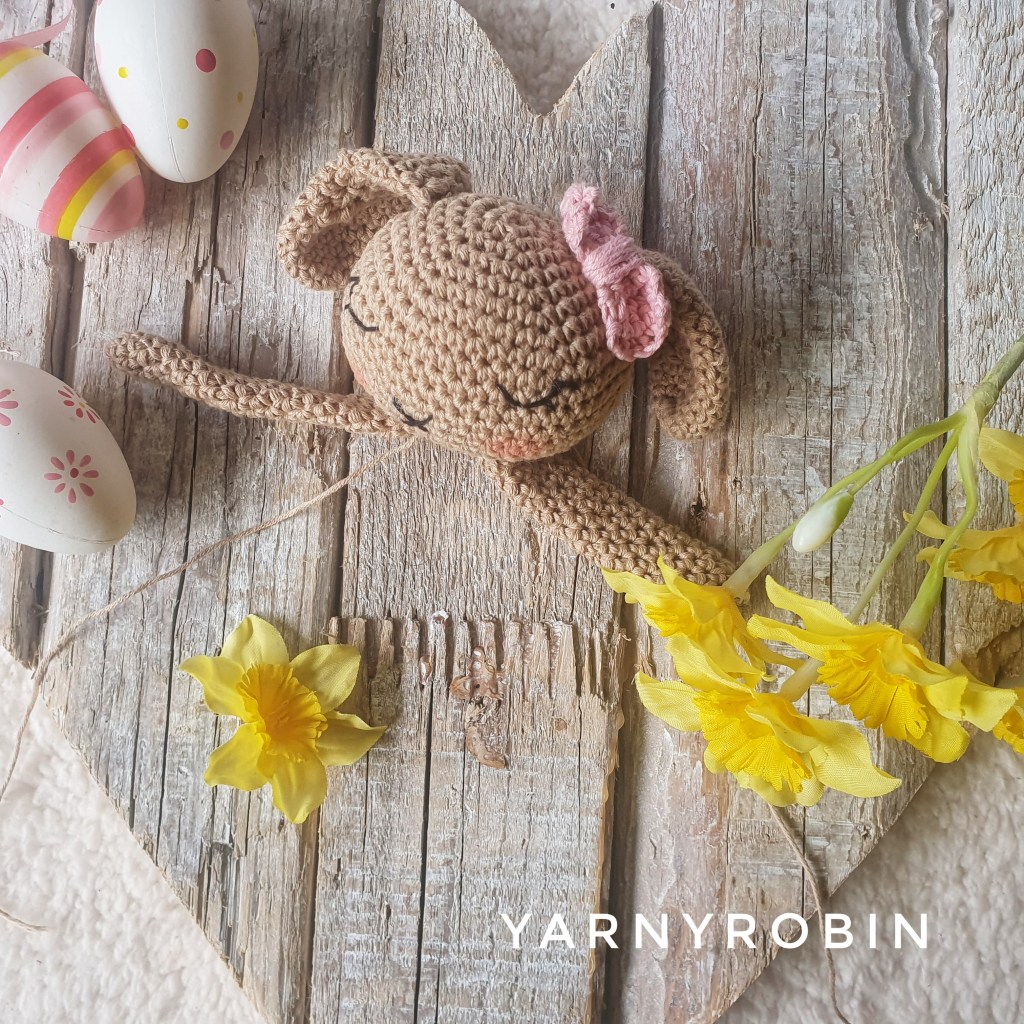
With her rosy cheeks and little criss cross nose, this little bunny has the sweetest face and floppy ears. The granny square blanket adds a vintage vibe coupled with it’s neutral tones.
If you’re putting together a handmade baby gift, I also have a free crochet teether pattern that pairs beautifully with this bunny lovey.
A word on yarn choice
I have opted to use Drops Safran 100% cotton as it is not only affordable, but it has a great colour palette too. It was also really important to me that I chose a cotton that was Oeko Tex standard 100 approved. This means the cotton has been certified to be free of harmful chemicals. It is safe for human use. Moreover, it has been verified as both safe and non-irritating to human skin. As this bunny lovey was inspired by a very precious little human, I wanted to be sure there were no hidden nasties.
Pattern Protocols
This pattern including all photos are the property of Nicola Florence at ayarnyrobin.wordpress.com. Please do not modify, resell, publish in part or in full, or share this pattern or photo’s as your own. You may sell finished items made from this pattern, (subject to toy making regulations) I hope it becomes a hot item for you; but please credit, with a link, that the item is made using @yarnyrobin pattern /
2g of Drops Safran 100% cotton colour 01 (desert rose pink)
Small amount of black embroidery floss
Want a calm, ad-free, printable version with both UK and US terminology included, check out the premium pattern in my Etsy shop — perfect to save with your project notes or take on the go./em> Click below to get the PDF.
Pattern Notes
This pattern is written using UK crochet terminology and the stitch abbreviations can be found below. I have included US terminology in brackets if you wish to convert.
The head, arms and ears are made in continuous rounds or spirals. It is a method commonly used in amigurumi and means there will be no visible seams. Therefore, when you start a new round just work it into the next st. I recommend marking the first st of each round with a st marker.
Starting chains in the blanket section counts as a stitch throughout the pattern unless otherwise stated. Repeats are marked by asterisks *.
Dc – double crochet / single crochet (US) BLO – back loop only
Htr – half treble / half double (US)
Dc2tog – decrease / Sc2tog – decrease (US)
Dc: Insert hook into chain or under both loops of stitch, yarn over and pull through so there are 2 loops on hook, yarn over again and pull through both loops on hook.
Tr: Yarn over hook, insert hook into chain or under both loops of stitch, yarn over and pull through so there are 3 loops on hook, yarn over again and pull through 2 loops, yarn over and pull through last 2 loops on hook.
Htr: Yarn over hook, insert hook into chain or under both loops of stitch, yarn over and pull through so there are 3 loops on hook, yarn over and pull through all 3 loops on hook.
BLO: Work stitch as stated, but in back loop of stitch only.
Dc2tog – decrease st worked over 2 stitches: insert hook under both loops of stitch, yarn over and pull through so there are 2 loops on your hook, insert hook into next st, yarn over and pull through so there are 3 loops on your hook, yarn over and pull through all 3 loops.
Gauge:
Please check your gauge to obtain stated size and to ensure yarn quantities stated are achieved. If your swatch is too small, try going up a hook size to obtain gauge. If your swatch size is too big try going down a hook size to obtain gauge. Of course, gauge isn’t imperative as this is not a garment that is worn. However, if you do not check your gauge, you may need more yarn than stated and your lovey may turn out smaller or larger than stated.
Round 2: 2dc in next st and in each st around (12dc / 12sc )
Round 3: *2dc in next st, dc in next st* repeat around (18dc / 18sc )
Round 4: *2dc in next st, dc in next 2 sts*repeat around (24dc / 24sc )
Round 5: * 2dc in next st, dc in next 3 sts *repeat around (30dc / 30sc )
Round 6: *2dc in next st, dc in next 4 sts* repeat around (36dc / 36sc )
Round 7: *2dc in next st, dc in next 5 sts* repeat around (42dc / 42sc )
Round 8: *2dc in next st, dc in next 6 sts* repeat around (48dc / 48sc )
Round 9 – 13: dc in each st around (48dc / 48sc )
Round 14: *dc2tog, dc in next 6 sts* repeat around (42dc / 42sc)
Round 15: *dc2tog, dc in next 5 sts* repeat around (36dc / 36sc )
Round 16: *dc2tog, dc in next 4 sts* repeat around (30dc / 30sc )
Round 17: *dc2tog, dc in next 3 sts* repeat around (24dc / 24sc )
Round 18: *dc2tog, dc in next 2 sts* repeat around (18dc / 18sc )
Now tightly stuff head with safety toy filling
In Back Loops Only (BLO)
Round 19: *dc2tog, dc in next st* repeat around (12dc / 12sc )
Fasten off leaving a long tail. You will use this to sew the head to the blanket.
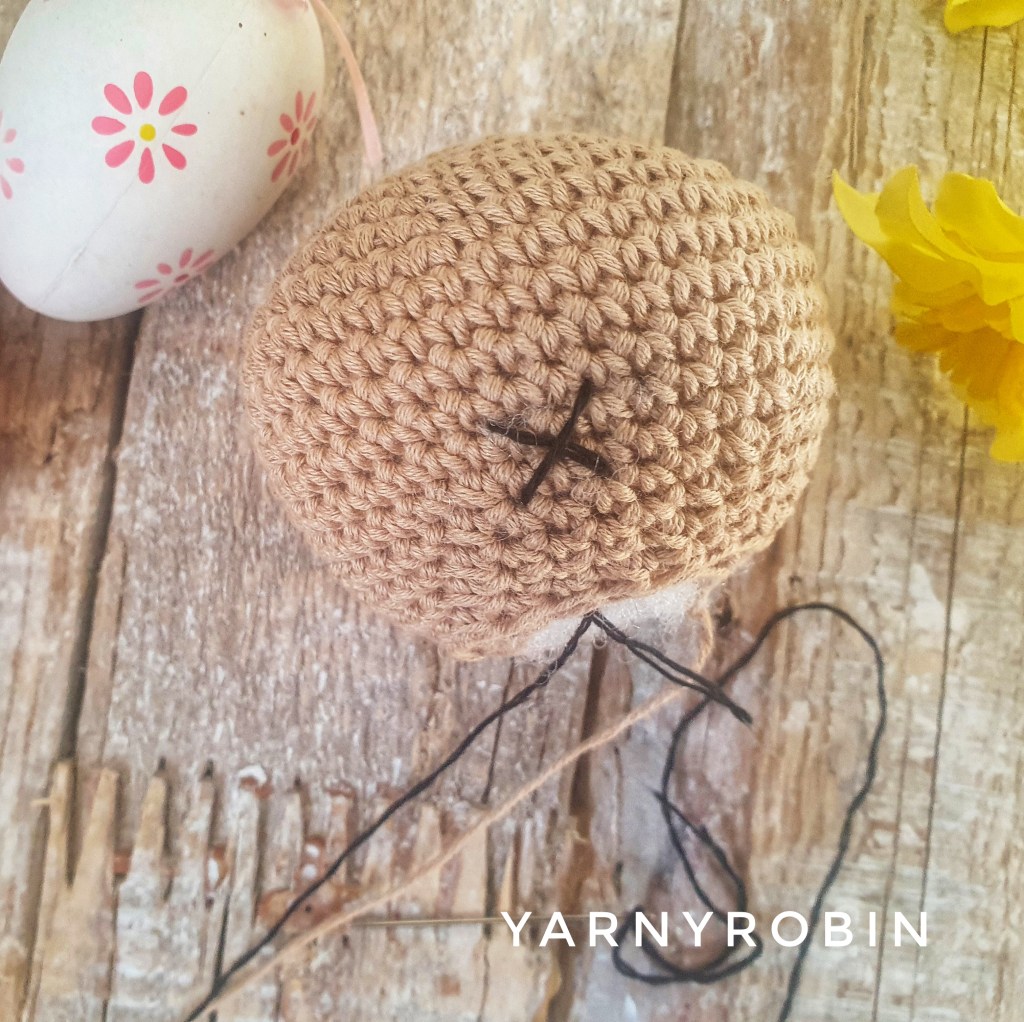
How to embroider the face
Take a long length of embroider floss and split off 3 strands by holding them and pulling down the whole length. When making your stitches do not pull them to tight, a gentle tension is all that is needed. I embroidered the face with one long length of floss, to do this pull your stitches through slowly, to prevent tangling and /or knotting.
Nose:
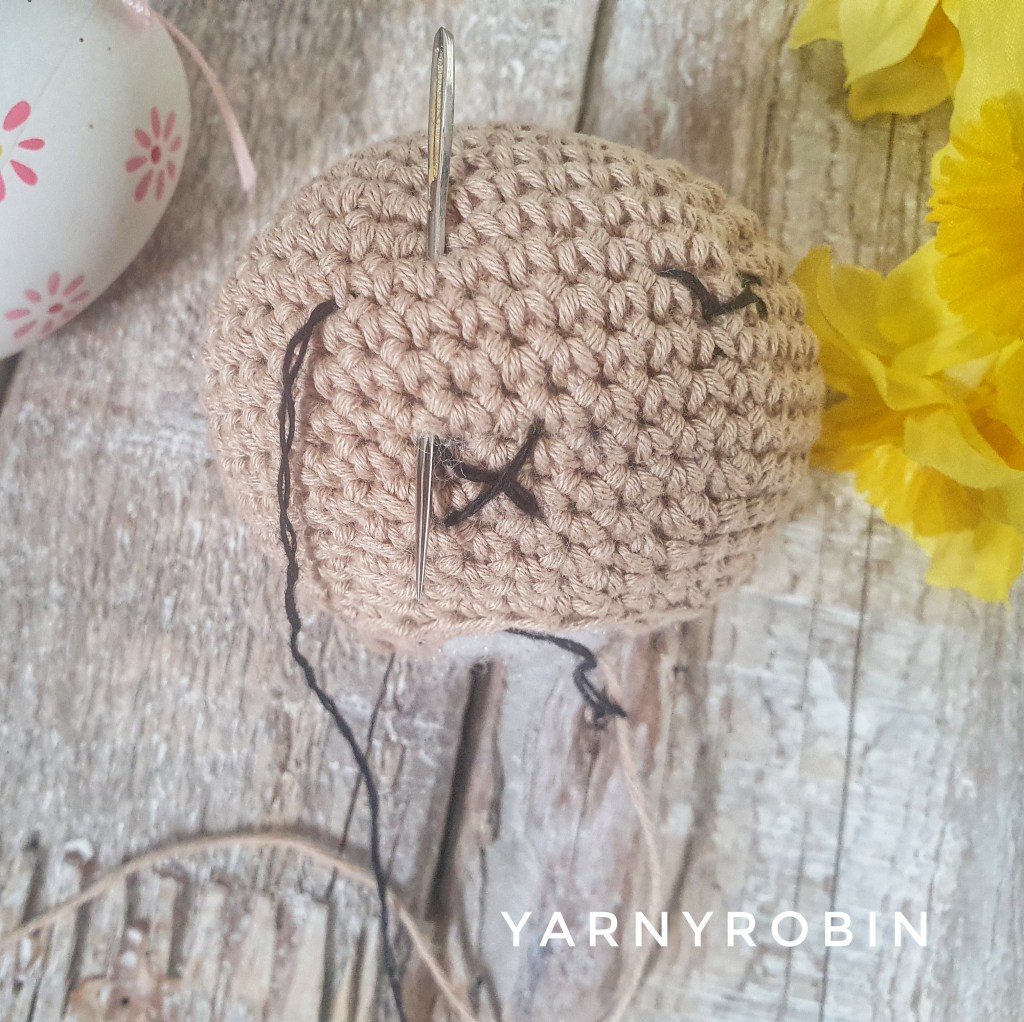
Start by threading your sewing needle and inserting it through the bottom of the head and leaving a small tail visible hanging from the stuffing. Exit needle on row 6 from the bottom of the head, insert needle diagonally into row 8. I made my diagonal stitch over 3 dc’s width. Exit needle in row 6 under previous entry point and insert at opposite diagonal. Do not fasten off move straight onto the eyes.
Eyes:
Insert pin to mark where the eye will start, above and inline with the outside of the nose on the right side (facing you) with the floss still on your needle exit in st marked by your needle on row 11, insert needle in a gentle diagonal on row below, exit needle horizontally on same row about 2sts across, insert needle at point of last entry (back stitch), exit needle in a gentle diagonal on outside edge of eye on row above the horizontal st just made, exit needle below lid a ¼ of the way from the outside of eye and insert needle in a straight line to eye lid to make first eyelash. Exit needle below outside edge of lid at a slight angle and insert needle at outside edge of eye lid to make final eye lash. Do not fasten off.
Exit needle at point for second eye and repeat process. Finish by bringing floss through the bottom of the head and tie with starting tail and trim ends.
Round3: *2dc in next st, 1dc in next st* repeat around (18dc / 18sc )
Round 4 – 7: dc in each st around (18dc / 18sc )
Round 8: dc2tog, dc in next 14sts, dc2tog, (16dc / 16sc )
Round 9: dc2tog, dc in next 12sts, dc2tog (14dc / 14sc )
Round 10: dc2tog, dc in next 10sts, dc2tog (12dc / 12sc )
Rounds 11 – 14: dc in each st around (12dc / 12sc )
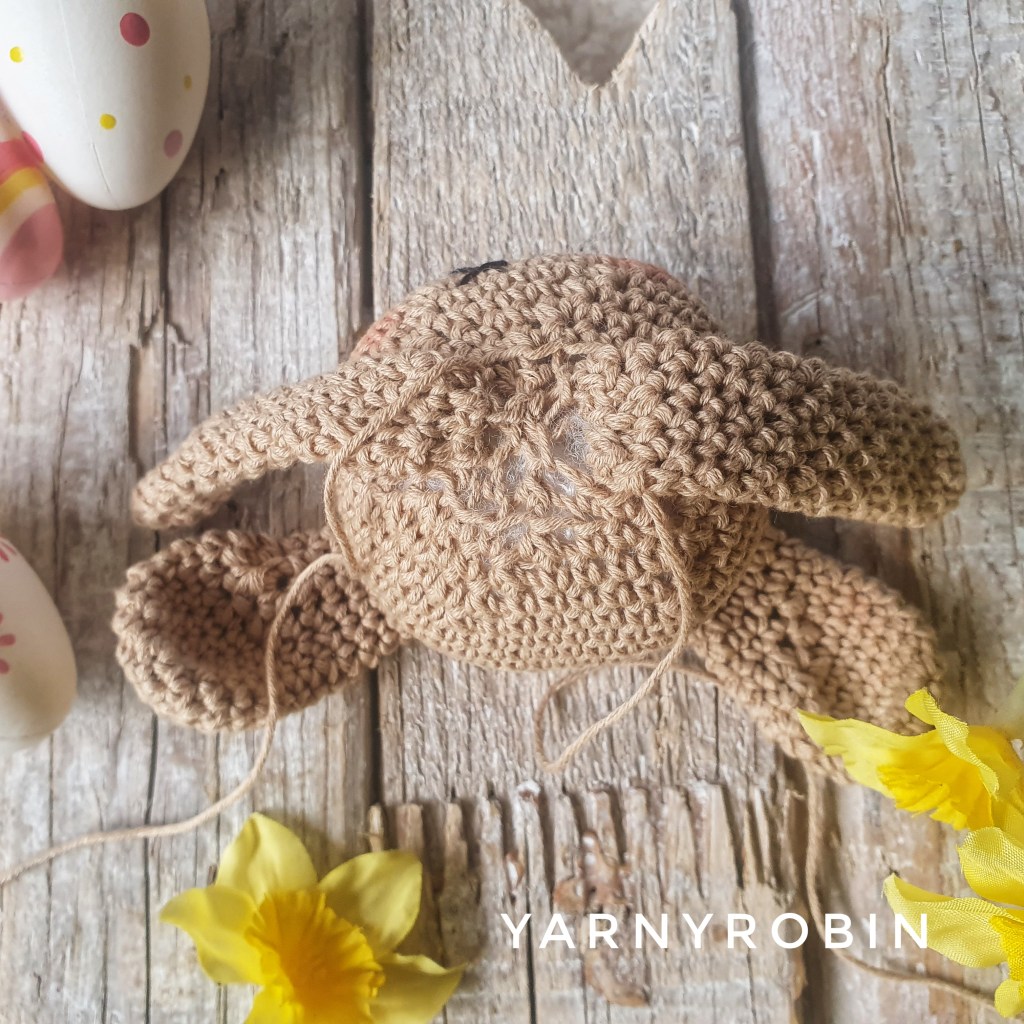
Round 15: dc2tog all around (6dc / 6sc ) Fasten off and leave along tail, now with a darning needle attach the ears securely to the head by sewing along both the outer side and under side of the ear, catching under the stitches of the head and the ear. You may find it helpful to pin the ears into position before you sew them on. This helps you to decide on a good position and will prevent lopsided ears! Once competed weave in any loose ends.
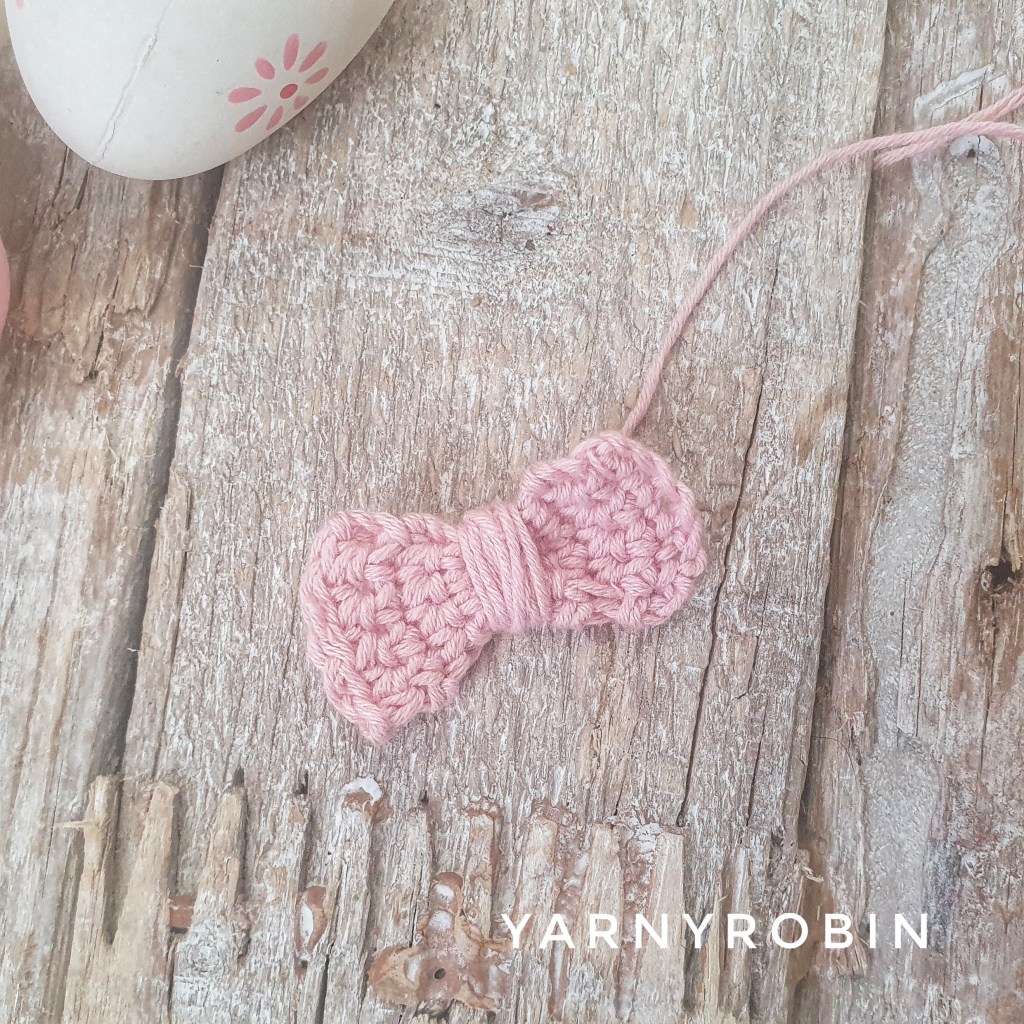
Bow
With pink cotton
Ch 6
Row 1: dc in 2nd ch from hook and in each ch along, turn (5dc / 5sc )
Row 2 – 10: dc in each st along, turn (5dc / 5sc )
Fasten off and weave in ends. Take long piece of cotton and tie a knot in the middle of bow, snipping short the shorter tail. Now wrap long tail several times around the middle of the bow taking care to cover the tail you snipped short. To finish take the cotton wrapped around the bow and thread needle. Finish by taking needle through the wrapped cotton on the backside and knot, leaving a long tail. Now with a darning needle, securely sew bow to the head and weave in any loose ends.
Now with a small amount of blusher on a brush add two little rosy cheeks to the face.
Fasten off leaving a long tail. With a darning needle attach to underside of head securely by sewing along both the outer side and under side of the arm, catching under the stitches of the head and the arm. You may find it helpful to pin the arms into position before you sew them on. Finish by sewing criss cross the bottom of head to close the gap.
Blanket
Ch 6, slst to 1st ch to form a ring
Round 1: Ch3 (counts as tr) 15tr into ring, join with a slst to top of ch3 (16tr / 16dc )
Round 2: ch3 (counts as a tr) tr in same space, ch1, 2tr in same space, *ch1, miss a st, 2tr in next st, ch1, miss a stitch, (2tr in next st, ch1, 2tr in same space)* repeat * – * twice, ch1, miss a st, 2tr in next st, ch1, slst to top of ch3, slst to corner space
Round 3: ch3 (counts as a tr) tr in same space, ch1, 2tr in same space, *ch1, 2tr in next ch space, ch1, 2tr in next ch space, ch1, (2tr in next ch space, ch1, 2tr in same space)* repeat * – * twice, ch1, 2tr in next ch space, ch1, 2tr in next ch space, ch1, slst to top of ch3, slst to corner space
Rounds 4 – 8: continue rounds as round 3, you will have an extra set of 2tr, ch1 along each side in each row.
Ie/ continue with corner spaces = 2tr, ch1, 2tr, ch1
Sides = 2tr, ch1
Rounds 9 – 14: Continue as rounds 4 – 8 but add 2ch in corner spaces
Ie/ continue with corner spaces = 2tr, ch2, 2tr, ch1
Sides = 2tr, ch1
Round 15: ch2 (counts as htr), htr in same space, ch2, 2htr in same space, htr in each st and in each space along edge
Corner space = 2htr, ch2, 2htr
Fasten off and weave in ends
Now with the long tail from the head, thread darning needle and position head in centre of blanket with the face pointing to a corner of the blanket (on the diagonal) sew securely all around utilising the front loops from round 19 of head. You will also need to sew blanket to the arms also. I like to sew around the head twice just for added security.
Thank you so much for crocheting along with me — I hope you enjoy making this pattern.
If you enjoyed this pattern, you may also like my crochet teether patterns. They are perfect for using leftover yarn. You can create a complete handmade baby gift with them.
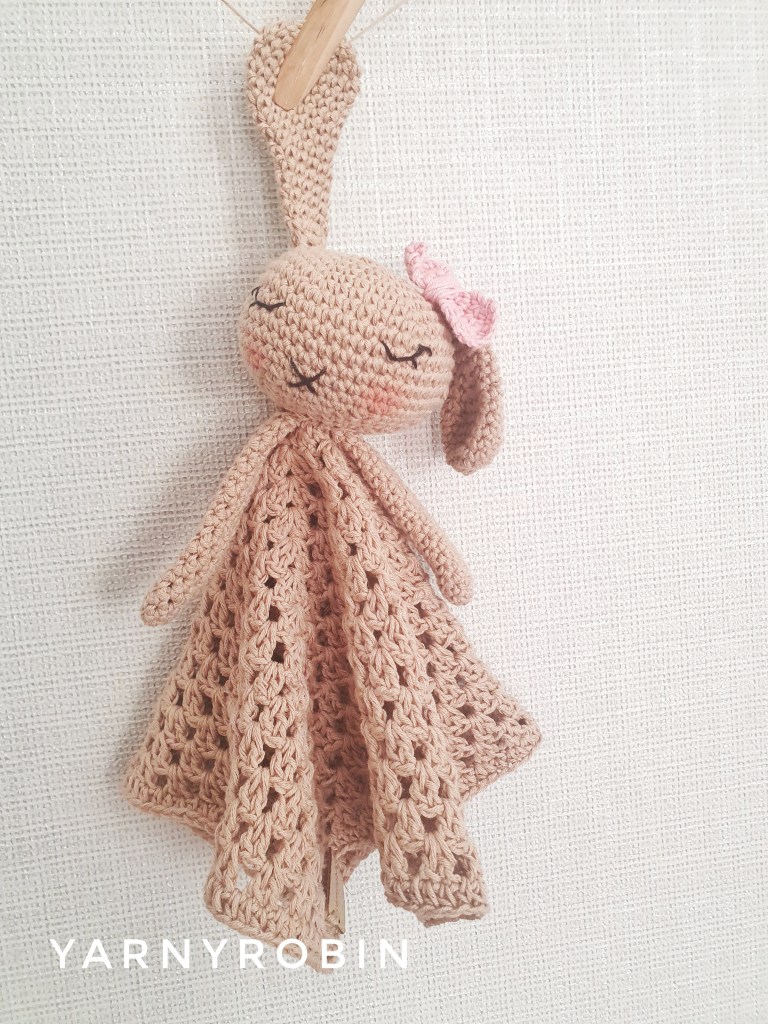
And if you want to save this pattern for later why not use the image below to save to your Pinterest board
Isn’t she lovely, isn’t she wonderful. Isn’t she lovely made from love
Lionel Ritchie
Let me start by saying I simply loved hooking every stitch of her. Isn’t she just adorable. I made her for a lovely sidekicksista aka a beautiful crafty friend. I can’t wait to hook another crochet angel. I would love to gift some more and make one for myself too.
The pattern is certainly not for beginners and it took a little deciphering, however it is a beautiful pattern that did not disappoint. I have never hooked with such a small hook before, a 2.5mm! That also took a little practice. The pattern states to hook with a fingering weight yarn held double stranded and gave a lovely denseness to the fabric of the doll.
I love everything about this angel, from her crazy curly hair to her button fastened limbs and little blush cheeks (which were ridiculously good fun to paint on)