Just wanted to drop in and let you know that I am almost done on the newest tea cosy in the Grandma Collection; which means that I will release the pattern on Tuesday. I am so very excited about this one, it’s simply beautiful. Here’s a sneak peak…
This photo was taken a little while ago…I can’t wait to show you! Have a great weekend
2017 has certainly had it’s ups and it’s downs. I am pleased to report that it is ending on an up. I have really enjoyed perusing back through my posts and have picked out my favourite from each month in way of reviewing 2017 here at the nest. Before we begin I just wanted to say a huge thank you to all of my seasoned readers, to those of you that have recently discovered this little corner of yarniness and to you if you have just stumbled across this post by accident.
Without all of you, I would just be here, hooking and writing and hooking some more; annoying my family by taking photo’s every 2 minutes and whilst that would be ok, it is so much more fun with you dropping by and saying hi every once in a while. You encourage me and inspire me to keep blogging about all things yarny and for that I am very grateful.
So grab a glass of prosecco or the bottle! or maybe a cuppa if you prefer and lets look back at 2017 here at the nest.
January 2017
crochet in bed.
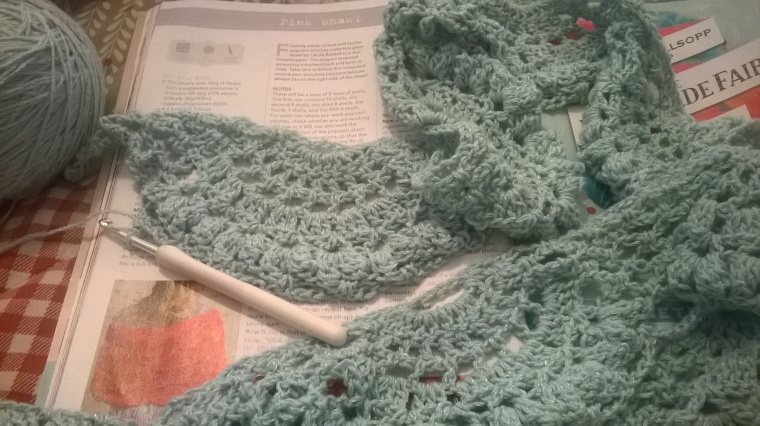
2017 began with shawls, having completed x2 virus shawls I had the bug for more. This‘ is the ‘pink shawl’ by Cecile Balladino, and it is still one of my favourites although I still can’t call it the ‘pink shawl!’
February 2017
I had so much fun doing the yarn love challenge during February. A post a day was a challenge, but I relished the daily prods to share.
I’d love to do this again in 2018.
Here is a little link to my favourite #yarnlovechallenge post and another favourite… well I couldn’t just pick one!
March 2017
Sunday Shawl hooking
Another month another shawl…This time the beautiful Sunday Shawl by Alia Bland. This project proved to be the perfect way to jump into spring, maybe it was those delicious pastels against the warmth of the grey.
April2017
Alpaca cake…
A milestone birthday, an alpaca birthday cake, and a graduation. I couldn’t have imagined a happier set of celebrations. I was so blissfully unaware of the catastrophe about to beset us.
May 2017
Interlocking stitch
At least I got some crochet in whilst juggling hospital trips and the absence of a critically ill Mr R…crochet is not only my joy it’s my default when things get tough…my sanity.
This Baby Wilmer blanket, filled me with hope, a new life just entering this world, whilst life at the nest felt as if it had paused in some horrific nightmare.
June 2017
yarnbomb
Mr R had prayerfully turned a corner and our healing had begun, it was time for some fun and this yarny gate installation celebrated that!
I fell so in love with these adorable C2C (corner to corner)hearts that I just couldn’t stop hooking them! I couldn’t!!
They fell off my hook so quickly that before I knew where I was I had enough for a blanket of hearts.
I have to confess that I still need to border this lovely…yes it is still a PHD (project half done). In my defense I just can’t decide what colour to border it in!
September 2017
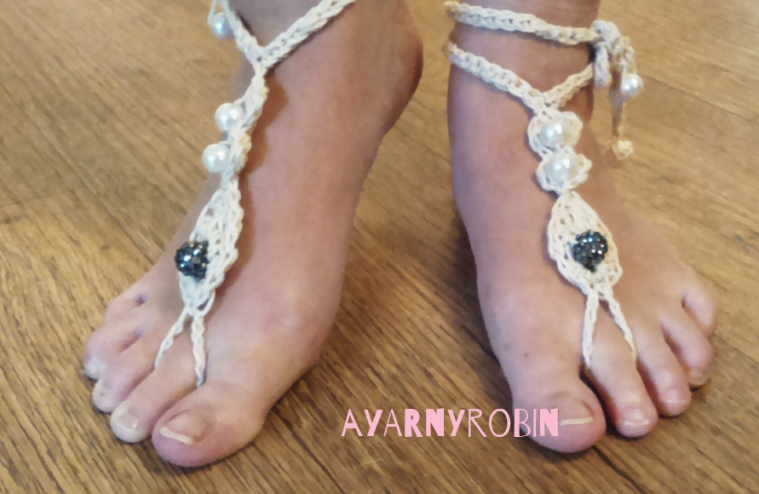
Corfu – Barefoot sandals
September felt much more ‘normal’ although I don’t know why…I spent a large majority of it bobbing around on a lazy river being drenched in golden sunshine on the amazing island of Corfu. I didn’t forget about you though…look I made these barefoot sandals by the pool… here’s the link to the free pattern just in case you fancy a pretty 20 minute hook up!
Finally, the release of my newest tea cosy in the Grandma Collection…the Grandma Dot tea cosy. I don’t know why this took me so long to publish but it did. Anyway, thank you for your frankly very kind feedback about this free pattern…there will be another one coming very shortly in the new year.
December 2017
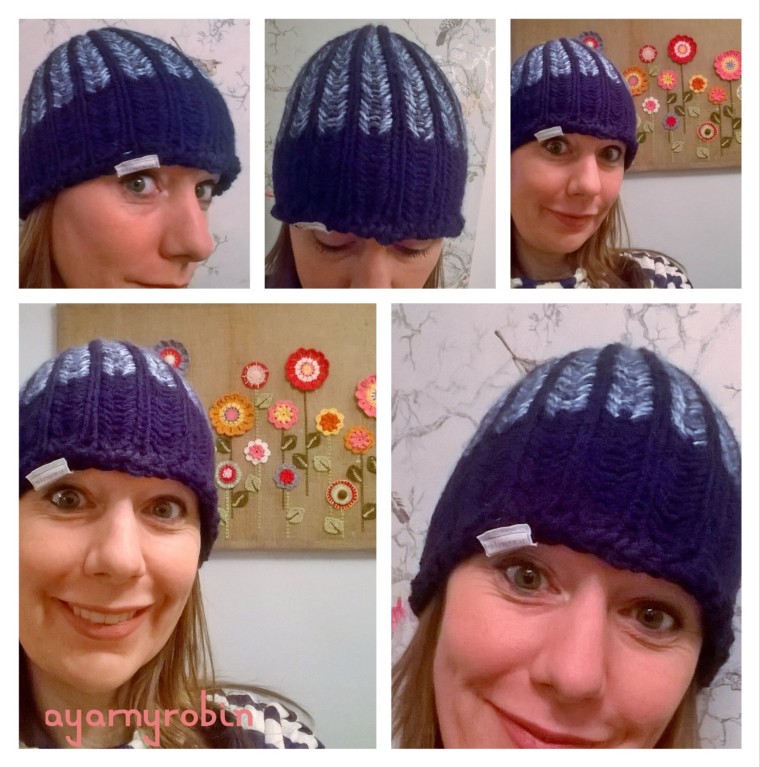
loom knitted beanie…
I told you 2017 ended on an up…the hat fit!
Enough said.
Thank you 2017 for the joy, for the triumphs, for the challenge and even for the heartbreak…for all the folk that have stood alongside me whether that has been for a few minutes, a few days or for those lifers that are always cheering me on… you know who you are.
Finally, thank you once again to you, for riding this journey with me… I think you are amazing and want to wish you all a very blessed and extremely yarny 2018…
I just wanted to bob in and out quickly to let you know I did it…I got the hat done and this time it fits!
What do you think?
loom knitted beanie…
I am really pleased with it!
I used Stylecraft Special Chunky in Midnight and King Cole Tonal Chunky in Misty Teal this time and this seems to have made all the difference in terms of size and stretch. It still needs to stretch a bit…it is an only just fit, but I am hoping it will stretch a little more as it gets worn. The hats I have made previously have always stretched a bit when worn.
If you are interested in the pattern details the links to such can be found in this post. I modified the brim slightly by adding a row of double crochet to the bottom of the brim once I had taken it off the loom. I found the edge curled outwards otherwise and didn’t lie flat. I think this may have something to do with my cast on technique and being a novice loom knitter!
So there it is… just in time for Christmas!
I would recommend this pattern if you are still outstanding a hand made gift for Christmas…4 hours and I had this knocked out, so there is still time!
Talking of which if you do celebrate this festive season then I wish you a peaceful and very happy Christmas. If you are not celebrating then I wish you a happy and crafty weekend. I will try and pop by before the new year, I’m sure I will feel the need to escape the madness at some point.
Thank you so much for your hat suggestions, I have really enjoyed looking at them and reading your thoughts about them. In the end I went with a loom knitted hat, inspired in part by a post I read by Kagibari ami unravelled and a forgotten find in the back of a wardrobe.
Do you remember this?
No!
Well if I am honest, I had forgotten about it too and seemingly abandoned it in the back of a wardrobe.
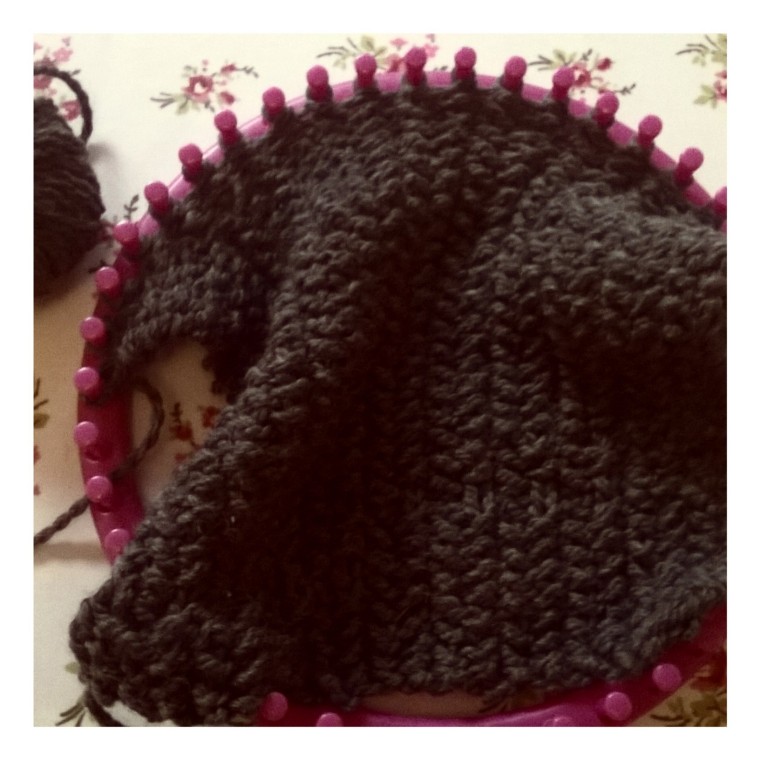
This was my first dabble with loom knitting and on closer inspection, it was a bit holey and I could not remember what pattern I was using or where I had got up to. So after falling into the abyss of you tube and loosing myself for almost a whole day, I set my beating heart upon this pattern
I unravelled the yarn from my loom, and began again… only this time I was making a beanie hat for Mr. R.
Oh! how I loved knitting and purling, even if I did have to rip it back 3 times…yes 3 times!!!! to start over and make an emergency dash to the habadashery shop when I snapped my loom pick as my tension was too tight!
When I saw those knitted stripes in perfect formation I didn’t care that my fingers hurt a little or that I had ceased all work on my Charming Harbour Blanket for my new love.
I soldiered on until the end, enjoying every knit stitch and every purl stitch until I cast off and realised…
this beautiful beanie would not be gracing the fair head of Mr R at all because it was just too small…
but it did fit my little birthday Robin and doesn’t he look dandy in it?
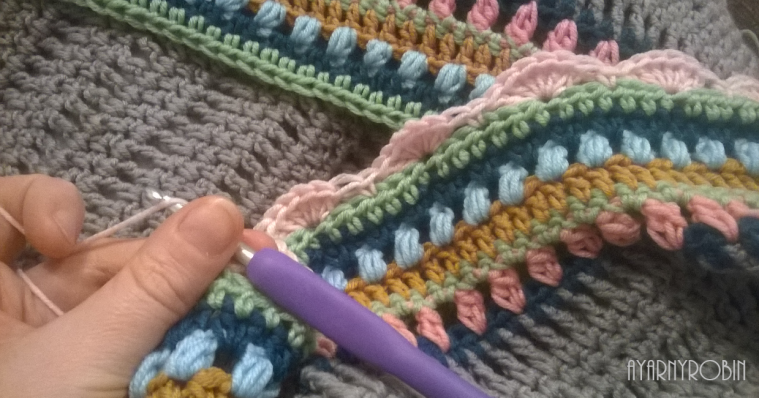
After a slow start I am finally making steady progress on my Charming Harbour blanket.
In the beginning…
I have found myself flitting from one project to the next lately, but I am getting at least a couple of rows hooked each evening now; which is reassuringly comforting as the pattern is so familiar.
Charming Harbour Blanket in the making
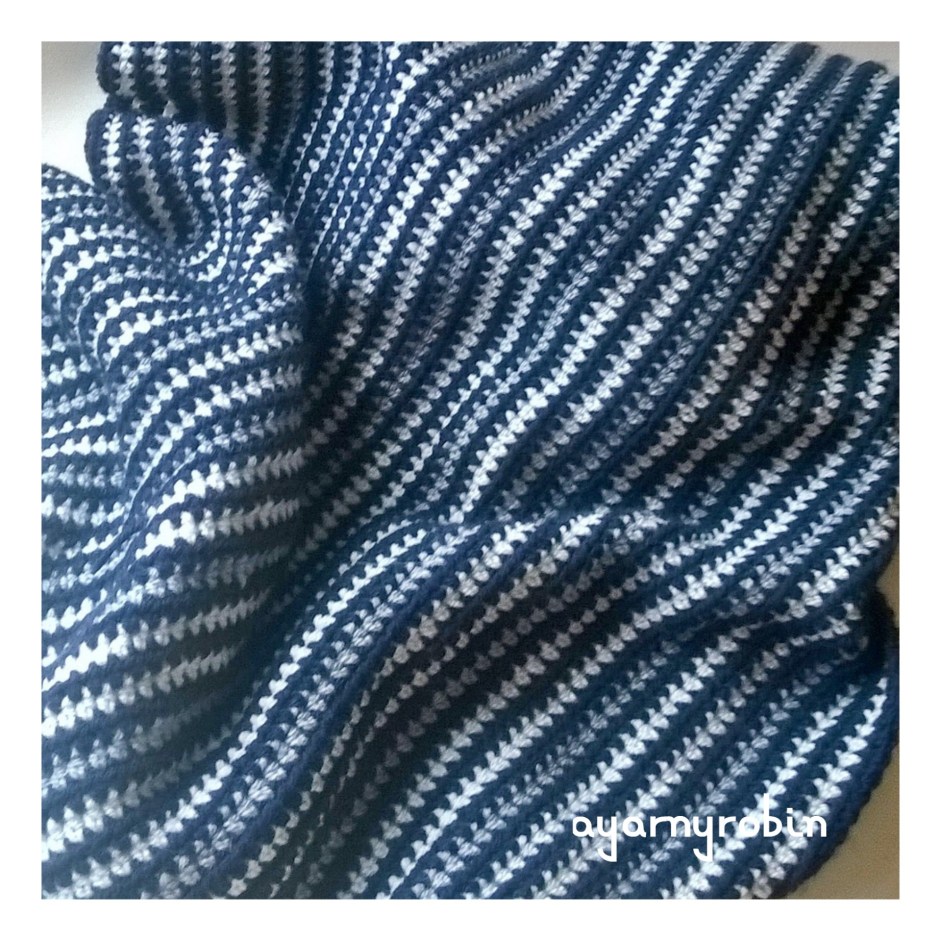
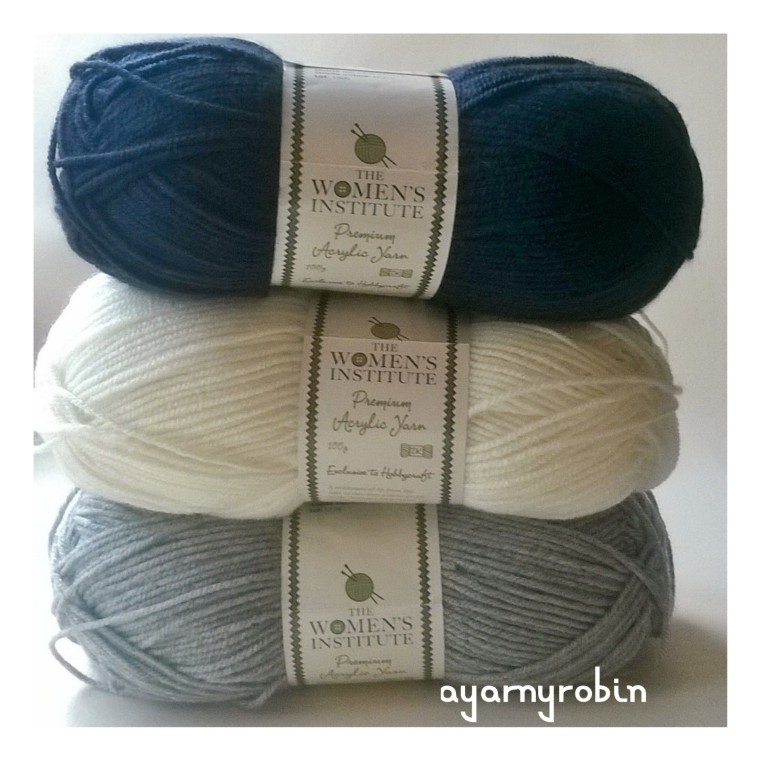
I am enjoying the simplicity of the colourway also. A trio of sober colours, which formally stand to attention and which make this blanket so wonderfully handsome and so beautifully striking.
The yarn has also proven to be a joy to hook with. The yarn is from the Women’s Institute…you can read my review of it just here.
I am totally thrilled with this blanket’s reversibility which was entirely serendipitous. The right side is darker
Charming Harbour blanket in progress…
and the back (I can’t call it the wrong side…because it is not wrong at all!) is lighter altogether.
I have not been disciplined in weaving in the ends as I go, so I must make more effort else I will have a mammoth task at the end!
What do crochet, senior moments and mud have in common?
Well the answer is me!
It has been a looooong week…let’s just say that. Yesterday I was the Duty Health Visitor in the office, we take it in turns to triage calls and sort out various problems…I won’t bore you with the detail. I took a call from a worried parent and said I’d get the Duty Health Visitor (which was me…I just forgot!!) After several enquiries amongst my colleagues I was gently reminded (actually,ribbed to the max) it was me. I returned to the phone and in a posher voice said Duty Health Visitor, how can I help you?
This was followed later in the day when I received an email from my GP asking me to attend a well woman check (for women over a certain age)…sigh!
Then…yes there is more! I had to ask to borrow my Mom’s glasses for the very first time ever to read a food packet.
Oh my!…little signs.
Another feature looming large in my week has been mud…lots of mud. I have become a rugby mamma and I need help! How on earth do I get this….erm…earth out of his kit.
Proud of my boy…he sure can tackle!
Please let me have any top tips for getting rid of all this mud!
I also need your crochet help…pattern recommendations. I want to make a few beanie style hats for Christmas, male and female. I have a few, but they always seem to come off my hook too large or I am always a little disappointed with them. Can you wholeheartedly recommend a superb pattern? I would be so very grateful.
For a dk weight the yarn strand is divinely round, but all in a good way. I’m hooking my Charming Harbour blanket in this yarn and let me tell you that it is hooking up into a seriously squishy comforter indeed.
The yarn slides well over my hook, it feels cozy and comfortable on my skin and has not split or frayed one little bit.
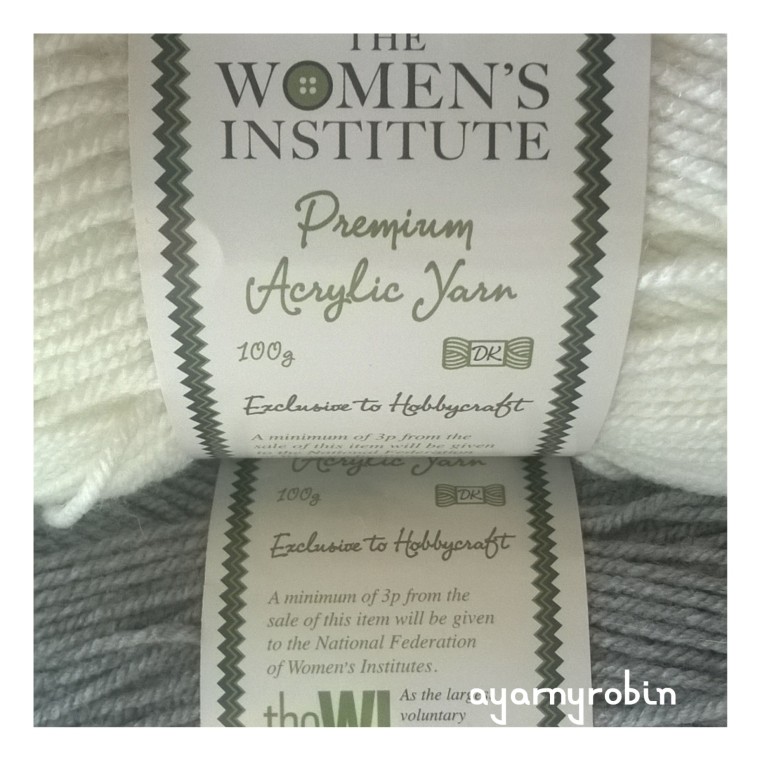
It’s 100% premium acrylic so is affordable, washable and dryable and very easy to care for. The ball band tells me there is 250m in yarn length for a 100g ball and is exclusive to Hobbycraft.
The Women’s Institute is the largest women’s organisation in the UK and champions all sorts of campaigns such as gender pay gap to midwifery shortages, climate change and food waste.
On the down side the colour range is basic to say the least, which didn’t matter in the slightest for my Charming Harbour Blanket, which is looking very dapper in a trio tone.
Charming Harbour blanket in progress…
This could be a limitation for my more usual hook ups which consistently involve numerous colours…however, all in all I’m smiling with this yarn.
I have had some lovely comments and thought putting the pattern for the flower on a separate post might be useful….even though it is so simple, you could hardly call it a pattern!
Maybe inspiration may be a better phrase.
Any how this is what I did.
To make a dotty little flower, ch4, slst to 1st chain to make a ring.
Ch 2 (counts as a hdc) x9 hdc into ring, slst into top of starting ch and fasten off to finish.
To create a real field of flowers cross stitch some centres, add beads to others and save some for a french knot centre. When using beads, just make sure they have large enough centres for the yarn to pass through!
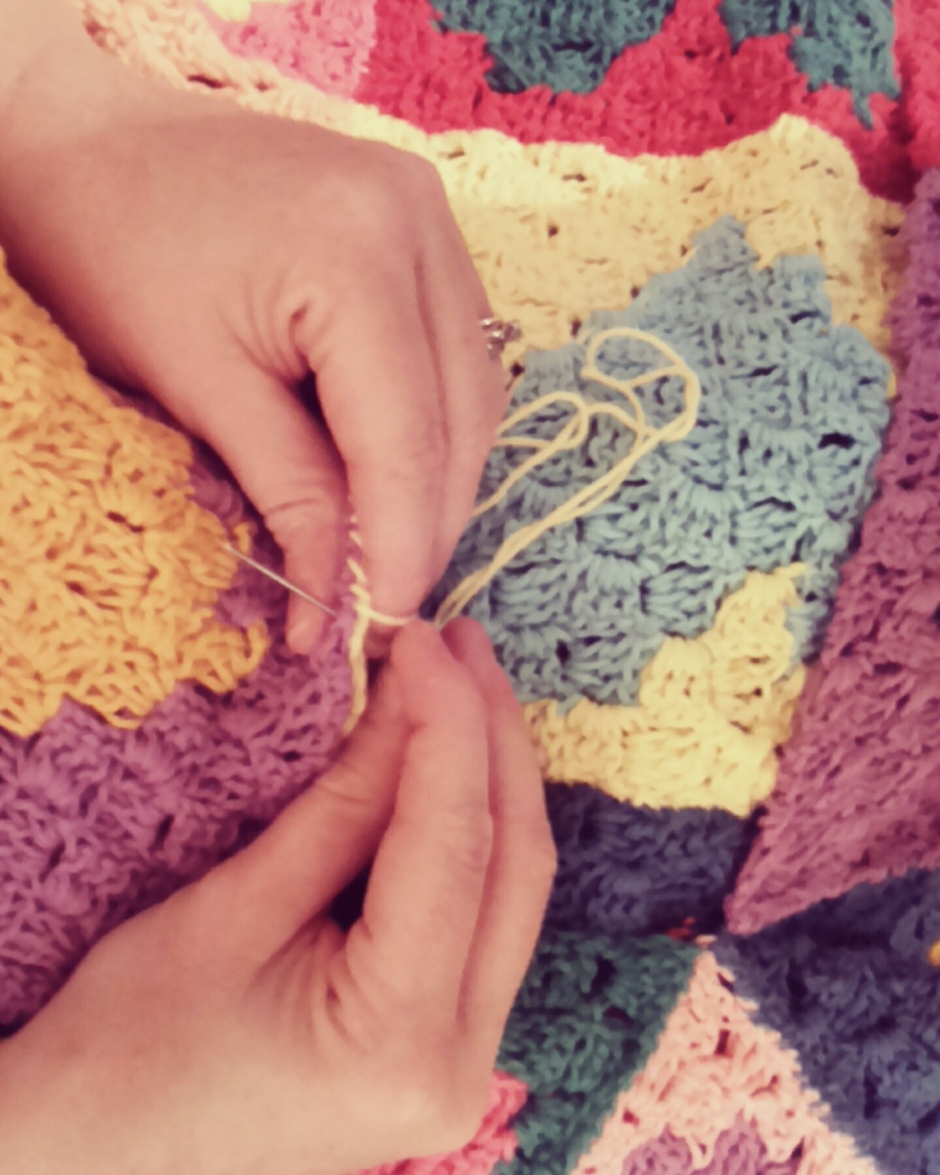
I used a cheat method to create the french knot centre by pulling a piece of yarn from the back of the flower to the front and then tying a knot x10 in the yarn in exactly the same place to make a large knot.
To finish thread the other tail of the yarn from the front to the back, so both tails are now at the back of the flower, tie to secure and trim tails short.
et voila!
A dotty little flower ready to be sewn or glued or attached to whatever your heart desires.
This is the third tea cosy in theGrandma collection,designed with simplicity and sweetness. The top down design means this pattern makes for a quick hook up. Ideal for beginners and sure to guarantee a perfectly sweet cosy for your teapot.Dedicated to the inspiration that was‘Nanna Dot’
The pattern makes a tea cosy that fits a standard 4 cup teapot.
I used less than 50g of Stylecraft special dk yarn in colourways cream and raspberry which I used as my base colours. Please note that I have used a different colour yarn in the photo tutorial below.
I also used scraps of stylecraft special dk yarn in: lipstick, saffron, meadow, fondant, gold, shrimp, lime, khaki and grape.
You will also need a darning needle, a selection of beads with a centre hole wide enough for the dk yarn to be threaded through, a pair of scissors and x4 stitch markers (or small safety pins or scraps of different colour yarn). The use of a hot glue gun is optional, flowers can either be glued into position or stitched.
Stitches used in this pattern refer to English terminology, however a conversion to US terminology is provided in brackets.
Ch – chain stitch
slst – slip stitch
hdc– half double crochet (half single crochet)
You will also need:
a 4mm crochet hook
Ok, here we go…
Using the raspberry yarn Ch 4
Join with a slst to form a ring.
Row 1: Ch1 (does not count as a st), 6hdc into ring,
finish with a slst in 1st hdc. (6hdc).
Row 2: Ch1, (does not count as a st) 2hdc in same space, 2hdc in each st around, finish with a slst in 1st hdc. (12hdc).
Row 3: Ch1 (does not count as a st), 2hdc in same space, 1hdc in next st, *2hdc in next st, 1hdc in next st* . Repeat * – * to end, finish with a slst in 1st hdc. (18hdc).
Rows 4: Ch 1 (does not count as a st), 2hdc in same space, 1hdc in next 2 sts, *2hdc in next st, 1hdc in next 2 sts*. Repeat *-* to end,finish with a slst in 1st hdc. (24hdc).
Row 5: Ch1 (does not count as st), 2hdc in same space, 1hdc in next 3 sts, *2hdc in next st, 1hdc in next 3 sts*. Repeat *-* to end, finish with a slst in 1st hdc. (30hdc).
Row 6: Ch 1 (does not count as a st), 2hdc in same space, 1hdc in next 4 sts, *2hdcin next st, 1hdc in next 4 sts*. Repeat *-* to end, finish with a slst in 1st hdc. (36hdc).
Row 7: ch1 ( does not count as a st), 1hdc in same space and in each st around, finish with a slst in 1st hdc. (36hdc).
Row 8: ch1 (does not count as a st), 2hdc in same space andin each st around, finish with a slst in 1st hdc. (72hdc).
Row 9 and 10: Repeat row 7, finish with a slst in 1st hdc. (72hdc).
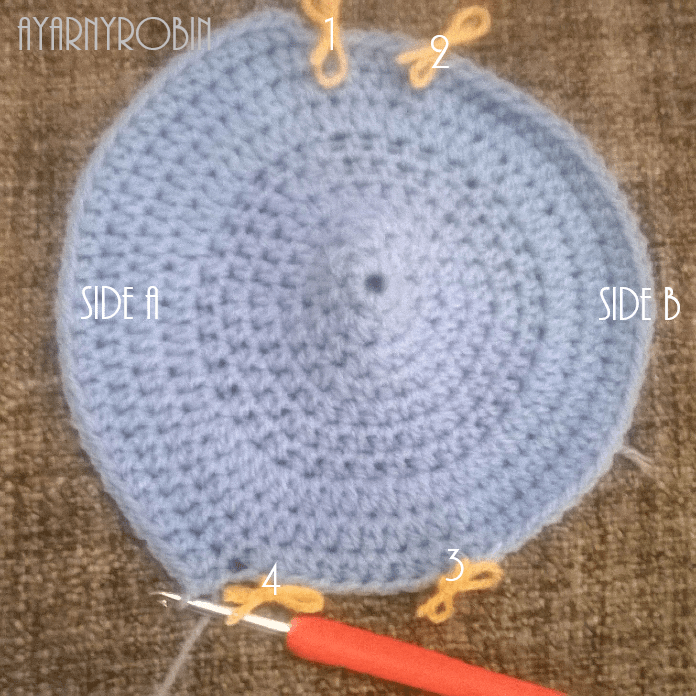
You should have something that is starting to look a bit like a flying saucer! This is a good point to check your measurements with your intended teapot. Place your hooked disc on top of your teapot. You want the edges of the circle to be approx. 1cm from the handle of the teapot.
To mark out handle and spout holes, simply take x4 st markers (or cut short pieces of yarn in a different colour as I did) and place/ tie first marker in the st behind where you joined last row.
Counting backwards (or to the right)miss x3 sts and place/tie second marker in next st. This marks out your handle.
From this second marker count backwards (or to the right) 30sts and place 3rd marker in the next st (31st st). Return to the first marker and count forwards 30 sts (or to the left) and place 4th marker in the next st.
You have now marked out the handle and spout positions for your cosy. Marker 1 and 2 indicate the handle space and markers 3 and 4 indicate the spout space.
The next stage of the cosy is to construct the sides. So, for the purposes of the pattern these will be referred to as side A (between marker 1 and 4) and side B between marker 2 and 3).
Side A row 1: In Cream yarn Ch 1(does not count as a st)* 1hdc in same st and in each st along to marker/tie 4, ch1, turn*
Side A row 2: repeat Side A row 1 returning to marker/tie 1.
Repeat (side A row 1 and side A row 2), to fit the height of your teapot. I completed 15 rows in total. Fasten off.
To complete side B, join cream yarn in stitch to the left of stitch marker number 2
repeat Side A instructions between markers 2 and 3. Fasten off and sew in all loose ends.
Remove stitch markers.
Place on your teapot to check the fit.
Next, using a darning needle sew sides A and B together from the bottom of the cosy to below the spout (approx. 2 rows) and on the handle side from the bottom of the cosy to below the handle.
Now for the creative part… making ‘dotty little crochet flowers’. I made x4 flowers in each of the following colours:
lipstick, fondant, grape, gold, raspberry, saffron and shrimp
A dotty little flower
To make a ‘dotty little flower’ ch4, slst to 1st chain to make a ring. Ch 2 (counts as a hdc) x9 hdc into ring, slst into top of starting ch and fasten off to finish.
To create flower centres you can cross stitch the centre, add beads and create a french knot centre.
I used a cheat method to create the french knot centre by pulling a piece of yarn from the back of the flower to the front and then tying a knot x10 in the yarn in exactly the same place to make a large knot.
To finish thread the other tail of the yarn from the front to the back, so both tails are now at the back of the flower, tie to secure and trim tails short.
Secure your dotty little flowers to both sides of the cosy. You can sew them into place or secure them with hot glue! Then using green yarns sew simple stems and leaves using a back stitch to finish. I used stylecraft special DK yarn in meadow, khaki andlime.
And there you have it…a sweet dotty flower tea cosy to keep your brew warm.
xxxxx
I REALLY HOPE YOU HAVE ENJOYED MAKING THIS PATTERN AS MUCH AS I HAVE ENJOYED CREATING IT FOR YOU. IF YOU ARE NOT SURE ABOUT SOMETHING OR NOTICE ANY ERRORS PLEASE SHOUT UP. EQUALLY PLEASE FEEL FREE TO SHARE YOUR DOTTY FLOWER CREATIONS IN THE COMMENTS BELOW oron social media using the hashtags #ayarnyrobin or @yarnyrobin…I WOULD LOVE TO SEE THEM!


")


 No!
No! 


 this beautiful beanie would not be gracing the fair head of Mr R at all because it was just too small…


 Another feature looming large in my week has been mud…lots of mud. I have become a rugby mamma and I need help! How on earth do I get this….erm…earth out of his kit.


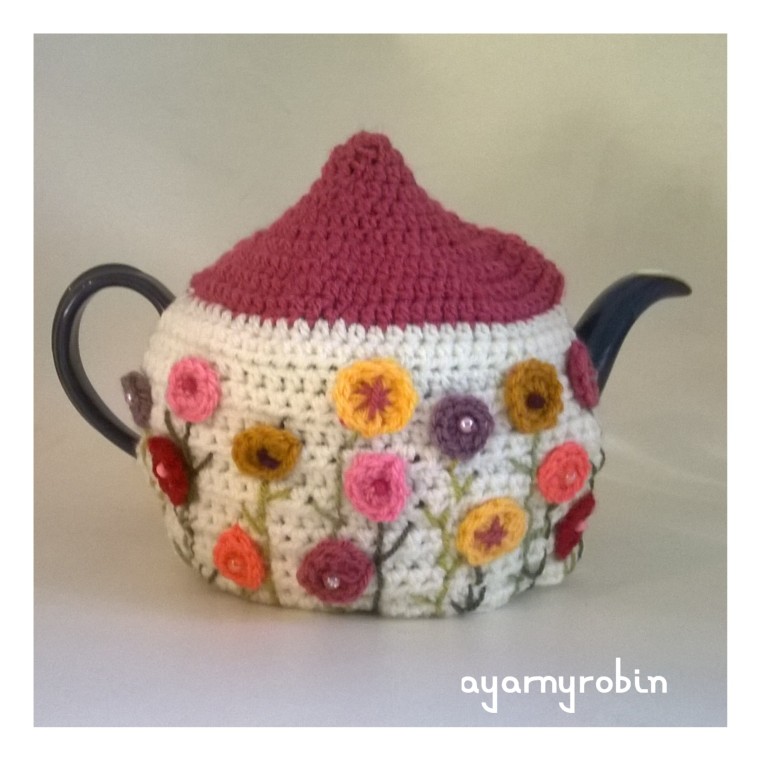
 The ‘Grandma Dot Tea cosy’ which is part of my Grandma Collection.

 et voila!


 You should have something that is starting to look a bit like a flying saucer! This is a good point to check your measurements with your intended teapot. Place your hooked disc on top of your teapot. You want the edges of the circle to be approx. 1cm from the handle of the teapot.
 To mark out handle and spout holes, simply take x4 st markers (or cut short pieces of yarn in a different colour as I did) and place/ tie first marker in the st behind where you joined last row.