
Bobble Edge Tutorial
WARNING….This is the most fun edging ever and may become addictive!!

Unfortunately, this is not my own design, I have seen it on several projects and learnt the technique from this blog here.
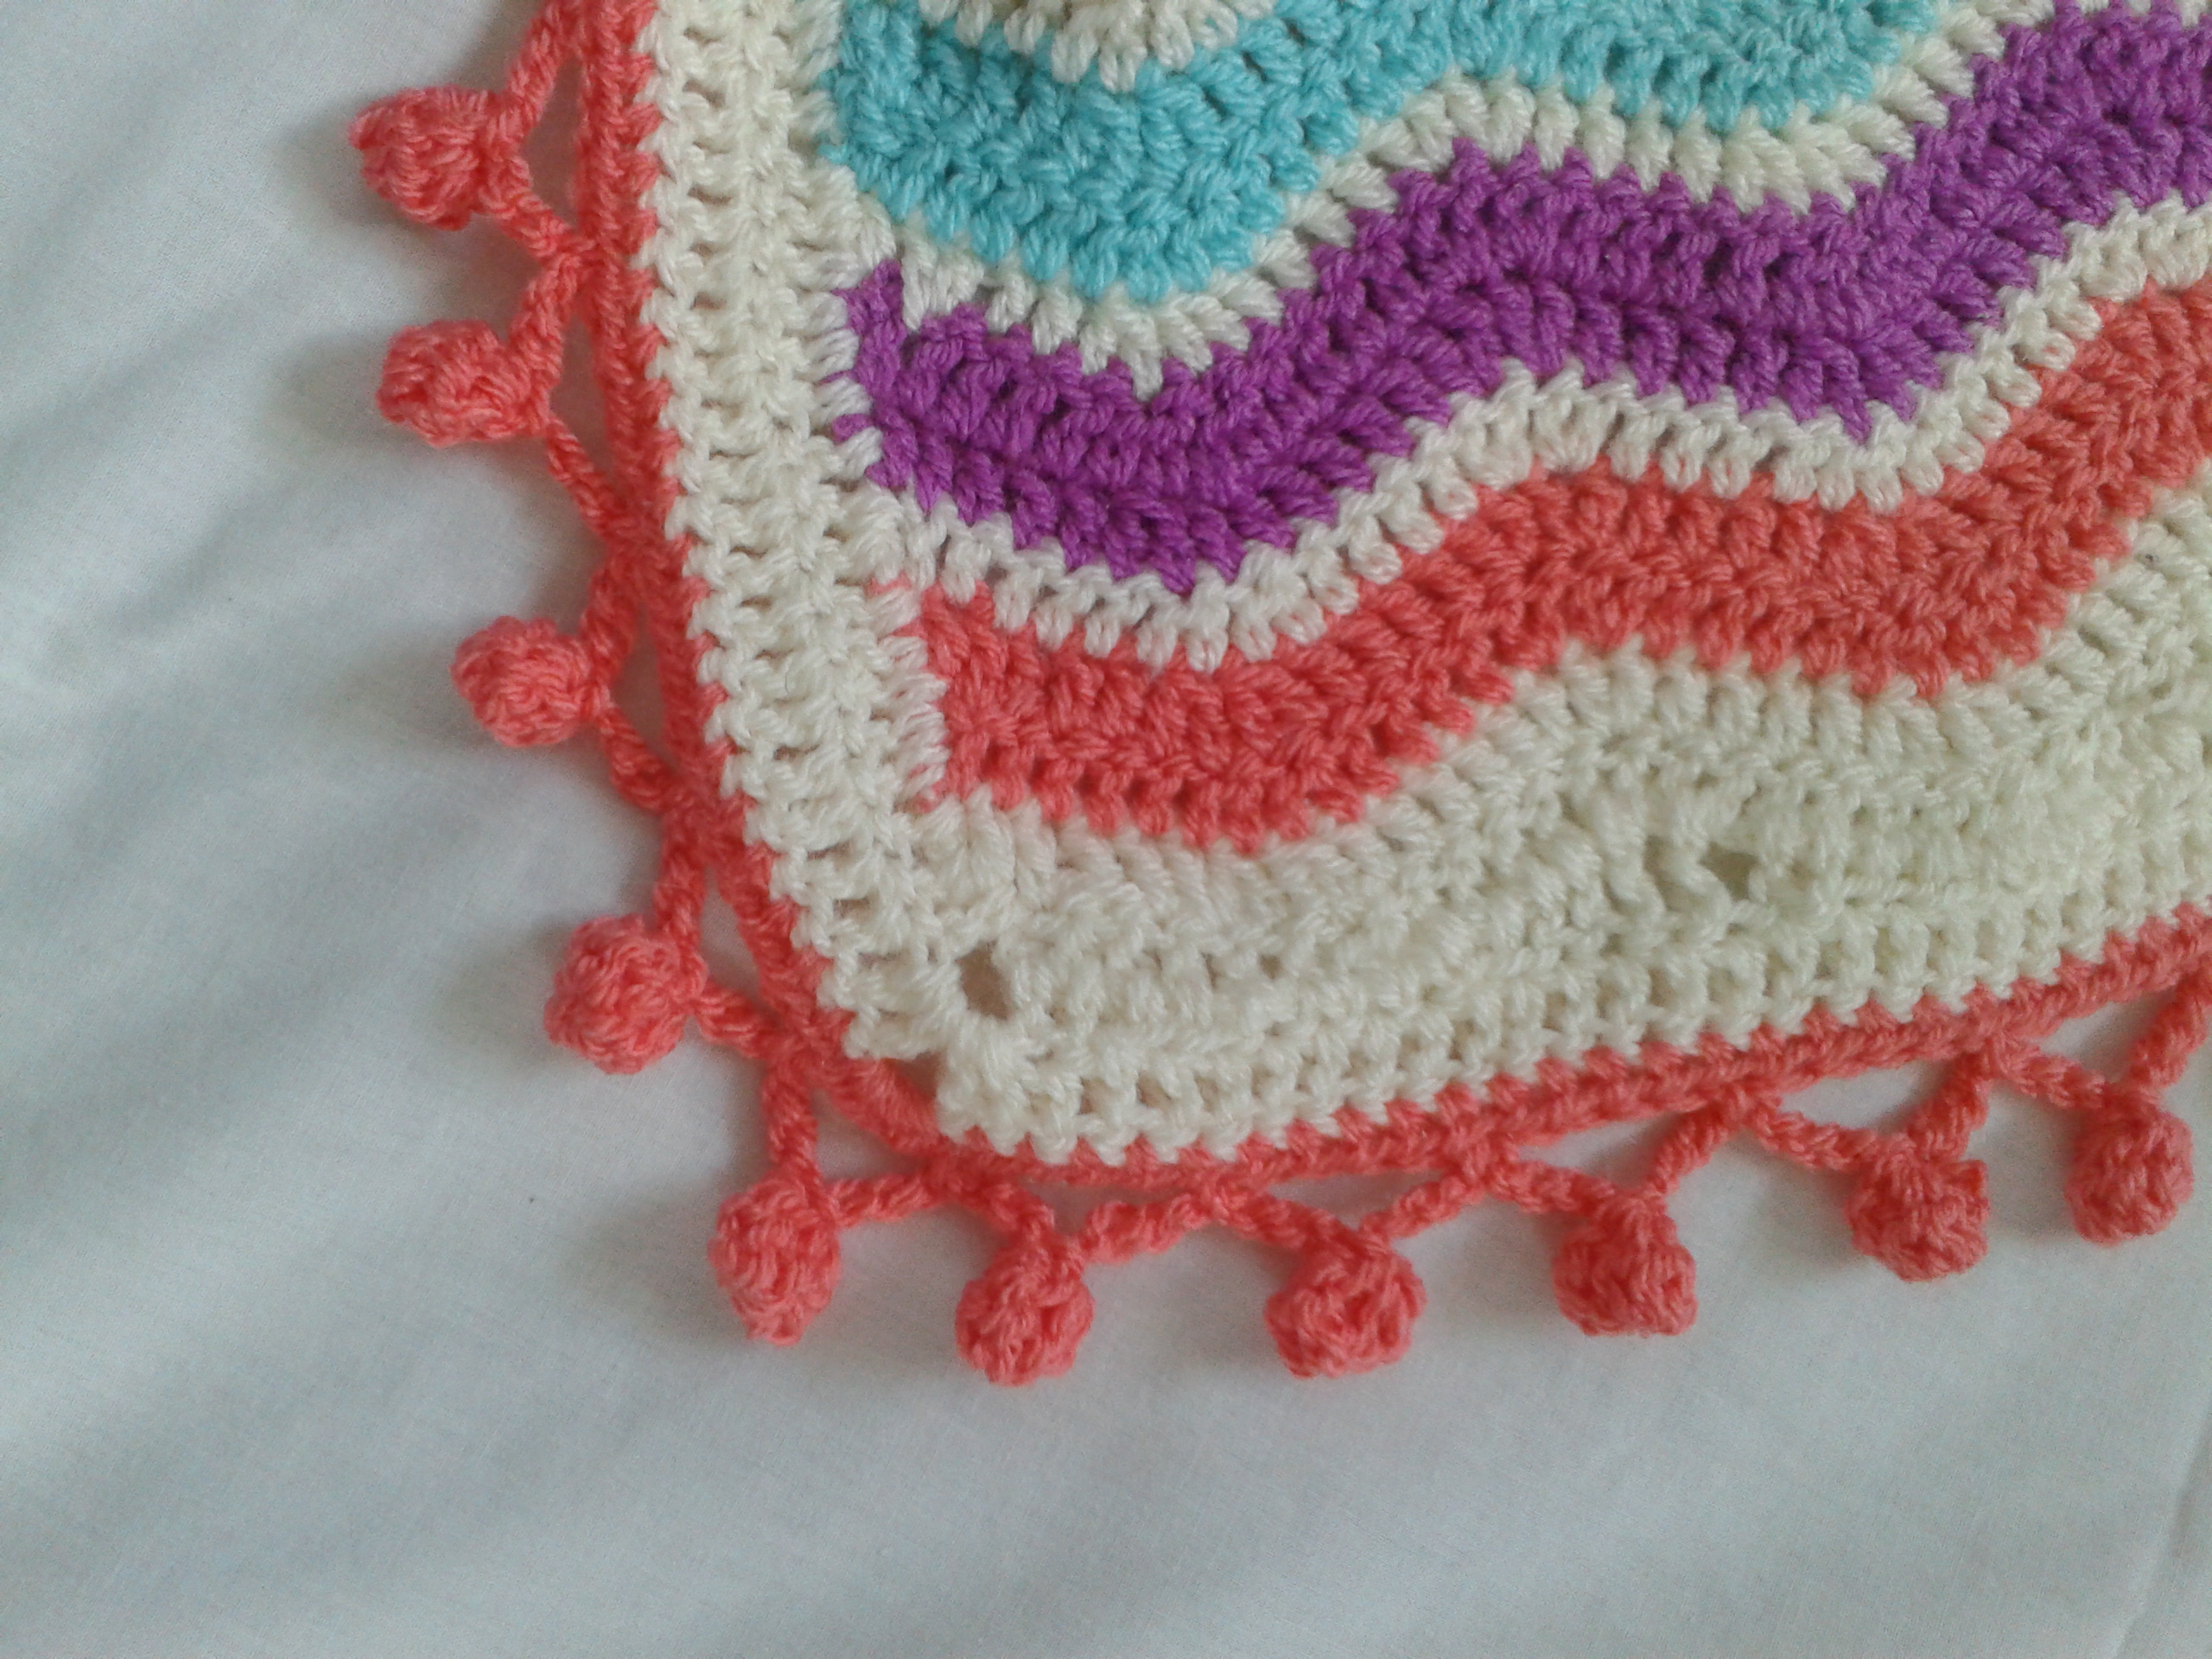
I had so much fun adding it to my Happy Ripple, that I just had to do my own tutorial (which is photo heavy), so here it is, let me know how you go with it!
You will need a secure base to attach your bobble edging to, I did a row of treble stitches in cream, then a row of half trebles in shrimp as in the picture below.
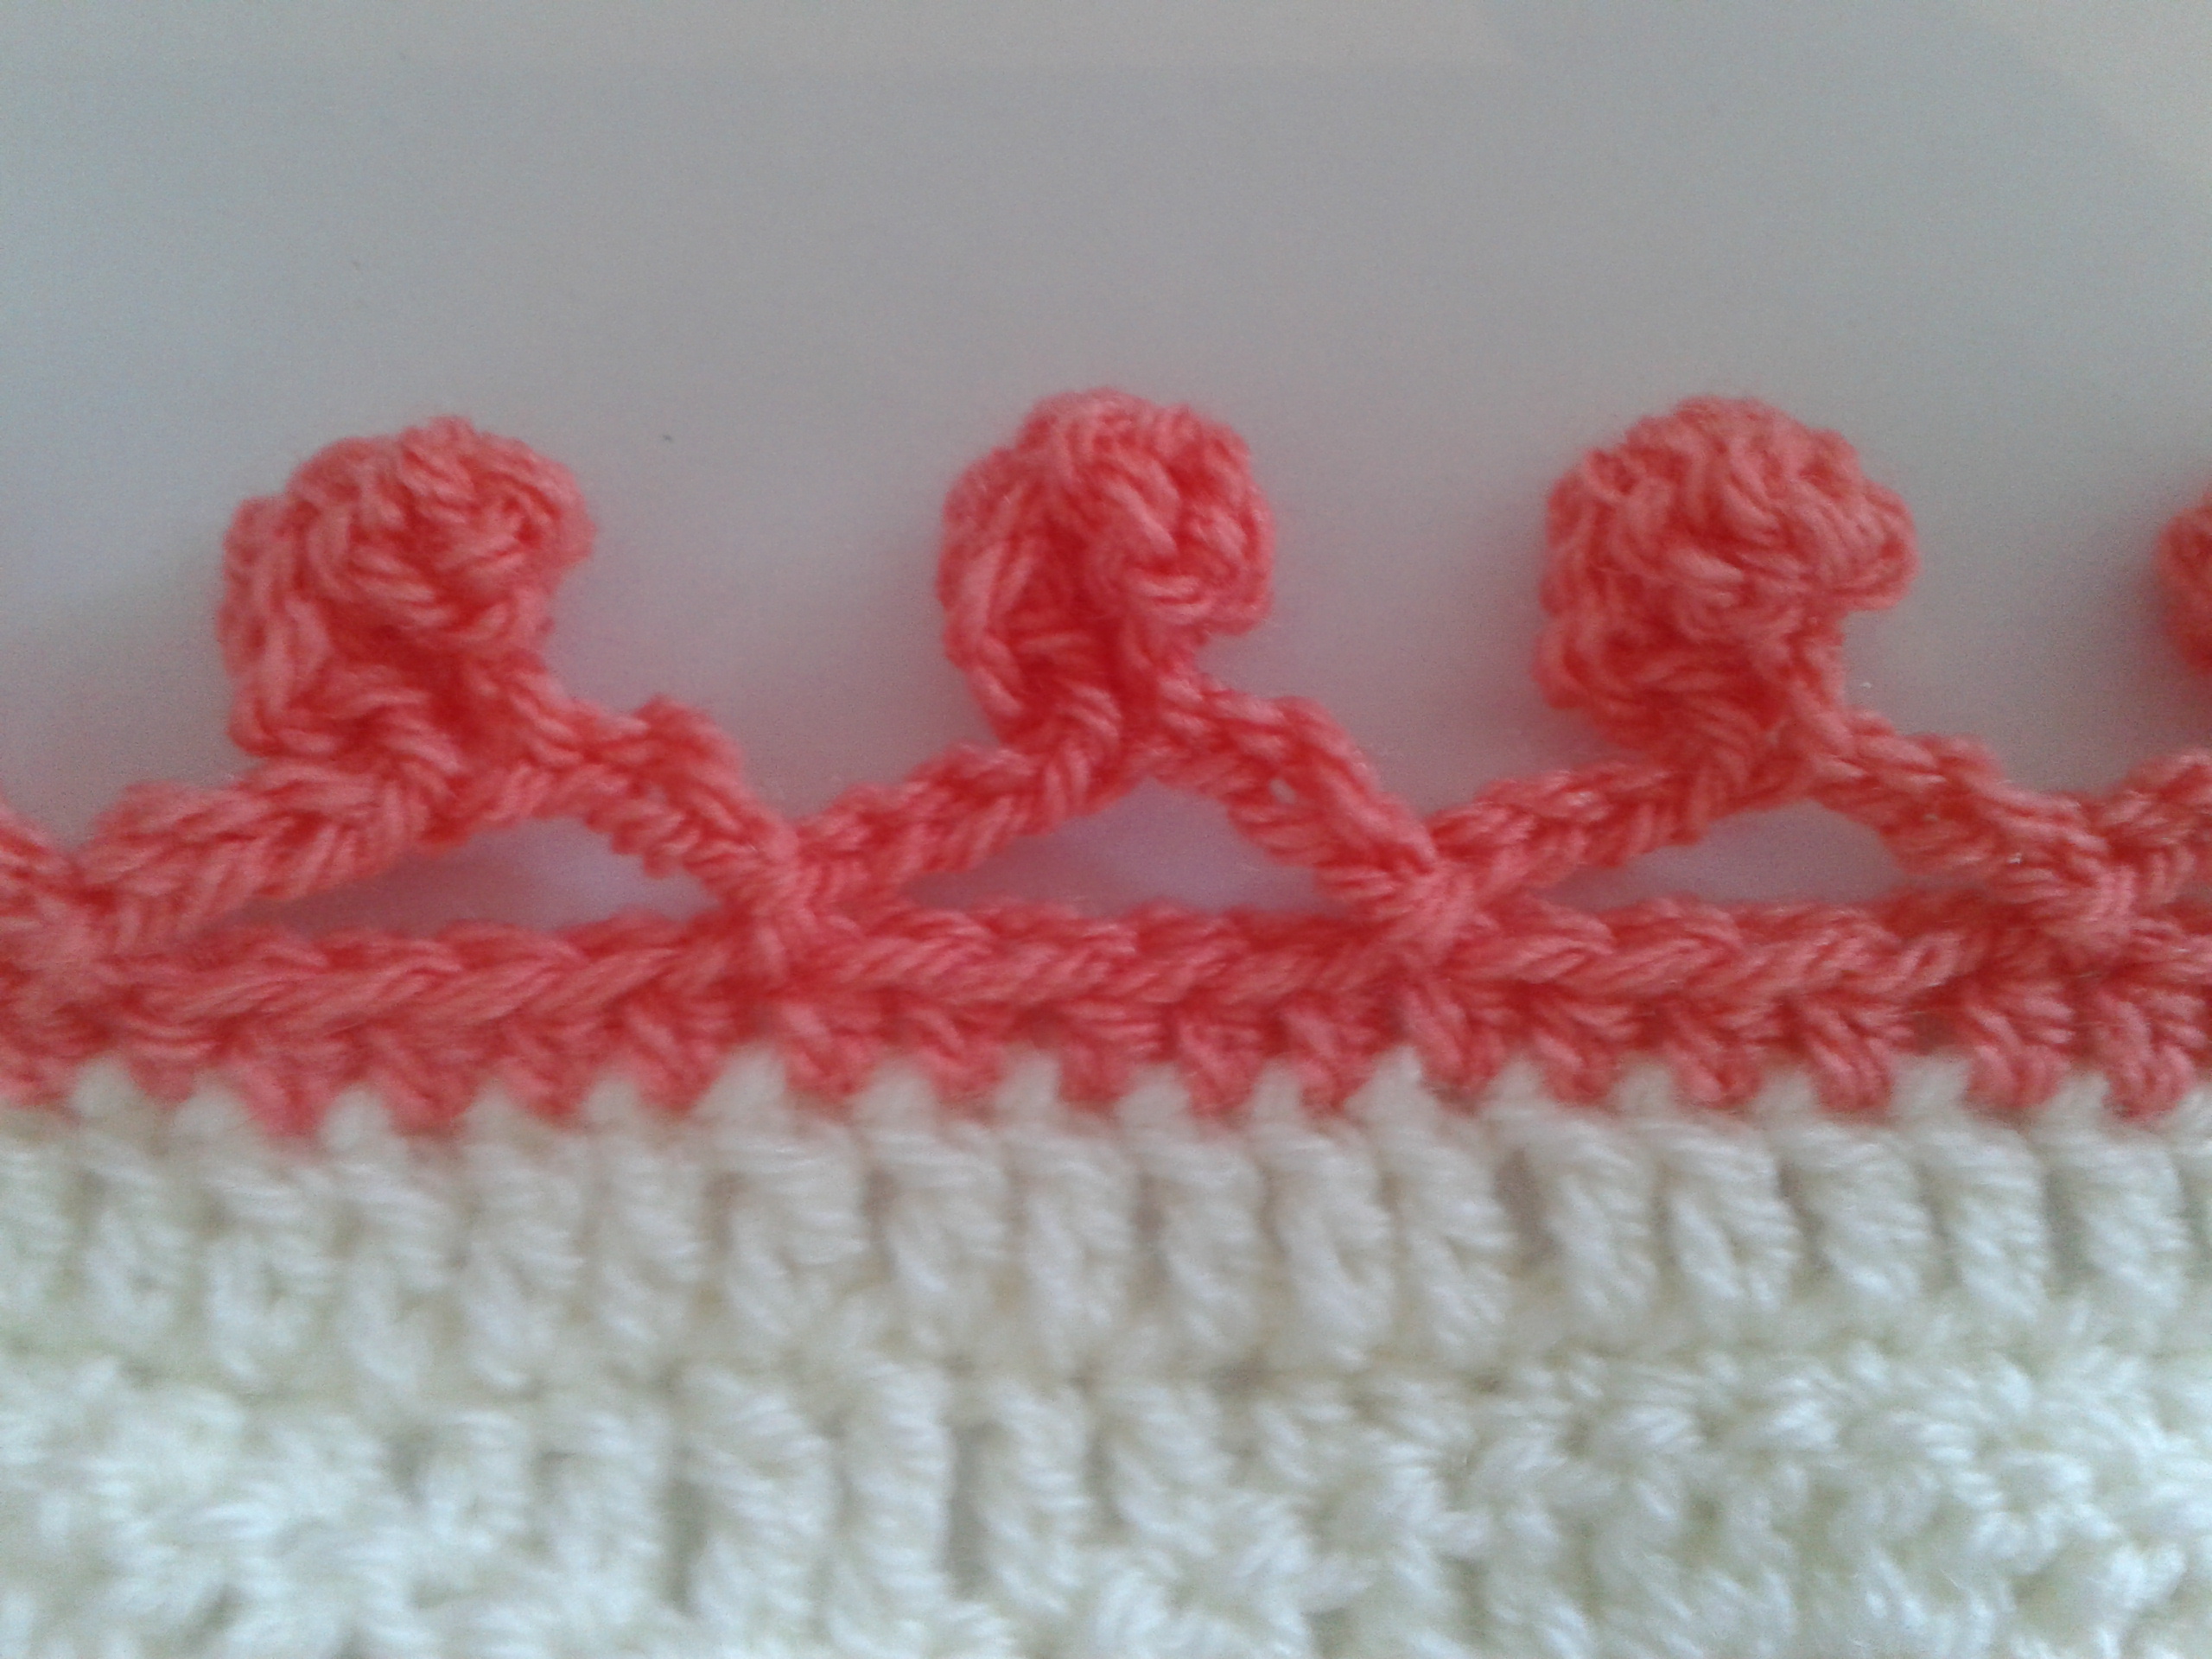
If you want your bobbles to be a different colour to your secure base change colour now, attaching to any stitch. I used the same shrimp colour so did not have to change colour yarn. Ok, now that your yarn colour is decided on, we can start on the fun part… making the bobbles. Here we go!
Chain 7
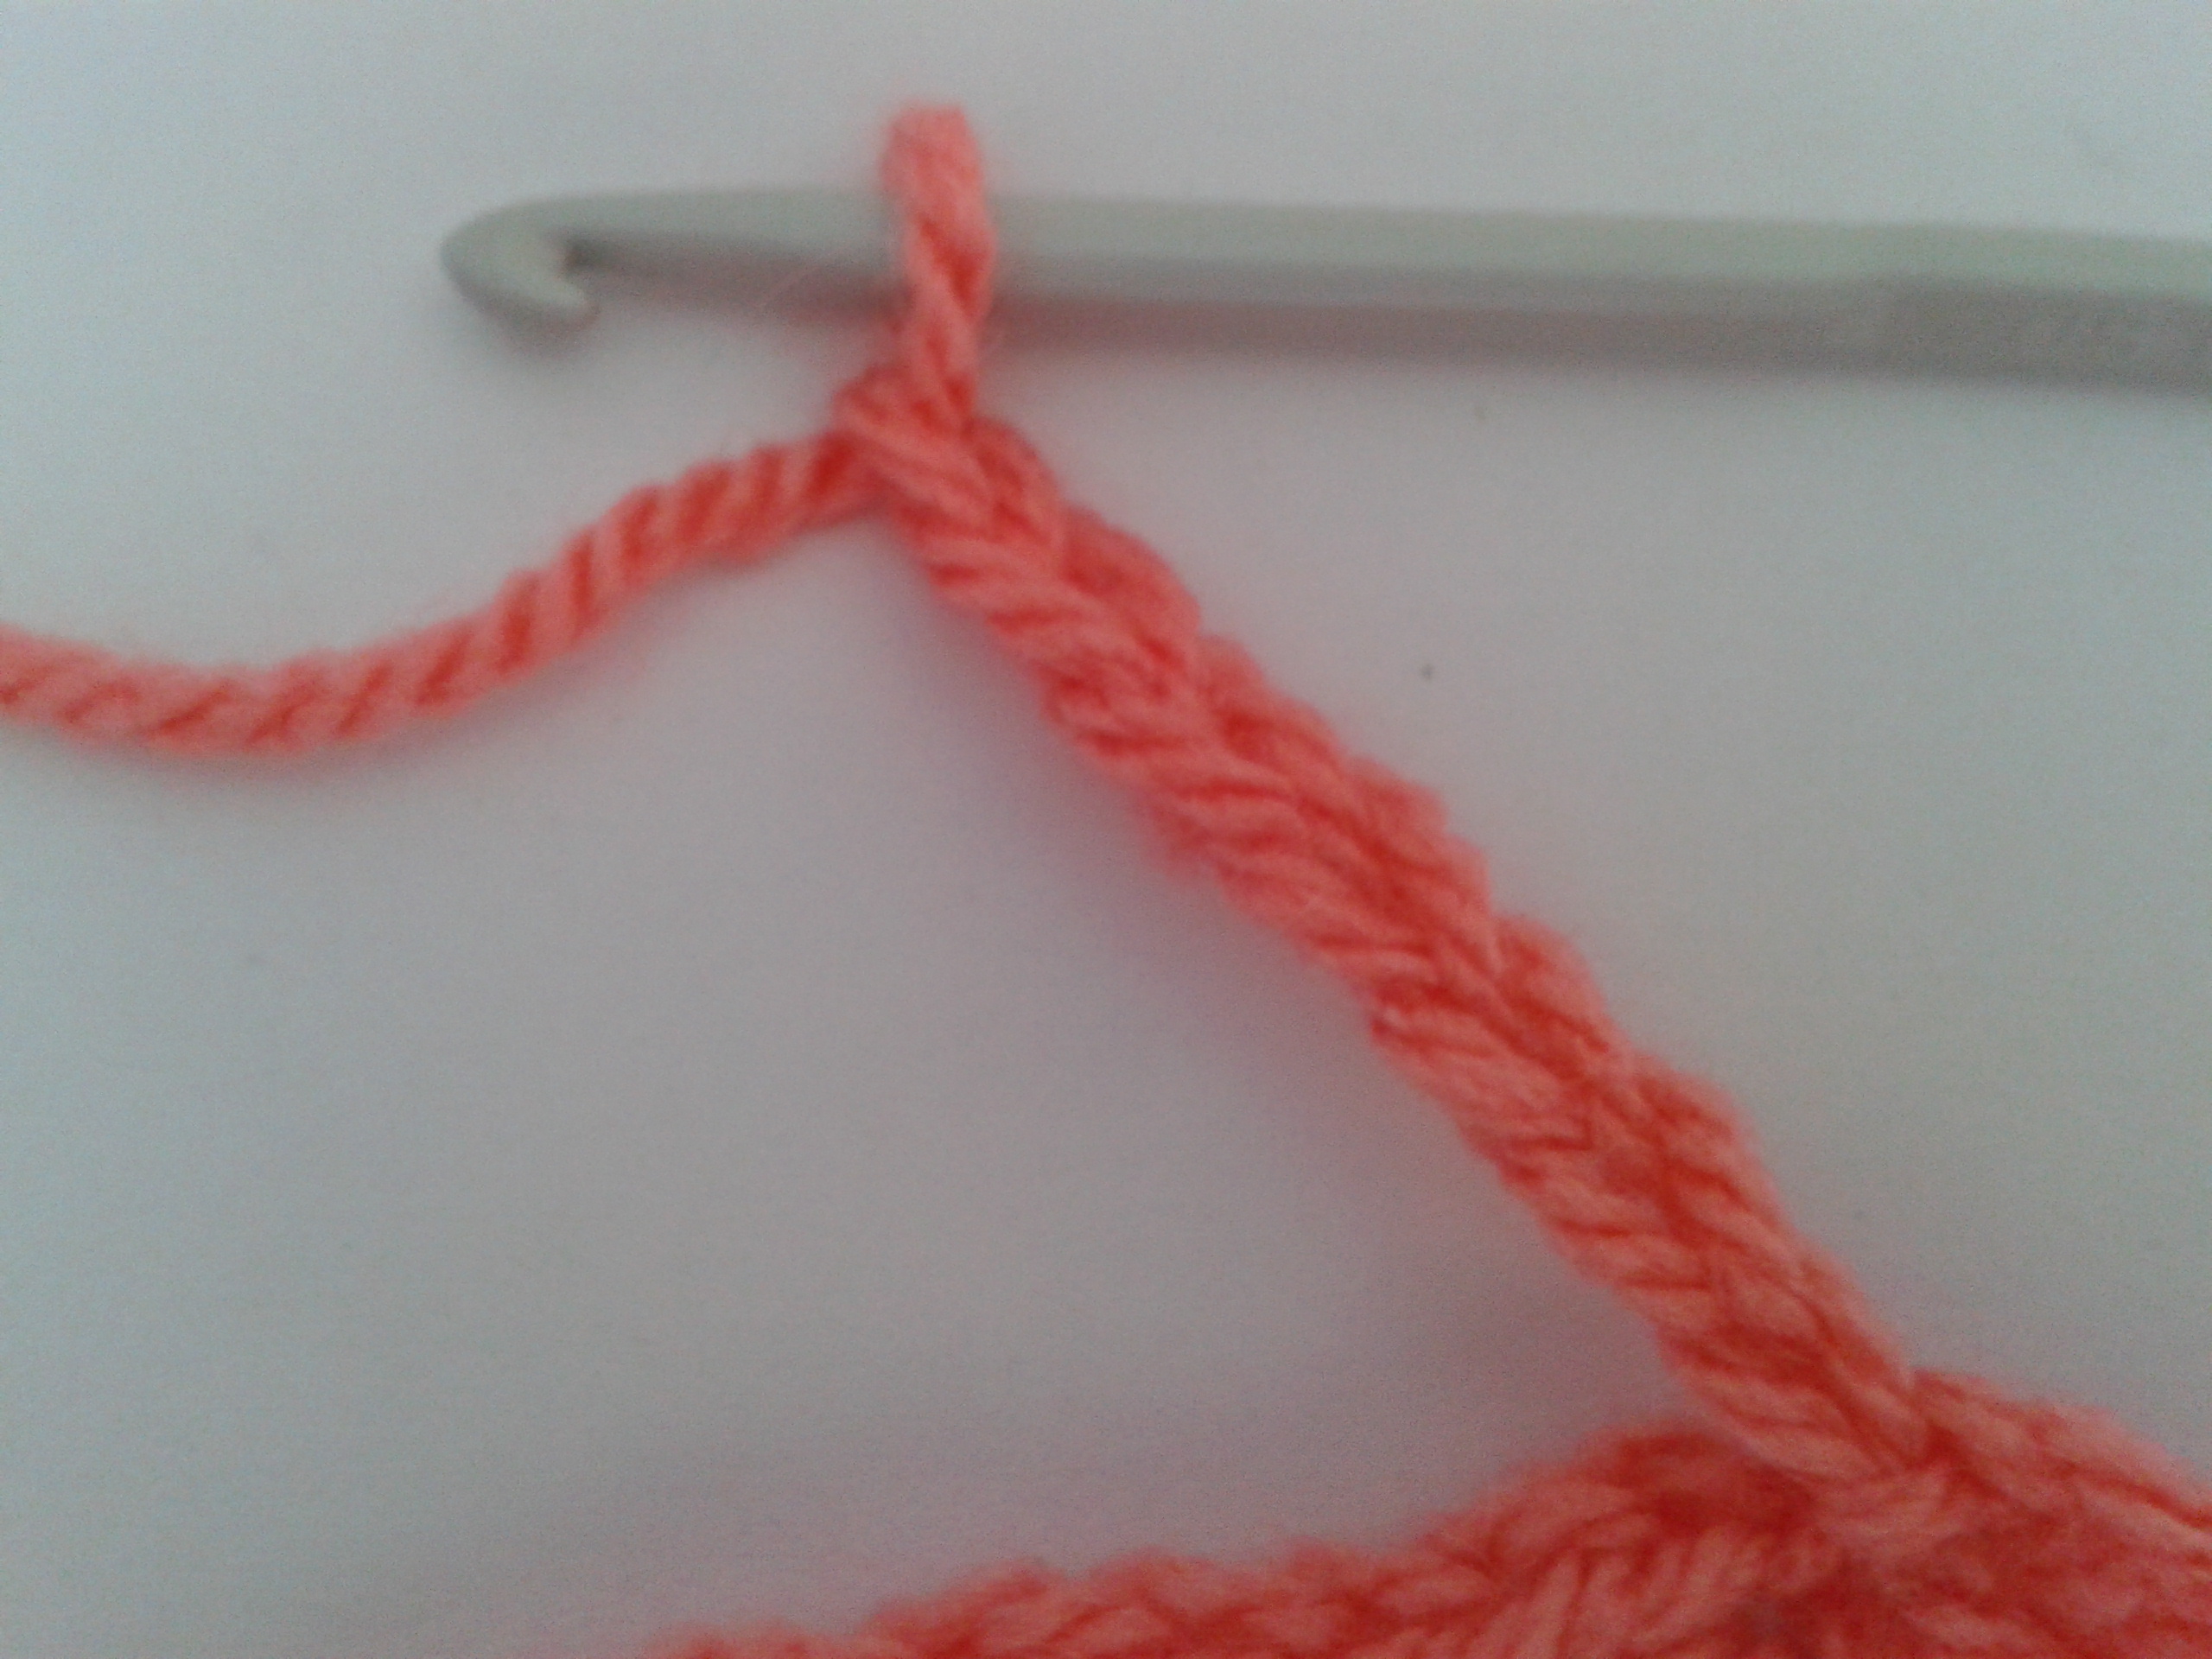
The first 4 chains will be the first part of the V that the bobble is suspended from, the last 3 chains count as your first tr of your bobble. Ok, now you need to make a trtog (treble together) cluster… don’t worry I will talk you through.
First of all yarn around hook and insert your hook into the 3rd ch from the hook…

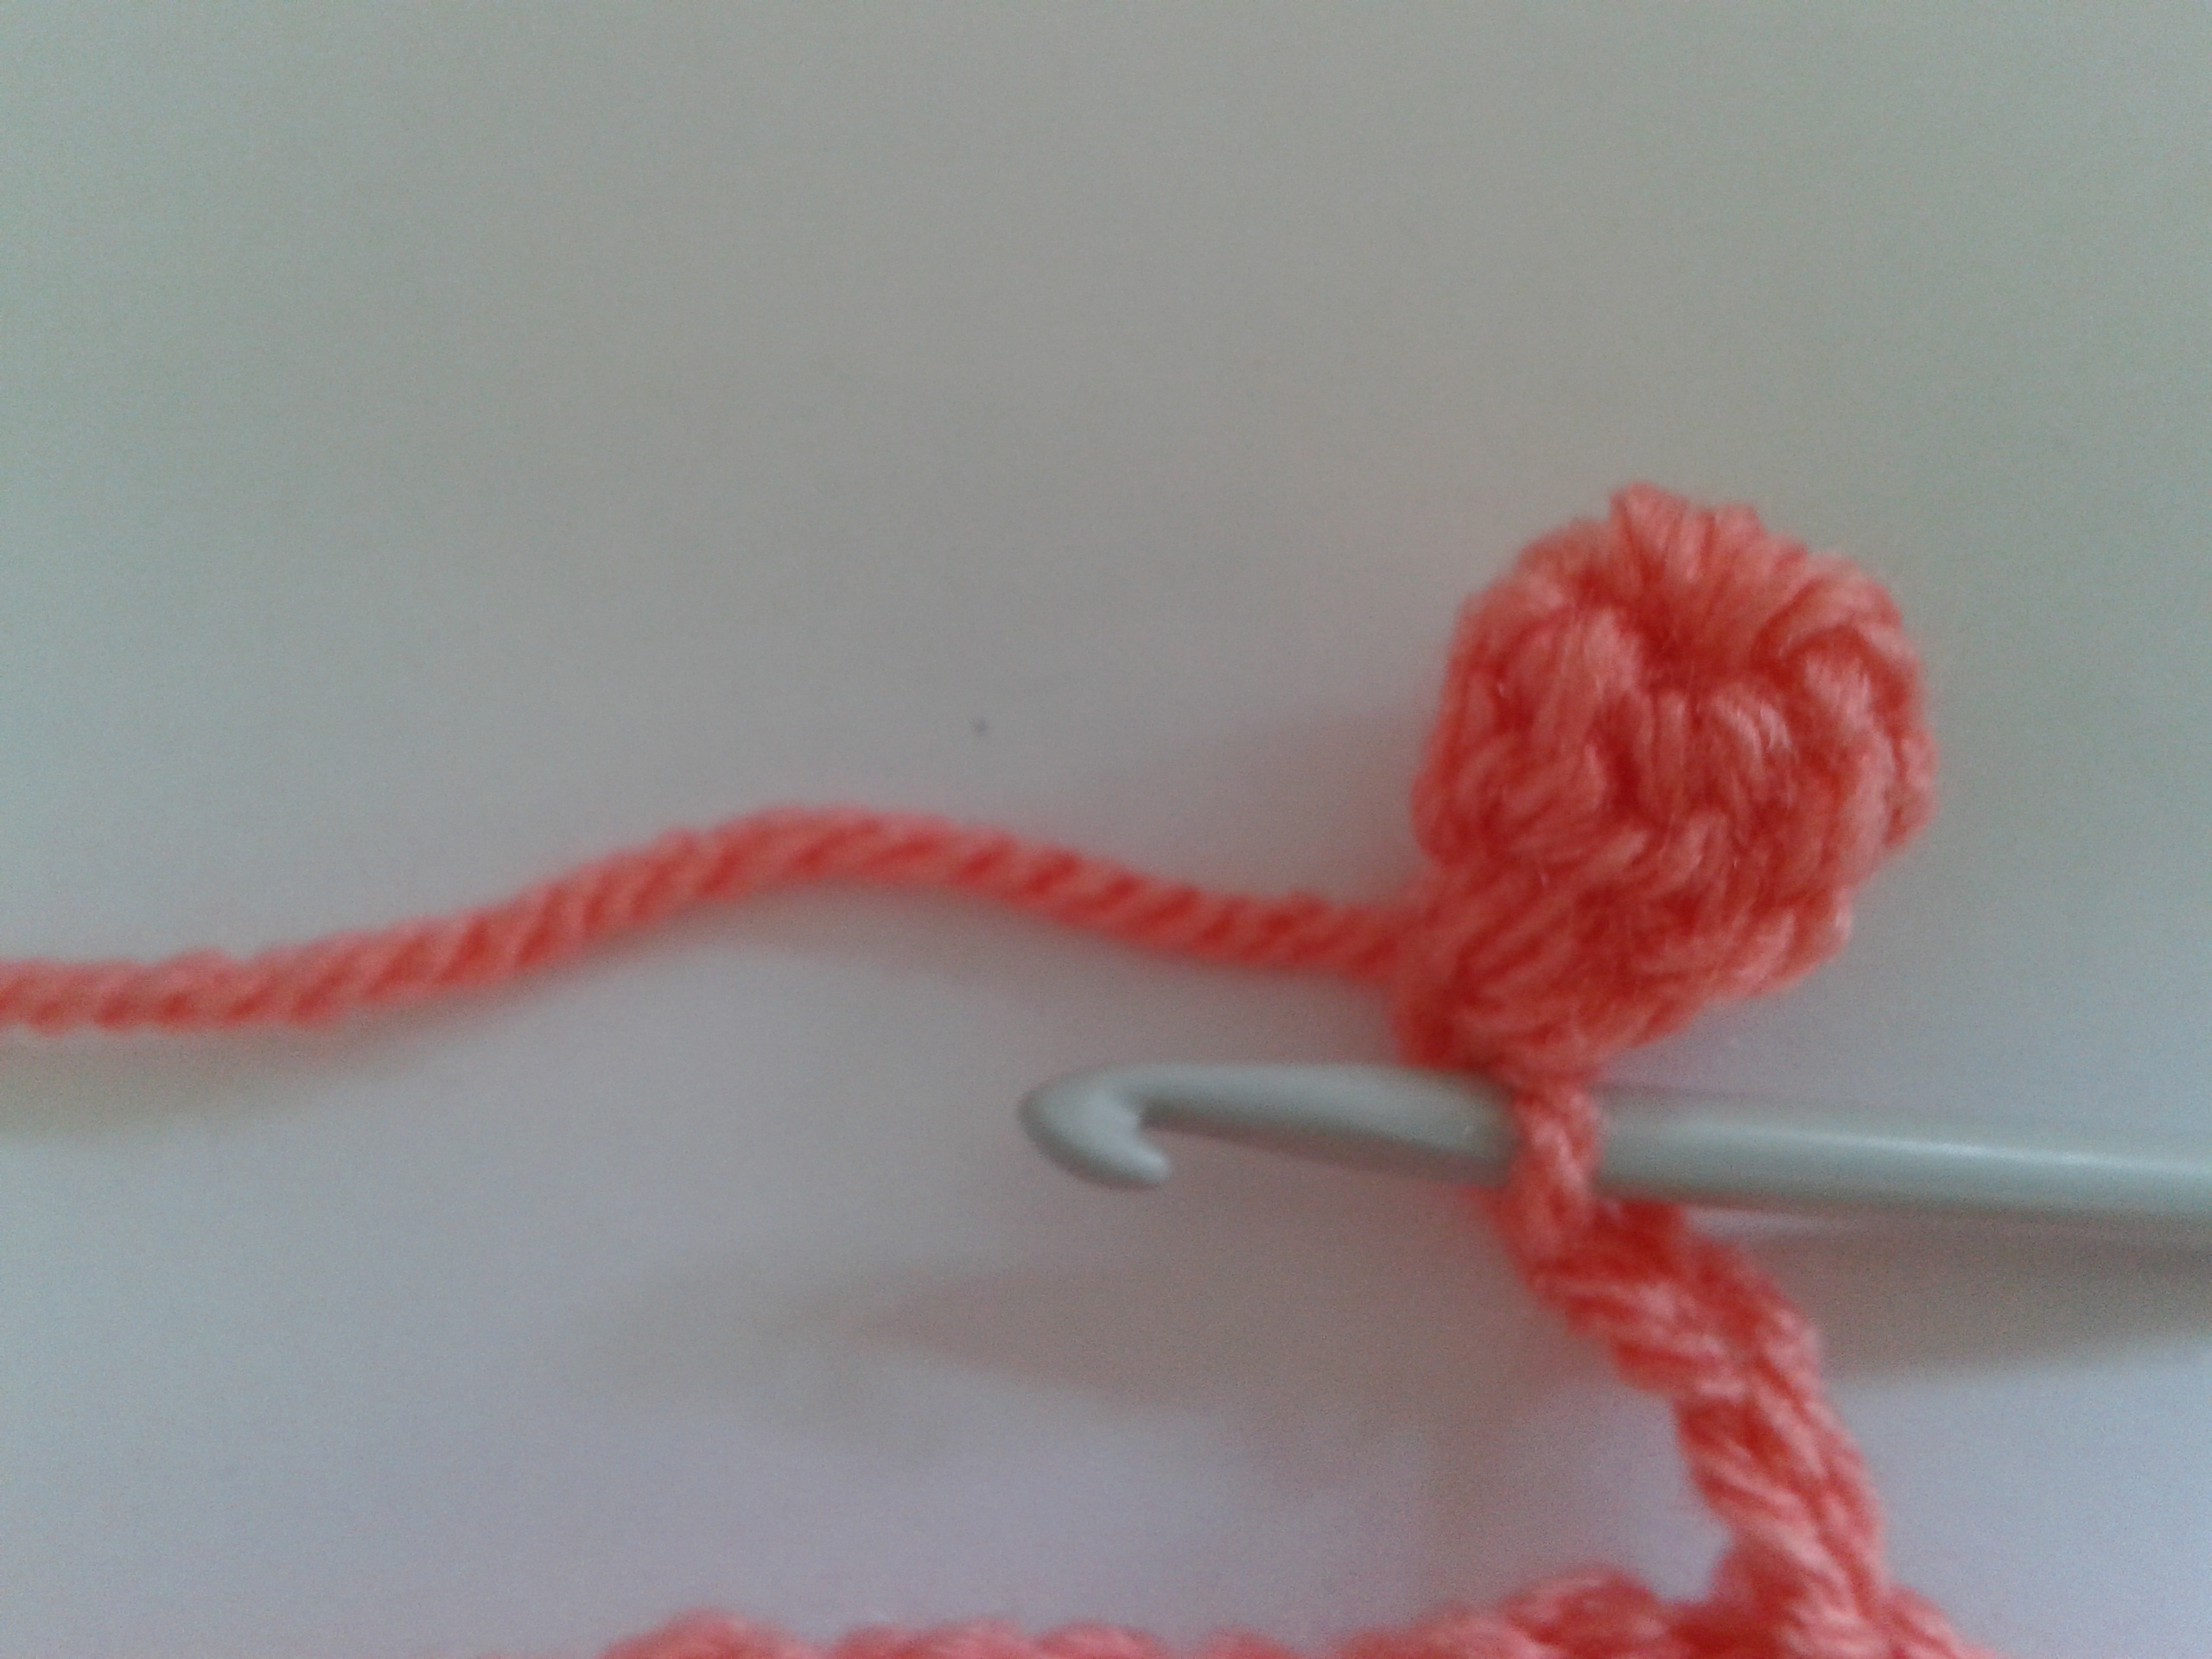
yarn around hook and pull through (you will now have 3 sts on your hook as you would with a regular tr st), yarn around hook and pull through 2sts on hook, yarn around hook and insert into same chain st as before, yarn around hook and pull through, yarn around hook and pull through first 2sts on hook… you should now have 3sts on your hook! Repeat process x1 more time… so yarn around hook and insert into same chain st as before, yarn around hook and pull through, yarn around hook and pull through first 2sts on hook… you should now have 4 sts on your hook… like this
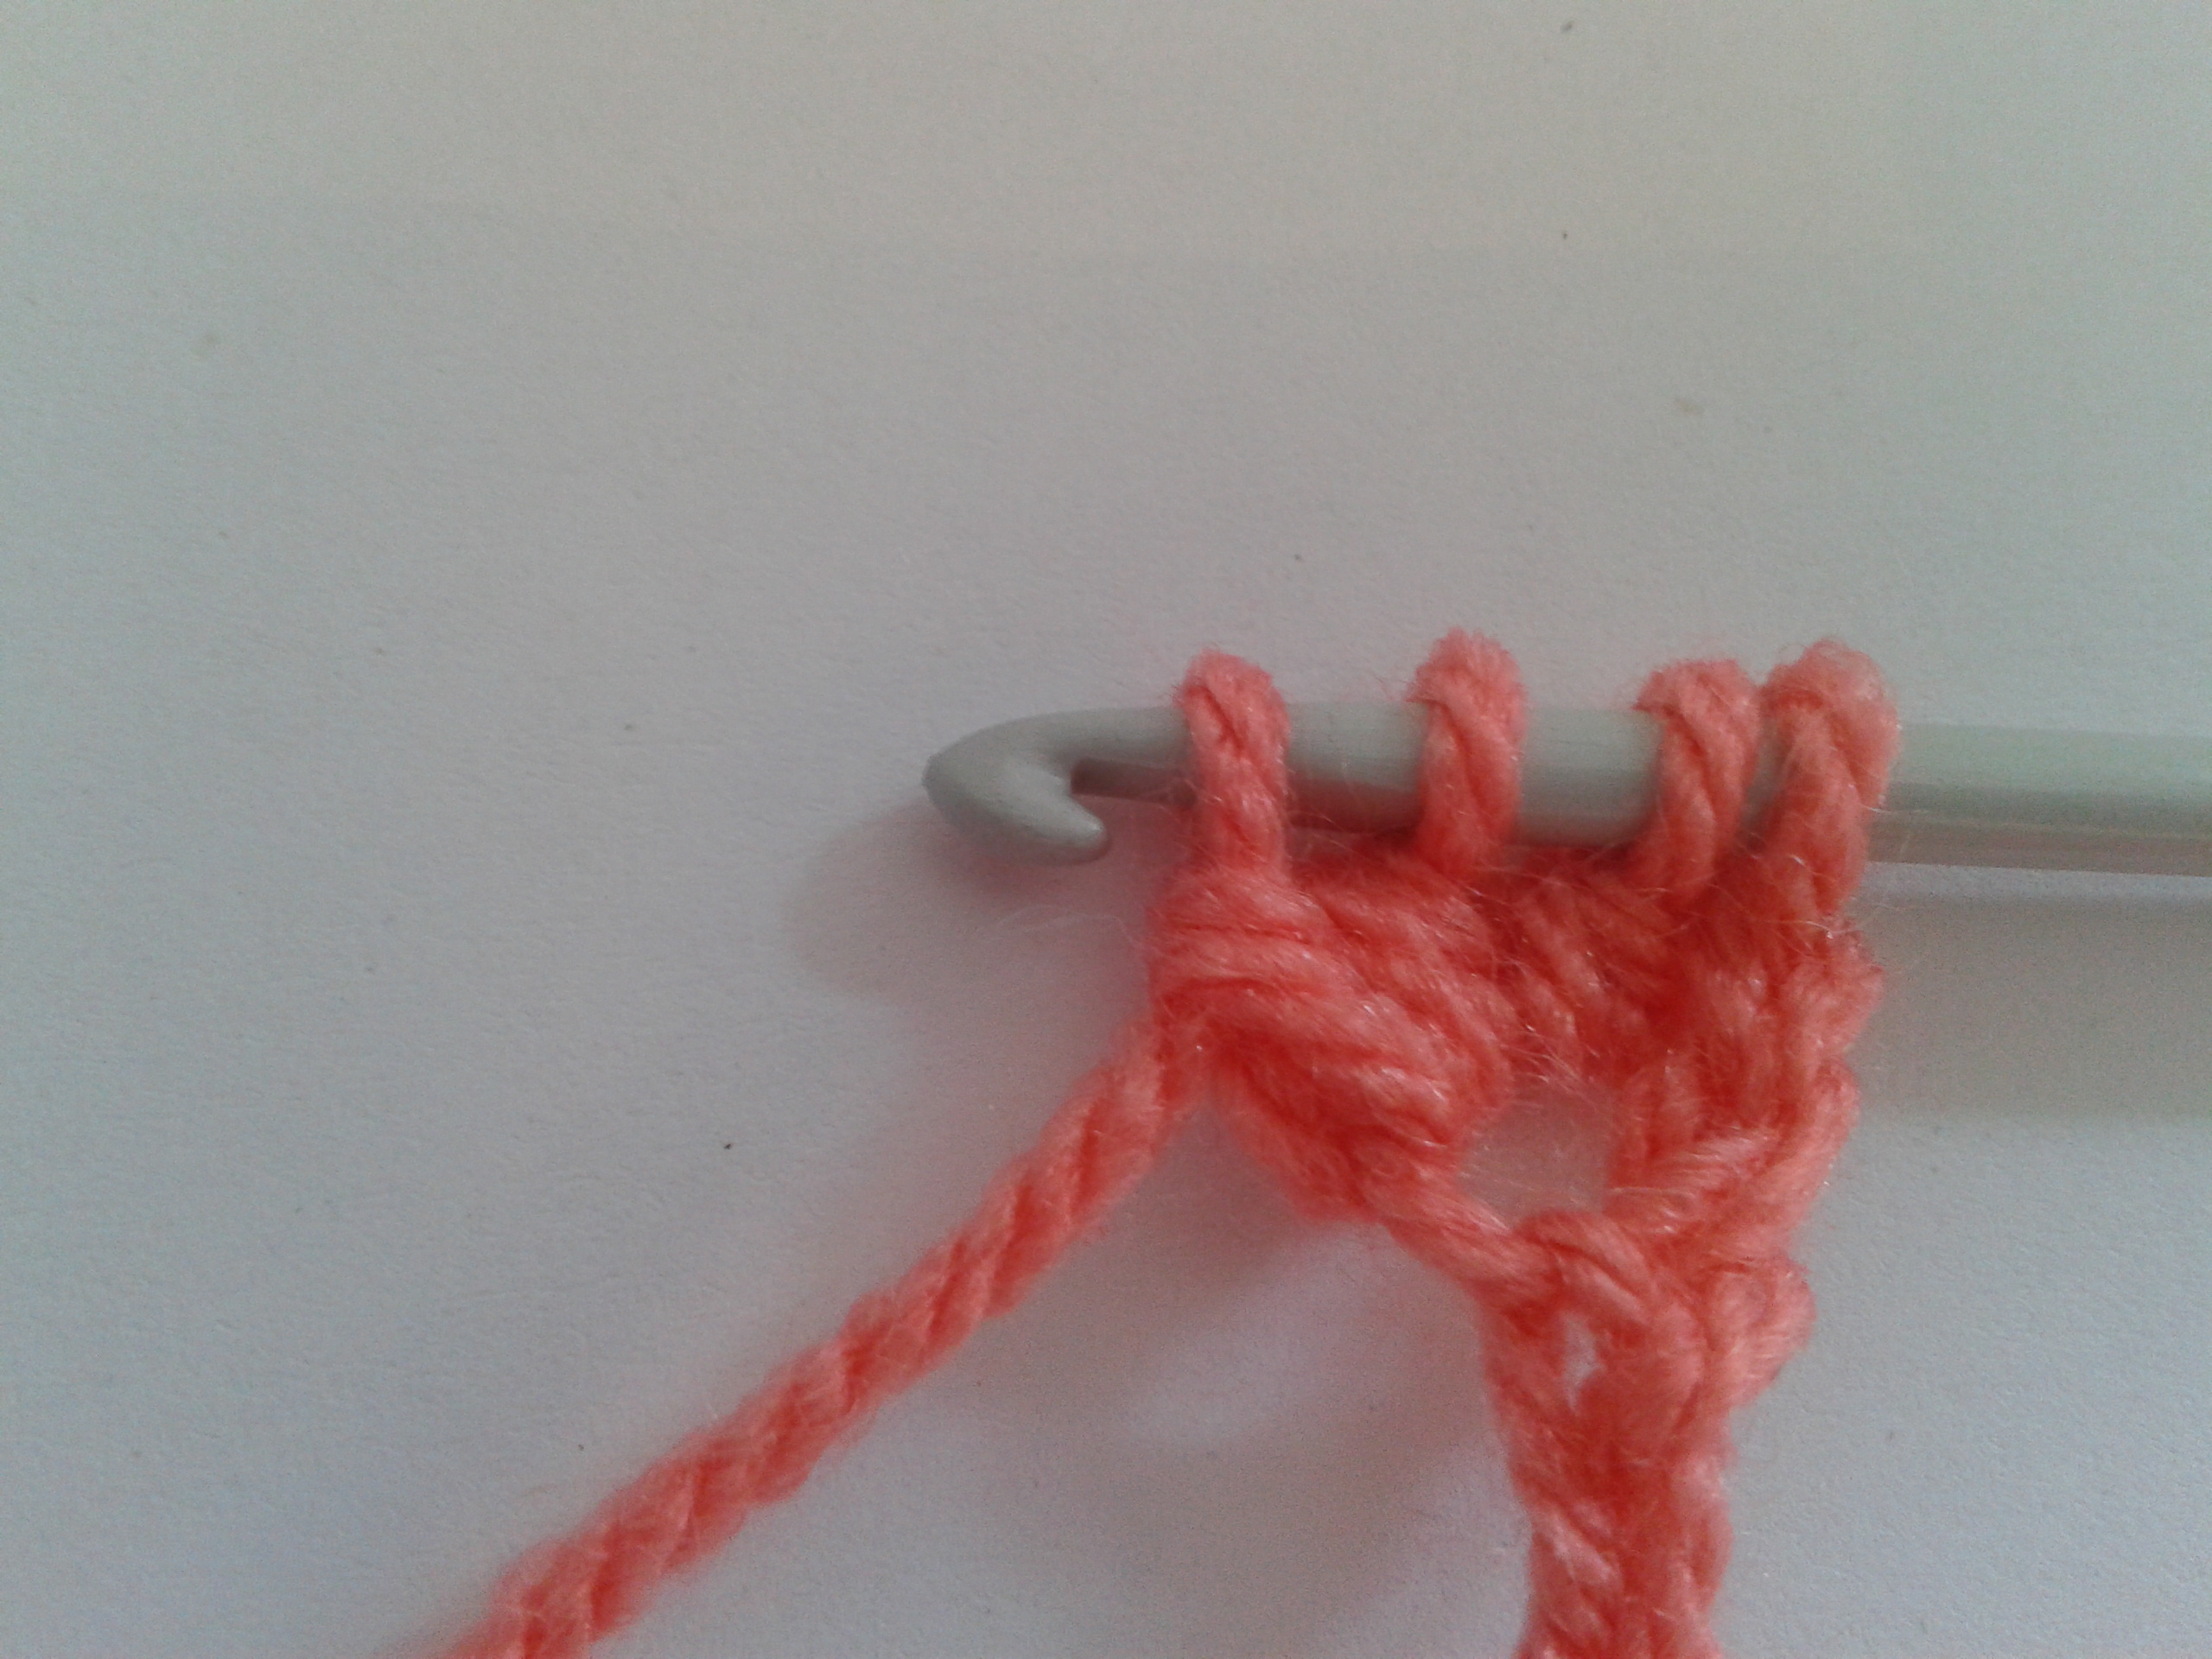
To finish the trtog cluster, yarn around hook and pull through all 4sts on your hook… cluster completed. Well done, you have the first part of the bobble done and it should look like this in the picture below.

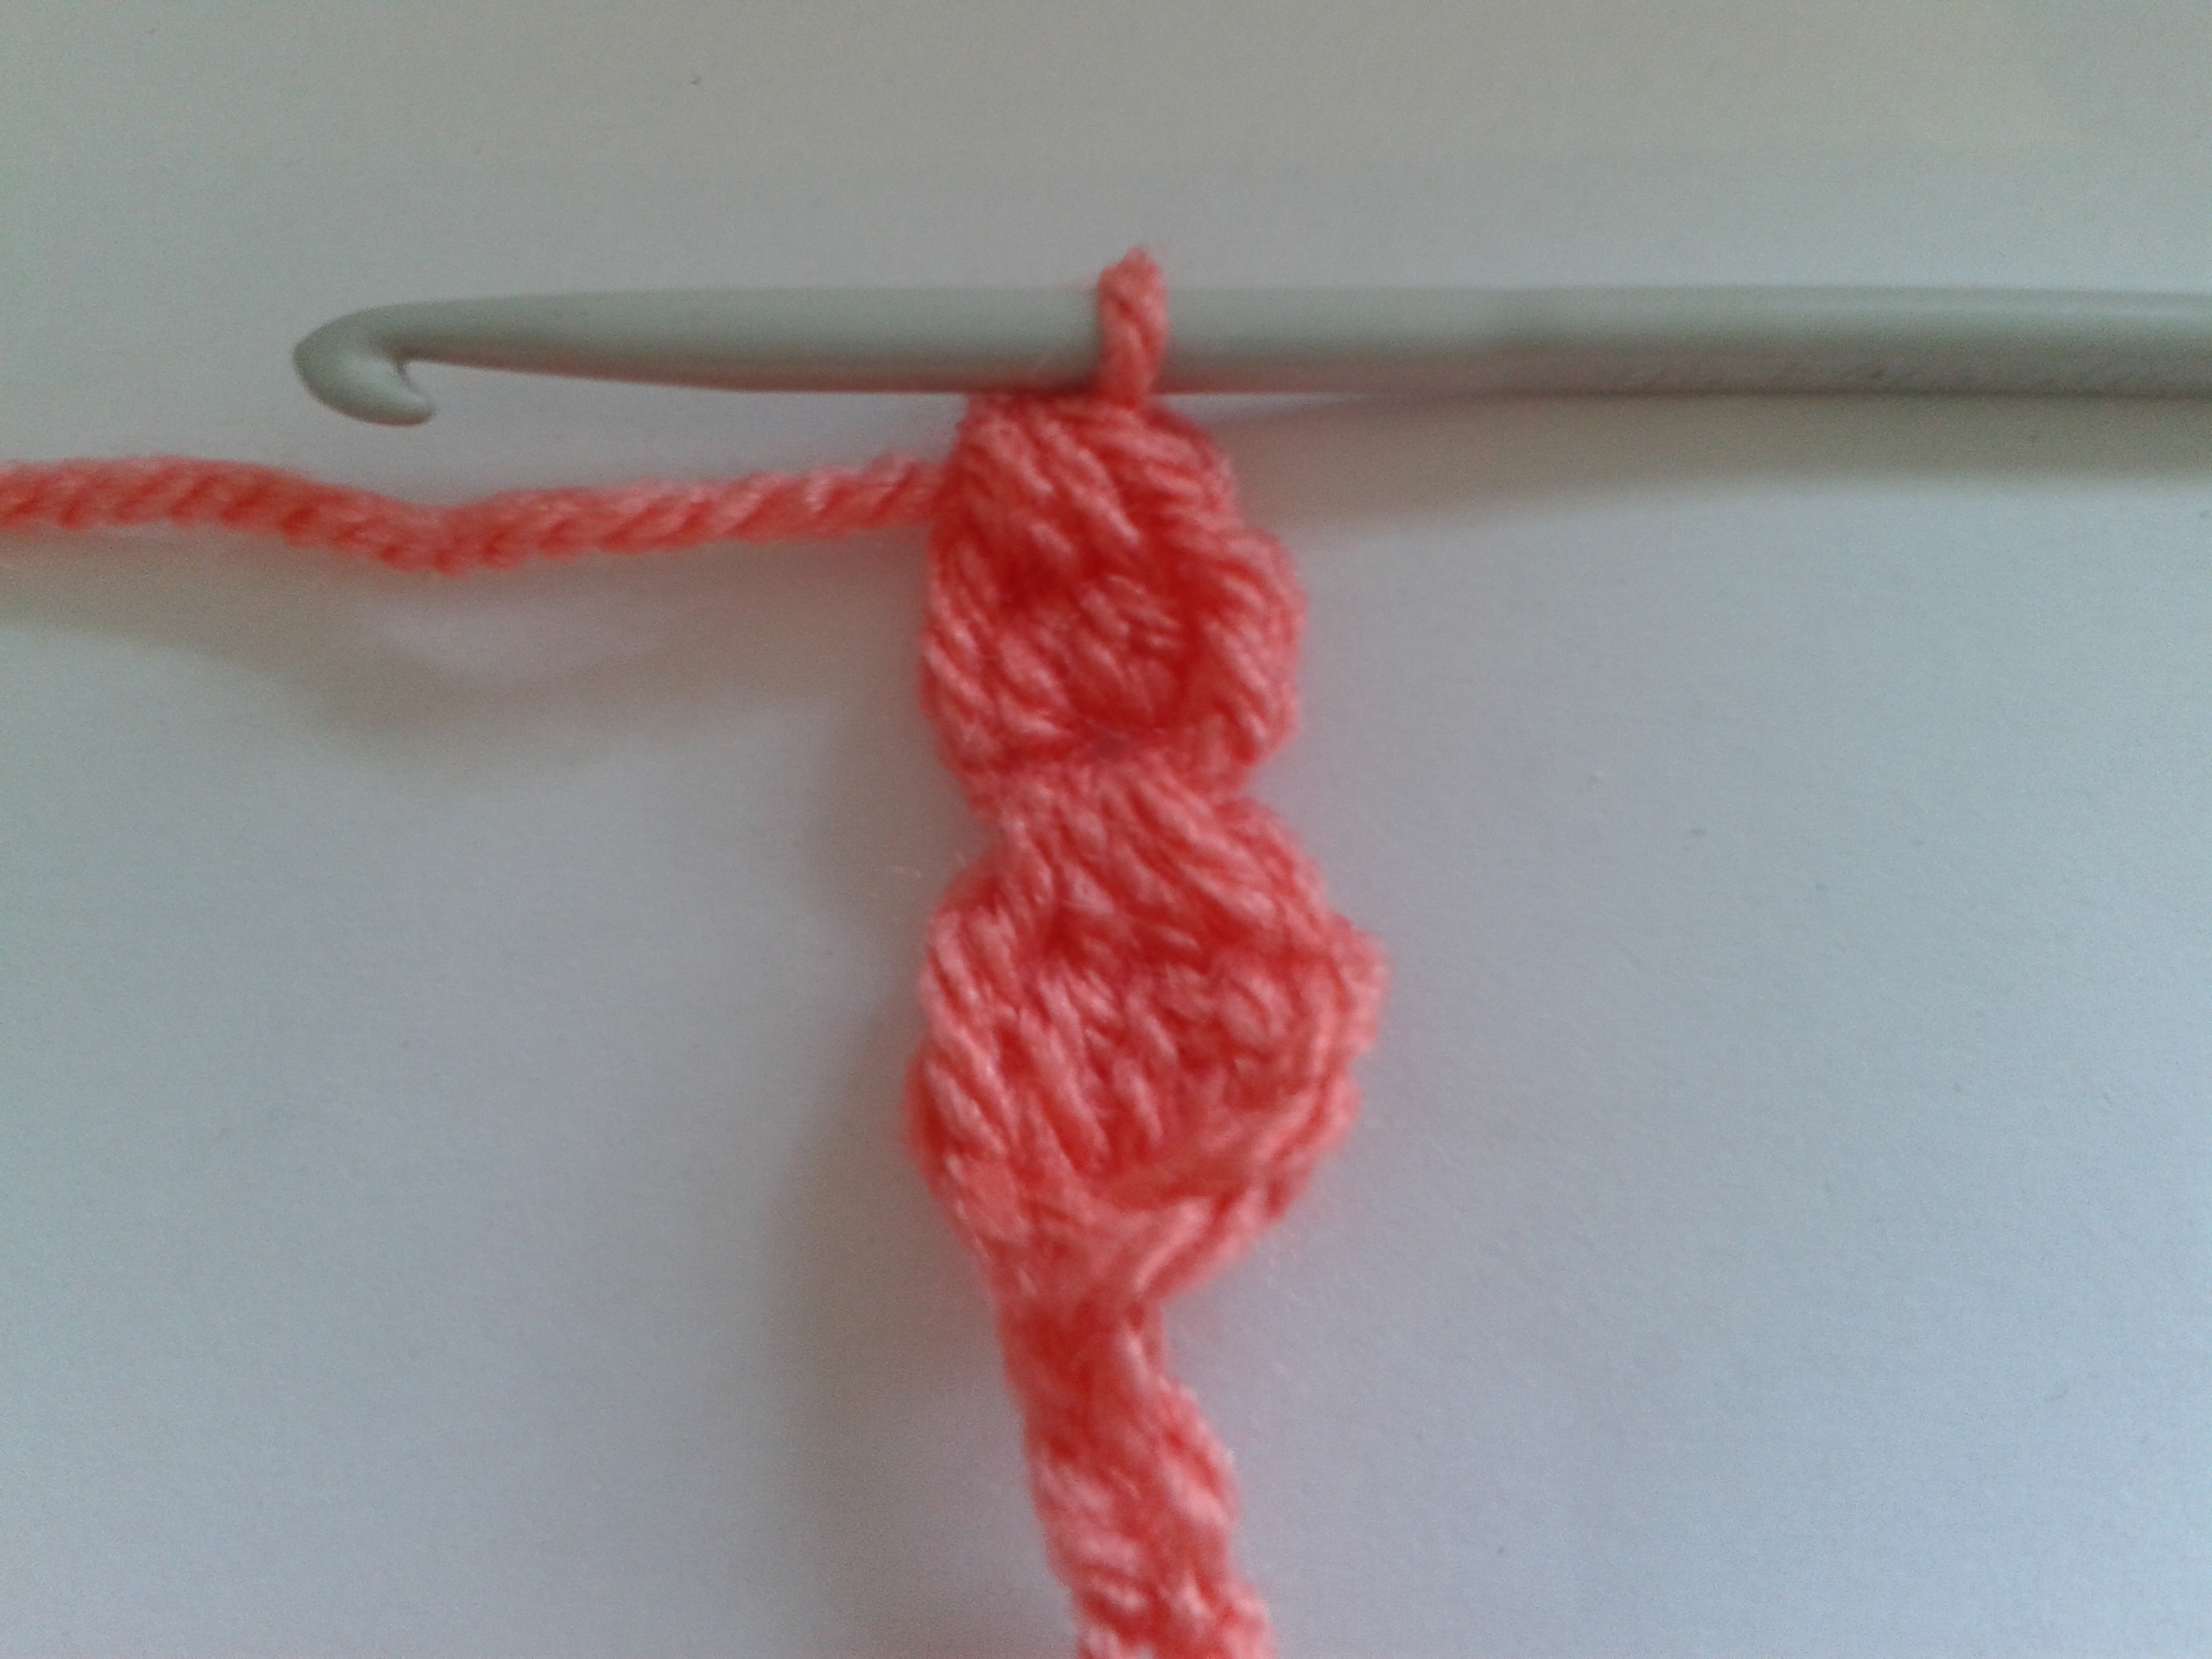
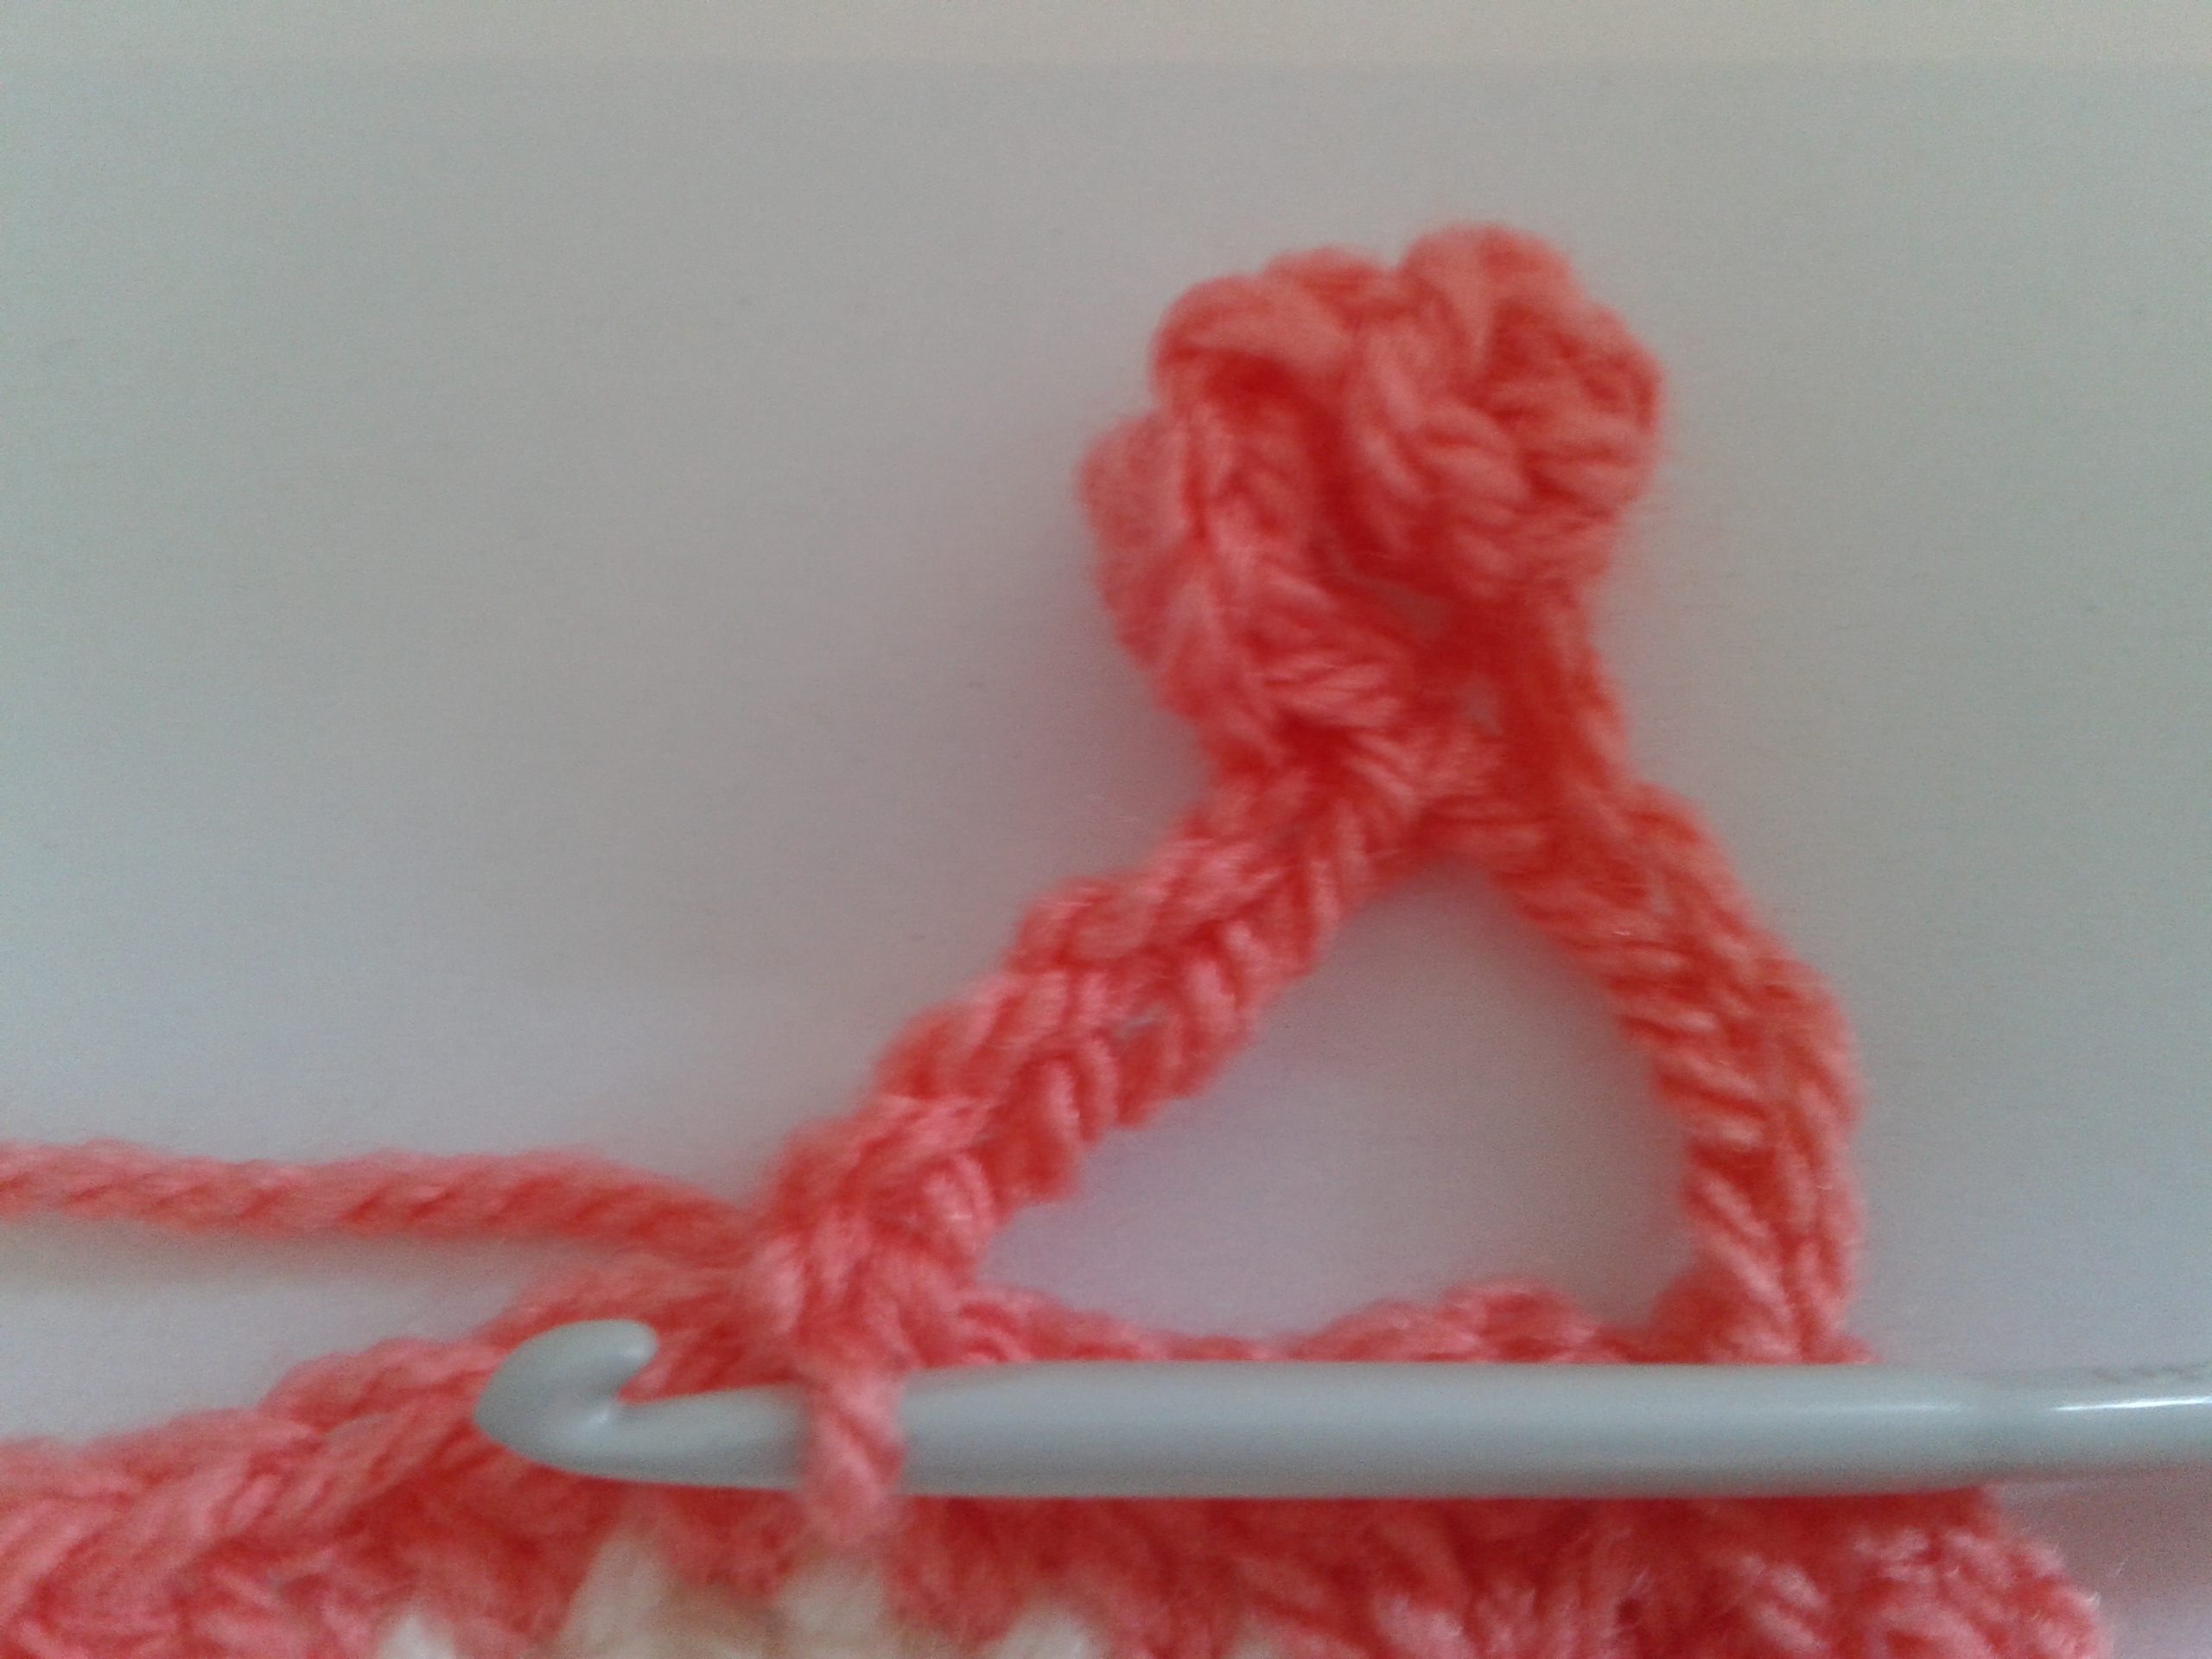
now ch 3 (counts as first tr of trtog), yes we are going to do another trtog!

so, as the picture above suggests we will be working the next trtog cluster into the top of the previous cluster, indicated by the needle in the picture… ready…yarn around hook and insert into the st indicated by the needle, yarn around hook and pull through (you will now have 3 sts on your hook as you would with a regular tr st), yarn around hook and pull through 2sts on hook, yarn around hook and insert into same chain st as before, yarn around hook and pull through, yarn around hook and pull through first 2sts on hook… you should now have 3sts on your hook! Repeat process x1 more time… so yarn around hook and insert into same chain st as before, yarn around hook and pull through, yarn around hook and pull through first 2sts on hook… you should now have 4 sts on your hook, yarn around hook and pull through all 4sts on your hook… cluster completed… you should now have something that looks like this
to complete your bobble slip stitch (slst) into the base of first trtog as shown in the picture below

now chain 4

and slst into secure base. This bit will be purely personal and will need you to make a decision on how you want your bobble edging to be spaced . For the Happy Ripple I secured with a slst into every 5th ch as this gave me the best visual impact
and there you have it… now just repeat the process all the way around what ever it is you are putting this glorious edging on to. I really hope this tutorial is helpful… please let me know how you get on with it, if something could be made more clear let me know and I will make changes if I can. I hope you have fun with this process.


I shared this on my crochet pinterest board! Looks very thorough and I want to have a link back ot it when I decide to exercise the bobble edge option! 😀 Thank you!
LikeLike
Thanks Dawn,
You’ve gotta love pintrest… let me know how you get on with it x
LikeLike
Thank you for the tutorial. I love the step by step pix. Saw your FO in the Ripple thread of We Love Lucy and followed the links. You did a beautiful job on the blanket AND instructions! =)
Chicksinger on Rav
LikeLike
Thank you for your very kind comments…:)
LikeLike
I’m just about to start my own ripple blanket (in different colours) and love this bobble border. You’ve written a great tutorial, now I just need to crochet the throw!
LikeLike
I’m sure you will love doing the ripple… keep us up to date with your progress x
LikeLike
Greats idea! This is adorable. Thanks for sharing.
LikeLike
Lovely blanket!
LikeLiked by 1 person
That looks so cool! I might have to give it a go 🙂
LikeLiked by 1 person
Too cute! I’ll have to try this technique. Thank you so much for sharing this tutorial!
LikeLike
What a beautiful blanket! And that bobble border is just too fun and cute! Once I get some more crochet hours under my belt, I will have to give that border a try.
LikeLiked by 1 person
Oh love this ! Glad you found me & now I found you 🙂
LikeLiked by 1 person