

I have updated this lovely pattern and have re shot the tutorial photos, so they are clearer. I have also updated this pattern on ravelry too so you can save for later if you want to.
Hope you enjoy!
As always I’m using English crochet terminology.
Ch – chain
Slst – slip stitch
dc – double crochet
tr – treble crochet
ch3 – counts as a treble unless otherwise stated.
I’m using drops muskat cotton
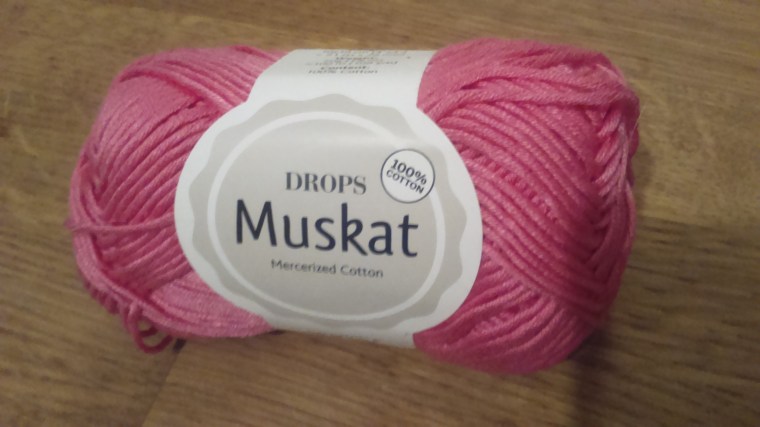
and I’m using the colours listed below, you will see you only need a very small quantity of yarn.
red – 16g
old pink – 5g
white – 3g
vanilla yellow – 4g
dark orange -1g
sky blue – 2g
apple green – 3g
and a 4mm crochet hook.
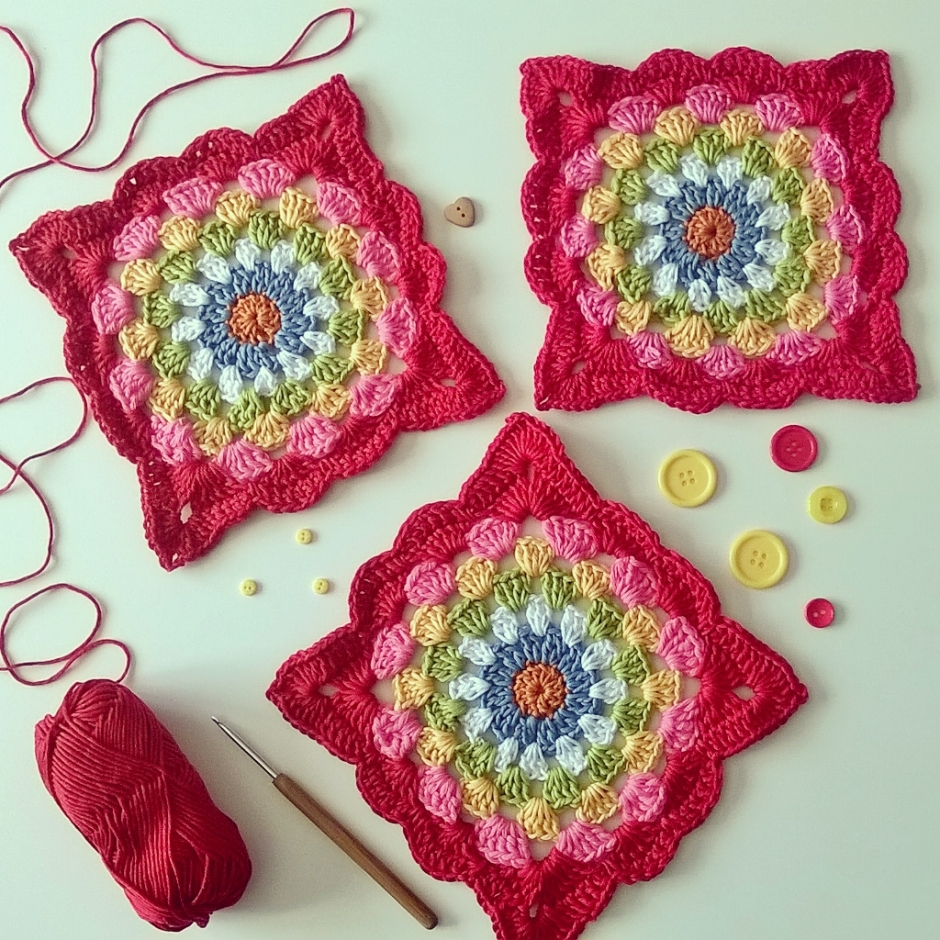
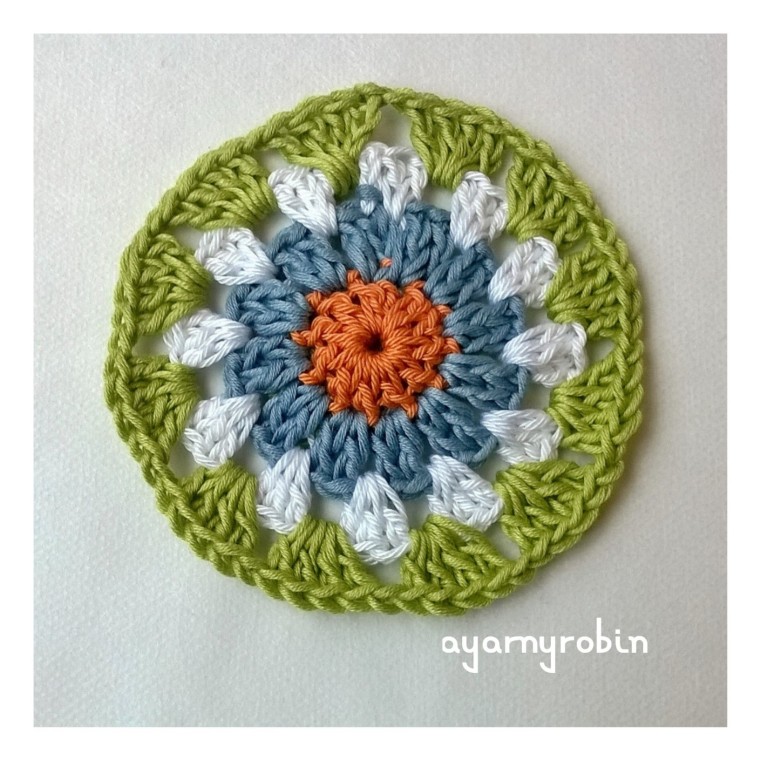
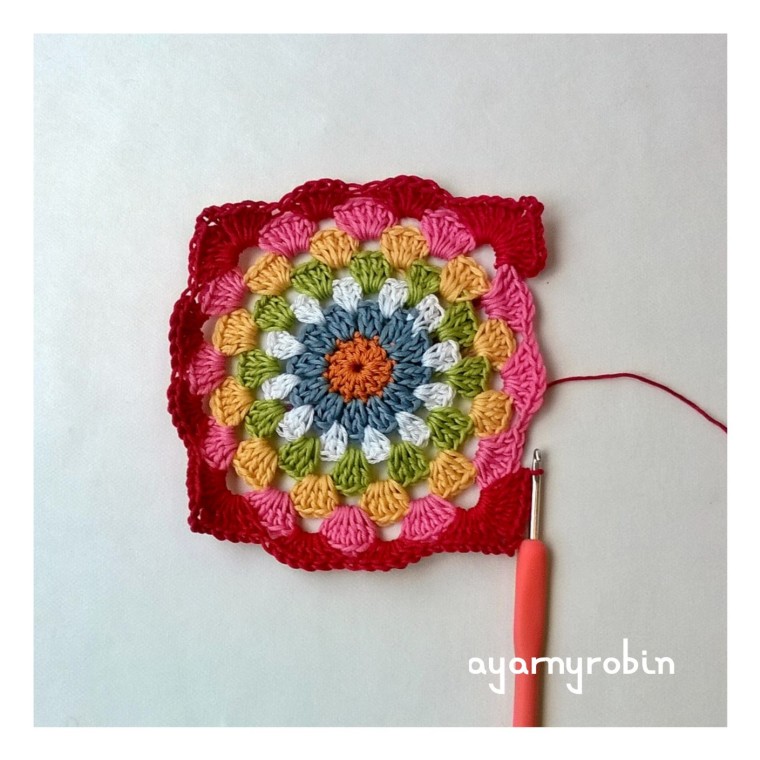
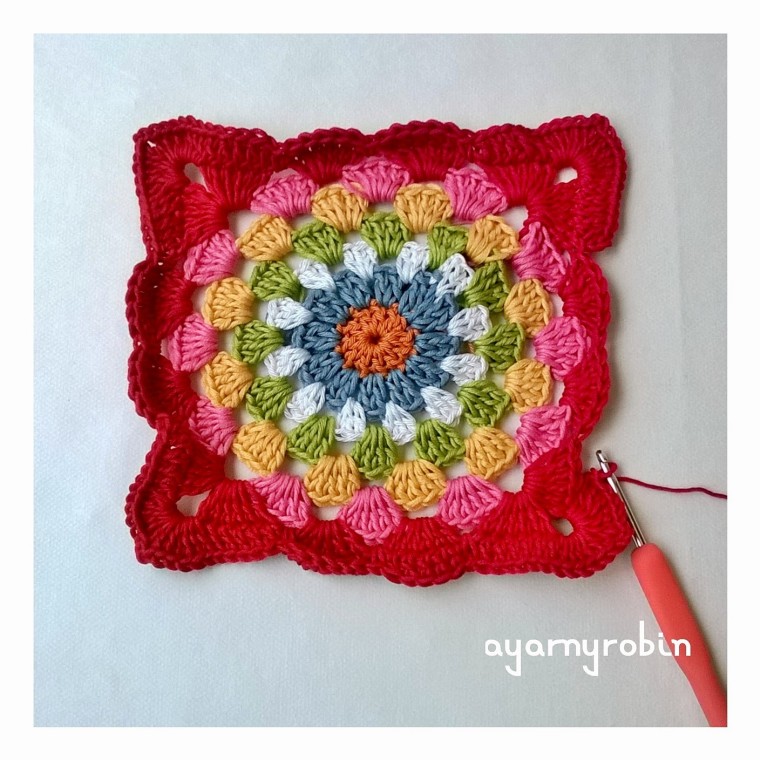
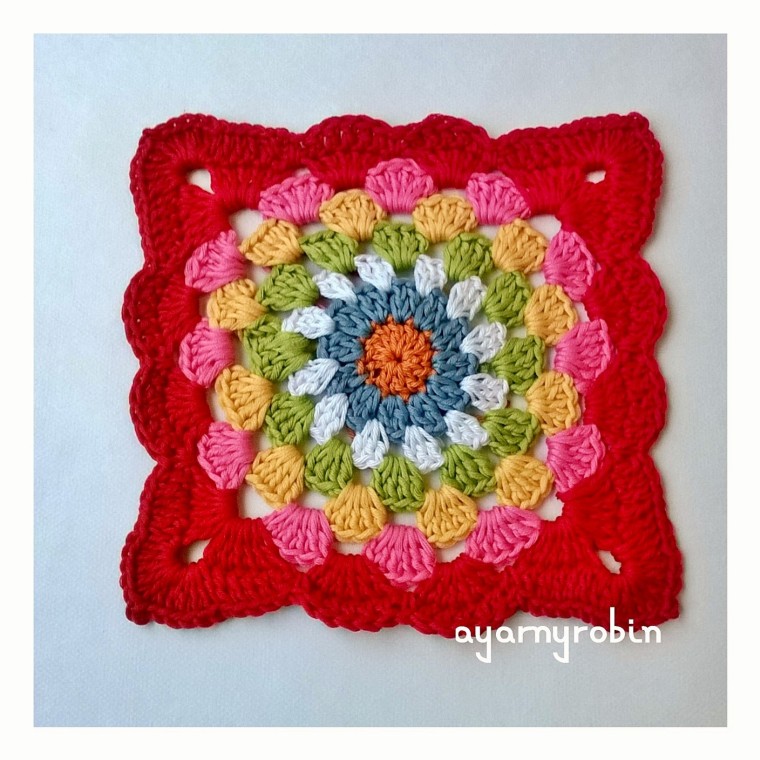
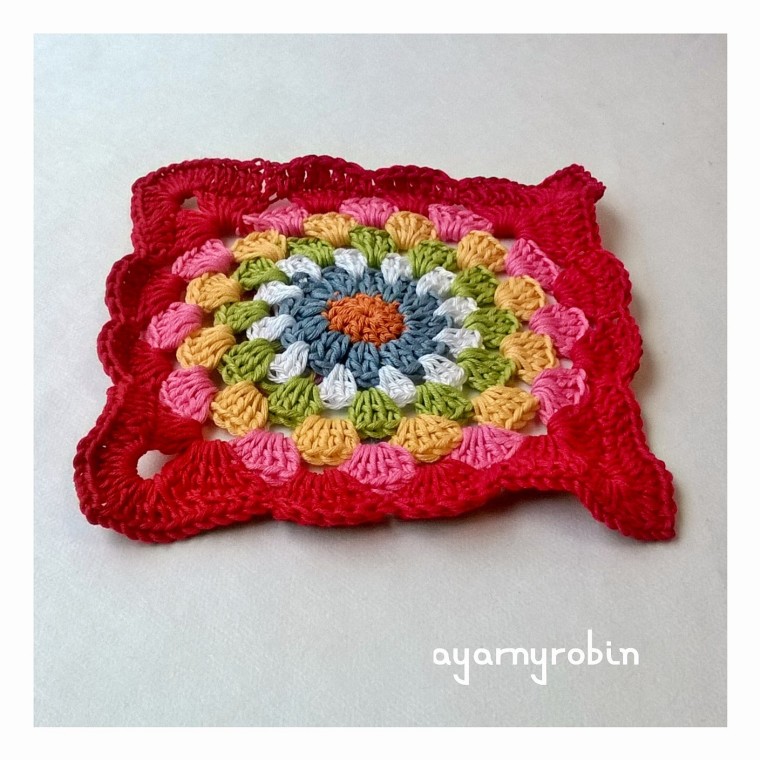
This lovely yarny square measures 7″ x 7″ or 18cm x 18cm once blocked.
So here goes…
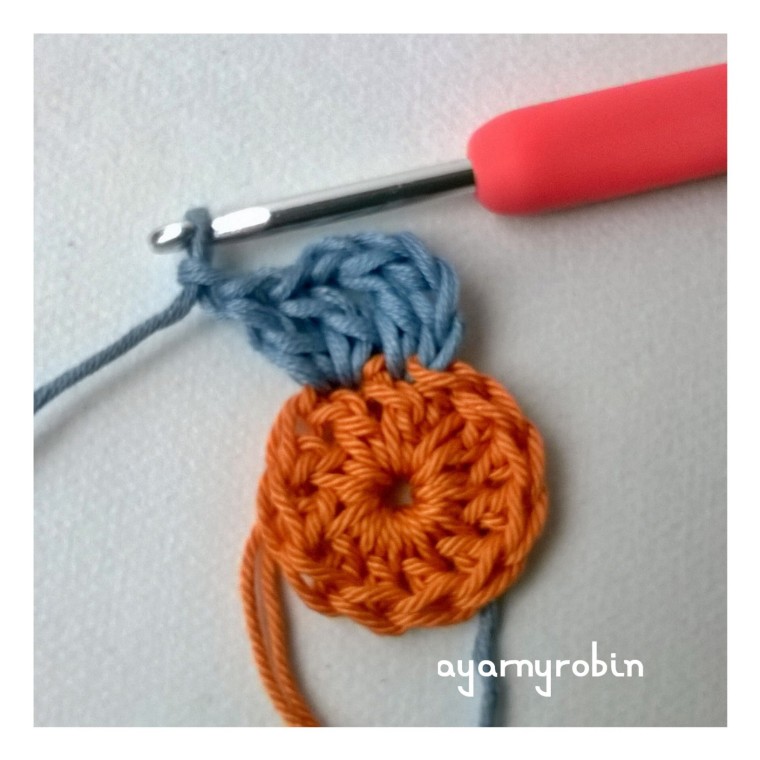
ch2, join with ss to form a tiny ring (you could make a magic circle instead if you prefer)
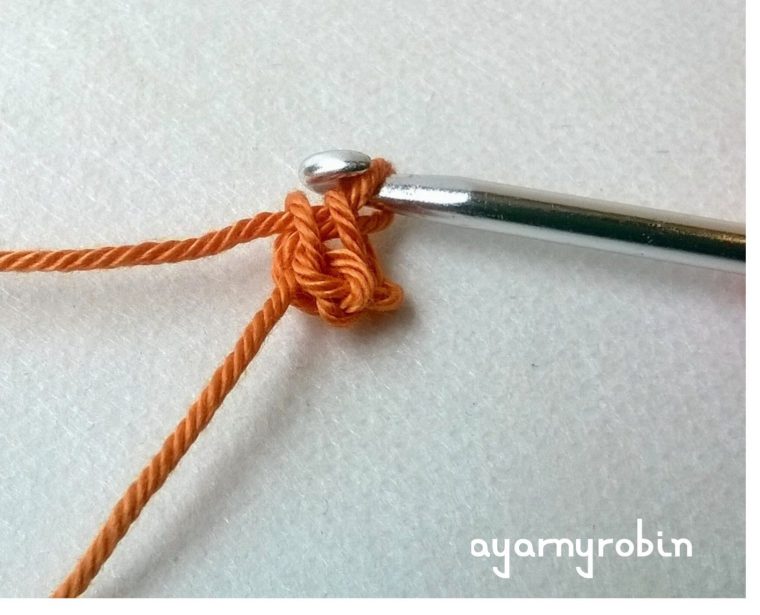
Row 1: ch3,
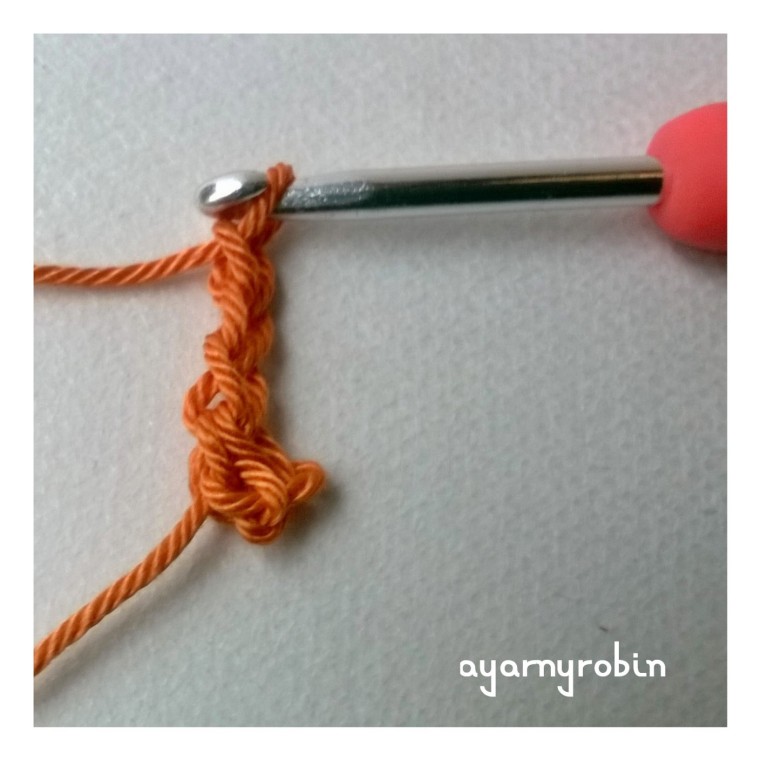 11tr into ring,
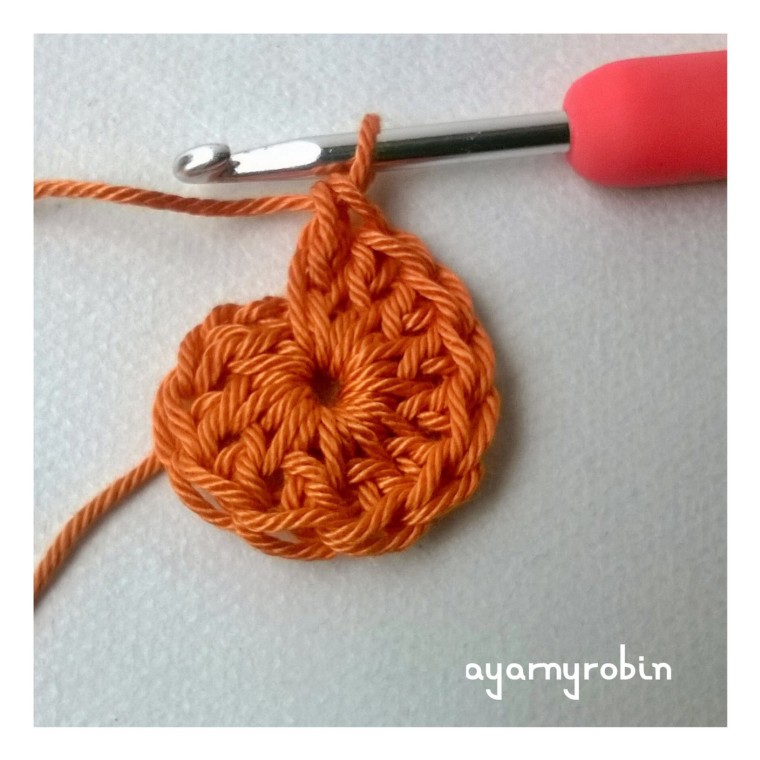 join blue yarn and slst into 3rd ch
(12tr in total).
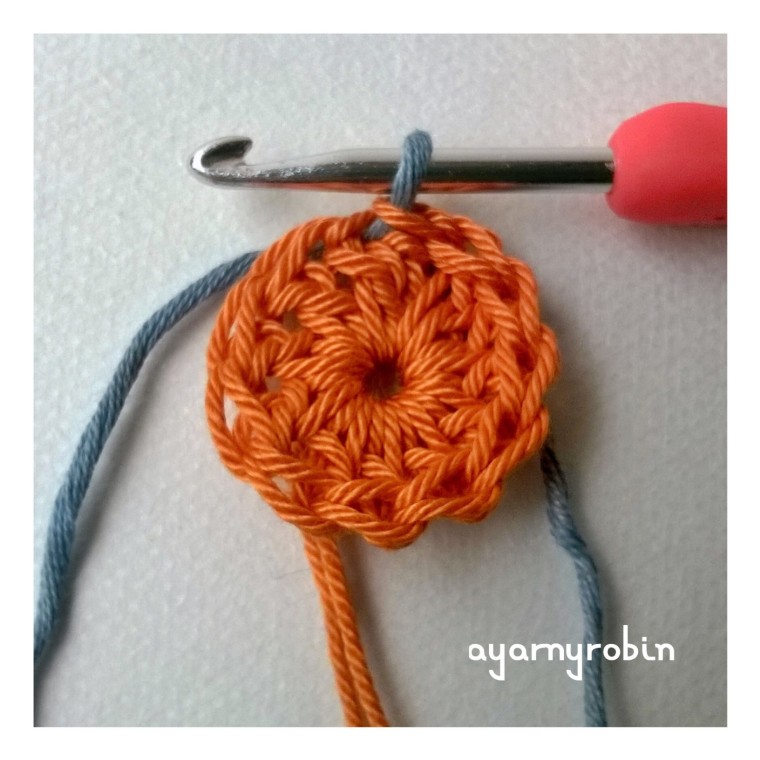 Row 2: ch3,
 1tr in same space, ch1
 2tr in next st, ch1
 *2tr in next st, ch1*, repeat * * x10 times,
join white yarn and slst into 3rd ch
(12 clusters of 2tr and 12 ch spaces).
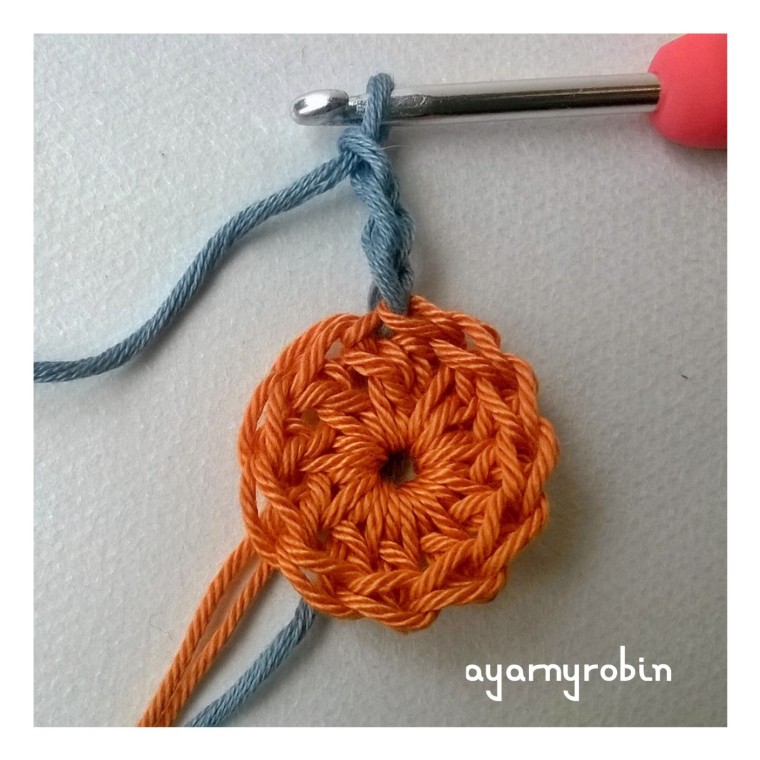
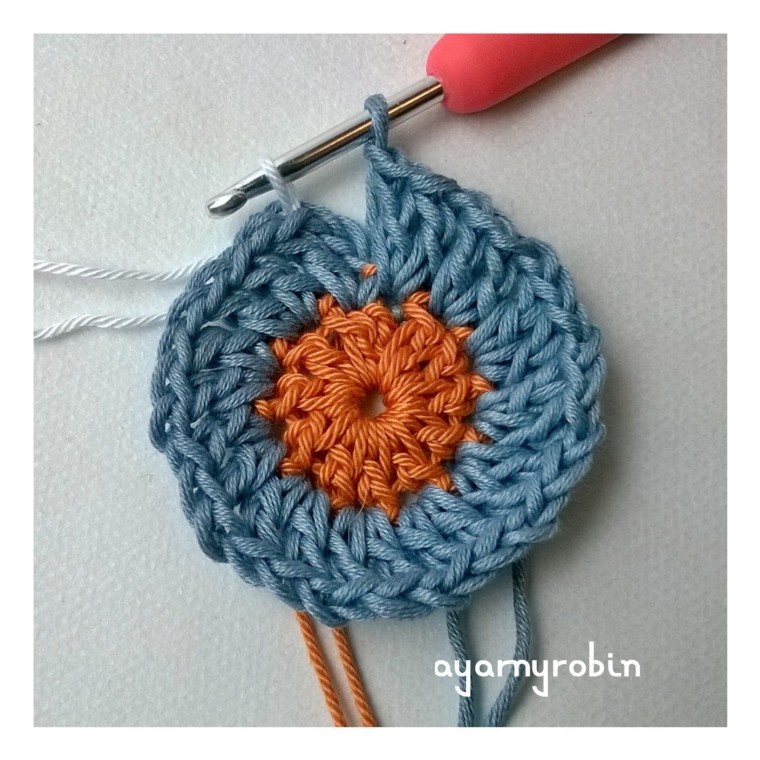 Row 3: ch3,
 *3tr in next ch space*,
 repeat * * x10 times, 2 tr in next ch space,
 join with slst in top of ch3 and fasten off.
(12 clusters of 3tr).
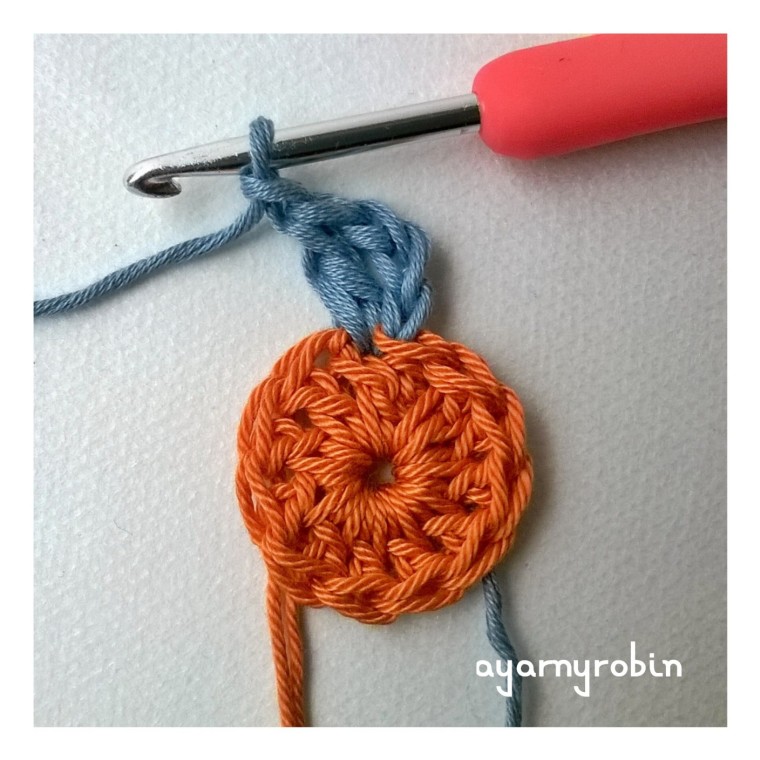
Row 4: join green yarn in between any cluster of 3tr of previous round and ch3,
3tr in same sp, ch1
*4tr in between next cluster of 3tr, ch1*,
repeat * * x10 times, join with slst in ch3 and fasten off.
(12 clusters of 4tr and 12 ch spaces)
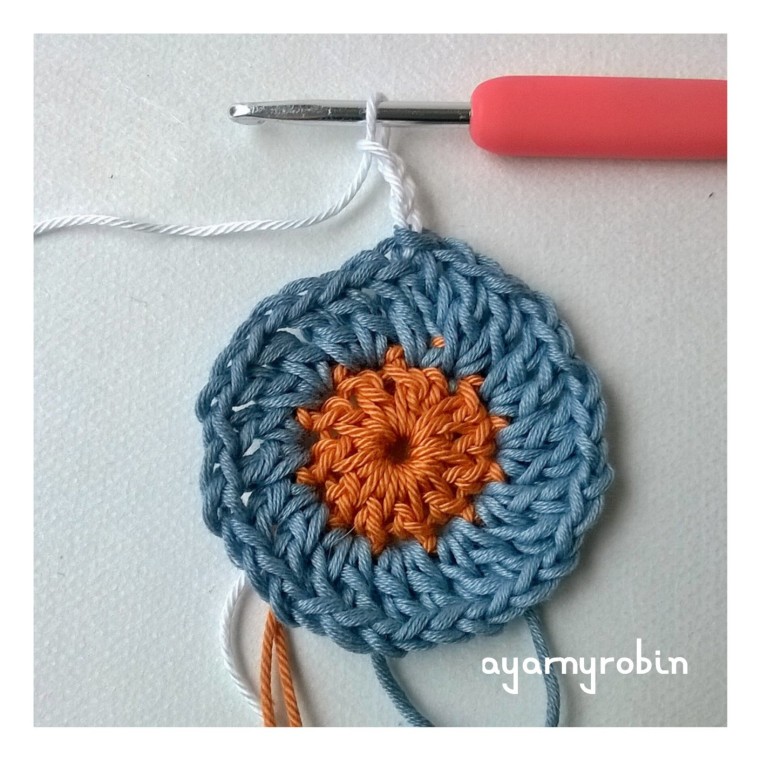
Row 5: join yellow yarn in any ch space and ch3,
4tr in same sp, ch1
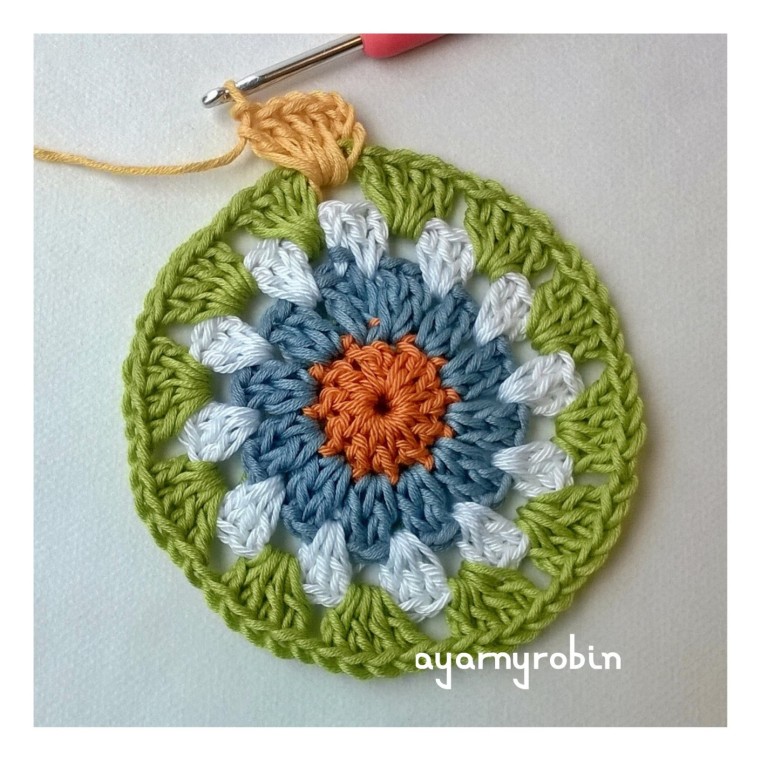 *5tr in next ch space, ch1*,
repeat * * x10 times, join with slst in ch3 and fasten off.
(12 clusters of 5tr and 12 ch spaces)
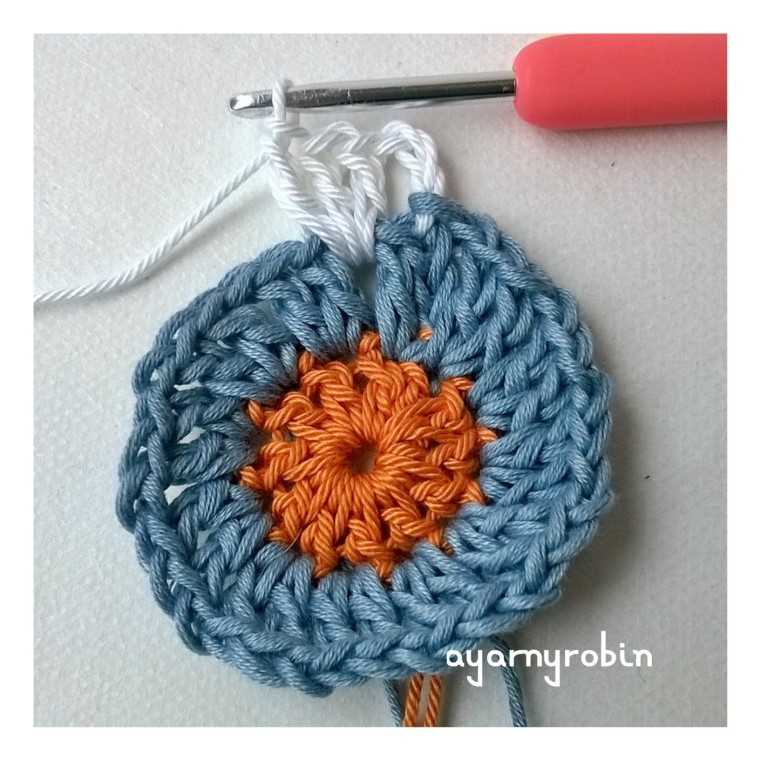
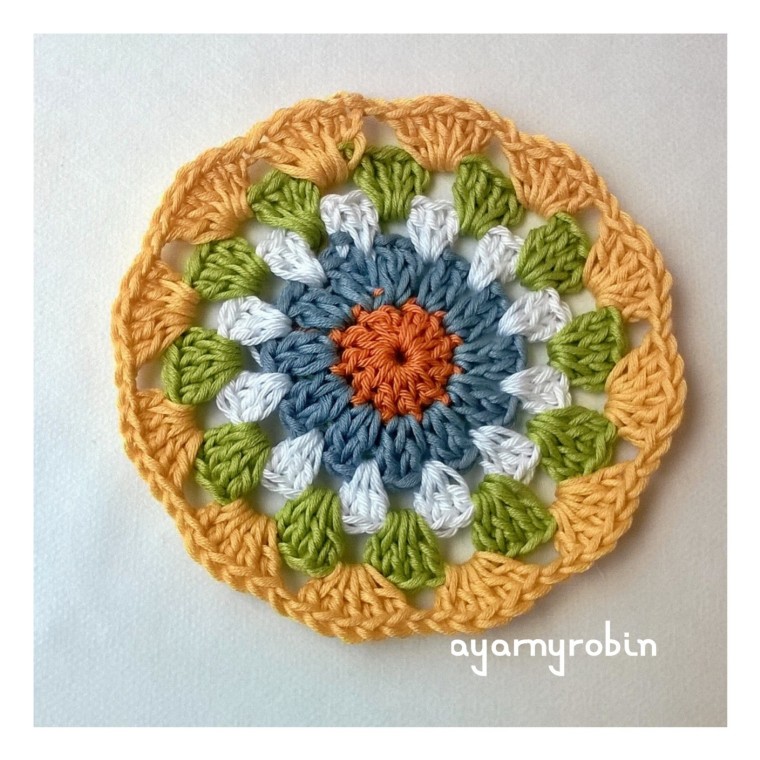 Row 6: join pink yarn to any ch space and ch3,
5tr in same sp, ch1,
*6tr in next ch space, ch1*,
repeat * * x10 times, join with ss in ch3 and fasten off.
(12 clusters of 6tr and 12 ch spaces)
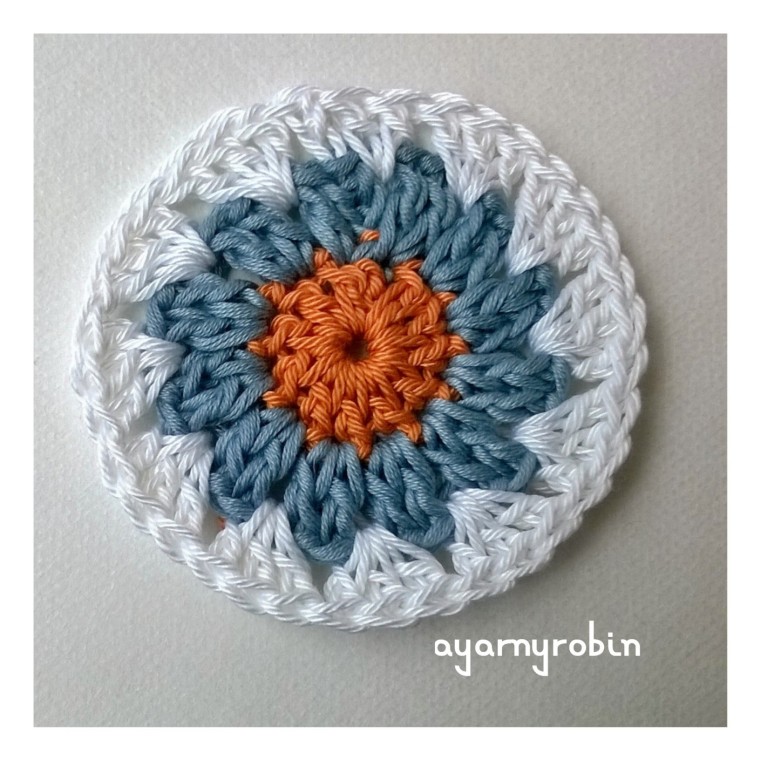
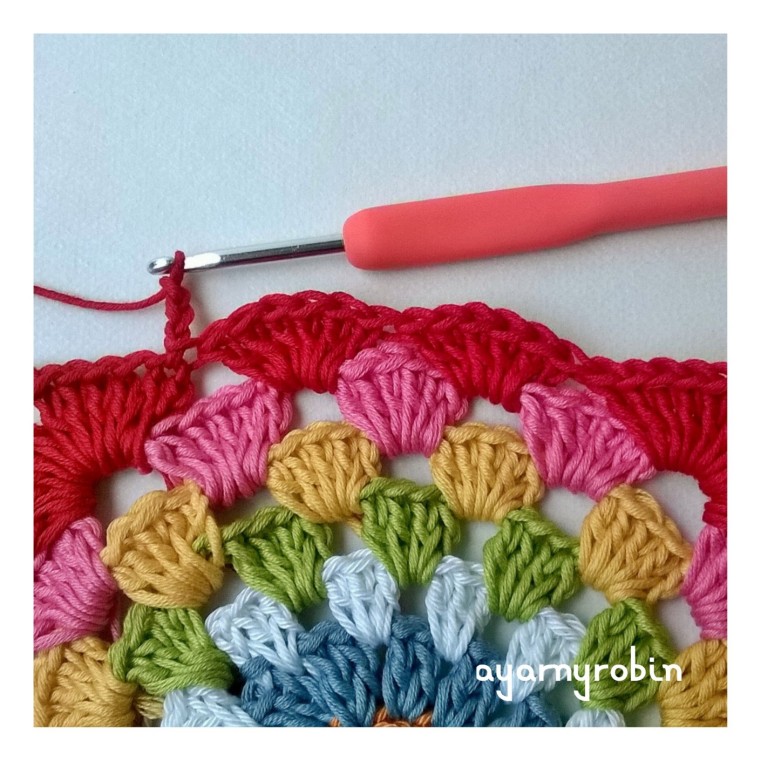
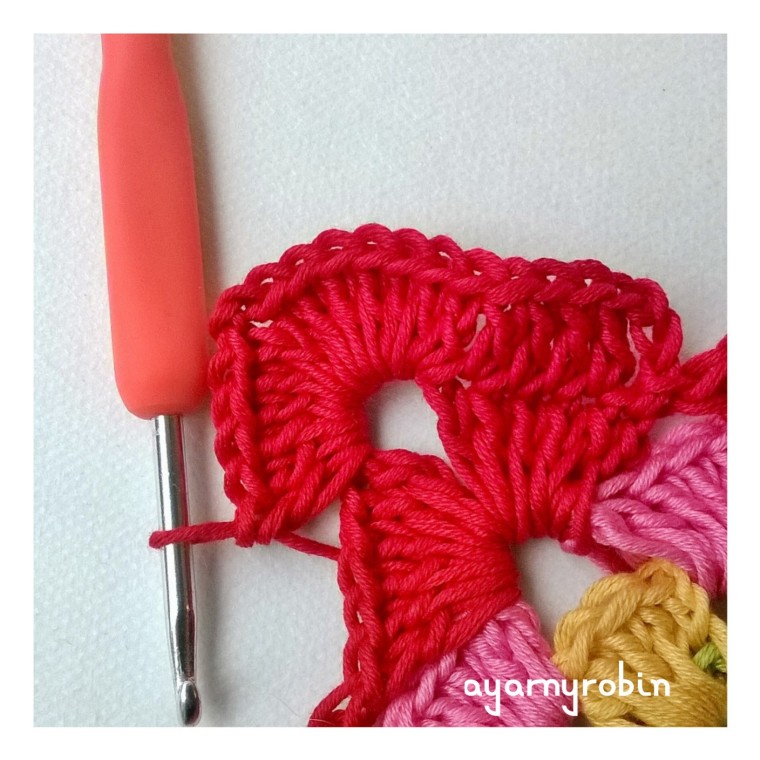
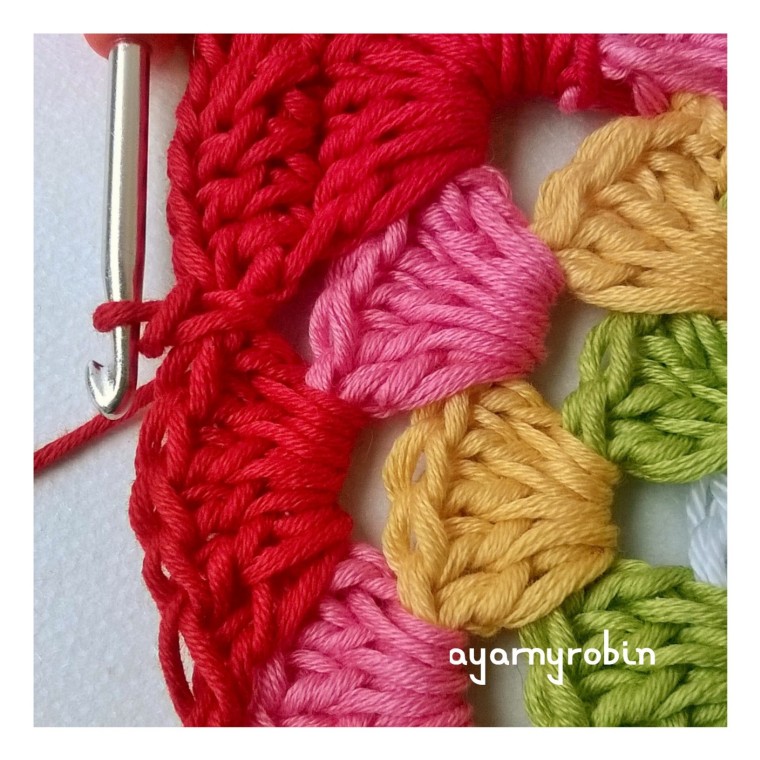
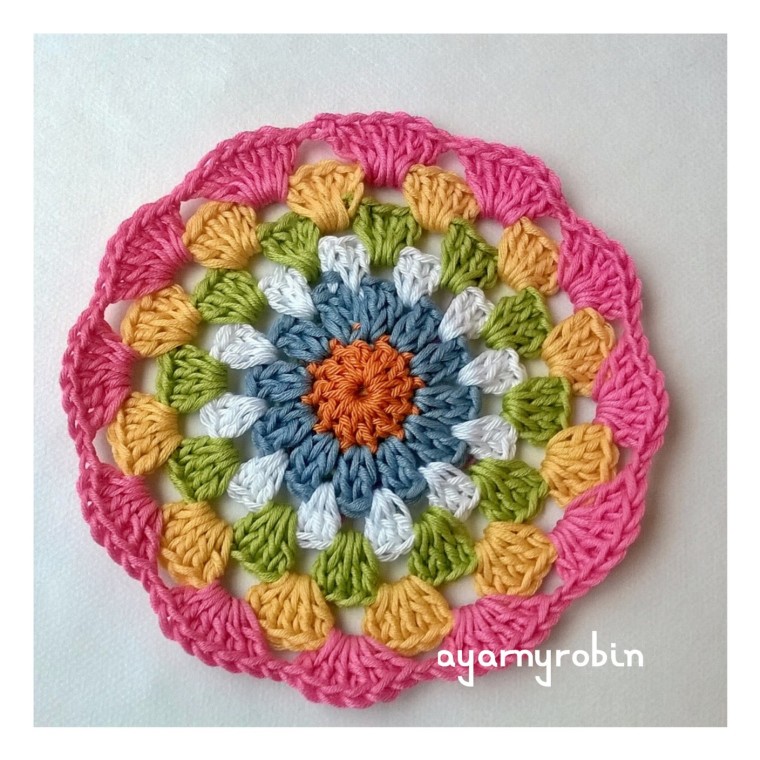 Row 7: join red yarn in any ch space, ch3,
5tr in same space,
 ch3,
ch3,
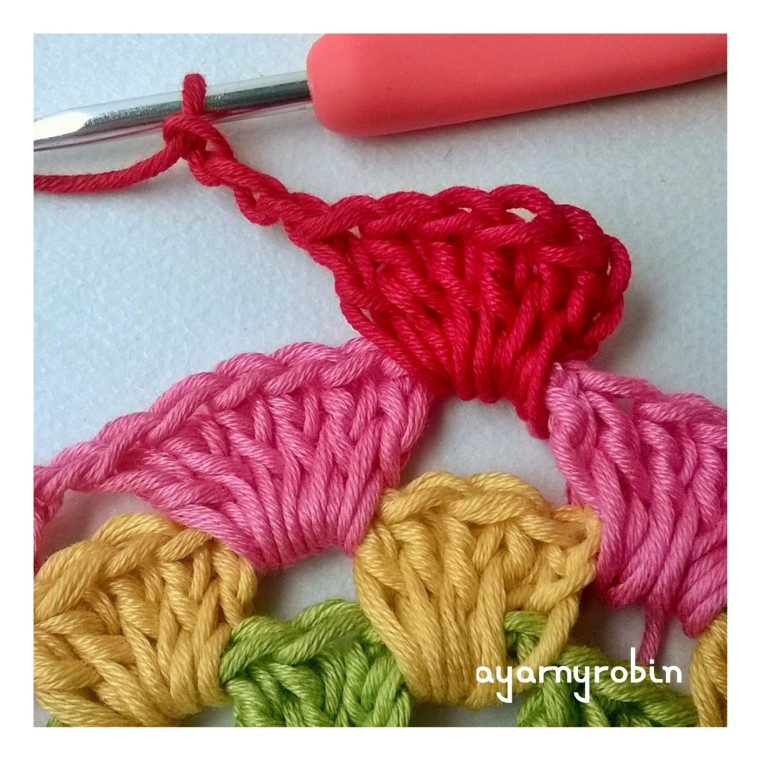 6tr in same space (corner made),
 *6tr in next ch space, 6tr in next ch space,
 6tr in next space, ch3, 6tr in same space*
(2nd corner made)
repeat * * x2 times
 6tr in next space, 6tr in next space, join with slst in beginning ch3. Do not fasten off.
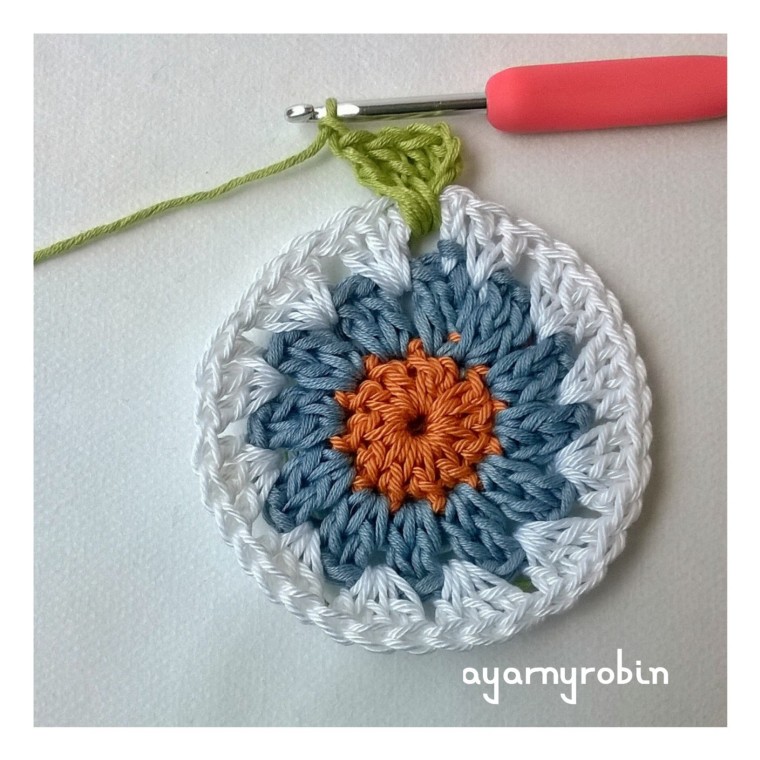
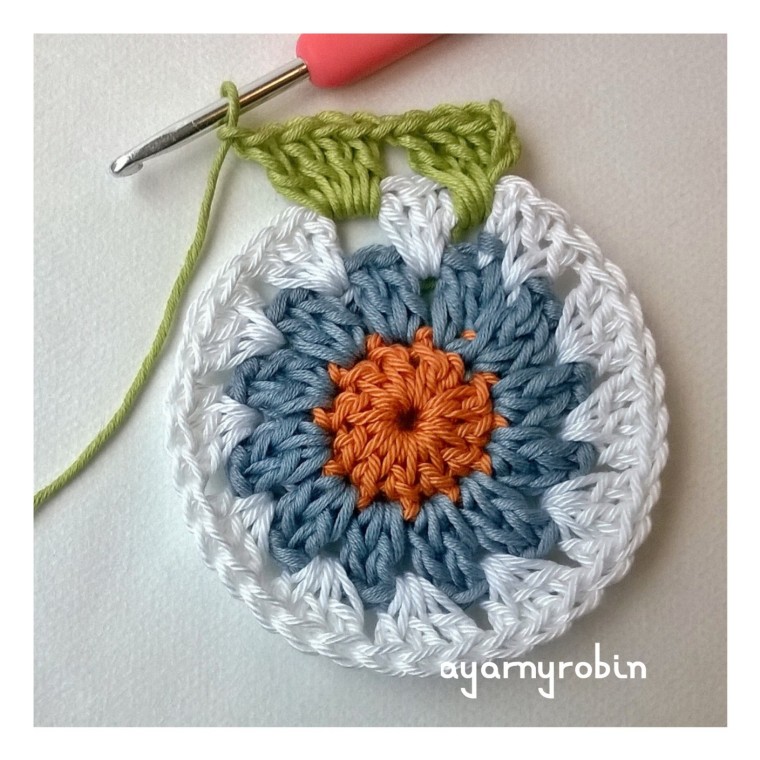
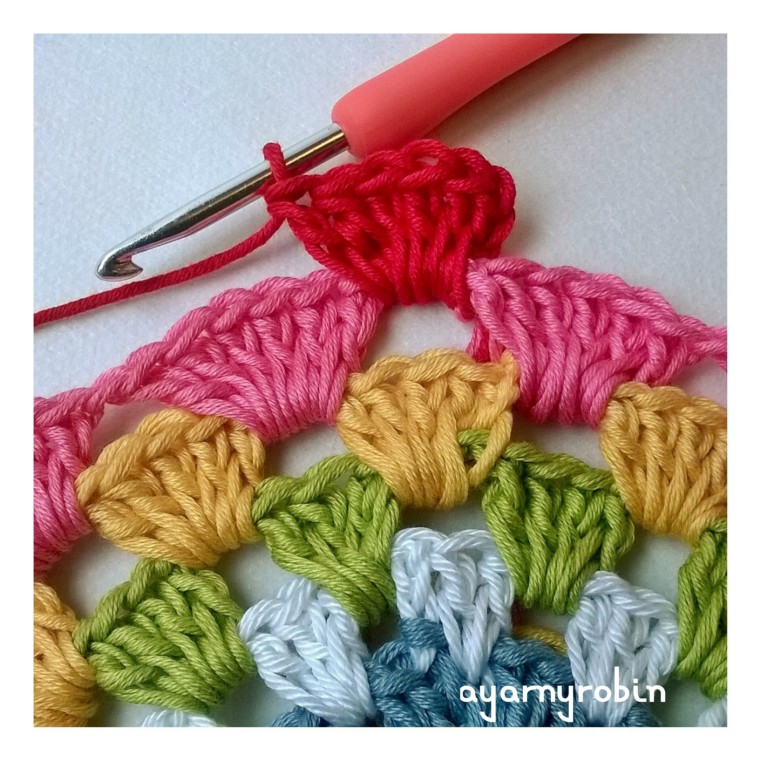
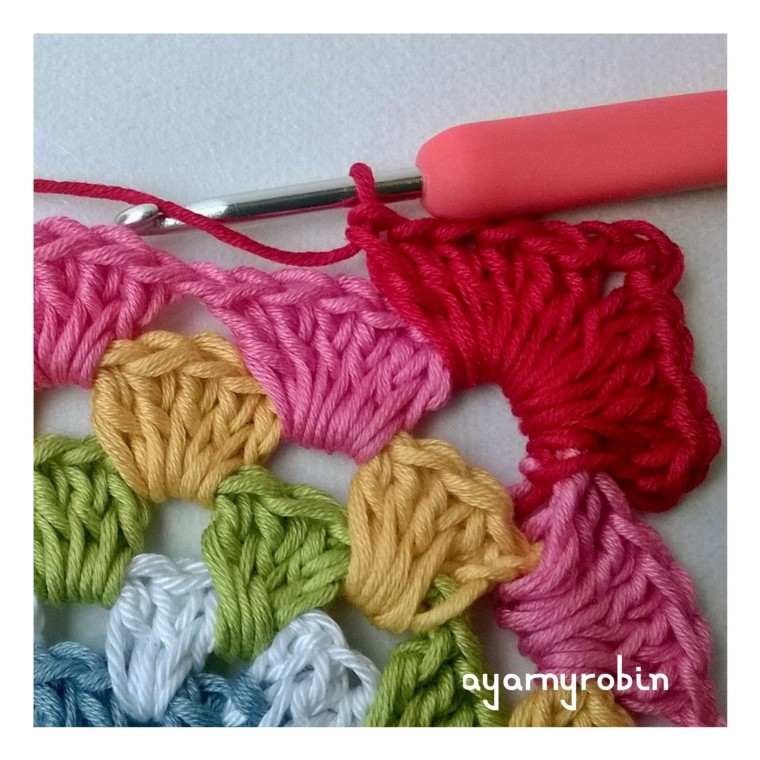
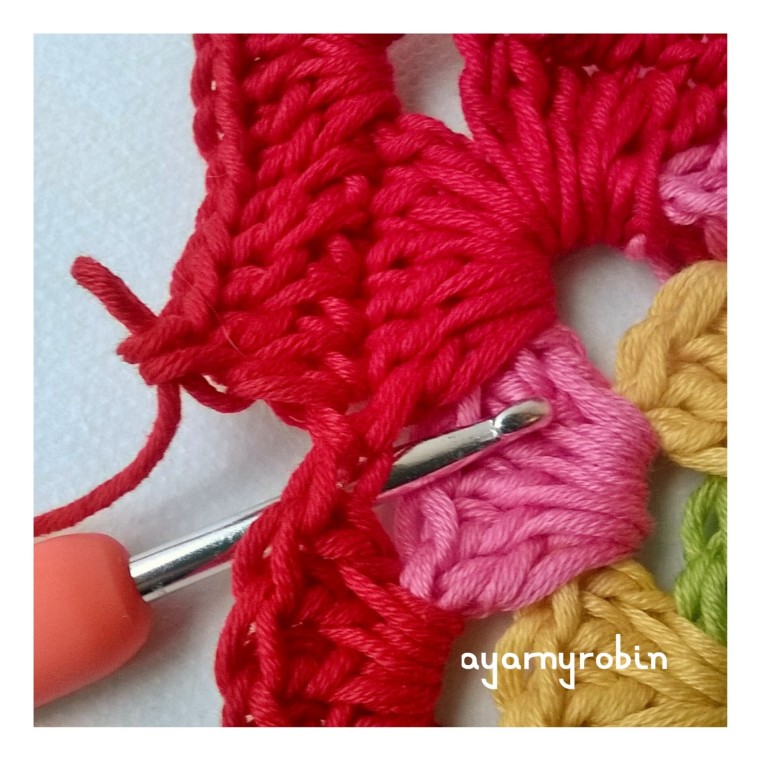
Row 8: ch3,
 1tr in next 5sts,
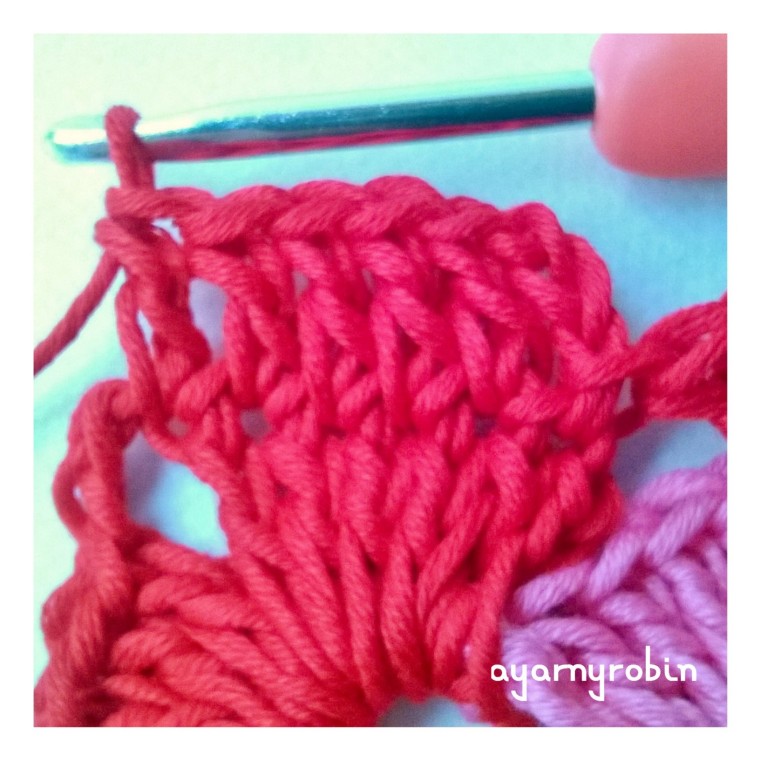
*6tr in ch3 sp, ch2,
6tr in same space (corner made),
 *1tr in next 5sts,
 dc UNDER next stitch (indicated by the hook)
 1tr in next 5sts, dc under next stitch,
1tr in next 5sts, dc under next stitch
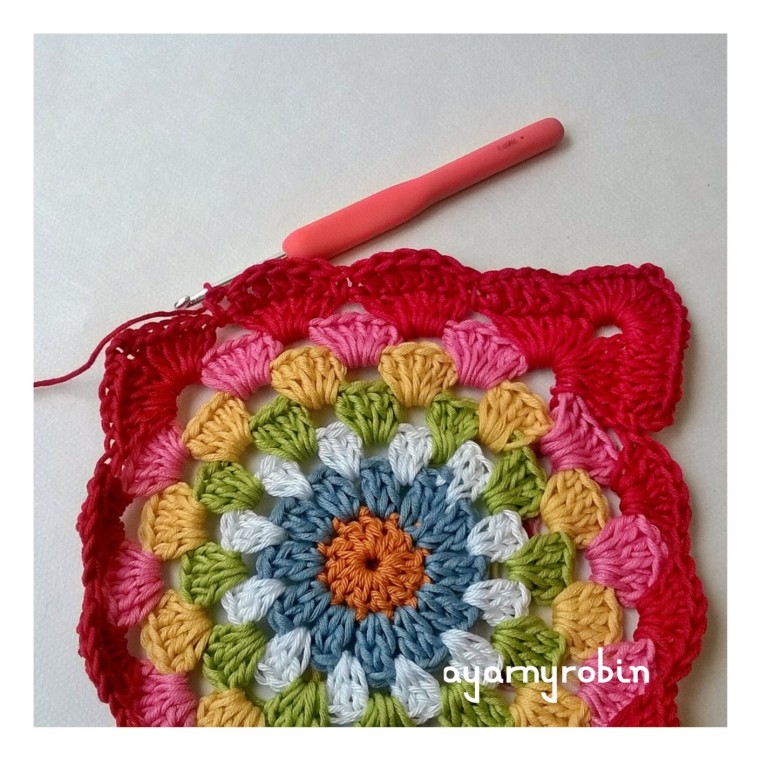 1tr in next 6sts,
6tr in ch sp, ch 2, 6tr in same space*

repeat * * x2times
1tr in next 5sts, dc under next stitch,
1tr in next 5 sts, dc under next stitch,
1tr in next 5 sts, dc under next stitch,
slst to beginning 3rd ch to finish.
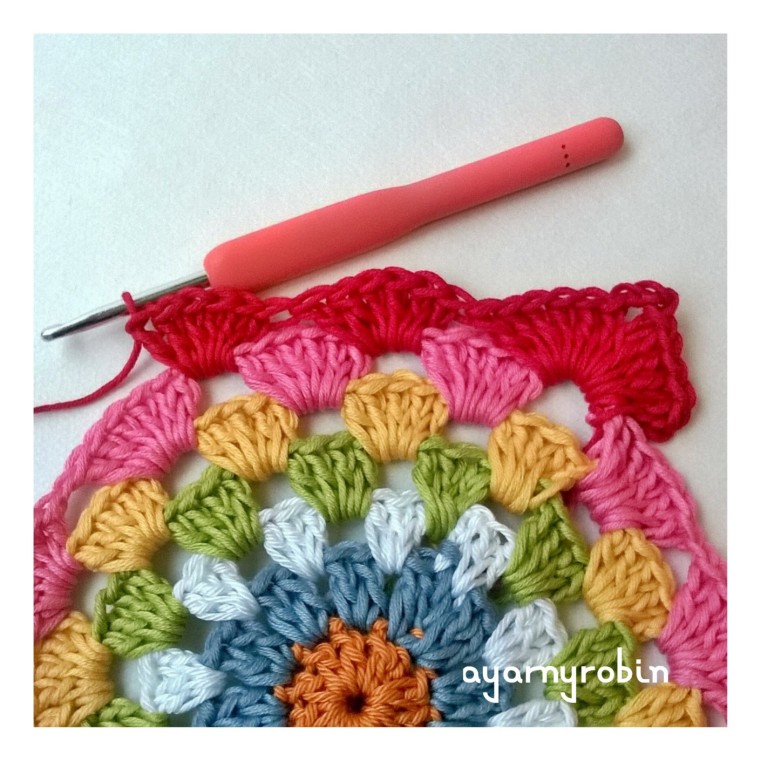
Weave in ends.
A word on blocking:
Before blocking…
Your square will be wibbly.
After blocking…
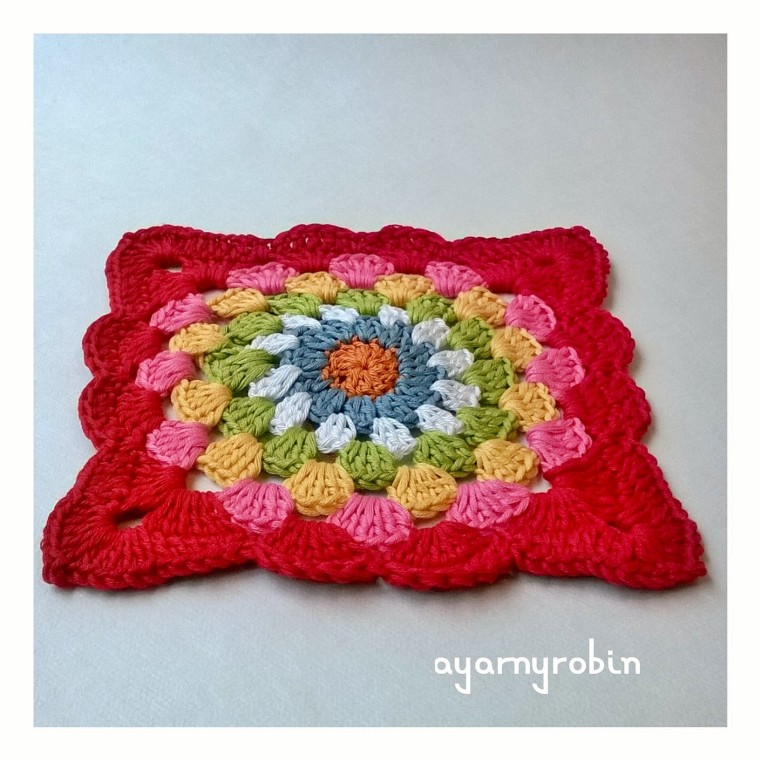 Your square will lie flat and will look much better.
Blocking is really worth the extra effort and isn’t difficult or expensive to do. I just pinned this square to my ironing board so that it measured 7″ by 7″ and hovered my iron just above the square and blasted it with steam. Allow to cool before unpinning and store carefully. Alternatively, you could pin square to the required measurements, to a towel or a pin board, spritz with water and allow to dry.
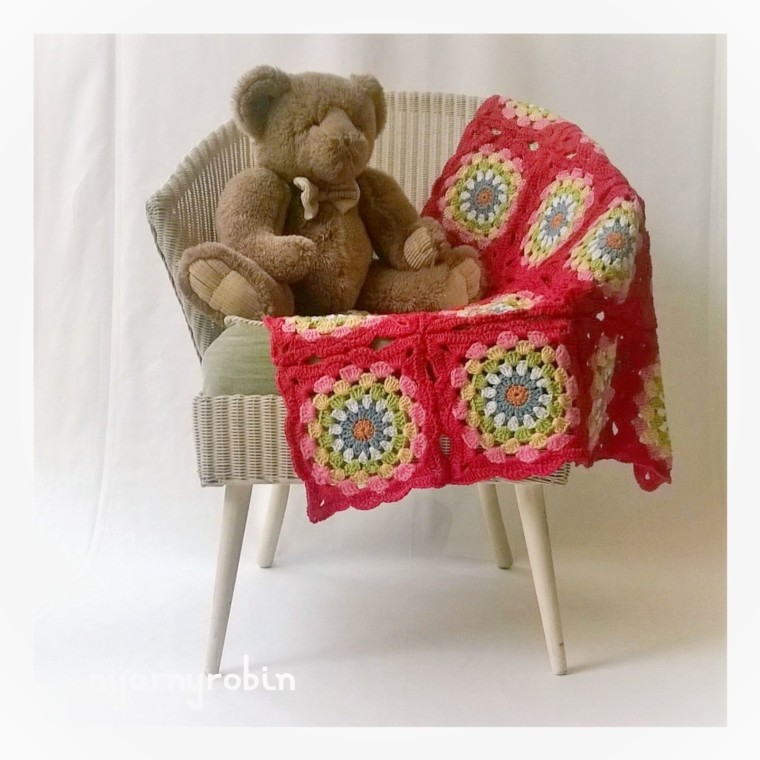
A very versatile yarny square.
I have also made a baby blanket using this square called the Sunshine Jelly Baby Blanket
Happy hooking.
 Robins nest square ©2016 designed by Nicola Florence @ayarnyrobin #yarnyrobin on Instagram.
This pattern to include the photos are the property of Nicola Florence @ayarnyrobin. You can’t modify, resell or share this pattern. You can sell finished items made from it, but please mention that the item is made using AYARNYROBIN pattern.
Processing…
Success! You're on the list.
Whoops! There was an error and we couldn't process your subscription. Please reload the page and try again.


Very pretty
LikeLiked by 1 person
Thank you 😊
LikeLike
Hmmm … It’s easy to see why you love to crochet, Nicola – you are so very good at it ! 🙂 This is a pretty square indeed; but I tremble at the thought of weaving in all those ends … I feel it would be easy, however, to JAYG with this, as those clearly defined waves invite a joining stitch; so maybe the w.i.o.t.es could be dealt with !
LikeLiked by 1 person
Haha…there is a plan. Thank you for your kind words 😊
LikeLike
what lovely bright colours. Looks very attractive Nicola.
LikeLiked by 1 person
Thank you Shirley, it is certainly a happy square indeed ☺
LikeLike
It is a beautiful square. They are so clear and makes the crochet pattern so very easy to follow. 🙂
LikeLiked by 1 person
I’m so pleased you like it xx
LikeLiked by 1 person
Hi Nicola, I’ve not been around much lately in blog land but when I saw the gorgeous granny image peeping out from the email I just had to come by and say how lovely and cheerful it is. Thank you 💐😊 for sharing your pattern and I hope to try it out soon xx 😚 ❤
LikeLiked by 1 person
I had missed you, hope you are ok. Thank you for your kind comments 😊
LikeLiked by 1 person
So beautiful! Thank you for sharing your wonderful tutorial. I will have to try this one day. Just love it!
LikeLiked by 1 person
It’s my pleasure Ginny, I hope you enjoy it 😊
LikeLike
Made this lovely square on a cold wet Welsh April afternoon. Just the thing to cheer me up and add some colour – thank you x
LikeLiked by 1 person
Helen, I’m so pleased you enjoyed this square 😊
LikeLike
Very pretty, lovely colours, cheery indeed.
How would you join these together to make a blanket. Do you have a link that would give me some ideas as to making a blanket with theses delightful squares.
LikeLiked by 1 person
Hi Sara, Thanks for stopping by. I have made a blanket using these squares it is called the sunshine jelly baby blanket it should give you a good idea of how I’ve joined the squares.
LikeLike
Thank you so much helped me out and I love the colors how can u not be happy when your looking at all those colors.?.
LikeLiked by 1 person
Glad you enjoyed this pattern 😊
LikeLike
Hello Nicola, thank you for this lovely pattern, definitely one to make sometime soon – have a new grandchild on the way and would be lovely for either a boy or a girl. EVERY time I come across this pretty pattern I save it – I think it appears on a number of my boards now. (Just in case). Thanks again and all the best to you.
LikeLike
Thanks for stopping by and taking the time to comment. I’m glad you like the pattern and hope you will enjoy hooking it soon. Congratulations on your new Grandchild (on the way) xx
LikeLike
I have just finished the agarnyrobin Blanchett it looks so beautiful thank you so much for a beautiful thank you Pam
LikeLike
I’m so glad you liked it x
LikeLike
Thanks for sharing. Is so easy and nice. Greetings from Germany👋🏻
LikeLiked by 1 person
Thank you Sabine xx
LikeLike